SAVE THESE INSTRUCTIONS
Item #750403, 752803
051 01 0078, 051 01 1078 Page 5 of 5
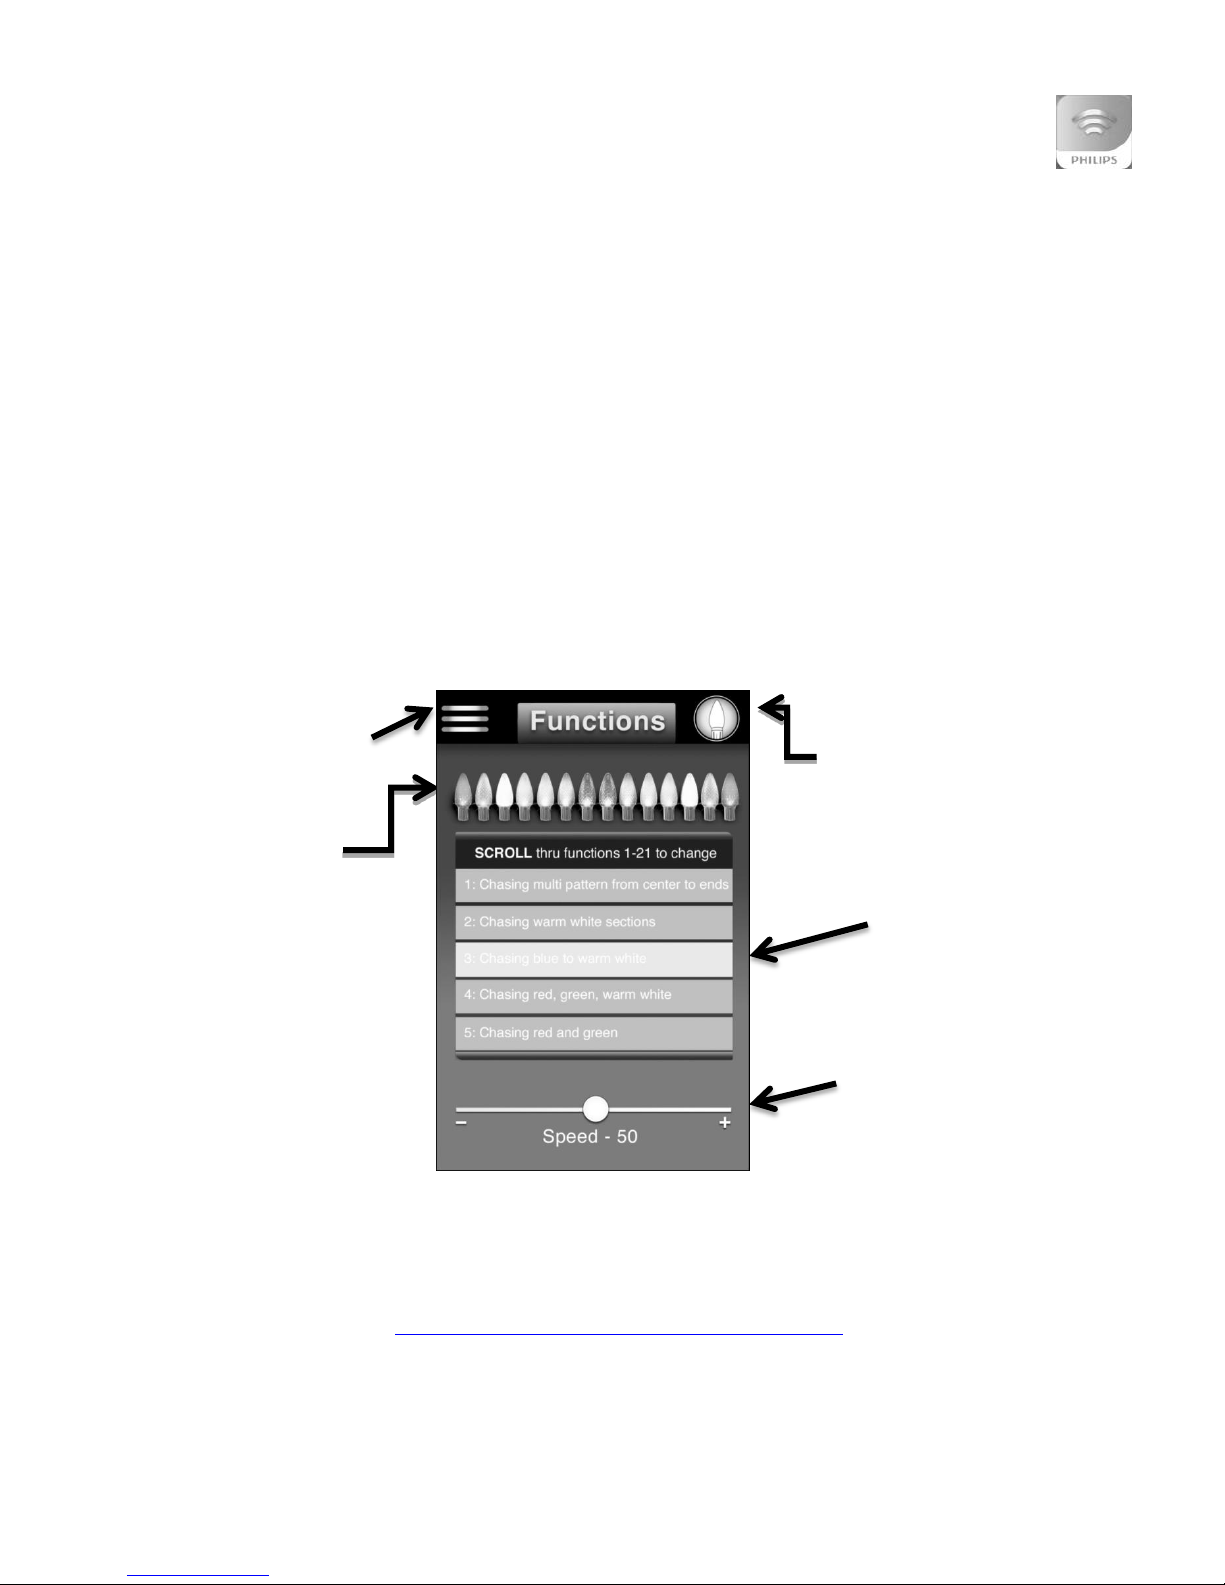
ILLUMINATE™TROUBLESHOOTING INSTRUCTIONS
Additional information and troubleshooting tips can be accessed through the Help screen inside the
Illuminate™app. If you cannot access the Help screen inside the IlluminateTM app, please contact our
customer service department at 1-800-763-6177 8:30 a.m. –5:00 p.m. CST, Monday –Friday.
CUSTOMER SERVICE
3 Year Limited Guarantee
Thank you for purchasing this Philips Pre-Lit tree.
This product has a 3 Year Limited Guarantee - Subject to the exclusions contained below, Seasonal Specialties LLC, at its option, will at no charge
repair, replace (with same or equivalent product), or refund the purchase price if the product fails due to defects in material or workmanship within
three (3) years from the date of purchase.
If, after following all of the enclosed assembly instructions and precautions, you require assistance, please contact us at 1-800-763-6177 to speak to
a customer service representative. DO NOT RETURN THE ITEM TO YOUR PLACE OF PURCHASE!
If instructed by customer service, please ship the product prepaid along with the Original UPC & Original dated legible proof of purchase to Seasonal
Specialties, L.L.C., 11455 Valley View Road, Eden Prairie, MN 55344, Attn: Customer Service. Please include your return address, contact phone
# and e-mail address. Allow six to eight weeks for handling.
We are committed to making high quality products. Returning the product to us helps us to monitor and improve product quality.
Exclusions - This product is intended for residential seasonal use only (90 days maximum per year), and was pre-tested and date coded prior to
shipment. This limited guarantee extends only to the first consumer purchaser, and is not transferable. This guarantee does not include: 1)
commercial use, 2) normal wear and tear, 3) products not used in accordance with directions provided on or with the product, 4) burnout of bulbs or
LEDs, 5) batteries, 6) products that have been subjected to unauthorized repair, and/or modification, or 7) damage caused by shipping, improper
handling, alterations, misuse, or accidents.
ANY IMPLIED WARRANTIES, INCLUDING WITHOUT LIMITATION THE IMPLIED WARRANTIES OF MERCHANTABILITY AND FITNESS FOR A
PARTICULAR PURPOSE, SHALL BE LIMITED TO THE DURATION OF THIS LIMITED WARRANTY. OTHERWISE THE REPAIR,
REPLACEMENT, OR REFUND AS PROVIDED UNDER THIS EXPRESS LIMITED WARRANTY IS THE EXCLUSIVE REMEDY OF THE
CONSUMER, AND IS PROVIDED IN LIEU OF ALL OTHER WARRANTIES, EXPRESS OR IMPLIED. IN NO EVENT SHALL SEASONAL
SPECIALTIES, LLC BE LIABLE, WHETHER IN CONTRACT OR TORT (INCLUDING NEGLIGENCE) FOR DAMAGES IN EXCESS OF THE
PURCHASE PRICE OF THE PRODUCT, OR FOR ANY INDIRECT, INCIDENTAL, SPECIAL OR CONSEQUENTIAL DAMAGES OF ANY KIND,
ARISING OUT OF OR IN CONNECTION WITH THE USE OF THE PRODUCT TO THE FULL EXTENT THESE DAMAGES MAY BE DISCLAIMED
BY LAW.
Some states and jurisdictions do not allow the limitation or exclusion of incidental or consequential damages, or limitation on the length of an implied
warranty, so the above limitations or exclusions may not apply to you. This limited guarantee gives you specific legal rights, and you may also have
other rights that vary from state to state or from one jurisdiction to another.
Philips and Philips Shield are used under license of Koninklijke Philips Electronics NV
Flame Resistant Made in China
Please contact our customer service department if you need any assistance or replacement parts:
1-800-763-6177, 8:30 a.m. –5:00 p.m. CST, Monday –Friday or visit our website at
www.seasonalspecialties.com.