manuals.online logo
Brands
  1. Home
  2. •
  3. Brands
  4. •
  5. Philips
  6. •
  7. Projection TV
  8. •
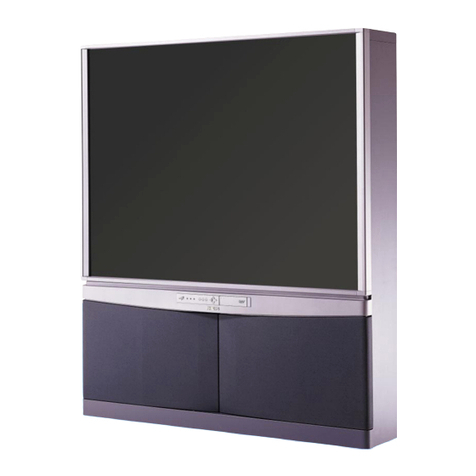
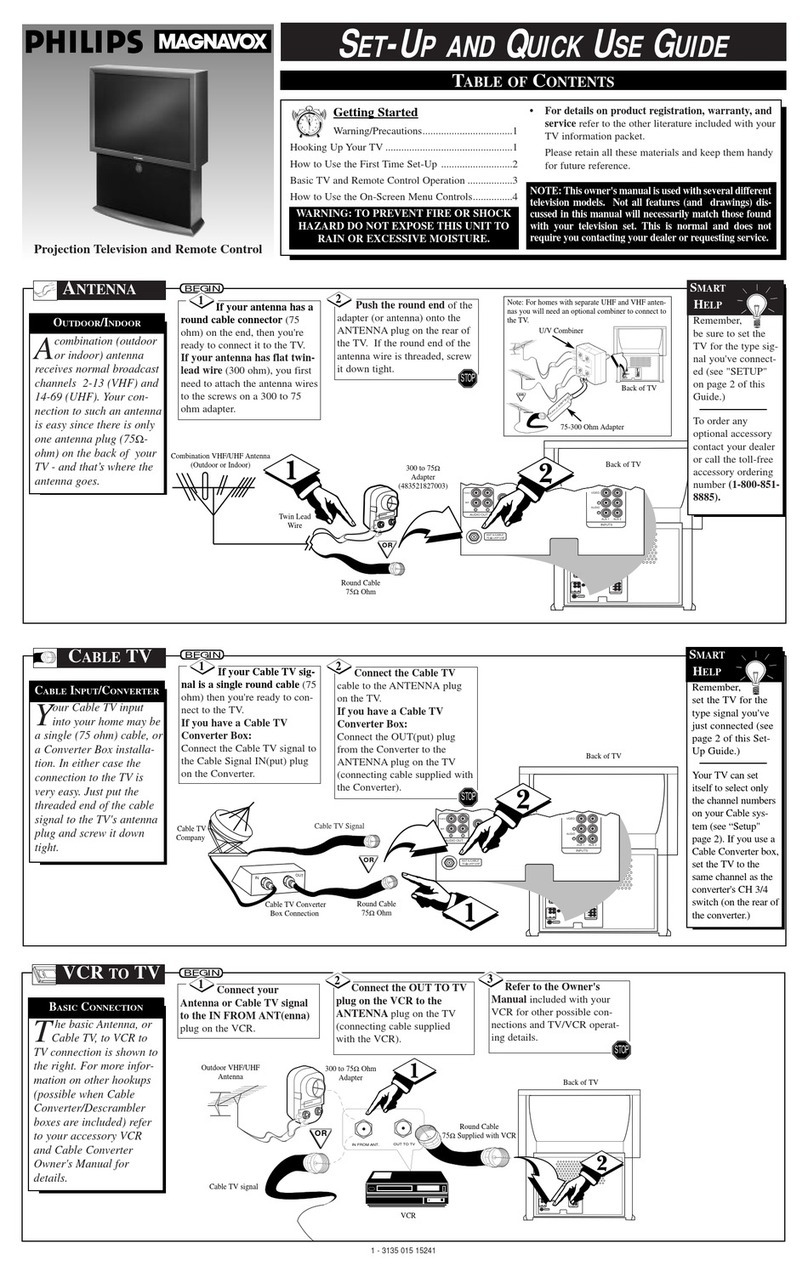
  9. Philips MAGNAVOX 7P4830 User manual

Philips MAGNAVOX 7P4830 User manual

O
PROJECTION TELEVISION
AL
"_ce your PHILIPS MAGNAVOX purchase is registered, you're eligible to receive all the privileges of
Jwning a PHILIPS MAGNAVOX product. So complete and return the Warranty Registration Card
enclosed with your purchase at once. And take advantage of these important benefits.
Congratulations on your purchase,
and welcome to the "family!" PHILIPS
Dear PHILIPS MAGNAVOX product owner:
Thank you for your confidence in PHILIPS MAGNAVOX. You've selected one of the best-built, best-
backed products
available today. And we'll do everything in our power to keep you happy with your purchase for many
years to come.
As a member of the PHILIPS MAGNAVOX "family," you're entitled to protection by one of the most
comprehensive warranties and outstanding service networks in the industry.
What's more, your purchase guarantees you'll receive all the information and special offers for which
you qualify, plus easy access to accessories from our convenient home shopping network.
And most importantly you can count on our uncompromising commitment to your total satisfaction.
A_Iof this is our way of saying welcome-and thanks for investing in a PHILIPS MAGNAVOX product.
Sincerely,
Robert Minkhorst
President and Chief Executive Officer
P.S. Remember, to get the most from your PHILIPS
MAGNAVOX product, you must return your
Warranty Registration Card within 10 days. So
please mail itto us rightnow!
Know these
safetysymbo/s
CAUTIOfk TO _114ERISK OF EU[CTRIC BI_CX. DONOT
IREMOVE COIRR [OR BACK}, NO m_SERVICFJUILE
mlqOE. REFER 9ERVICIN6 TO ml_ IFIED EI[R_CE PERSOImlEL
MAGNAVOX
_This "bolt o_lightning"indicates uninsulated material within your unitmay cause an electrical
shock. For the safety of everyone in your household, please do not remove product covering.
_IL The "exclamation point" calls attention to features for which you should read the enclosed lit-
erature closely to prevent operating and maintenance problems.
WARNING: TO PREVENT FIRE OR SHOCK HAZARD, DO NOT EXPOSE THIS EQUIPMENT
TO RAIN OR MOISTURE. -- " "
CAUTION: To prevent electric shock, match wide blade of plug to wide slot, and fully insert.
ATTENTION: Pour 6viter les chocs 61ectriques, introduire la lame la plus large de la fiche dans la
borne correspondante de la prise et pousser jusqu'au fond.
SAFETYINSTRUCTIONS- Read before operating equipment
This product was designedand manufacturedto meet strict quality and
safety standards. There are, however, some installation and operation
_recautions which you should be particularly aware of.
ReadInstructions-Allthesafetyandoperatinginstructionsshould
bereadbeforetheapplianceis operated.
2. RetainInstructions- Thesafetyand operatinginstructionsshould
beretainedforfuturereference.
3. HeedWarnings-Allwarningsontheapplianceandin theoperating
instructionsshouldbeadheredto.
4. FollowInstructions- Alloperatingand useinstructionsshouldbe
followed.
5. WaterandMoisture-Theapplianceshouldnotbeusednearwater
- for example,neara bathtub,washbowl,kitchensink,laundrytub,
ina wetbasementor nearaswimmingpool,etc.
6. CartsandStands- Theapplianceshouldbeusedonlywitha cartor
standthatis recommendedbythemanufacturer.
6A. _ An applianceand cart combinationshould be moved
with care. Quickstops, excessiveforce, and uneven
surfacesmaycausetheapplianceandcartcombination
tooverturn.
7. WallDrCeilingMounting-Theapplianceshouldbe mountedtoa
wallorceilingonlyasrecommendedbythemanufacturer.
8. Ventilation-Theapplianceshouldbesituatedsothatits locationor
positiondoesnotinterferewithitsproperventilation.Forexample,
theapplianceshouldnotbesituatedona bed,sofa,rug,orsimilar
surfacethat may blocktheventilationopenings;or, placedin a
built-ininstallation,suchasa bookcaseor cabinetthatmayimpede
theflowofairthroughtheventilationopenings.
9. Heat- Theapplianceshouldbesituatedawayfrom heatsources
such as radiators,heatregisters,stoves, or otherappliances
(iincludingamplifiers)thatproduceheat.
10. PowerSources-Theapplianceshouldbe connectedto a power
supplyonlyofthetypedescribedin theoperatinginstructionsor as
markedontheappliance.
Power-CordProtection- Powersupplycordsshouldbe routedso
thattheyare notlikelyto bewalkedon or pinchedby itemsplaced
upon or againstthem, payingparticular attentionto cords and
plugs,conveniencereceptacles,andthepointwheretheyexit from
theappliance.
12. Cleaning-Theapplianceshouldbe cleanedonlyasrecommended
bythemanufacturer.
13. PowerLines -An outdoorantennashouldbe locatedawayfrom
powerlines.
14. OutdoorAntennaGrounding-Ifan outsideantennaisconnectedto
thereceiver,besuretheantennasystemisgroundedsoastopro-
videsome protectionagainstvoltagesurgesandbuilt upstatic
charges.
Section810oftheNationalElectricCode,ANSI/NFPANo.70-1984,
providesinformationwithrespectto propergroundingof themats
andsupportingstructuregroundingofthelead-inwiretoananten-
nadischargeunit,sizeofgroundingconnectors,locationofanten-
na-dischargeunit,connectiontogroundingelectrodesandrequire-
mentsforthegroundingelectrode.SeeFig.below.
15. Non-use Periods - The powercordof theapplianceshouldbe
unpluggedfrom theoutletwhenleftunusedfor a longperiodof
time.
16. ObjectandLiquidEntry- Careshouldbetakenso thatobjectsdo
notfallandliquidsarenotspilledintotheenclosurethroughopen-
ings.
17. DamageRequiringService- Theapplianceshouldbe servicedby
qualifiedservicepersonnelwhen:
A. Thepowersupplycordor theplughasbeendamaged;or
B. Objectshavefallen,or liquid hasbeenspilledinto the appli-
ance;or
C. Theappliancehasbeenexposedto rain;or
D. Theappliancedoesnot appearto operatenormallyor exhibits
a markedchangeinperformance;or
E. Theappliancehasbeendropped,or theenclosuredamaged.
18. Servicing- Theusershouldnot attemptto servicethe appliance
beyondthatdescribedintheoperatinginstructions.All otherservic-
ingshouldbereferredtoqualifiedservicepersonnel.
NotetotheCATVsysteminstaller:Thisreminderis providedto callthe
CATVsysteminstaller'sattentiontoArticle820-40oftheNECthatpro-
videsguidelinesforpropergroundingand,in particular,specifiesthatthe
cablegroundshallbeconnectedtothegroundingsystemofthebuilding,
asclosetothepointofcableentryaspractical.
EXAMPLEOFANTENNAGROUNDINGAS PERNATIONALELECTRICALCODE(NEC)
ExampleofAntennaGrounding
as perNEC- NationalElectricCode
GROUNDCLAMP ANTENNALEADIN WIRE
ANTENNADISCHARGEUNIT(NECSECTION|1|-20)
GROUNDINGCONDUCTORS(NECSECTm..0-.)
GROUND CLAMPS
I
ELECTRICSERVICEEQUIPMENT "'- POWERSERVICEGROUNDINGELECTRODESYSTEM IN_ AnTZSO.r_mTHI
J_ Getting Started
Welcome/Product Registration ................... 2
oafety/Precautions ..................................................... 3
Table of Contents ....................................................... 4
Features and Model Information ................................ 5
_--'_ On-Screen Features
PICTURE MENU
_,Adjusting Color, Brightness, Sharpness,
Tint, and Picture Controls ................................... 6
_Using the Clearview Control............................... 7
"_Adjusting the TV's Convergence Control ........... 8
_-Using the Flesh Correction Control .................... 9
FEATURES MENU
_'Selecting a Picture Source/RF Switcher ........... 10
_Setting the TV for Closed Captioning ............... 11
_-Setting the TV for Cable or Antenna Signals.... 12
"#'Adding Channels in Memory (Automatically). 13
_-Adding Channels in Memory (Manually) ......... 14
<_Setting the TV Clock ......................................... 15
Turn-On Timer .................................................. 16
9Using the Sleep Timer Control ......................... 16
'flU:sing the Time/Channel Reminder Control ...... 17
<_Using the Parental Control ........................... 18-19
<_Adjusting the Channel Display Control ............ 20
@Using the Language Control ............................. 20
SOUND MENU
_'Adjusting Bass, Treble, and Balance Sound
Controls ............................................................. 21
<_Setting the Bass Boost Control ........................ 21
_-Setting the TV for Stereo and SAP Programs ..22
_'Using the Sound Image Control ........................ 23
'#Using the Volume Display Control ................... 23
,#Using the TV Speaker On/Off Control with
the Audio Output jacks ..................................... 24
i_'Surround Sound Speaker Connections and
i Variable Audio Output Control ........................ 25
+Using the TV's Audio/Video Input and
Output Jacks ............................................... 26-27
Remote Control Operation
Using the Smart Picture Control ................. 28
Using the Smart Sound Control ............................... 28
Using the Smart Surf Control and the Surf button...29
Setting the Remote to Work VCRs .................... 30-31
Setting the Remote to Work
Cable TV Converters ........................................... 32-33
Setting the Remote to Work VCRs or Cable
Converters - "Search Method". ................................ 34
Using the Remote's VCR buttons ............................ 35
_-'_ Picture-ln-Picture (PIP)
How to Use PIP (Connections) ........................... 36-37
How to Use PIP with the "IV Remote ...................... 38
Selecting the Picture Source for PIP ........................ 39
Adjusting Picture-in-Picture Color and Tint ............ 40
More PIP Connections (Cable Converter) ............... 41
_General Information
Tips if Something Isn't Working ............................. 42
TV Help Menu ......................................................... 43
Glossary of TV Terms ............................................. 44
Index ........................................................................ 45
Factory Service Locations .................................. 46-47
Warranty .................................................................. 48
Use the simple Set-Up Guide (supplied with
your TV information packet) for details on:
•Antenna Hook-ups
° First Time Set-Up
(Automatic Settings)
• Basic TV and Remote
Control Operation
On-Sct'een Menu Use
Copyright © 1996 Philips Consumer Electronics Company. All rights reserved.
I First Time Set Up - automatically sets the TV for
.local channels and the correct picture signal (antenna
:ahle). It even helps you make the necessary con-
.ections for the Picture-In-Picture (PIP) feature. See
your Set-up and Quick Use Guide for details.
Infrared Remote Control - operates your TV set
and a variety of wireless remote control VCRs and
Cable TV Converters.
Standard TV broadcast (VHF/UHF) or Cable TV
(CATV) channel capability.
Closed Captioning - allows the viewer to read TV
program dialogue or voice conversations as on-screen
text.
Automatic Programming of channels - for quick
and easy selection of favorite stations available in
your area.
Picture-In-Picture (PIP) -can show a TV program
and t]ae direct video output from an accessory (VCR,
etc.) onto the TV screen at the same time.
Stereo TV - with a built-in audio amplifier and a
twin speaker system, reception of TV programs in
both broadcast stereo sound or (SAP) bilingual broad-
- st are available.
On-Screen Features -display helpful information
for the setting of TV controls (such as help messages,
operating tips and glossary).
Parental Controls - for "censoring" orblocking out
channels to keep children from watching undesirable
programming.
Audio/Video Jacks - for direct connections with
VCR.s (and other accessories) for quality TV picture
and sound playback.
Surround Sound - external audio speaker connec-
tions.
Sleep-Timer -automatically turns the TV OFF at
preset time intervals.
Smart Button - for the control of TV Sound and
Picture levels. Use the Smart Button on the remote to
quickly adjust Smart Sound (to set TV Volume levels
during program changes or commercial breaks);
Smart Picture (for programmed video level adjust-
ments on a variety of program sources); and Smart
qurf (for quick one button channel selection of up to
of your favorite channels).
|
As you unpack your TV please note that the fol-
lowing items have been included with your set:
•Owner's Manual
- Safety Tip Information
Factory Service Center Locations
• Warranty Registration Card
• Remote Control Transmitter
• Batteries for Remote Control Use
Please take a few minutes to complete your regis-
tration card. The serial number for the TV is on
the back of the set.
Refer to the back of this manual for instructions
on the cleaning and care of the TV.
An accessory storage shelf compartment has been
designed into some Projection TV Cabinets for the
placement of such items as VCRs, CD-i (Compact
Disc Interactive) Players, or other pieces of
audio/video equipment.
If your Projection TV is so equipped, use the con-
nection tunnel (located on the rear wall of the stor-
age compartment) to route Antenna, Cable, or other
signal supply wires from the accessories to the TV's
rear cabinet jackpanel.
Note: A Projection TV Screen Enhancement Filter
may also be present on certain select models. Refer
io the Cleaning and Care Instructions provided for
directions on how to remove the framed filter if it
should ever be necessary.
ff pOadjust your TV color and
icture controls, select a TV
channel and follow the steps shown
below:
<_ Select BRIGHTNESS, PIC-
TURE, COLOR, TINT, or
SHARPNESS picture control.
With the PICTURE MENU on
screen, move the RED highlight
with the MENU 4_ buttons. Then
press the MENU (M) button.
<_ Press the (+) or (-) buttons to
adjust the selected control.
<_ Press the STATUS button to
clear the screen.
Remember. When the bar
scale is centered, control set-
tings are at normal mid-range lev-
els.
BRIGHTNESS Press (-) or (+) until
dark parts of the picture show good
detail.
pICTURE Press (-) or (+) until
whitest parts of the picture areas
bright as you prefer.
COLOR Press (-) or (+) to add or
eliminate color.
T__I_I_I_I_I_I_I_Lr_Press (-) or (+) to obtain natu-
ral skin tones. (Also see Flesh
CoiTection on page 9 for more infor-
mation).
SHARPNESS Press (-) or (+) to
improve detail in the picture.
<
i®$® < ,
ISelect and then press Select and then press MENU
IMENU (M) button to (M) button to view additional
Iview an explanation of IconU'ols grouped under same
[the selected feature. Ifeat_ heading. For
IExample: Tint, Brightness,
Picture, etc.
HOW TO SELECT FEATURES
(WITH BUTTONS ON THE REMOTE)
Press MENU (M) _ _
to select RED high-
lighted feature. Press MENU (M)
• • to move Up
andDown within
the Menu.
Press MENU (M)4I ]l_
to move from Side-to-
Side within the Menu.
lwearview is a sharpness feature
hich smoothes out back-
ground snow (or picture noise)
without losing picture image detail
or crispness.
Select CLEARVIEW control.
With the PICTURE MENU on
screen, move the RED highlight
with the MENU 4o I, buttons. Then
'qw
press the MENU (M) button.
_Press the MENU AV buttons
to move the RED highlight. Press
the MENU button to select (v") the
ENHANCED mode.
,_ Press the STATUS button to
Iclear the screen. 0
MAIN MENU
NNN PICTURE MENU
I
nVergence is the correct lin-
g up of the red and blue
Jght paths on the TV screen.
NOTE: If no color fringing (see
Smart Help) shows, then no
Convergence adjustments are nec-
essary for your TV.
<_ ,Select CONVERGENCE con-
trol.
With PICTURE MENU (2 of 2) on
screen, move the RED highlight
,dk
with the MENU 4_ buttons. Then
press the MENU (M) button.
<_If there is RED or BLUE color
fringing on the White cross, press
the MENU button to continue.
A
<_ Press the MENU _$_ buttons
to move the red or blue cross
directly over the white cross on the
TV screen.
The red or blue cross is properly
adjusted when it is completely
aerged with the white cross. (No
color appears around the edge of
the white cross).
<_ Press the STATUS button to
clear the screen when convergence
adjustments are complete.
Remember. Convergence
has been set at the factory for
best viewing, but if one or more of
the (red or blue) colors appear
around the edges of objects (color
fringing) follow the steps given in
this section.
MAIN MENU
:i::
:i!!:.
<
=PICTURE MENU
tm 1'0_:'f:
PICTURE MENU
20F2_
If there is REDor BLUE
fringe onthe WHITEcross,
usethis adjustment to
impr_ctore.
Press "M" to Continue
-or -
Press "P" to Return
e the Flesh Correction con-
rol to keep skin tone hues (or
facial tint)from varying from TV
channel to TV channel.
_,_ Select FLESH CORREC-
TION control.
With PICTURE MENU (2 of 2) on
screen, move the RED highlight
with the MENU 4-_ buttons. Then
v
press the MENU (M) button.
_,_ Press the MENU AV buttons
to move the RED highlight. Press
the MENU button to turn (_") the
I_-LESHCORRECTION control
ON.
_Press the STATUS button to
(:lear the screen.
0pip
_= PICTURE MENU
_= PICTURE MENU
,\, ,i, I,I,11,
'rhe picture for the TV can come
through either the ANTENNA plug
or the A UDIONIDEO INput jacks (on
the rear of the TV). The Picture
Source control simply tells the TV
which one of these picture sources it is
to show on the TV screen.
_ Select PICTURE SOURCE
SELECT control.
With the FEATURES MENU on
screen, move the RED highlight with
the MENU 4_ buttons. Then press
the MENU (M) button.
<_ Press the MENU AV buttons to
move the RED highlight. Press the
MENU button to turn the desired PIC-
TURE SOURCE control ON (u,').
ANTENNA- for a picture signal
coming from the ANTENNA
plug on the TV.
VCR/AUX- for a picture signal
coming from the Video Input
jack on the rear of the TV.
Press the STATUS button to clear
i the screen.
-- l L
Remember.
The VCR/AUX
TV screen will
be blank unless a
signal source is
connected to the
Video Input jack
on the rear of the
TV. (See page 26
for details).
n optional RF Switcher is available
that will allow an Antenna/Cable TV
signal and another video accessory
'VCR, Video Disc Player, etc.) to be
contnected to the TV at the same time.
Connection instructions are given with
the accessory RF Switcher, but be sure
to turn the TV's power OFF (and
unplug its AC power cord) when con-
necting the RF Switcher to the RF
Switch Input jack on the rear of the TV.
Rep,!ug the TV's AC Power Cord into
the waU outlet and turn the TV ON. The
TV's Picture Source Menu will now
show an Accessory Signal Source option
available for selection.
The accessory RF Switcher can be pur-
chased or ordered from your dealer. If
9ur dealer does not carry the accesso-
y, call the Information Center number
I(listed with your warranty)for furtherassistance.
II
-- MAIN MENU --
.-_:+_:-.
.::_:_:..
i+i iiiiiiiliiiiii+iiiii ::........
-- FF_TL_ MENU-- FIE_TIJF_ MENU
1171_
[] ANT/CABLE t
..........
f-_losed Captioning (CC) allows
'l_,/ you to read the voice content of
television programs on the TV
screen. Designed to help the hearing
Jimpaired this feature uses on-screen
"text boxes" to show dialogue and
conversations while the TV program
is in progress.
_a Select CLOSED CAPTION-
ING control.
With the FEATURES MENU on
,;creen, move the RED highlight
with the MENU 4_ buttons. Then
press the MENU (M) button.
,_ Press the MENU AV buttons
to move the RED highlight. Press
the MENU button to select (t,I) the
desired Closed Caption mode - For
Example: "ALWAYS ON" and
"CAPTION 1".
CAPTION 1, 2, 3, 4:
dialogue (and descriptions)
for the action on the captioned
TV program shows on-screen.
(See Important Note on this
page.)
TEXT 1,2, 3, 4:
often used for channel guide,
schedules, or bulletin board
information for CC programs.
_,,_ After making your Caption mode
selection, press the STATUS button
to clear the TV screen. The selected
Closed Caption mode will be active.
To cancel, set the Closed Captioned
:feature to OFF when finished view-
ing.
Remember. Broadcast
t stations will often use
spelling abbreviations, symbols,
dropouts and other grammatical
shortcuts in order to keep pace
with the on-screen action. These
type factors vary upon the source
of the captioned text material and
do not indicate a need for service
on the part of the TV.
NOTE: Not all TV programs and product commercials are made for broadcast
with Closed Caption (CC) information included. Neither are all Closed Caption
modes (CAPTION 1-4; or TEXT 1-4) necessarily being used by a broadcast station
during the transmission of a closed caption program. UsuaUy "CAPTION 1" is the
most used mode to view captioned material. Refer to your area's TV program list-
ings for the stations and times of Closed Caption shows.
i::ii::i_iii::i::iii::iiiiiiii_:Jii::_::i_ii_ !!i::::::iiilii!i!ii::i.."._il;:.;i;_...........
MAIN MENU
:!ii::
FEATURE MENU
NOTE: The ON DURING
MUTE ONLY control can
be used to set the "IV to
turn the Closed Caption
mode "ON" whenever the
Closed Caption information will usually appear
in black and white (although some broadcasters
or networks may occasionally use color to hi
light or draw attention to certain areas.)
CAPTION 1 mode
Example Screen Display
This symbol will appear on channels that con-
tain Closed Captioning material whenever the
status display is shown. I
FULL SCREEN TEXT
will block TV screen from viewing
12:00 I
OiTE: If you went through
rst Time Setup (in your
Quick Use Guide), this task has
already been completed for you.
You need to make sure the TV is
set to pick up either Cable TV or
Antenna signals. In other words,
the TV needs to know if you con-
nected a Cable TV signal or a nor-
mal antenna to its ANTENNA plug.
_Select CABLE CHANNEL
TUNING control•
With the FEATURES MENU on
sc,reen, move the RED highlight
with the MENU I_ buttons.
Then press the MENU (M) button.
_Press the MENU AV buttons
I o move the RED highlight. Press
the MENU button to select (1,")the
desired mode -For Example:
CABLE.
CABLE- If you DO have
Cable TV connected
to the TV. Channels
1-125 are available.
NORMAL- If you have an
Antenna connected
to the TV. Channels
2-69 are available.
<_ Press the STATUS button to
I clear the screen.0
:_!ii
FEATURE MENU
10F3_
D NORMAL
• ._ .,.,.,......,............
OiTE: If you went through First
me Setup (in your Quick Use
Guide), this task has already been
completed for you.
Your TV can automatically set itself
for local area (or Cable TV) chan-
nels. This makes it easy for you to
select only the TV stations in your
area when the CHANNEL • • but-
tons are pressed.
<_ Select CHANNEL MEMORY
(START AUTO-PROGRAM-
MING) control.
With the FEATURES MENU on
screen, movethe RED highlight with
the MENU _o_ buttons. Then press
,v
the MENU (M) button.
<_ Press the MENU button to turn
I AUTO-PROGRAMMING ON.
The TV shows which channel num-
Ix,rs are "SAVED" (J,J) as they are
•added into memory.
"Auto-programming CHANNEL
MEMORY is finished" shows when
the TV is through adding channels.
<_ Press the STATUS or Menu (M)
button to clear the screen.
Try it out. Press the
CHANNELAV buttons and
see which channels you can select.
Remember. An Antenna orCable TV
signal must first be connected to your
TV so that channels can be saved.
If you want to delete any unwanted
channels from the TV's memory, see
"ADD/DELETE CHANNELS" on
page 14.
MAIN MENU
,\_ I it,
ua Channel Numbers are j
Saved in Memory
,,€
FEATURE MENU
AUTO.PROGRAMMING
CHANNEL MEMORY
1 2-4" 3,,," 4€"
5_" 6€" 7€" 8€"
9'_' 10 11 12
13 14 15 16
17 18 19 20
21 22 23 24
uto-Programming (see page 13)
adds all the channels it can find
(on your Antenna or Cable TV sys-
tem) into the TV's memory.
Add/Delete Channels makes it easy
fi_r you to add other channels, or
drop unwanted channels, from the
list of channels in the TV's memory.
<_ Select CHANNEL MEMORY
(ADD/DELETE CHANNELS)
control.
With the FEATURES MENU on
screen, move the RED highlight
with the MENU 4-_ buttons. Then
press the MENU (M) button.
<_ Press the CHANNEL A_' or
number buttons to select the chan-
nel you want to add or delete.
<_ Press the MENU button to
ADD the channel into the TV's
memory.
Press the MENU • button to
DELETE the channel from memory.
Repeat steps 2 and 3 for each chan-
Inel you wish to add or delete.
<_ Press the STATUS MENU
or
button to clear the screen.
Remember. You can also
add the VCR/AUX mode
just like a channel. Then by
pressing the CHANNEL AV
buttons the VCR/AUX mode can
quickly be selected to use the
Input jacks on the rear of the TV
(see page 26).
Note: "VCR/AUX" mode is
located between the lowest and
highest channel numbers within
the ADD/DELETE CHANNEL
control screen.
<
= MAIN MENU
....iiiiii!ii
FEATURE MENU
=CHANNEL MEMORY
,I,_,l,l,te
: l ADD/DELETE
SELECT CHANNEL
(_O to DELETE CHANNEL
(_ when RNISHED
'1/1
OTE: If you went through
irst Time Setup (in your
Quick Use Guide), this task has
already been completed for you.
Your TV comes with an on-screen
clock. During normal operation the
clock appears on the screen with
every channel change (and when
the STATUS button is pressed).
_,_ Select SET CLOCK control.
With FEATURES MENU (2 of 3)
on screen, move the RED highlight
with the MENU 4*_ buttons. Then
press the MENU (M) button.
,_ Press the remote's number
buttons to set the time clock.
,_ Press the STATUS button to
I set the clock in operation and clear
the screen.
Remember, be sure to
3ress "0" first and then the
hour number for single digit
entries.
A
The remote's MENU 4_ buttons
can also be used to set the hours,
minutes and AM/PM portions of
the clock.
TV Clock settings may be lost
when the TV is unplugged (or AC
power to the set is interrupted.)
You can also set the TV Clock
automatically if you follow the First
Time Set-up procedure for the
Smart Clock feature.
FEATURE MENU
FEATURE MENU =
2 OF 3=
SET CLOCK & ON TIMER
,i,l_t,
I
ust like an alarm clock you can
et the TV to turn itself on at the
vame time everyday.
Select SET ON TIMER con-
trol.
With FEATURES MENU (2 of 3)
on screen, move the RED highlight
with the MENU 4=-_buttons. Then
press the MENU (M) button.
_Press the MENU AV and
MENU (M) buttons to highlightand select "ON" (va).
<_ Press the MENU •• and
Ithen the MENU (M) buttons to
select "SET ON TIME".
<_ Press the remote's number
Iuttons to set the "TURN ON"
time for the "IV. (Press MENU •
• for AM or PM.)
<_ Press the STATUS button to
I set the "ON TIME" and clear the
screen.
r" ....................... i
i
P_K_fi ENlIE_I'n-E
I-OuR "ro _ oN ,
Ve you ever fallen asleep in
ont of the TV only to have it
wake you up at two in the morning
with a test pattern screeching in
your ears? Well, your TV can save
you all that trouble by automatical-
ly turning itself off
<_ Select SLEEP TIMER control.
With FEATURES MENU (2 of 3)
on screen, move the RED highlight
with the MENU 4_ buttons. Then
press the MENU (M) button.
<_ Press the • It, buttons
MENU
I c pick the amount of time (15 min-
utes to 2 hours ahead) before the
TV will turn itself off.
<_ Press the STATUS MENU
or
(M) button to clear the screen after
you have set the time for the TV to
turn off.
20F3--m
,i
Remember,
to see how many
minutes are left
before the TV shuts
itself off, reselect
the SLEEP TIMER
control screen.
To stop a SLEEP
TIMER setting,
reset the timer back
to OFF. (Turning
the TV off and on,
or pressing a button
during the last
minute of a timer
setting, will also
cancel a setting.)
A few seconds
before the TV is to
shut off a message
will come on the
screen telling you
GOOD NIGHT.
"l_][th the Half Hour Reminder
V V control the TV automatically
shows you the current time and
channel every thirty minutes.
Select HALF HOUR
REMINDER control.
With FEATURES MENU (2 of 3)
on screen, move the RED high-
A
liight with the MENU _ buttons.
Then press the MENU (M) button.
_, Press the MENU AV and
MENU (M) buttons to highlight
and select (tl) the EVERY HALF
FLOURitem.
_Press the to
STATUS button
clear the screen.
MAIN MENU
FEATURE MENU
FEATURE MENU
20F 3=
rental Control allows parents
block out, or censor", any
channels they think children should
not watch. A channel placed under
Parental Control cannot be viewed
until a correct access code is used to
unlock the channel for viewing.
First let's set your Parental Code:
_ Select the PARENTAL CON-
TROL.
With FEATURES MENU (3 of 3)
on screen, move the RED highlight
A
with the MENU _ buttons. Then
press the MENU (M) button.
"BLOCK CHANNELS" and
"SETUP CODE" show on screen.
;_ Press the MENU AV and
I MENU (M) buttons to highlight
and select the SETUP CODE item.
<_ Press 0, 7, 1, 1 on the remote.
] XXXX" shows on the ACCESS
CODE SETUP screen as you press
the number buttons.
"INCORRECT ACCESS CODE -
TRY AGAIN" will also show on the
I screen.
Press 0, 7, 1, 1 on the remote
again.
"Next Enter Your New Access
Code" shows on the screen.
,_ Enter a new digit
four number
code using the remote.
"Access Code Changed" shows on
the screen to let you know the new
code has been set.
Continue to the next page to find
out how to "block" channels from
viewing.
Parents -it isn't possible
to unlock or defeat your
Censor Code without changing to
a new code number. So if your
Code number changes, and you
di_dn'tchange it yourself, then you
I ill know that someone has
altered the code and the blanked
out channel has been viewed.
INOTE:Your TV left the factory with the Parental Code set to "0000". If you are using
your TV and the Parental Control for the first time, and don't want to SETUP a new
Access code number, you can use the "0000" number to block channels - see next page.
The "0711" Parental Code (shown on this page) is given as a default or way to reset the
Code when the current Access number is not known.
FEATURE MENU
,i,1,1,
V
FEATURE MENU
rm 3OF 3_
PF_,'R.JRE MENU
='_ bg b'_=_ "
I
I
..... ...J
PARENTAL CONTROL
I
f. .............. ........ .,I
i
EXIT
I
i
..... ...... ..,J
ACCESS I
EXIT EXIT
Press MENU • to go on and start
to "block" channels
Press MENU to return to the
Parental Control Menu screen.
Press STATUS to clear the screen.
fter iParental
number has been set (see
previous page), you are now ready
to select the channels you want to
block out or censor.
_Select the BLOCK CHAN-
NELS control.
With FEATURES MENU (3 of 3)
on screen, move the RED highlight
with the MENU _ buttons. Then
press the MENU (M) button.
_' Press the MENU AV and
MENU (M) buttons to highlight
and select the BLOCK CHAN-
NELS item.
_' Enter the correct Parental
Code number.
_Press Channel AV or Channel
Number buttons to select the chan-
nel you want to block.
_Press the MENU • button to
] "BLOCK VIEWING" on the
!selected channel.
Press the MENU • button to
"ALLOW VIEWING" on a
blocked channel.
Repeat steps 3 and 4 for any other
channels you wish to block out.
Remember, to make TV
viewing easier all channels
(and Audio/Video Input jacks)
will be unblocked, once the cor-
rect Parental Code number has
been entered.
When the TV is turned OFF and
then back ON again, Parental
Control is back in place for all
channels.
FEATURE MENU
rm 3 OF 3_=
FEATURE MENU
i
......... .I
PARENTAL CONTROL
i
..... J
___ o Block or Un_lock €_LECT CHANNEL
channels First Er/t_P
our Access Code , , _ to ALLOW VIEWING
C_ to EXIT C_) to EXIT ,,
I" ...................... J
]_ Note: You can also block out the
use of the Audio/Video Input jacks
on the TV. This stops the viewing
C_N_L 1Sof VCR programs which can be
BLOCKED BY PARENTAL CONTROL shown through the A/V IN jacks.
Just select VCR/AUX 1 (located
between the lowest and highest
Please enter Access Code channel numbers) on the Channel
_3R- Blocking screen, and select
Select snorer Channel
fo_v_*wing. "blocked".
BLOCKED CHANNEL SCREEN MESSAGE
(Appears when an attempt to select a blocked
channel is made and Parental Control is ON.)
nd location of the on screen
channel and clock information.
<_ Select CHANNEL DISPLAY
conlrol.
With FEATURES MENU (2 of 3)
on screen, move the RED high-
light with the MENU 4_ buttons.
Then press the MENU (M) button.
<_ Press the MENU _kY and
MENU (M) buttons to highlight
and select (t,J) the LARGE or
SM,M_.L display control.
<_ Press the STATUS button to
clear the screen.
.:.. _::_::
.::::!i!
iili
._,.::::::_:_:_:_!_;!;;;::_i_::_::iii::!i::::::::_i_i_i_i_;_::_::__:::::::.:......
FEATU_ M_IU
Try it out.
Press the CHAN-
NEL dk_' buttons
and you should see
the Display Size you
selected.
Remember. The
SMALL SIZE dis-
play shows only the
channel number, not
the time (or clock).
CHANNEL DISPLAY OPTIONS
.[_Tote: If you went through First
¥Time Setup, This task has
already been completed for you.
For our Spanish and French
speaking TV owners an on-screen
LANGUAGE option is present.
With the LANGUAGE control you
can set the TV's on-screen fea-
tures to be shown in either
English, Spanish or French.
_ Select the LANGUAGE DIS-
PLAY control.
With FEATURES MENU (3 of 3)
on screen, move the RED high-
light with the MENU _'_ buttons.
Then press the MENU (M) button.
_,._ Press the MENU J,V and
MENU (M) buttons to highlight
and select (_") English, Spanish
(ESPANOL), or French (FRAN-
CAIS) on the display control.
Text for the on-screen Menu will
change to the selected language.
¢, ''-_" Press the STATUS button to
ear the screen.
1.
Remember,
the Language con-
trol only makes the
TV's on-screen
(MENU) items
appear in English,
Spanish, or French
text. It does not
change the other on-
screen text features
such as Closed
Captioned (CC) TV
shows.
LANGUAGE DISPLAY OPTIONS
2O

Other Philips Projection TV manuals

Philips 60PP9200D User manual

Philips

Philips 60PP9200D User manual

Philips 60P9271 User manual

Philips

Philips 60P9271 User manual

Philips Magnavox 7P5441C User manual

Philips

Philips Magnavox 7P5441C User manual

Philips Projection Television User manual

Philips

Philips Projection Television User manual

Philips 55PP950299 User manual

Philips

Philips 55PP950299 User manual

Philips 48PP9103 User manual

Philips

Philips 48PP9103 User manual

Philips 60P 8341 User manual

Philips

Philips 60P 8341 User manual

Philips 7P4841C User manual

Philips

Philips 7P4841C User manual

Philips PTV400 series User manual

Philips

Philips PTV400 series User manual

Philips 50PL9126D/37E User manual

Philips

Philips 50PL9126D/37E User manual

Philips 43PP925 User manual

Philips

Philips 43PP925 User manual

Philips MX6472C User manual

Philips

Philips MX6472C User manual

Philips Magnavox 9P5531C User manual

Philips

Philips Magnavox 9P5531C User manual

Philips 64P 9161 User manual

Philips

Philips 64P 9161 User manual

Philips 60P834299 Manual

Philips

Philips 60P834299 Manual

Philips Magnavox 9P6034C User manual

Philips

Philips Magnavox 9P6034C User manual

Philips 51PP9100D - Hook Up Guide User manual

Philips

Philips 51PP9100D - Hook Up Guide User manual

Philips Magnavox 8P5434C User manual

Philips

Philips Magnavox 8P5434C User manual

Philips 43PP7445 User manual

Philips

Philips 43PP7445 User manual

Philips 51PP9303H Manual

Philips

Philips 51PP9303H Manual

Philips 28PW5408 User manual

Philips

Philips 28PW5408 User manual

Philips 64PP 9901 User manual

Philips

Philips 64PP 9901 User manual

Philips Magnavox 7P4830W199 User manual

Philips

Philips Magnavox 7P4830W199 User manual

Philips 46PP9302 User manual

Philips

Philips 46PP9302 User manual

Popular Projection TV manuals by other brands

Akai HC-P4241W Owner's instructions

Akai

Akai HC-P4241W Owner's instructions

Sony GRAND WEGA KF-50SX200 Service manual

Sony

Sony GRAND WEGA KF-50SX200 Service manual

Panasonic PT-51HX43 operating instructions

Panasonic

Panasonic PT-51HX43 operating instructions

Mitsubishi WT-46809 owner's guide

Mitsubishi

Mitsubishi WT-46809 owner's guide

Panasonic PT-61DLX75 operating instructions

Panasonic

Panasonic PT-61DLX75 operating instructions

Toshiba TheaterWide 62HM94 specification

Toshiba

Toshiba TheaterWide 62HM94 specification

Sony KP-57WV600 - 57"hi-scan 1080i 16:9 Projection... Service manual

Sony

Sony KP-57WV600 - 57"hi-scan 1080i 16:9 Projection... Service manual

Samsung SP53J5HFX/RAD Service manual

Samsung

Samsung SP53J5HFX/RAD Service manual

Hitachi 51M200A operating guide

Hitachi

Hitachi 51M200A operating guide

LG RL-44SZ21RD Service manual

LG

LG RL-44SZ21RD Service manual

Sony GRAND WEGA KF 60DX100 Operating	 instruction

Sony

Sony GRAND WEGA KF 60DX100 Operating instruction

Panasonic TX-47P600H operating instructions

Panasonic

Panasonic TX-47P600H operating instructions

Toshiba TW40H80 owner's manual

Toshiba

Toshiba TW40H80 owner's manual

Hitachi 42V710 - 42" Rear Projection TV operating guide

Hitachi

Hitachi 42V710 - 42" Rear Projection TV operating guide

Mitsubishi WD-52527 Service manual

Mitsubishi

Mitsubishi WD-52527 Service manual

Mitsubishi Electric WD-52628 owner's guide

Mitsubishi Electric

Mitsubishi Electric WD-52628 owner's guide

Sony KP-EF48 operating instructions

Sony

Sony KP-EF48 operating instructions

Panasonic PT-61G53X operating instructions

Panasonic

Panasonic PT-61G53X operating instructions

manuals.online logo
manuals.online logoBrands
  • About & Mission
  • Contact us
  • Privacy Policy
  • Terms and Conditions

Copyright 2025 Manuals.Online. All Rights Reserved.