manuals.online logo
Brands
  1. Home
  2. •
  3. Brands
  4. •
  5. Philips
  6. •
  7. TV
  8. •
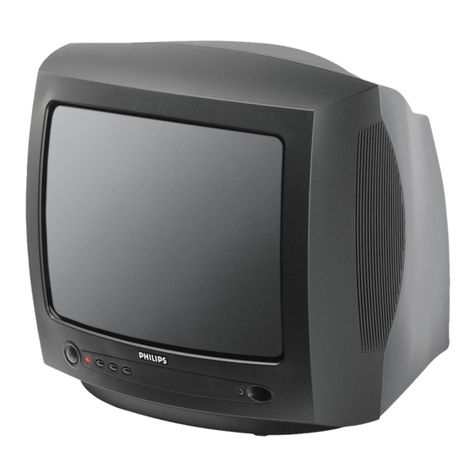
  9. Philips 15PF9925/12S User manual

Philips 15PF9925/12S User manual

Other manuals for 15PF9925/12S

2

This manual suits for next models

1

Other Philips TV manuals

Philips EM5A P/M User manual

Philips

Philips EM5A P/M User manual

Philips 15MF227B/27 User manual

Philips

Philips 15MF227B/27 User manual

Philips 21GR2651 User manual

Philips

Philips 21GR2651 User manual

Philips 43PUT6504/98 User manual

Philips

Philips 43PUT6504/98 User manual

Philips 5504 Series User manual

Philips

Philips 5504 Series User manual

Philips 14PT1573 User manual

Philips

Philips 14PT1573 User manual

Philips 32PW6304 User manual

Philips

Philips 32PW6304 User manual

Philips 6501 series User manual

Philips

Philips 6501 series User manual

Philips LC7.1E User manual

Philips

Philips LC7.1E User manual

Philips 40PFL4707/F7 User manual

Philips

Philips 40PFL4707/F7 User manual

Philips 25PT7303 User manual

Philips

Philips 25PT7303 User manual

Philips BDL8470QT User manual

Philips

Philips BDL8470QT User manual

Philips 43PUD7437 User manual

Philips

Philips 43PUD7437 User manual

Philips 25DC2065 User manual

Philips

Philips 25DC2065 User manual

Philips 32PHD4503 User manual

Philips

Philips 32PHD4503 User manual

Philips 55OLED806 User manual

Philips

Philips 55OLED806 User manual

Philips TS2744C User manual

Philips

Philips TS2744C User manual

Philips PFL30x8D User manual

Philips

Philips PFL30x8D User manual

Philips 42PF9831 User manual

Philips

Philips 42PF9831 User manual

Philips 7906 Series User manual

Philips

Philips 7906 Series User manual

Philips 27PT5245 User manual

Philips

Philips 27PT5245 User manual

Philips 200V4LSB User manual

Philips

Philips 200V4LSB User manual

Philips 32MF337B User manual

Philips

Philips 32MF337B User manual

Philips 50PFL3707/F7 User manual

Philips

Philips 50PFL3707/F7 User manual

Popular TV manuals by other brands

IKEA UPPLEVA user manual

IKEA

IKEA UPPLEVA user manual

Toshiba 19A20 Service manual

Toshiba

Toshiba 19A20 Service manual

Sony XBR-100Z9D reference guide

Sony

Sony XBR-100Z9D reference guide

Sony Trinitron KV-HR36M90 Service manual

Sony

Sony Trinitron KV-HR36M90 Service manual

JVC AV-14AG16 instructions

JVC

JVC AV-14AG16 instructions

Loewe Table Stand Reference 55 user guide

Loewe

Loewe Table Stand Reference 55 user guide

Panasonic Genus TX-G10 operating instructions

Panasonic

Panasonic Genus TX-G10 operating instructions

Samsung LN26C350D1D Service manual

Samsung

Samsung LN26C350D1D Service manual

BBK LT1516D Service manual

BBK

BBK LT1516D Service manual

Samsung 55S9 B Series Quick setup guide

Samsung

Samsung 55S9 B Series Quick setup guide

Sharp LC-40FI5012E user manual

Sharp

Sharp LC-40FI5012E user manual

Evervue BN185 Operation manual

Evervue

Evervue BN185 Operation manual

North State TV2GO user guide

North State

North State TV2GO user guide

Toshiba CX35F70 owner's manual

Toshiba

Toshiba CX35F70 owner's manual

Magnavox PS1980 owner's manual

Magnavox

Magnavox PS1980 owner's manual

Panasonic QuintrixF TX-29AS1D operating instructions

Panasonic

Panasonic QuintrixF TX-29AS1D operating instructions

Samsung 4 Series Quick setup guide

Samsung

Samsung 4 Series Quick setup guide

Panasonic TX-21FG20R Service manual

Panasonic

Panasonic TX-21FG20R Service manual

manuals.online logo
manuals.online logoBrands
  • About & Mission
  • Contact us
  • Privacy Policy
  • Terms and Conditions

Copyright 2025 Manuals.Online. All Rights Reserved.

Published by TA 0260 Service PaCE Printed in the Netherlands Subject to modification EN 3122 785 12510
©
Copyright 2002 Philips Consumer Electronics B.V. Eindhoven, The Netherlands.
All rights reserved. No part of this publication may be reproduced, stored in a
retrieval system or transmitted, in any form or by any means, electronic,
mechanical, photocopying, or otherwise without the prior permission of Philips.
Colour Television
15PF9925/12S/19S
AA
Contents Page
Block diagram
Description of controls
Adjustment Instructions
Troubleshooting
Exploded View
Exploded View Parts List
Replacement Parts List
Circuit diagram, Printed Board Lay-out
All manuals and user guides at all-guides.com
all-guides.com
Tuner & IF
- TAUC-S120D
- TAFC-M130D
- TAFC-Z140D
Audio
Processor
- MSP3410D
Ext- L
Micro-Controller
- INFINEON ( SDA55XX )
L
LCD
< LCD TV System Block Diagram >
Video
Decorder
- VPC3230D
Video Scaler
- MX88L284
Computer
Signal
- D-Sub
R/G/B
H/V
D-R/G/B,
H / V -Sync,
Den, Clock
From
Computer
OSD -IC
MC141585
CVBS
Audio-Amp
LA4282 R
Ext- R
SIF
For MNT Application
LM151X3 - 8-bits
1H/1V
A to D Converter
- AD9884
For PC Input
- Contrast
- Brightness
- Color
Ext_Video Ext_Y/C
OSD B/R/G/B
Scart RGB
For TV
. Contrast
. Brightness
. Color
. Tint
CVBS For TXT
AM
Interface
- TMDS (8bits)21 pin
RGB Switching
TDA8601
Y / Cb / Cr
RGB in
Back Light
Inverter Assy
CVBS OUT
All manuals and user guides at all-guides.com
DESCRIPTION OF CONTROLS
MENU OK
PV¬
5
13
2
46
79
8
0
0LIST
h
fg
Ò‡π
c
b
®
†
U
ek
C
aD
B
M
AUTOAUTO
w
Y-Z
wSource
Select your computer or other
peripherals:press repeatedly to
select TV,AV1, AV2, S-VIDEO
or PC monitor mode.
XBilingual choice and
sound mode selection
Press this key
• to switch from Stereo to
Mono sound in case of
stereo transmission,or from
Nicam Stereo to Nicam
Mono,in case of digital
transmission
• to switch from Nicam Dual
Yto Nicam Dual Zor
Nicam Dual Xin case of
Nicam Dual transmission
• to choose between Dual Y,
Dual Zor Dual Xin case
of bilingual transmission:
Dual Ysends the primary
broadcast language to the
loudspeakers;
Dual Zsends the secondary
broadcast language to the
loudspeakers;
Dual Xsends a separate
language to each loudspeaker.
Note: in case of weak stereo
sound signals, with stereo or
Nicam stereo transmission,select
mono reception.
Sound output selection in AV mode
InAV mode,you can select the output sound for the left and right loudspeakers.
Press the Xkey repeatedly to select:
• L+R:the audio signal from the audio L input is sent to the left loudspeaker,the audio signal
from the audio R input to the right loudspeaker
• L+L:the audio signal from the audio L input is sent to the left and right loudspeakers
• R+R:the audio signal from the audio R input is sent to the left and right loudspeakers.
BStandby
Switches theTV on from
standby or off to standby.
AUTO keys
To select predefined picture
and sound settings.
a AUTO picture
Each time it is pressed,a
different picture setting is
selected,corresponding with
specific factory settings of
Contrast,Brightness, Colour
and Sharpness.
MAUTO sound
Each time it is pressed,a
different sound setting is
selected,corresponding with
specific factory settings of
treble and bass.
Personal refers to the personal
preference settings of picture
and sound selected and stored
in the picture and sound menu.
All manuals and user guides at all-guides.com
B
M
a
AUTO AUTO
w
Y-Z
C
h
fg
c
b
ek
Ò‡π
®
†
U
D
12
9
3
6
5
7
4
8
00LIST
MENUOK
P
¬
V
VVolume
Press + or - to adjust the
volume.
¬Mute
Temporarily interrupt the
sound or restore it.
PProgramme selection
•to browse through theTV
channels which are not
skipped
• to switch theTV on from
standby.
®Ò‡π† Video
recorder keys
UTime display
The time, downloaded from the
TV channel (with teletext
broadcast) stored on
programme number 1 or the
lowest not skipped programme
number,is displayed on the
screen.
0/9 Digit keys
To select aTV channel.
0Previous programme
To display the previously
selectedTV channel.
LIST Programme list
To display the programme list.
bTeletext on/off
Teletext functions
hUfgcek
DSleeptimer
With this key you can set a
time period after which the
TV should switch itself to
standby.
Press the key repeatedly to
select the number of minutes.
The counter runs from B0,
10, 20, 30... to 240 minutes.
The timer begins to count
down from the number of
minutes selected.
Note:To view the remaining time,
press the Dkey once.To cancel
the sleep time, repeatedly press
the Dkey until B0 appears.
MENU Press repeatedly to
display each menu.
OK Press this key to activate
your choice,when in the menus.
All manuals and user guides at all-guides.com
Should your remote control be lost or broken you can still operate yourTV with the keys
in front of theTV.
ON/OFF:Press the power ON/OFF key to switch theTV on or off
TV/VIDEO:Press repeatedly to select TV,AV or PC monitor mode
MENU:Press repeatedly to display each menu
OK:- Press this key to activate your choice when in the menu
- Auto demonstration:Keep the OK key pressed for about 10 seconds.
All the menus are being displayed automatically one after the other.
To stopAuto demonstration, press any key on the front panel.
-VOL + :- Press - or + to select a menu item;
- Press - or + to adjust the volume;
- Press - or + to adjust the menu settings.
- CH/PR +:- Press - or + to browse through theTV channels which are not skipped;
- Press - or + to select a menu item;
-To switch theTV on from standby.
B: Switches theTV on from standby or off to standby.
The Bindicator lights up brightly when theTV is in standby, dims when theTV is
switched on.
TV/VIDEO MENU OKVOLCH/PR
_+_+BON/OFF
All manuals and user guides at all-guides.com
1. Application Object
This instruction is for the application to the LCD TV.
2. Notes
(1) This set uses an adapter, so connect the adapter and the
set correctly before adjustment.
(2) The adjustment must be performed under the correct
sequence.
(3) The adjustment must be performed in the circumstance of
25!5cC of temperature and 65–10% of relative humidity if
there is no specific designation.
(4) The input voltage of the receiver must keep 220V, 60Hz in
adjusting.
(5) The set must be operated for 30 minutes preliminarily
before adjustment if there is no specific designation.
[‘Heat Run’ must be performed with the full white signal or TV
noise signal in the internal part of the set.
[ The time for ‘Heat Run’ can be changed owing to production
plan.
3. PC Input Mode Adjustment
3-1. Required Test Equipment
(1) A pattern generator being in proportion to VG819 ; Pattern
of 64 tones
(2) A remote control
3-2. Preparation for Adjustment
(1) Perform ‘Heat Run’ for more than 30 minutes in white
pattern.
(2) Connect the signal of pattern generator with LCD TV.
(3) Lean the set 45° backward. (Adjustment is easy.)
(4) Set the PC mode menu as below.
3-3. White Adjustment
(1) Approve the signal of 64 tones of XGA(1024 * 768).
(2) Select all the gain of R, B and G with using ADJ of remote
control.
(3) After making 62 tones, 63 tones and 64 tones not
distinguished with using each signal of R, G and B, finish
adjusting at the moment when the signal 62, 63 and 64 is
distinguished.
ADJUSTMENT INSTRUCTION
45°
Initial Value
Contrast
70
Brightness
100
R
0.63 0.34
0x02
G
0.30 0.60
0x03
B
0.14 0.10
0x04
Error
!0.03
Register
Color Coordinates(x,y)
AD9884
All manuals and user guides at all-guides.com
all-guides.com
3-4. Position of Mode Adjustment
Timing of Mode Table * H[dot]/V[line]
Mode
H_Total
H_Display
H_Blanking
H_Sync
H Polarity
H_Bp
H_Fp
H-Freq[KHz]
/Clk[MHz]
V_Total
V_Display
V_Blanking
V_Sync
V Polarity
V_Bp
V_Fp
VGA-60
800
640
160
96
NEG.
48
16
31.469
25.175
525
480
45
2
NEG
33
10
VGA-67
864
640
224
64
NEG.
96
64
35.0
30.24
525
480
45
3
NEG
39
3
VGA-72
832
656
176
40
NEG.
120
16
37.861
31.5
520
496
24
3
NEG
20
1
VGA-75
840
640
200
64
NEG.
120
16
37.5
31.5
500
480
20
3
NEG
16
1
VGA-85
832
640
192
56
NEG.
80
56
43.269
36.0
509
480
29
3
NEG
25
1
TEXT-70
900
720
180
108
NEG.
54
18
31.469
28.324
449
400
49
2
POS
34
13
SVGA-56
1024
800
224
72
POS
128
24
35.156
36.0
625
600
25
2
POS
22
1
SVGA-60
1056
800
256
128
POS
88
40
37.879
40.0
628
600
28
4
POS
23
1
SVGA-72
1040
800
240
120
POS
64
56
48.077
50.0
666
600
66
6
POS
23
37
Mode
H_Total
H_Display
H_Blanking
H_Sync
H Polarity
H_Bp
H_Fp
H-Freq[KHz]
/Clk[MHz]
V_Total
V_Display
V_Blanking
V_Sync
V Polarity
V_Bp
V_Fp
SVGA-75
1056
800
256
80
POS
160
16
46.875
49.5
625
600
25
3
POS
21
1
SVGA-85
1048
800
248
64
POS
152
32
53.674
56.25
631
600
31
3
POS
27
1
XGA-60
1344
1024
320
136
NEG
136
160
48.363
65.0
806
768
38
6
NEG
29
3
XGA-70
1328
1024
304
136
NEG
144
24
56.476
75.0
806
768
38
6
NEG
29
3
XGA-75
1312
1024
288
96
POS
176
16
60.23
78.75
800
768
32
3
POS
28
1
MAC-75
1152
832
320
64
NEG
224
32
49.725
57.283
667
624
43
3
NWG
39
1
All manuals and user guides at all-guides.com
9 No sound Defective Reset IC of IC603 1) Check volume and speaker
- Speaker Defective MSP3400D of IC601 - Sound comes out only when being inputted into Audio
- Earphone Defective B+(8V,5V) of IC604,605. L/R
2) Check after replacing IC603
3) Replace IC601
4) Check and replace B+ of IC604,605.
10 Video color beat noise Earphone shield case being touched
Check the mould of shield and JA401, Replace shield case
Soldering IC301 and IC507 Re-soldering
1 Soft touch doesn’t Defective speaker wire 1) Make some space between the speaker wire and
function properly and inverter wire the Soft touch Board by sticking the speaker wire
to the guide hole of the cabinet.
2) Arrange working state of A1. Tape in the inverter wire
and correct working state of the Shield case.
2 Soft touch doesn’t 1) Broken components and 1) Check Soft touch with eyes
function soldering of them Check and repair soldering
2) P101 connector error 2) Check and repair the P101 connector
3 No screen Input error of inverter connector 1) Bend the pin legs of P801 connector -> recheck them
2) Check and repair the IC801,802 SI4925
P502 and Pin 21 connector 1) Check and fix P502 connector
being slipped out 2) Check and fix the components at P502 LCD module
and at main board.
3) Check Pin21.
Cracked components and 1) Check and repair tuner board and main board
soldering at tuner board 2) Solder Q403, Q402 and C153
4 Dark screen 1) Defective LCD lamp 1) Replace the inverter
2) Defective inverter 2) Replace the LCD lamp
3) Input error of inverter connector 2) Check the connector input.
5 Broken OSD display Defective the font rom of IC501 Check and replace the font rom of IC501
TROUBLESHOOTING
1. General Features
2. PC Mode
No. Symptom Cause Check Point
Check Point
6 Screen noise Clock or phase being 1) Resettig is needed according to the video card of each
not able to be adjusted PC
2) Horizontal noise : adjust phase until no horizontal
noise occurres
3) Vertical noise : adjust clock in menu until no vertical
noise occurres
7 Screen position error Screen position error 1) Play the Auto Configure in Menu.
horizontally or vertically 2) Adjust horizontal and vertical position until the screen
displayes normally
8 Color beat noise Soldering AD converter Recheck adn repair AD9884
or making it short
3. TV and external input
No. Symptom Cause
All manuals and user guides at all-guides.com
EXPLODED VIEW
300 121
120
174
112
540
520
550
521
541
A4
400 430
420
410
530
310
560330
All manuals and user guides at all-guides.com
112 6304VT1511A LCD 151X3 B3AP 15.1” LGPHILIPS-LCD
120 6400VA0017A SPEAKER,GENERAL T401SX-095K14 8 OHM 1.0
121 4950V00067A METAL,SPEAKER HOLDER (L,R)
174 6410VEH003A POWER CORD
300 3091V00A15A CABINET ASSEMBLY
310 5020V00552B BUTTON
330 5020V00553A BUTTON,POWER
400 3809V00273G BACK COVER ASSEMBLY
410 4811V00015A BRACKET ASSEMBLY,MAIN
420 4950V00063B METAL,HINGE FIXER
430 3581V00033A DOOR ASSEMBLY
520 6871VMM600D PWB ASSY,MAIN RE-
6871VMM600H PWB ASSY,MAIN RL-
521 4950V00059A METAL,FRAME MAIN
530 6871VSMA12A PWB ASSY,CTRL ASSY
540 6633VA0003E INVERTER ASSY 12VVOLT DC/ACVO
541 4950V00060A METAL,SHIELD INVERTER
550 6871VSM660A PWB ASSY,MAIN TUNER RL-
6871VSM660B PWB ASSY,MAIN TUNER RE-
560 6871VSMA13A PWB ASSY,POWER ASSY
EXPLODED VIEW PARTS LIST
No. PART NO. DESCRIPTION
All manuals and user guides at all-guides.com