Sanyo CE19LD90N-B User manual

INSTRUCTION MANUAL
Colour television
ENGLISH
1 - 31
CE19LD90N-B
Please read this Instruction book before using your television.
We wish you many hours of pleasure from your new television.
Problems with set-up?
Call 0844 335 2230

English - 1 -
Contents
Accessories............................................................ 2
Features ................................................................. 2
Introduction............................................................. 2
Preparation............................................................. 2
Safety Precautions ................................................. 2
Power Source..................................................... 2
Power Cord......................................................... 2
Moisture and Water ............................................ 2
Cleaning.............................................................. 3
Heat and Flames ................................................ 3
Lightning............................................................. 3
Replacement Parts............................................. 3
Servicing............................................................. 3
Waste Disposal................................................... 3
FOR EU USERS................................................. 3
Disconnecting the Device...................................3
Headphone Volume............................................ 3
Installation........................................................... 3
LCD Screen........................................................ 3
Warning .............................................................. 3
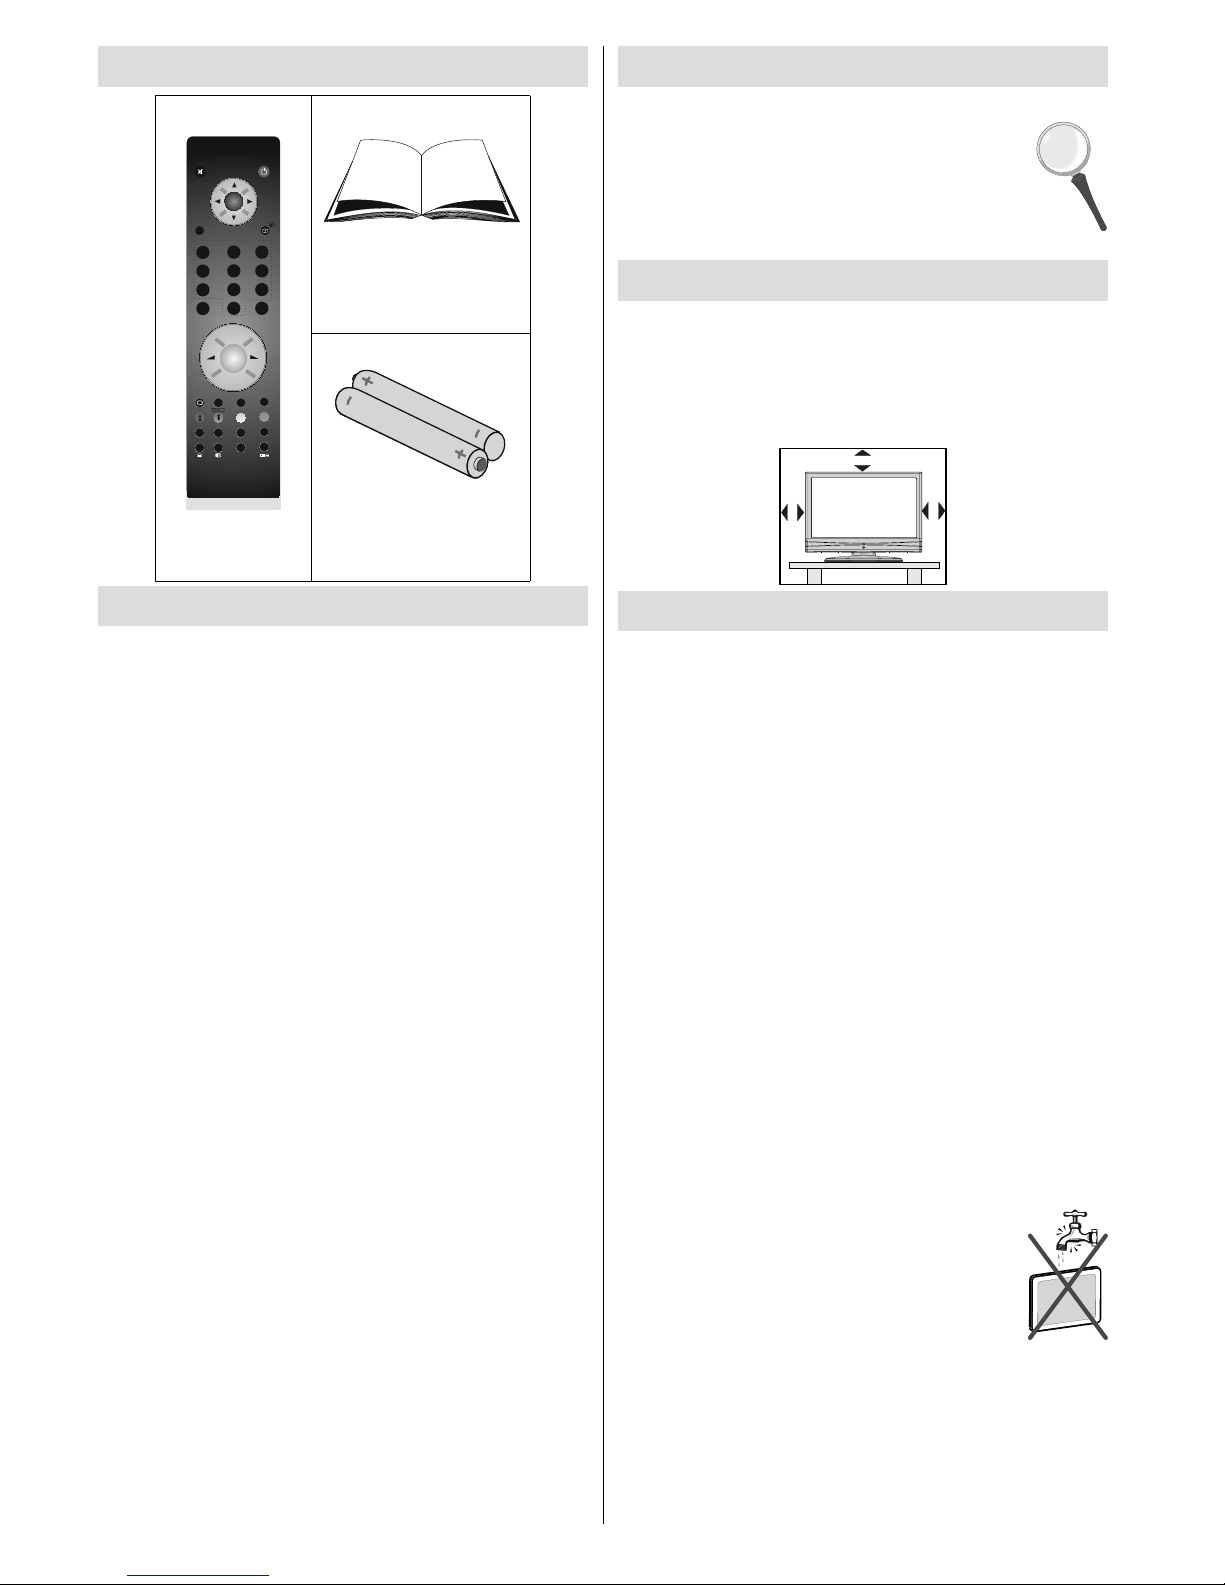
Overview of the Remote Control ............................ 4
LCD TV and Operating Buttons.............................. 5
Viewing the Connections- Back Connectors .......... 5
Viewing the Connections - Side Connectors.......... 6
Power Connection.................................................. 6
Aerial Connection................................................... 6
Using Side USB Input............................................. 7
USB Memory Connection................................... 7
Connecting the LCD TV to a PC............................. 7
Connecting to a DVD Player................................... 8
Using Side AV Connectors ..................................... 8
Connecting Other Equipment via Scart.................. 8
Inserting Batteries into the Remote
Control Handset...................................................... 9
Switching the TV On/Off......................................... 9
To Switch the TV On........................................... 9
To Switch the TV Off........................................... 9
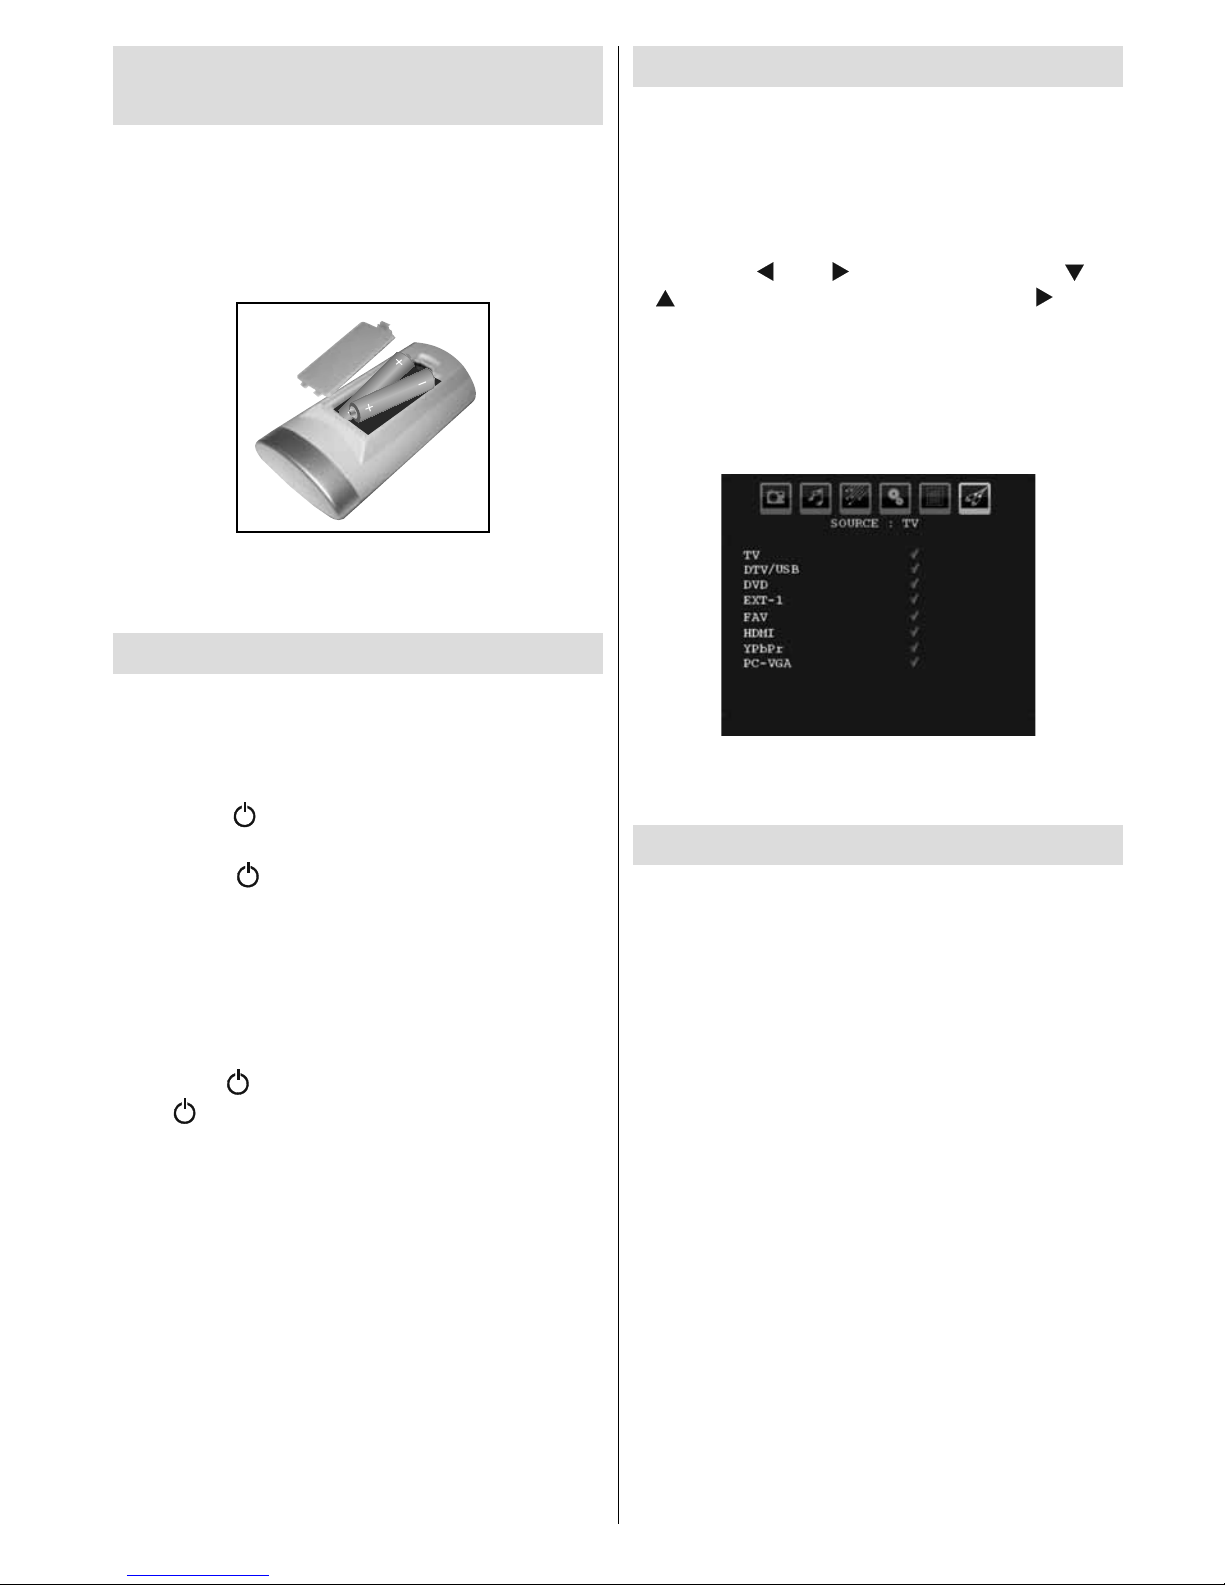
Input Selection........................................................ 9
Basic Operations.................................................... 9
Operation with the Buttons on the TV................. 9
Initial Settings....................................................... 10
General Operation................................................ 10
Electronic Programme Guide (EPG) .....................11
Displaying Subtitles ...........................................11
Digital Teletext (** for UK only) ..........................11
Analogue Teletext..............................................11
Widescreen........................................................11
IDTV Menu System .............................................. 12
Channel List...................................................... 12
Timers............................................................... 13
Conditional Access ........................................... 14
TV Setup........................................................... 14
Setup ................................................................ 14
Media Browser.................................................. 18
Playing MP3 Files............................................. 18
Viewing JPG Files.............................................18
Slideshow Options............................................ 18
Video Playback................................................. 19
Analogue TV Menu System.................................. 19
Picture Menu..................................................... 19
Sound Menu ..................................................... 20
Feature Menu ................................................... 21
Install Menu ...................................................... 22
Source Menu .................................................... 23
PC Mode Menu System........................................ 23
PC Position Menu............................................. 23
Displaying TV Information .................................... 24
Mute Function....................................................... 24
Picture Mode Selection......................................... 24
Freezing Picture ................................................... 24
Zoom Modes......................................................... 24
Auto .................................................................. 24
16:9................................................................... 24
4:3..................................................................... 25
Panoramic......................................................... 25
14:9................................................................... 25
Cinema ............................................................. 25
Subtitle.............................................................. 25
Zoom................................................................. 25
Teletext................................................................. 25
Tips....................................................................... 26
Image Persistence............................................ 26
No Power.......................................................... 26
Poor Picture...................................................... 26
No Picture......................................................... 26
Sound ............................................................... 26
Remote Control................................................. 26
Input Sources.................................................... 26
Appendix A: PC Input Typical Display Modes....... 27
Appendix B: AV and HDMI Signal Compatibility
(Input Signal Types).............................................. 28
Appendix C: Supported File Formats for
USB Mode............................................................ 29
Specifications ....................................................... 30
Important Instruction............................................. 31
A01_MB45_[GB]_1800UK_UKIDTV_NICKEL9_19890W_10065652+10067012_50156666.indd 1 22.01.2010 09:12:44

English - 2 -
Accessories
TV DTV
OK
SELECT
INFO /
123
456
789
0
RETURN
SOURCE
EPG
M
MENU
ABC DEF GHI
JKL MNO PQR
STU VWX YZ
P+
P-
-
+
SWAP
PRESETS
FAV
SCREEN LANG SUBTITLE SLEEP
/
Remote
Controller
Instruction Book
Batteries: 2 X AAA
Features
• Remote controlled colour LCD TV.
• Fully integrated digital TV (DVB-T).
• HDMI connectors for digital video and audio. This
connectionisalso designed toaccepthigh definition
signals.
• USB input.
•200 programmes from VHF, UHF(analogue).
• 500 programmes for digital mode (IDTV).
• OSD menu system.
• Scart socket for external devices (such as video,
video games, audio set, etc.).
• Stereo sound system.
• Teletext, fastext, TOP text.
• Headphone connection.
• Automatic programming system.
• Forward or backward manual tuning.
• Sleep timer.
• Child lock.
•Automatic sound mute when no transmission.
• NTSC playback.
• AVL (Automatic Volume Limiting).
•Whennovalid signal isdetected,after5 minutes the
TV switches automatically to standby mode.
• PLL (Frequency Search).
• PC input.
• Plug&Play for Windows 98,ME,2000,XP, Vista.
• Game Mode.
Introduction
Thank you for choosing this product.This manual will
guide you for the proper operation of your
TV. Before operating the TV, please read
this manual thoroughly.
Please do keep this manual in a safe place
for future references.
Preparation
For ventilation, leave a free space of at least 10 cm
all around the set. To prevent any fault and unsafe
situations, please do not place any objects on top
of the set.
Use this device in moderate climates.
10 cm
10 cm
10 cm
Safety Precautions
Please read the following recommended
safety precautions carefully for your
safety.
Power Source
The TV set should be operated only from a 220-240
VAC, 50 Hz outlet. Ensure that you select the correct
voltage setting for your convenience.
Power Cord
Do not place the set, a piece of furniture, etc. on the
powercord(mainslead) orpinch thecord. Handlethe
power cord by the plug. Do not unplug the appliance
by pulling from the power cord and never touch the
powercord with wet hands as this couldcause ashort
circuitor electric shock.Never makea knotin thecord
or tie it with other cords. The power cords should be
placed in such a way that they are not likely to be
stepped on.Adamaged power cord can cause fire or
give you an electric shock. When it is damaged and
needs to be replaced, it should be done by qualified
personnel.
Moisture and Water
Donotuse thisdevice in ahumid and damp
place (avoid the bathroom, the sink in the
kitchen, and near the washing machine).
Do not expose this device to rain or water,
asthis may be dangerous anddo not place
objectsfilledwithliquids, such asflowervases, on top.
Avoid from dripping or splashing.
Ifanysolid objectorliquid fallsintothe cabinet,unplug
the TV and have it checked by qualified personnel
before operating it any further.
A01_MB45_[GB]_1800UK_UKIDTV_NICKEL9_19890W_10065652+10067012_50156666.indd 2 22.01.2010 09:12:45

English - 3 -
Your SANYO product is designed and manufactured
with high quality materials and components which can
be recycled and/or reused.
The symbol mark means that electrical and electronic
equipment, batteries and accumulators, at their end-
of-life, should be disposed of separately from your
household waste.
Note:
If a chemical symbol is printed beneath the symbol
mark, this chemical symbol means that the battery
or accumulator contains a heavy metal at a certain
concentration. This will be indicated as follows: Hg:
mercury, Cd: cadmium, Pb: lead
In the European Union there are separate collection
systemsfor used electrical and electronicequipment,
batteries and accumulators.
Please, dispose of them correctly at your local
community waste collection/recycling centre.
Please, help us to conserve the environment we
live in!
Disconnecting the Device
The mains plug is used to disconnect TV set from
the mains and therefore it must remain readily
operable.
Headphone Volume
Excessive sound pressure from earphones
and headphones can cause hearing loss.
Installation
To prevent injury, this device must be securely
attachedto the wall in accordancewith theinstallation
instructions when mounted to the wall (if the option
is available).
LCD Screen
TheLCD panel is a veryhigh technology productwith
about a million thin film transistors, giving you fine
picture details. Occasionally, a few non-active pixels
may appear on the screen as a fixed blue, green or
red point. Please note that this does not affect the
performance of your product.
Warning
Do not leave your TV in standby or operating mode
when you leave your house.
Cleaning
Before cleaning, unplug the TV set
from the wall outlet. Do not use liquid or
aerosol cleaners. Use soft and dry cloth.
Ventilation
Theslots andopenings on theTV set are intended for
ventilationandtoensure reliableoperation.To prevent
overheating, these openings must not be blocked or
covered in anyway.
Heat and Flames
Theset should notbe placednear to open
flames and sources of intense heat such
asan electricheater.Ensure thatno open
flame sources, such as lighted candles,
are placed on top of the TV. Batteries
should not be exposed to excessive heat
such as sunshine, fire or the like.
Lightning
In case of storm and lightning or when
going on holiday, disconnect the power
cord from the wall outlet.
Replacement Parts
Whenreplacement parts are required, make sure that
the service technician has used replacement parts,
which are specified by the manufacturer or have the
samespecificationsas theoriginal one.Unauthorized
substitutions may result in fire, electrical shock or
other hazards.
Servicing
Please refer all servicing to qualified
personnel. Do not remove the cover
yourself as this may result in an electric
shock.
Waste Disposal
Instructions for waste disposal:
• Packaging and packaging aids are recyclable and
shouldprincipally be recycled. Packaging materials,
such as foil bag, must be kept away from children.
• Batteries, including those which are heavy metal-
free, should not be disposed of with household
waste. Please dispose of used battery in an
environment friendly manner. Find out about the
legal regulations which apply in your area.
• Cold cathode fluorescent lamp in LCD PANEL
contains a small amount of mercury; please follow
the local laws or regulations for disposal.
FOR EU USERS
Thesymbolmarkandrecyclingsystems
described below apply to EU countries
and do not apply to countries in other
areas of the world.
A01_MB45_[GB]_1800UK_UKIDTV_NICKEL9_19890W_10065652+10067012_50156666.indd 3 22.01.2010 09:12:47

English - 4 -
Overview of the Remote Control
TV DTV
OK
SELECT
INFO /
123
456
789
0
RETURN
SOURCE
EPG
M
MENU
ABC DEF GHI
JKL MNO PQR
STU VWX YZ
P+
P-
-
+
1
2
3
4
5
6
7
8
9
10
11
12
13
14
15
16
17
18
19
20
21
22
23
24
25
26
27
28
29
30
31
32
SWAP
PRESETS
FAV
SCREEN LANG SUBTITLE SLEEP
/
Standby1. Cursor up / Page up (in TXT mode)2. Cursor right / Subpage (in TXT mode)3. Info / Reveal (in TXT mode)4. Numeric buttons5. Return / Exit (in DTV mode) / Index page6. (in TXT mode)
Programme up / Page down (in DTV7. mode)
Volume up8. Favourite mode (in DTV mode)9. AV / Source selection10.Yellow / Feature menu / Current language11. (*)(in DTV mode)
Blue / Install menu / Favourite mode (*) (in12.DTV mode)
Subtitle on-off / TXT subtitle13.Sleep timer14.No function15.Guide (in DTV mode)16.Update (in TXT mode)17.Teletext / Mix / Pat18.Image size / Expand (in TXT mode)19.Mono-Stereo / Dual I-II / Current language20.(in DTV mode) (*)
Red / Sound menu / Channel list (in DTV21.mode)
Green / Picture menu / Subtitle on-off (in22.DTV mode) (*)
Previous Programme / Swap23.TV – Digital TV mode24.Programme down / Page up (in DTV25.mode)
Volume down26.Picture mode selection27.Menu on-off28.Cursor down / Page down (in TXT mode)29.Cursor left30.OK / Select / Freeze picture / Hold (in TXT31.mode)
Mute32. (*) Only for EU country options.
A01_MB45_[GB]_1800UK_UKIDTV_NICKEL9_19890W_10065652+10067012_50156666.indd 4 22.01.2010 09:12:48

English - 5 -
LCD TV and Operating Buttons
FRONT and REAR VIEW SIDE VIEW Control Buttons
Up button1. Down button2. Programme/Volume / AV3. selection button
Standby button4.
Note:You can use “+/-” buttons to
change volume. If you want to change
channels, press P/V/AV button once
and then use “+/-” buttons. If you hold
theP/V/AV buttonabout a fewseconds,
source OSD will be displayed. Main
menu OSD cannot be displayed via
control buttons.
Note2: In source menu, + button
functions as cursor down, - button
functions as cursor up.
Viewing the Connections- Back Connectors
SCART socket inputs or outputs for external devices.1.
HDMI
Connect the SCART cable between SCART socket on TV and
SCART socket on your external device (such as a decoder, a VCR
or a DVD player).
Note: If an external device is connected via the SCART socket, the
TV will automatically switch to AV mode.
PC Input is for connecting a personal computer to the TV set.2. Connect the PC cable between the PC INPUT on the TV and the
PC output on your PC. Component Video Inputs (YpBPr) are used
for connecting component video.
You can use PC input to enable YPbPr signal sonnection with a
device that has component output. Connect the YPbPr to PC cable
between the PC INPUT on the TV and the component video outputs
of your device. (YPbPr cable is not supplied)
HDMI3. : HDMI input
HDMI Input is for connecting a device that has an HDMI socket.
Your LCD Television is capable of displaying High Definition pictures from devices such as a High
Definition Satellite Receiver or DVD Player. These devices must be connected via the HDMI sockets
or Component Socket. These sockets can accept either 480i, 480p, 576p, 576i, 720p, 1080i, 1080p
signals. No sound connection is needed for an HDMI to HDMI connection.
RF Input connects to an antenna or a cable.4. Note that if you use a decoder or a media recorder, you should connect the aerial cable through the
device to the television with an appropriate antenna cable, as shown in the illustration in the following
pages.
When you use the wall mount kit (optional) with the LCD TV, we would definitely recommend to plug all your cables into the
back of the LCD before mounting to the wall.
A01_MB45_[GB]_1800UK_UKIDTV_NICKEL9_19890W_10065652+10067012_50156666.indd 5 22.01.2010 09:12:49

English - 6 -
Viewing the Connections - Side Connectors
CI Slot is used for inserting a CI card. A CI card allows you to view all the1. channels that you subscribe to. For more information, see “Conditional
Access” section.
USB Input (functional in DTV mode only).2. Video Input is used for connecting video signals of external devices.Connect3. the video cable between the VIDEO IN socket on the TV and the VIDEO
OUT jack on your device.
Audio Inputs are used for connecting audio signals of external devices.4. Connect the audio cable between the AUDIO INPUTS on the TV and the
AUDIO OUTPUT jacks on your device.
Also to enable PC/YPbPr sound connection in such a case, use an
appropriate audio cable between the connected device’s audio outputs and
the TV’s audio inputs
Note: If you connect a device to the TV via the VIDEO or PC/YPbPr cable
(YPbPr cable is not supplied) you should also connect your device with an
audio cable to the AUDIO INPUTS of the TV to enable audio.
Headphone jack is used for connecting an external headphone to the system.5. Connect to the HEADPHONE jack to listen to the TV from headphones.
Power Connection
IMPORTANT: The TV set is designed to operate on 220-240V AC, 50 Hz.
• After unpacking, allow the TV set to reach the ambient room temperature before you connect the set to the
mains.
• Plug the power cable to the mains socket outlet.
Aerial Connection
• Connect the aerial or cable TV plug to theAERIAL INPUT socket located at the rear of the TV.
HDMI
A01_MB45_[GB]_1800UK_UKIDTV_NICKEL9_19890W_10065652+10067012_50156666.indd 6 22.01.2010 09:12:51

English - 7 -
Using Side USB Input
• You can connect USB devices to your TV by using
the USB input of the TV. This feature allows you to
display/play music,photo or video files stored in a
USB stick.
• It is possible that certain types of USB devices (e.g.
MP3 Players) may not be compatible with this TV.
• You may back up your files before making any
connections to the TV set in order to avoid any
possible data loss. Note that manufacturer will not
be responsible for any file damage or data loss.
• The TV supports only FAT32 disk formatting. NTFS
format is not supported. If you connect a USB disk
with NTFS format, “usb is unformatted” osd will
be displayed.
• Do not pull out USB module while playing a file.
CAUTION: Quickly plugging and unplugging USB devices,
is a very hazardous operation. Especially, do not repeatedly
quickly plug and unplug the drive. This may cause physical
damage to the USB player and especially the USB device
itself.
SIDE VIEW USB MEMORY
USB Memory Connection
• Plug your USB device to the USB input of the TV.
Note: USB hard disk drives are not supported.
Connecting the LCD TV to a
PC
For displaying your computer’s screen image on
your LCD TV, you can connect your computer to the
TV set.
• Power off both computer and display before making
any connections.
• Use 15-pin D-sub display cable to connect a PC
to the LCD TV.Use an audio cable between audio
inputs of the TV (side) and audio output of your PC
to enable sound connection.
• When the connection is made, switch to PC source.
See “Input selection” section.
•Settheresolutionthatsuitsyourviewingrequirements.
Resolutioninformation can befound inthe appendix
parts.
HDMI
PC audio cable
(not supplied)
to AUDIO INPUTS
on the TV
PC RGB cable
(not supplied)
to PC input
Audio
Inputs
PC Input
A01_MB45_[GB]_1800UK_UKIDTV_NICKEL9_19890W_10065652+10067012_50156666.indd 7 22.01.2010 09:12:53

English - 8 -
Connecting to a DVD Player
If you want to connect a DVD player to your LCD
TV, you can use connectors of the TV set. DVD
players may have different connectors. Please refer
to your DVD player’s instruction book for additional
information. Power off both the TV and the device
before making any connections.
Note: Cables shown in the illustration are not supplied.
• If your DVD player has an HDMI socket, you can
connectviaHDMI. Whenyouconnect toDVDplayer
as illustrated below, switch to HDMI source. See,
“Input Selection” section.
• Most DVD players are connected through
COMPONENT SOCKETS. YPbPr can be use only
whenyou connect adevice that hasaYPbPr output
through the PC input with YPbPr to PC cable. To
enable sound connection, use AUDIO IN located
side of the TV (YPbPr cable is not supplied).
. When the connection is made, switch to YPbPr
source. See, “Input selection” section.
• You may also connect through the SCART socket.
Use a SCART cable as shown below.
HDMI
input
Scart socket
Component
video
inputs
Component
audio
inputs
DVD Player
Note: These methods of connection perform the same
function but in different levels of quality. It is not necessary
to connect by all three methods.
Using Side AV Connectors
You can connect a range of optional equipment
to your LCD TV. Possible connections are shown
below. Note that cables shown in the illustration are
not supplied.
• For connecting a camcorder, connect to the VIDEO
IN socket and theAUDIO SOCKETS. For selecting
the related source, see the section “Input selection”
in the following parts.
• To listen the TV sound from headphones, connect
to the HEADPHONE jack of theTV
Camcorder
Headphone
Connecting Other Equipment
via Scart
Most devices support SCART connection. You can
connect a; DVD recorder, a VCR or a decoder to
your LCD TV by using the SCART socket. Note that
cables shown in the illustration are not supplied.
Power off both theTV and the devices before making
any connections.
For more information, refer to your device’s own
instruction book.
Scart socket
Decoder
DVD Recorder Video Recorder
A01_MB45_[GB]_1800UK_UKIDTV_NICKEL9_19890W_10065652+10067012_50156666.indd 8 22.01.2010 09:12:55

English - 9 -
Inserting Batteries into the
Remote Control Handset
• Remove the battery cover located on the back of
the handset by gently pulling backwards from the
indicated part.
• Insert two AAA/R3 or equivalent type batteries
inside.Place the batteries in theright directions and
replace the battery cover.
Note:Remove thebattery from remote control handsetwhen
it is not to be used for a long period. Otherwise it can be
damaged due to any leakage of batteries.
Switching the TV On/Off
To Switch the TV On
• Connect the power cord to the 220-240V AC , 50
Hz. Then the standby LED lights up.
• To switch on the TV from standby mode either:
• Press the “ ” button, P+ / P- or a numeric button
on the remote control.
• Press the “ ” button, -P/CH or P/CH+ button on
the TV. The TV will then switch on.
Note:If youswitch onyour TV via PROGRAMME UP/DOWN
buttonsonthe remote controloron the TVset,the programme
that you were watching last will be reselected.
By either method the TV will switch on.
To Switch the TV Off
• Press the “ ” button on the remote control or press
the “ ” switch on the TV, so the TV will switch to
standby mode.
• To power down the TV completely, unplug the
power cord from the mains socket.
Note:WhentheTV is switchedtostandbymode, standby LED
can blink to indicate that features such as Standby Search,
Over Air Download or Timer is active.
Input Selection
Once you have connected external systems to your
TV, you can switch to different input sources.
• Press SOURCE button on your remote control for
directly changing sources.
or
• Select “Source” option from the main menu
by using “ ” or “ ” button. Use then “ ” or
“”button tohighlight aninput andpress “ ”button
to select.
Note: You can mark desired source options by pressing the
OK button. Therefore, when SOURCE button is pressed,
only the marked source options will be available (except for
the TV source).
Note : YPbPr mode can be use only when you connect a
device that has a YPbPr output through the PC input with
YPbPr to PC cable (YPbPr cable is not supplied).
Basic Operations
Youcan operateyourTV usingboththe remote
control and onset buttons.
Operation with the Buttons on the TV
Main menu OSD cannot be displayed via control
buttons.“+/-”buttons will function as volume up/down
as default. Even if you set other functions for these
buttons, “+/-” buttons will perform as default after a
short while.
Volume Setting
•Press“P/V/AV”buttononceandthenuse “+/-”buttons
to increase or decrease volume, so a volume level
scale (slider) will be displayed on the screen.
Programme Selection
• Press “+/-” to select the next or previous programme.
AV Mode
• Hold the “P/V/AV” button, source OSD will be
displayed.
Operation with the Remote Control
• The remote control of yourTV is designed to control
all the functions of the model you selected. The
functions will be described in accordance with the
menu system of your TV.
A01_MB45_[GB]_1800UK_UKIDTV_NICKEL9_19890W_10065652+10067012_50156666.indd 9 22.01.2010 09:12:56

English - 10 -
• Functions of the menu system are described in the
following sections.
Volume Setting
•Press “ ”button toincrease the volume. Press
“”button to decrease the volume. A volume
level scale (slider) will be displayed on the screen.
Programme Selection (Previous or Next
Programme)
• Press “P -” button to select the previous programme.
• Press “P +” button to select the next programme.
Programme Selection (Direct Access)
•Pressnumericbuttonson the remotecontroltoselect
programmes between 0 and 9. The TV will switch
to the selected programme. To select programmes
between10-500(for IDTV)or10-199 (foranalogue),
press the numeric buttons consecutively
• Press directly the programme number to reselect
single digit programmes
Initial Settings
When the TV is turned on for the first time, the menu
forthelanguage selectionappears on thescreen.The
message “Welcome please select your language!”
is displayed in all language options sequentially in
the OSD.
By pressing the “ ” or “ ” buttons highlight the
language you want to set and press OK button.After
then, “First time installation” OSD will appear on the
screen. By pressing “ ” or “ ” buttons, select the
country you want to set and press OK button (* for
EU countries).
Note: Country selection OSD will not be available for UK.
Press OK button on the remote control to continue
and the following message will be displayed on the
screen:
• To select the “Yes” or “No” option, highlight the item
by using “ ” or “ ” buttons and press the “OK”
button.
TheIDTV will automatically tune tothe UHFor VHF(*)
(*for EUcountries) transmissionchannels, searching
for digital terrestrial TV broadcasts and displaying
the names of channels found. This process will take
about a few minutes.
After Automatic Search is completed, the following
messageaskingforanaloguechannel search appears
on the screen:
To search for analogue channels, select “Yes”. TV
switches to the analogue TV mode. The menu is
displayed to search for analogue channels.
Select your Country, Language and Text language
by using “ ” or “ ” and “ ” or “ ” buttons. Press
OK or RED button to continue. To cancel, press the
BLUE button.
Formoreinformationonthisprocess,see“InstallMenu”
section.
Note:Forproperfunctioningof digitalteletextinDTVmode,you
should set country as UK in analogue AUTO PROGRAM (for
UK broadcasts only).
Do not turn off the TV while initializing first time installation.
General Operation
Press the “SOURCE” button on the remote control
and select DTV/USB to switch the TV set to digital
terrestrial television broadcasting.
Information Banner
• Whenever you change channel, using the P- / P+
button or the numeric buttons, the TV displays the
broadcast picture along with an information banner
at the bottom of the screen (available only in DTV
mode). This will remain on the screen for a few
seconds.
• The information banner can also be displayed at
any time while watching TV by pressing the “INFO”
button on the remote control:
If the selected channel is locked, you must enter the
correct four numeric code to view the channel. “Enter
PIN” will be displayed on the screen in such a case:
A01_MB45_[GB]_1800UK_UKIDTV_NICKEL9_19890W_10065652+10067012_50156666.indd 10 22.01.2010 09:12:57

English - 11 -
Electronic Programme Guide (EPG)
• Some, but not all, channels send information about
the current and next events. Press EPG button to
view the EPG menu. EPG appears on the screen. It
is able to get Information of the channel - programs
weekly by means of 7-DAY-EPG. All programs of
channelsaredisplayed.Onthe bottomofthescreen;
info bar, showing all the available commands, will
be displayed.
RED button (Shrink): makes the info boxes smaller.
GREEN button (Expand): makes the info boxes larger.
YELLOWbutton(Prev.Day):displaystheprogrammes
of previous day.
BLUE button (Next day): displays the programmes of
the next day.
INFO (Details): displays the programmes in detail.
Numeric buttons (Jump): go to preferred channel
directly via numeric buttons.
OK : view for current broadcast/reminders for future
programs.
SWAP : jumps to the current broadcast.
• Press “0” button on the remote control to view Guide
Search menu. Using this feature, you can search the
programme guide database in accordance with the
genre selected or with name match.
Displaying Subtitles
With digital terrestrial broadcasting (DVB-T), some
programmes are being broadcasted with subtitles.
Pressthe“M”buttontodisplaythe main menu,highlight
the Setup and then Language menu using “ ” or “ ”
buttonandpresstheOKbuttontodisplaythe“Language
settings” menu.
Highlight the “Subtitle” item in “Language settings”
menu and use ” or “ button to set Subtitle to the
desired language.
If“Subtitle” ison anda languageoption isset, pressing
the “ ” button causes the following warning message
display on the screen (** for UK only):
Digital Teletext (** for UK only)
• Press the “ ” button.
• The digital teletext information appears.
• Operate it with the coloured buttons, cursor buttons
and OK button.
The operation method may differ depending on the
contents of the digital teletext.
Follow the instructions displayed on digital teletext
screen.
• When Press “SELECT” button or similar message
appears on the screen, press the OK button.
• When the “ ” button is pressed, the TV returns to
television broadcasting.
• With digital terrestrial broadcasting (DVB-T), in
additionto digital teletextbroadcasting togetherwith
the normal broadcasting, there are also channels
with just digital teletext broadcasting.
• The aspect ratio (picture shape) when watching
a channel with just digital teletext broadcasting is
the same as the aspect ratio of the picture viewed
previously.
• When you press the “ ” button again, the digital
teletext screen will be displayed.
Analogue Teletext
Use of teletext and its functions are identical to
the analogue text system. Please do refer to the
“TELETEXT” explanations.
Widescreen
Depending on the type of the broadcast being
transmitted, programmes can be viewed in a number
of formats. Press the “SCREEN”button repeatedly to
change screen format.
WhenAuto is selected, the format being displayed is
determined by the picture being broadcasted.
PLEASE NOTE: Menu size changes depending on the
chosen image size.
Notice !
AC3 audio type is not supported. In this case, Tv
sound will be muted. If the broadcast includes AC3
stream, the following warning message will be
displayed on the screen:
If there is no audio available, the following warning
message will be displayed on the screen:.
A01_MB45_[GB]_1800UK_UKIDTV_NICKEL9_19890W_10065652+10067012_50156666.indd 11 22.01.2010 09:12:58

English - 12 -
IDTV Menu System
Press the “M” button. Main menu will be displayed.
Channel List
Usingthe“ ”or“ ”buttonontheremotecontrol,make
sure that the first item, Channel List, is highlighted and
press the “OK” button to display the Channel List.
Navigating the Entire Channel List
Press“ ”or“ ”buttonforselectingthepreviousornext
channel. You can press “RED” or “GREEN” button to
move page up or page down.
Towatcha specificchannel, highlightit using “ ” or“
” button and then press “OK” button, while the “Select”
item on Channel List menu is highlighted by using “
” or “ ” button.
Then thename andnumber ofthe selected channelwill
be displayed in the top-left and top-right of the channel
display at the top-right of the screen, respectively.
Moving the channels in the channel list
• Press “ ” or “ ” buttons to select the channel that
will be moved.
• Press “ ” or “ ” buttons to select the “Move” item on
Channel List menu.
Following OSD will be displayed next to “OK” item
to indicate that enter a number by using the numeric
buttons on the remote control and press “OK” to
confirm.
Note:Ifyouenter thesameprogrammenumber ofthechannel
that you want to move, “.... channel services will be replaced.
Do you want to continue?” OSD will be displayed. Press OK
to confirm or select “No” to cancel.
Deleting the Channels in the Channel List
• Press “ ” or “ ” button to select the channel that
will be deleted.
• Press “ ” or “ ” button to select the “Delete’’ item
on Channel List menu.
• Press the “OK” button to delete the highlighted
channelinthe channellist.Thenthe message below
appears on the screen:
• Press “ ” or “ ” button to highlight the desired
option. If “OK” button is pressed while “Yes” is
highlighted, the highlighted channel is deleted.
Selecting “No” cancels the deletion.
Renaming Channels
To rename a specific channel, the channel must
be highlighted by pressing “ ” or “ ” button. Then
highlight the Edit Name item by pressing “ ” or “ ”
button as illustrated below. Press the “OK” button to
activate the rename feature.
A01_MB45_[GB]_1800UK_UKIDTV_NICKEL9_19890W_10065652+10067012_50156666.indd 12 22.01.2010 09:12:59

English - 13 -
Nowpressing“ ” or “ ”buttonmoves to theprevious/
next character. Pressing “ ” or “ ” button toggles
the current character, i.e., ‘b’ character becomes ‘a’
by “ ” and ‘c’ by “ ”. Pressing the numeric buttons
‘0...9’ replaces the highlighted character with the
characters printed above the button one by one as
the button is pressed.
Pressthe“M”button to canceltheediting orOKbutton
to save the new name.
Adding Locks to Channels
Channel locking provides a password-protected
access to channels selected by parents. In order to
lock a channel you should know the parental lock
password (default value is set to 0000 in the factory
and can only be changed from the Configuration
menu).
Select the channel to be locked by highlighting it and
select the Lock option by pressing “ ” or “ ” button.
Whenthe“OK”buttonispressed, a dialogOSDasking
for the password will be displayed.
Enter the password by using the numeric buttons on
the remote control. The lock icon “ ” will now be
displayed next to the selected channel. Repeat the
same operation to cancel the lock.
Setting Favourites
Toseta favouriteyoushould highlightthe“Favourites”
item at the bottom of the Channel List menu. Then
press “OK” button and Edit Favourite List menu
appears on the screen.
How to Add a Channel to a Favourites List
•Bypressing “ ” or “ ” buttons,highlightthe channel
that you want to add to the favourite list.
• By pressing “OK” button, the highlighted channel is
added to the Favourite List.
•F iconindicates that a channel is added to Favourite
List.
Removing a Channel from Favourite List
• Highlight the channel that you want to remove from
thefavourite list andpress OKbutton toremove.You
can press “OK” button again to re-add a channel.
•To activate Favourites, goto theConfiguration menu
and select Favourite mode. Use “ ” / “ ” to set
Favourite mode as on. To cancel Favourites, set
Favourite Mode to Off.
On Screen Help
For all menus, press the INFO button to display the
help information about the menu functions.
Program Guide
This section is same with the instructions given in
the General Operations page. Please see Electronic
Programme Guide (EPG) section in the General
Operations part.
Timers
To display timers window, activate the item from the
mainmenu.Toadda timer,press the YELLOW button
on the remote control. Then “Add Timer” window
appears.
Channel: “ ” or “ ” keys will navigate the user
through the TV or Radio list.
Date:Starting date is entered via the Left/Right orthe
numeric buttons.
Start: Starting time is entered via the Left/Right or
the numeric buttons.
End: Ending time is entered via the Left/Right or the
numeric buttons.
Change/Delete:permitsorprohibitsanymodifications
for other users.
Duration: Duration between Start and End time.
Repeat: You can set a timer to be repeated as Once,
Daily or Weekly.
A01_MB45_[GB]_1800UK_UKIDTV_NICKEL9_19890W_10065652+10067012_50156666.indd 13 22.01.2010 09:13:00

English - 14 -
You can savetheadjustmentsbypressingthe GREEN
keyorcancel the processbypressing theRED button.
You can edit the list via GREEN key and delete with
the RED button.
When a programmed timer is due, the following
messagewill bedisplayed onthe screen for switching
to the programmed channel (if it is not the current
channel).If you press No, timer will be cancelled.
Note: Please do not press standby button while this OSD
is on screen.
Conditional Access
• Press the “M” button to display the main menu and
use the “ ” or “ ” button to highlight the “Conditional
Access” line and press the “OK” button:
Some Digital Terrestrial channels operate on a Pay
Per View basis. These require a subscription and a
hardware decoder.
Obtain the Conditional Access Module (CAM) and the
viewing card by subscribing to a pay channel company,
then insert those to the TV using the following procedure.
• Switch off the TV and unplug from the mains.
• The CAM should be correctly inserted, it is impossible
to insert fully if reversed. The CAM or theTV terminal
may be damaged if the CAM is forcefully inserted.
•ConnecttheTVtothemainssupply,switchonandthen
wait for few moments until the card is activated.
• Some CAMs may require the following set up. Please
set the CAM by entering the IDTV menu, Conditional
Access then pressing the “OK” button. (CAM set up
menu is not displayed when it is not required.)
• To see the viewing contract information: enter IDTV;
pressthe“M”button,thenhighlightConditionalAccess
and press the “OK” button.
• When no module is inserted, “No Conditional Access
module detected” message appears on the screen.
• Refer to the module instruction manual for details of
the settings.
Note: Insert or remove the CI module only when the TV is
switched off or in standby mode.
TV Setup
You can use this item to display the TV functions.
The digital TV Setup menu screen is accessed from
the main menu. Press the “MENU” button to display
the main menu and use “ ” or “ ” button to highlight
“TV Setup”, press the “OK” button to display TV Setup
menu screen.
You can find detailed information for all menu items in
“Analogue TV Menu System” section.
Setup
The adjustments in this menu are given as the following:
Configuration
You can configure the settings of your TV. Select
Configuration from Setup menu and press “OK” to
view this menu. Press the “RETURN” button on the
remote control to exit.
Hard of Hearing (* for EU countries only)
Use “ ” or “ ” button to select Hard of Hearing and
then press “ ” or “ ” button to set this setting as
On or Off.
If the broadcaster enables any special signal
concerning the audio, you can set this setting as On
to receive such signals.
Favourite Mode
Use this function to enable or disable favourite
mode. Press “ ” / “ ” button to set this function as
on or off.
Channel List
Use “ ” or “ ” buttons to go to Channel List option.
Use “ ” or “ ” buttons to toggle Channel List Mode.
If you select “TV Only”, with the “ ” or “ ” buttons,
you navigate through only TV channels. If you select
“RadioOnly”,withthe“ ”or“ ” buttons,younavigate
throughonly radiochannels. If youselect “TextOnly”,
withthe “ ” or “ ” buttons, younavigate throughonly
text channels.
A01_MB45_[GB]_1800UK_UKIDTV_NICKEL9_19890W_10065652+10067012_50156666.indd 14 22.01.2010 09:13:01

English - 15 -
Scan Encrypted
Scan Encrypted Channel feature will always be ON
after performing first time installation. When this
settingis on, search process willlocate the encrypted
channelsas well.IfitissetasOFFmanually,encrypted
channelswill notbe locatedwhile inautomatic search
or manual search.
Use “ ” or “ ” button to select Scan Encrypted and
then press “ ” or “ ” button to set this setting as
On or Off.
Receiver Upgrade
Over Air Download (OAD)
This feature helps to keep your TV updated. It works
automatically and searches for new information
when available. Note that this setting is inactive to be
modified
modified
.
.Please ensure that the TV is set to standby
mode. The TV automatically powers up at 3.00 A.M.
eachday and searchesfor anynew informationwhich
may be broadcasted and will download this to your
receiver automatically. This operation will normally
take approximately 30 minutes.
Note: Your TV may start in First Time Installation mode after
OAD update.
Parental Control
Use “ ” or “ ” buttons to go to Parental Lock option.
Press OK button to enter the menu. A dialog box
askingforthe lockkey will bedisplayed.Thekey isset
to “0000” initially. Enter PIN. If it is incorrect, “Wrong
Pin”OSD willbe displayed. If it is correct, the Parental
Control menu will be displayed:
Maturity Lock (*)
(*) If you set Country option as UK in the first time
installation, Maturity Lock option will not be visible.
This setting is available only for EU countries.
When set, this option gets the maturity information
fromthebroadcastandif this maturitylevelisdisabled,
does not show video-audio.
Menu Lock
In menu lock you can set locking for all menus, or the
Installation Menu to restrict access to these menus.
If the menu lock is disabled, there will be free access
to the menu system. Use “ ” or “ ” buttons to go to
Menu Lock option. Use “ ” or “ ” buttons to choose
Menu Lock Mode.
DISABLED : All menus are unlocked.
ALL MENUS : All Menus are accessible only with
the correct lock key. So the user cannot add, delete,
rename, channels, cannot set timers.
INSTALLATION MENU: Installation menu is locked.
So the user can’t add channels. Changes will be
updated after exiting ‘Configuration Menu’.
Set PIN
Use “ ” or “ ” buttons to go to “Set PIN” option.
Press “OK” to display the “Set PIN” window. Use
numericbuttonstoenter new pinnumberyouwillneed
to input your new pin a second time for verification
purposes.The factory default pin number is 0000, if
you change the pin number make sure you write it
down and keep it safe.
Time Settings
Inthe configurationmenu, highlight theTimeSettings
item by pressing “ ” or “ ” buttons.
Press “OK” and Time Settings sub menu will be
displayed on the screen. Current Time,Time Zone
Setting and Time Zone will be available.
Use “ ” or “ ” buttons to highlight the Time Zone
Setting. Time Zone Setting is set using “ ” or “ ”
buttons. It can be set to AUTO or MANUAL.
WhenAUTOisselected, CurrentTimeandTimeZone
options will not be available to be set. If MANUAL
option is selected as the Time Zone Setting, Time
Zone can be altered:
• By pressing “ ” or “ ” buttons select Time Zone.
Use “ ” or “ ” buttons to change the Time Zone
between GMT-12 or GMT+12. Current Time on the
top of the menu list will then change according to the
selected Time Zone.
Audio Description
Audio description refers to an additional narration
track for blind and visually impaired viewers of
visual media, including television and movies. The
description narrator talks through the presentation,
describingwhatis happeningon the screenduring the
natural pauses in the audio (and sometimes during
dialogue, if deemed necessary). You can use this
feature,onlyifthe broadcaster supportsthatadditional
narration track. Use “ ” or “ ” buttons to select an
item. Then use “ ” or “ ” buttons to set.
A01_MB45_[GB]_1800UK_UKIDTV_NICKEL9_19890W_10065652+10067012_50156666.indd 15 22.01.2010 09:13:02

English - 16 -
Audio Description
Thisfunctionenablesor disables theaudiodescription
feature by pressing the “ ” or “ ” buttons.
Preferred Language
Bypressing the“ ” or “ ” buttons the preferred audio
description language is being changed.
This setting can be used, only if it is available.
Relative Volume
Using this option, theAudio Description volume level
can be increased or decreased relatively, according
to the general volume.
Standby Search (*)
(*)This settingis visible only when theCountry option
is set to Denmark, Sweden, Norway or Finland.
Use “ ” or “ ” button to select Standby Search and
thenpress“ ” or“ ”button to setthis setting asOn or
Off.If you change Standby Search toOff,this function
will be unavailable.
To use Standby search please make sure that
you select Standby Search as On.
Language
In this menu the user can adjust the preferred
language. Language is changed by pressing “OK”
button.
Menu: shows the language of the system
Preferred
Thesesettings willbe usedif available.Otherwise the
current settings will be used.
• Audio: by pressing “ ” or “ ” keys change the
audio language.
• Subtitle: alter the subtitle language with “ ” or “
” keys. The chosen language will be seen in
subtitles.
Movie Subtitle
• In order to display subtitles properly, use this setting
to select a movie subtitle language.
• By pressing “ ” or “ ” button, select the desired
language option.
• Guide: By pressing “ ” or “ ” buttons change the
guide language.
Current
• Audio: if audio language is supported change the
audio language by pressing “ ” or “ ” buttons
• Subtitle: if subtitle is backed up, alter the subtitle
language with “ ” or “ ” buttons. The chosen
language will be seen in subtitles.
Note: If the Country option is set to Denmark, Sweden,
Norwayor Finland, the Language Settingsmenu will function
as described below:
Language Settings
In the configuration menu, highlight the Language
Settings item by pressing “ ” or “ ” buttons. Press
“OK” and Language Settings submenu will be
displayed on the screen:
Use “ ” or “ ” buttons to highlight the menu item
that will be adjusted and then press “ ” or “ ” button
to set.
Notes:
• System Language determines the on-screen menu
language.
•Audio Languageis used for selecting the soundtrack
of a channels.
• Primary settings are the first priority when multiple
choices are available on a broadcast. Secondary
settings are the alternatives when the first options
are not available.
Installation
The Installation menu is mainly intended to help you
forcreating a ChannelTable in the most efficientway.
Select Installation from the Configuration menu by
pressing “ ” or “ ” buttons.
This menu includes the following items:
(*) For Denmark, Sweden, Norway or Finland.
A01_MB45_[GB]_1800UK_UKIDTV_NICKEL9_19890W_10065652+10067012_50156666.indd 16 22.01.2010 09:13:04

English - 17 -
Automatic Channel Scan
Automatic channel scan is started by pressing
“OK” button while Automatic channel scan item is
highlighted.
The following message appears on the screen:
Highlight Yes or No by using “ ” or “ ” buttons and
press “OK” button to confirm.
If Yes is selected, automatic search starts.
Selecting No cancels automatic search.
After search is completed for digital channels, a
message asking whether to search for analogue
channels appears on the screen:
Press the “OK” button to search for analogue
channels. The following menu appears on the screen
for analogue channel search:
Select your Country, Language and Text language
by using “ ” or “ ” and “ ” or “ ” buttons. Press
“OK” or RED button to continue. To cancel, press
BLUE button. The following menu will be displayed
during the automatic tuning:
AfterAPSisfinalized,theprogramme tablewillappear
on the screen. In the programme table you will see
the programme numbers and names assigned to the
programmes.
Manual Channel Scan
In manual channel scan, the number of the multiplex is
entered manually and only that multiplex is searched
for thechannels. For eachvalid channel number,signal
level and signal quality are shown on the screen.
In both manual and auto search any existing channel
in the database is not re-stored to avoid redundant
duplicates of that channel.
Clear Service List (*)
(*)This settingis visible only when theCountry option
is set to Denmark, Sweden, Norway or Finland.
Usethissettingtoclearchannels stored. Press“ ”or“ ”
buttontoselectClearServiceList andthenpressOK.The
following OSD message will be displayed on the screen:
PressOK tocancel. SelectYes by pressing “ ” or “ ”
button and press OK to delete all of the channels.
First Time Installation
The user can use this item to load default settings,
which were loaded to the receiver at the factory.
To install factory settings, highlight “First Time
Installation” menu item and press “OK” button,
then you will be asked whether or not to delete the
settings. Selecting “Yes” by pressing “OK” button
while the “Yes” is highlighted will delete the existing
channel table.
Then you will be asked to confirm for deleting all
channels and settings:
By selecting Yes and pressing the “OK” button, the
existing channel table will be deleted. After factory
settings are loaded, “First Time Installation” menu
will be displayed.
A01_MB45_[GB]_1800UK_UKIDTV_NICKEL9_19890W_10065652+10067012_50156666.indd 17 22.01.2010 09:13:05

English - 18 -
The menu which is displayed for language selection
appears on the screen at first. By using “ ” or “ ”
buttons,selectthe desired languageoption,and press
OK button to activate.
After then, “First time installation” OSD will appear
on the screen. By pressing “ ” or “ ” buttons, select
the Country you want to set and press “OK” button
(* only for EU countries).
Pressthe“OK” button tostart installation.After search
is completed for digital channels, a message asking
whether to search for analogue channels appears
on the screen.This process is same as described in
Automatic Search section..
Media Browser
• To display Media Browser window, press either
“MENU” button on the remote control and then
selectMediaBrowser bypressing “ ”or“ ” button.
Press“OK”buttonto continue. MediaBrowsermenu
contents (depending on the contents of your USB
drive) will be displayed.
• Also, when you plug a USB device, the following
screen will be displayed:
Select YES by pressing “ ” or “ ” button and press
OK button. Media browser will be displayed.
• You can play music, picture and video files from a
USB memory stick.
Note: If you plug USB stick while in analogue mode, the TV
will automatically switch to digital TV mode.
Note: Some USB compliant devices may not be supported.
Note: If the USB stick is not recognized after power off/on
or First Time Installation, first, plug the USB device out and
power off/on the TV set. Plug the USB device in again.
Playing MP3 Files
Play This (OK button) : Plays the selected file.
Play ( button) : Plays all media files in the folder
starting with the selected one.
Pause ( button) : Pause playing file.
Stop ( button) : Stop the playing file.
Previous/Next ( buttons) : Jumps to previous or
next file to play.
Shuffle (INFO button) : Plays the files randomly. If
shuffle mode is enabled, previous/next function will
also jump to the tracks randomly.
Loop ( button) : Plays the selected file repeatedly.
Viewing JPG Files
Jump (1...9 buttons) : jump to selected file using the
numeric buttons.
OK : (OK button) views the selected picture in full
screen.
Slideshow ( button) : starts the slideshow with all
pictures in the folder.
Slideshow Options
A01_MB45_[GB]_1800UK_UKIDTV_NICKEL9_19890W_10065652+10067012_50156666.indd 18 22.01.2010 09:13:06

English - 19 -
Pause ( button) : Pause the slideshow.
Continue ( button) : Continue with the slideshow.
Previous/Next ( buttons) : Jump to previous or
next file of slideshow.
Rotate ( buttons) : Rotate the picture using up/
down buttons.
Return : Back to file list.
Shuffle ( button) : Shows the files randomly and
continuous in current folder and icon turns the
highlightedicon.Ifduringaslideshowthe shufflemode
isenabled,the nextpictures will bechoosen randomly
(If the loop function is not enabled, the slideshow will
stop at the end. If the loop function is enabled, after
the slideshow ends, it will start again and again).
Loop( button):Slideshow goes oncontinuouslyand
icon turns the highlighted icon.
Info : Activates the operations bar.
Video Playback
Play ( button) : Starts the video playback.
Stop ( button) : Stops the video playback.
Pause ( button) : Pause the video playback.
Rewind ( button) : Goes backward.
Forward ( button) : Goes forward.
Menu (MENU button) : Sets subtitle/Audio.
• You can set subtitles by using “OK” button before
starting the playback or by using MENU button
during the playback.
Note:
-Selected subtitles may not be displayed correctly in some
cases.
-Inorder to display movie subtitles correctly, youshould set a
“MovieSubtitle” language. Seethe section, “MovieSubtitle” in
“Language Settings” for selecting Movie Subtitle language.
Press “STOP” button to switch back to previous
menu.
Analogue TV Menu System
Picture Menu
Mode
Foryourviewingrequirements, youcansetthe related
mode option.
Press “ ” or “ ” button to select Mode. Press “
” or “ ” button to choose from one of these options:
Cinema, Dynamic and Natural.
Brightness/Contrast/Colour/Sharpness/
Hue
Press “ ” or “ ” button to select the desired option.
Press “ ” or “ ” button to set the level.
Note: Hue option can only be visible when the TV receives
an NTSC signal.
Colour Temp
Press“ ”or “ ”buttonto selectColour Temp.Press
“” or “ ” to choose from one of these options: Cool,
Normal and Warm.
Note:
• Setting Cool option gives white colours a slight blue
stress.
• Setting Warm option gives white colours a slight red
stress.
• For normal colours, select Normal option.
Noise Reduction
If the broadcast signal is weak and the picture is
noisy, use Noise Reduction setting to reduce the
noise amount.
Press “ ” or “ ” button to select Noise Reduction.
Press“ ” or “ ” tochoose from one ofthese options:
Low, Medium, High or Off.
Film Mode
Filmsarerecorded ata differentnumber offrames per
second to normal television programmes.
Press “ ” or “ ” button to select Film Mode.
A01_MB45_[GB]_1800UK_UKIDTV_NICKEL9_19890W_10065652+10067012_50156666.indd 19 22.01.2010 09:13:08
Table of contents
Other Sanyo TV manuals

Sanyo
Sanyo CP29FS2 User manual

Sanyo
Sanyo CZP3359TX User manual

Sanyo
Sanyo DP42849 - 42" LCD TV User manual

Sanyo
Sanyo DS32424 User manual

Sanyo
Sanyo CZP2510 User manual

Sanyo
Sanyo CP21SA1 User manual

Sanyo
Sanyo CE28D4-C User manual

Sanyo
Sanyo 42LE1 User manual

Sanyo
Sanyo CZP2515V User manual

Sanyo
Sanyo C29LK40S User manual

Sanyo
Sanyo CE14SP4R User manual

Sanyo
Sanyo CE21FS2 User manual

Sanyo
Sanyo CP29KX2Z User manual

Sanyo
Sanyo CZP2515V User manual

Sanyo
Sanyo DP26649 - 26" LCD TV User manual

Sanyo
Sanyo CAP3310TXN User manual

Sanyo
Sanyo DS27820 User manual

Sanyo
Sanyo ce29ef1 User manual

Sanyo
Sanyo CP21SW1Z User manual

Sanyo
Sanyo CP21G1(C) User manual