Acura 02 GoldStar 15, 20, 27 Proline 31
Adyson 20 Goodmans 07, 10, 20, 29, 36 Protech 02, 12, 20, 23, 25, 38
Akai 18, 33 Gorenje 35 Quelle 03, 04, 33
Akura 21, 25 Graetz 33 Questa 07
Alba 02, 07, 21 Granada 10, 18, 20 Rank Arena 07
Allorgan 28 Grandin 26 Rediffusion 33
Amplivision 20 Grundig 17 Rex 25
Amstrad 02 HCM 02, 26 Roadstar 02, 21, 25, 38
Anitech 02 Hanseatic 30, 33 SEG 07, 20, 25
Arcam 19, 20 Hinari 02, 07, 21 SEI 12, 28
Asuka 21 Hisawa 26, 40 Saba 15
Audiosonic 15 Hitachi 05, 07, 08, 13, 15, 20, 22 Saisho 02, 04, 25
BPL 26 Huanyu 19, 36 Salora 33
BSR 28 Hypson 25, 26 Sambers 12
BTC 21 ICE 20, 25 Samsung 01, 02, 20, 25, 27, 35
Basic Line 02, 21 ICeS 21 Sandra 19
Baur 03, 33 ITT 33 Sanyo 04, 07, 10, 18
Beko 35 Imperial 23, 35, 38 Schaub Lorenz 33
Binatone 20 Inno Hit 10 Schneider 21, 23, 37
Blaupunkt 17 Interfunk 23, 33 Sei-Sinudyne 03
Blue Sky 21 Intervision 12, 20, 25 Sentra 06
Blue Star 26 Isukai 21 Sharp 07, 11
Bondstec 23 JVC 07, 09 Shorai 28
Boots 20 Kaisui 02, 19, 20, 21, 26 Siarem 12
Brandt 15 Kathrein 01 Siemens 17
Britannia 19 Kingsley 19 Silver 07
Bush 02, 07, 21, 26, 28, 36, 42 Koyoda 02 Sinudyne 12, 28
CGE 23 Leyco 10, 25, 28 Solavox 05
CS Electronics 19 Lloytron 05 Sonitron 18
CTC 23 Luxor 33 Sonoko 02
Carrefour 07 M Electronic 02, 13, 15, 20, 32, 36, 41 Sonolor 18
Cascade 02 Magnadyne 12, 23 Sony 03, 04, 07
Cimline 02 Magnafon 12 Soundwave 38
Clatronic 23, 35 Manesth 20, 25, 30 Standard 02, 20, 21
Condor 30, 35 Marantz 01 Sunkai 28, 31
Contec 02, 07, 19 Matsui 02, 04, 06, 07, 10, 18, 20, 28, 39 Susumu 21
Crown 02, 35, 38 Memorex 02 Tandy 10, 20, 21
Cybertron 21 Metz 34 Tashiko 07, 20
Daewoo 02, 36 Mitsubishi 07, 14, 16 Tatung 10, 20
Dainichi 21 Mivar 19, 27 Tec 20, 23
Dayton 02 Multitech 02, 12, 19 Technema 30
De Graaf 18 Neckermann 01 Technics 24
Decca 10 Nikkai 05, 06, 10, 19, 21, 25 Telefunken 15
Dixi 02 Nobliko 12 Telemeister 30
Dual 42 Nokia 33, 41 Teletech 02
Dual Tec 20 Nordmende 15 Teleton 20
Elite 21, 30 Oceanic 33 Tensai 21, 28, 29, 30
Elta 02 Orion 28, 30, 31 Texet 19, 21
Emerson 33 Osaki 05, 10, 20, 21, 25 Thomson 15
Ferguson 15 Oso 21 Thorn 06, 10, 33
Fidelity 19, 33 Osume 05, 10 Tomashi 26
Finlandia 18, 32 Otake 29 Toshiba 06, 07
Finlux 10, 13, 32 Otto Versand 01, 03, 07, 20, 30 Uher 30
Firstline 02, 19, 20, 23, 28, 31 Palladium 35, 38 Ultravox 12
Fisher 18, 20, 35 Panama 20, 25 Universum 13, 25, 32, 35
Flint 40 Panasonic 24, 34 Videosat 23
Formenti 30 Pathe Cinema 19, 30 Videotechnic 20
Frontech 23, 25 Pausa 02 Visa 02
Fujitsu 10 Perdio 30 Vision 30
Funai 25, 28 Phase 05 Waltham 20
GEC 10, 20 Philco 23 Watson 30
GPM 21 Philips 01, 36 Watt Radio 12
Geloso 02 Pioneer 15 Wega 07
Genexxa 21 Profex 02, 33 White Westinghouse 19, 30
Yoko 20, 25
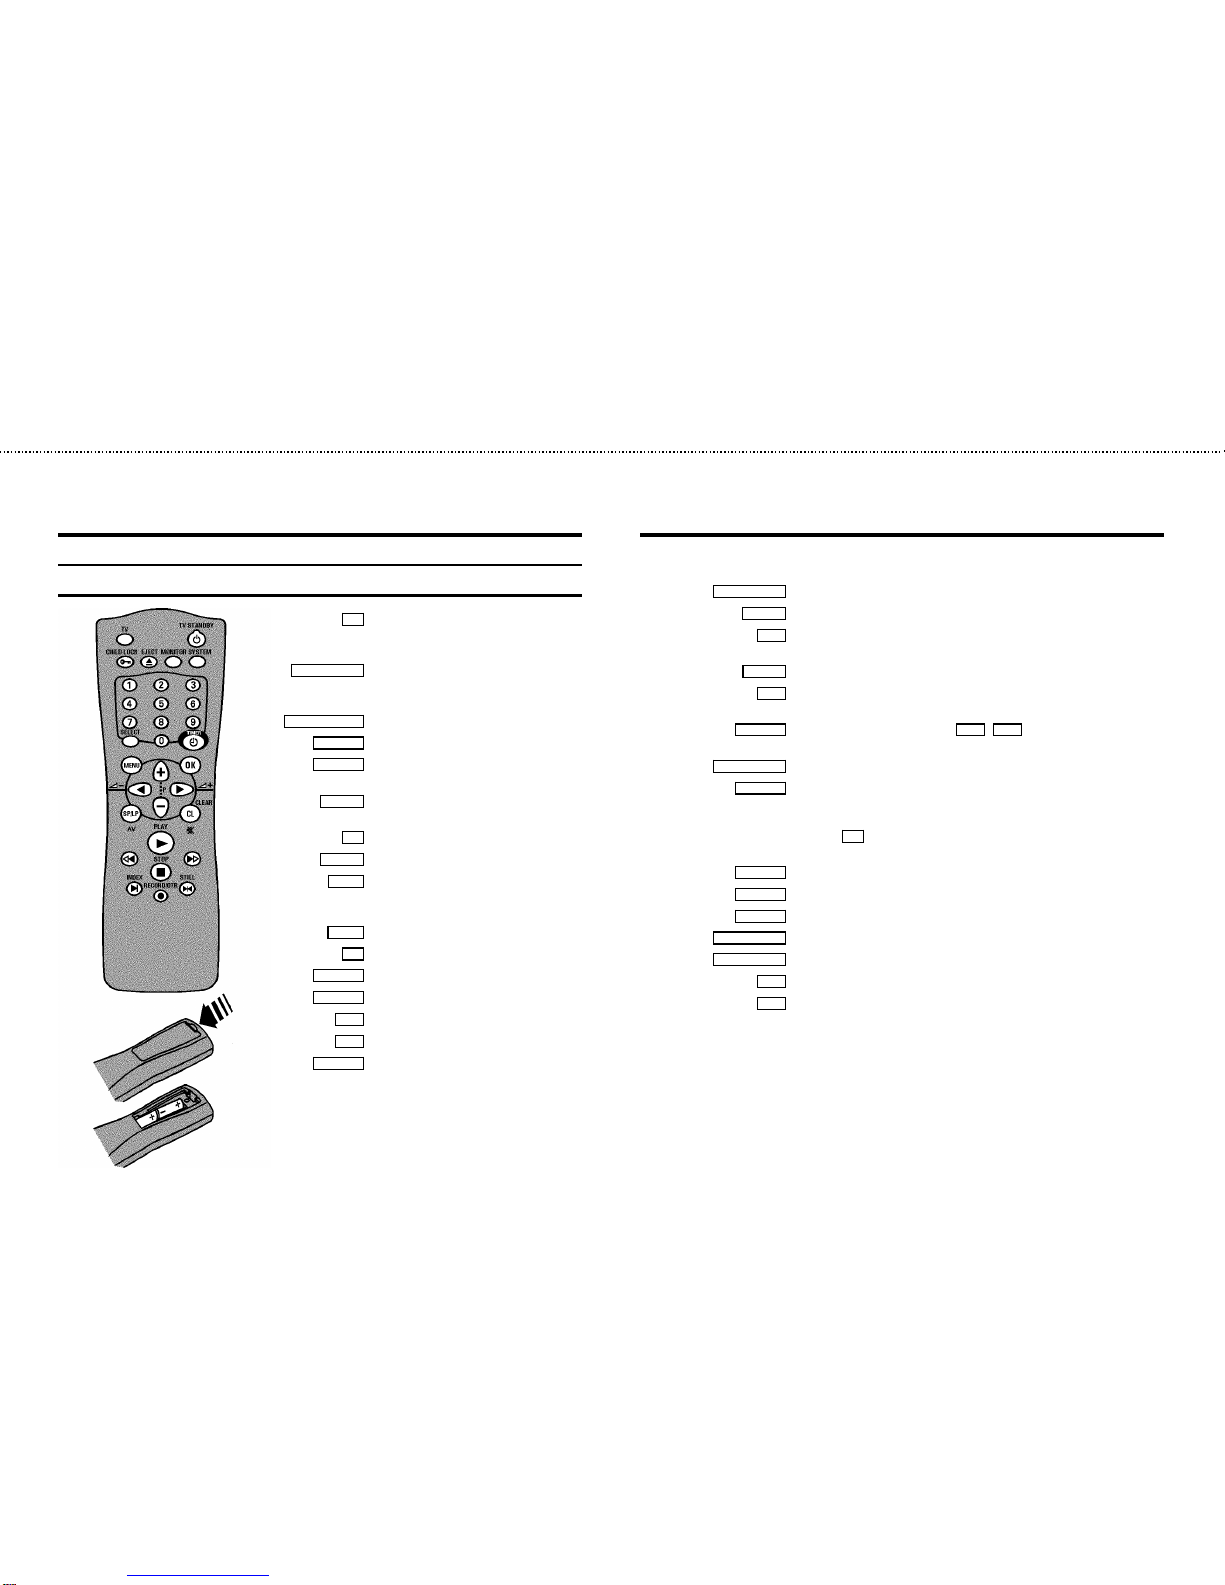
Remote codes
26
3103 166 21961
8392/001 VR800/02
(WwnnNNNwwnwNNnwnWwnNwNnNwNwwnN)