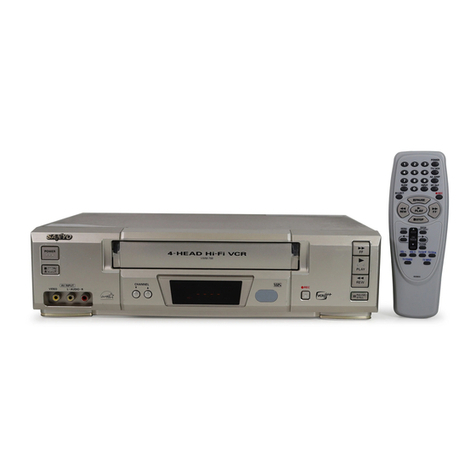
Sanyo VHR-230 series User manual

Instruction
Manual Video cassette
recorder
“\
VHR-230
VHR-250
mIHQ
PAL
[ASO]
\

❑This VCR is based on aVHS-PAL signalsystem.Only
video cassette bearing the ~symbol can be used.
0Video cassette recorders bearing the ‘HQ” mark
incorporate VHS high picture quafity technology. Note that
there is interchangeability with former VHS video cassette
recorders.
(ASO] (A~tive sideband optimum)
❑VCRs withthe ASO mark contain aspecial picture-
enhancing circuit. This circuit reduces picture noise during
playback and automatically compensates the playback
image to produce the best possible picture quality. It is
especially effective for playing back worn rental tapes.
●ASO 1s aNokla patent used under license.
Operating precautions I
Removing the cabinet and touching the inside of the VCR with
your hand, ascrewdriver, or anything else, is not only harmful
to the unit, but is also dangerous.
WARNING: TO PREVENT FIRE OR SHOCK HAZARD, DO
NOT EXPOSE THIS PRODUCT TO RAIN OR MOISTURE.
❑
•1
•1
•1
•1
•1
❑
❑
❑
The unauthorized recording of television programmed, video
tapes, films and other such material may infringe upon
copyright or the rights of third parties.
Be sure to use this VCR only in atemperature range of 50C
to 40°C and at less than 85’7f0humidity.
Do not place anything, except cassette tapes, in the unit.
Do not allow rain, steam, dew, salt water, sand, oily smoke,
metal objects, etc. entering the unit.
Place the VCR on a flat, stable, level surface. Never subject
it to violent shaking or any othershockor impact.
Do not expose the unitto high temperatures. Excessive
heat (heat sources such as heaters, ovens, closed car on
hot days, etc.) may damage the unit.
Do not block the air vents that are provided to prevent the
temperature inside the VCR from rising excessively.
Do not use the unit under the following conditions:
●in locations with high humidity
●in presence of excessive dirt or dust
●in areas subject to strong vibrations
●near strong magnetic fields (e.g. transmitting antennas,
motors, fluorescent lights, etc.)
If the unit does not operate properly, switch it off, refer to
the “TROUBLESHOOTING” or consult adealer or a
service center.
About this Instruction Manual
This instruction manual covers VHR-230 (Australia), VHR-250
(Australia) and VHR-250 (New Zealand). The main differences
between the three models are shown below.
IVHR-230 IVHR-250 IVHR-250
(Australia} (Australia) ‘“New Zealand) I
f.-
Tape speed SP only ‘‘SP/LP “‘SPILP ‘
Slow motion —Yes Yes
Video channel CHO/CHl CHO/CHl
?Iemswitch cH2/cH3
AV INPUT —Yes Yes
se’
!ny difference between the three models is indicated when
The o(POWER) button of this VCR is asecondary circuit, and
does not disconnect the unit from the AC power source, even if
the button is in the stand-by position, as longas the power
cord is connected to an AC electrical outlet.
Note: Stand-by is the condition in which the digital display
becomes dimmer.
(Stand-by display) (Power on display)
Be careful of condensation
Condensation is the moisture that forms on the outside of a
glass when you fill it with cold water. Condensation can also
form inside aVCR when it is suddenly moved from acold
place to awarm, humid one, or when aheater has been turned
on to quickly heat the room.
Particular care must be taken with your VCR because water
particles that form on the video head drum, which is the main
VCR mechanism, can cause the video tape to stick to the
drum. This prevents proper tape travel and may damage both
tape and mechanism.
Follow the procedures below the first time you use the
VCR, and whenever you use it in places which are subject
to condensation:
1. Connect the aerial cable and make all other necessa~
connections.
2. Plug the power cord into awall socket.
3. Turn on the VCR power to warm it up and speed up the
drying of any water particles that may have formed on the
video head drum.
4. Do not insert avideo cassette.
It takes about 1-1/2 to 2hours to completely eliminate
condensation. Wait at least this long before using the
VCR.
terminal (front) I1
necessary. 1

\
PRECAUTIONS ................●........................................................................1
CAUTION CONCERNING CONDENSATION ...........................................1
PARTS NAMES AND FUNCTIONS ...........................................................3
REMOTE CONTROL UNIT........................................................................5
CONNECTIONS .........................................................................................5
Power cord .........................................................................................................5
Aerial/Reconnection .........................................................................................5
AVconnection ....................................................................................................6
ADJUSTING THE TV RECEIVER TO THE VIDEO CHANNEL ................6
CLOCK SEl_nNG ......................................................................................7
Summer time adjustment ......................................................................."".".."...."7
Resume function ................................................................................................7
TUNING CONTROL ADJUSTMENTS .......................................................8
Channel fine tuning ............................................................................................8
CASSEITE LOADING AND UNLOADING ...............................................9
Automatic head-cleaning system .....................................................................9
PLAYBACK .................................................................................................9
Tracking adjustment ..........................................................................................9
TV monitor function ............................................................................................9
SPECIAL PLAYBACK .............................................................................10
Forward search ................................................................................................10
Reverse search ................................................................................................10
Still picture .......................................................................................................10
Frame advance ................................................................................................10
Slow motion ...(VHR-250 only) ..................................................................."."".l O
RECORDING TELEVISION BROADCASTS ...........................................10
Quick Start Recording (QSR) timer .................................................................l 1
Blank search function ..............................................................................c.......l 1
TIMER RECORDING ...............................................................................
Notes on timer setting ...................................................................................... .
On-screen display ............................................................................................l4
COPYING ATAPE ...................................................................................15
COUNTER MEMORY ..............................................................................15
INDEX SEARCH FUNCTION ...................................................................16
Index scan search ............................................................................................16
Index search ....................................................................................................16
HOLD FUNCTION ....................................................................................17
End[ess play ....................................................................................................17
All-key lock -.......................................................................................................17
TROUBLESHOOTING .............................................................................17
REPAIRS ..................................................................................................17
SPECIFICATIONS ...................................................................................18
\
2

Rear 1
Front
0Eject button (4 EJECT)
QCassette loadingslot
@Remote control detector
~Digital display
~Playback button (PLAY>)
(3 Stopbutton(= STOp)
0Summertime adjustment button (STA)
0VTWTV select button (VTR/TV)
0Data confirmation button (OK)
@Channel up button (A)
@Channel down button (7)
@Channel preset button (PRESEf7
@Finetuning/Tracking/V-lockcontrols
(FINE TUNING/lRACKINGW-LOCK)
---------------------------------------------------------------
VHR-250 only
@Tape speed select button (SP/LP)
---------------------------------------------------------------
@Record button (0 REC)
@Pause/Still button (11pAUS~STILL)
@Fast-forwarcVFomard search button (@!fFFW)
@Rewind/Reverse search button (44 REW&I)
---------------------- ------------ -----------------------------
VHR-250 only
@AV input selector (AV INPUT)
@Audio input terminal (AUDIO)
@Video input terminal (VIDEO)
----------- ----------------------------------------------------
@Power button (POWER)
Digital display
~Function indicators
D:Playback
o:Record
w:Fast-foward
u:Rewind
p+00 :Still
O+00 :Record pause
D+~: Forward search
D+44: Reverse search
@Channel position number
@Clock
@Date/Counter display
0Cassette-in indicator (-)
0Timer indicator (!ZJ)
0All-key lock indicator (~)
---------------------------------------------------------------
VHR-250 only
0LP mode indicator (La
---------------------------------------------------------------
0Aerial input terminal (ANT IN)
@Aerial output terminal (ANT OUT)
0Video channel select switch
for Australia... (CHCHl)l)
for New Zealand... (CHCH3)3)
0Audio input terminal (AUDIO IN)
6Video input terminal (VIDEO IN)
0Audio output terminal (AUDIO OUT)
0Video output terminal (VIDEO OUT)
0Power socket (AC IN)
Remote control unit 1
LCD panel
0Programmemode indicator (PROG)
@Date mode indicator (DATE)
@Clock mode indicator (CLOCK)
---------------------------------------------------------------
VHR-250 only
@LP mode indicator (LP)
----------: f----------------:--:-------&-----------------------
@Programme data transfer mdlcator (E)
@Data confirmation indicator (OK)
0index button (INDEX)
@Key lock button (e)
@VPS onloff button (VPS)
The VPS button is included in the remote control unit but it
is not used.
-------------------------------------------------------- -------
VHR-250 only
0Tape speed select button (SP/LP)
---------------------------------------------------------------
6Clock set button (CLOCK)
0.Programme set button (PROG)
0Counter reset button (RESET)
0Counter memory button (MEMORY)
0Record buttons (0 REC)
To record press both buttons.
(f!) Power button (0)
0Pause/Still button (11)
@Rewind/Reverse search button (44)
@Fast-fonvard/Fonvard search button (B)
@Playback button(>)
@Stop button(9)
@Cancel button (CL)
@Programme data transfer button(3)
@TV monitor button (MONITOR)
@Programme-check button (CHECK)
@Channel up button (A)
@Channel down button (7)
@On-screen assistance button (OSA)
@VTFWV select button (VTfUfV)
---------------------------------------------------------------
VHR-250 only
@Slow motion button (SLOW)
@Slow speed select b#&r@=,_+)
---------------------- ------------------------------
@Auto-trding button (ATR)
@Numeric buttons
@Data confirmation button (OK)
@AV select button (0/AV)
n

Front
aQ
? ?
Digital display
-l–/-l-\—l—
Rear
I
—1
I
———— —
II
&
!o---
-,
:,
.-.-,
Q--
o--
6-
0-
.
6-
@-----
(B’
AD
@.
●
a
i
*
Q
-@
-@
.-,
1
,,
,,
-@ .,
-@ *
-@
*
c
,
-@
e

This remote control unit is amulti-functional unit equipped with
an LCD panel.
Clock setting and timer programming operationscan be setup
while looking at the remote control unit LCD panel, then
transmitted to the VCR. [n addition to timer programming and
time adjustments, convenient special functions can also be
engaged with the remote control unit. For details, see separate
entries for each operation.
IBattery insertion I
1. Open the lid.
2. Insert 2“AA (IEC R6)” 1.5 volt batteries according to the
(+) and (-) signs.
3. Replace the lid.
Notes:
Operate the remote control unit within arange of approx.
30° from the front of the VCR.
Operate the unit within approx. 6m (20 ft.) from the front of
the VCR.
The battery life under normal operating conditions is about
six months. If the batteries become weak, the operating
distance will decrease; when this occurs, replace the
batteries.
If the remote control unit is not to be used for along period
of time, remove the batteries.
o
+f!iiJp
@
.,.?..
@
““”’”””.““
x
IPower cord I
Plug the power cord into the VCR power socket before using
the unit. Insert the plug straight and firmly.
.Insert the plug of the power cord into the wait socket.
IAerial/RF connection I
●Unplug the aerial cable from your TV receiver and
reconnect it to the terminal marked “ANT IN” on the VCR.
.Connect the aerial output cable supplied as an accessory
with the VCR to the “ANT OUT” terminal on the VCR.
Connect the other end of this aerial output cable to the TV
receiver.
Both video and audio (monaural) signals are fed to the TV
receiver and can be viewed by setting the TV receiver to your
preset video channel. (See page 6) -
Aeri~l
rI
L
*
...........
;.:,
i::’
,.,.;,
:;
f:
.......
-!
T!?-
?Jallsocket
. ................ ............ . .. ..
............. ... ..! ............ . .:;
::,
.....<.<
..—...- ——... —,—-w .. . .. . . —.. . . .. . . ..-...— -
Tv
J
*

IAV connection
If your TV receiver has an video/audio input terminals, the
following AV connections are also possible. The cable is sold
separately.
●Connect the AUDIO/VIDEO OUT terminals on the VCR to
th&fideo/audio terminals on the TV receiver.
●Both video and audio signals are fed to the TV receiver.
●The advantage of this ccmnection is ahigher quality of
picture and sound during playback.
. If you play back atape, set to the TV receiver to the AV
mode.
Note: To switch the lV input mode, refer to the instruction
manual of the TV.
Aerial
I1
-1
!l!!?-
Wall socket
1
ml
L.i.@J~
Q.::”::.:::::?.
... ..... ... . ...
‘F
I“I
LN
..-
The following procedure is only necessary if no AV connection
to the TV is made. With an AV connection, simply switch the
TV to AV mode.
Set the TV receiver to channel (Australia.,.O or 1, New
Zealand...2 or 3). (Choose the channel that is not used
for broadcasting in your area.)
Then set the video channel select switch, on the rear of
the VCR, to the (Australia...”CH Oor “CH 1”, New
Zealand...”CH 2’* or “CH 3“) psition, corresponding to
the channel selected on the TV receiver.
Press the VTRflV button to display “VTR”on the VCR
display.
Select, on the VCR, an active channel by pressing the
(A or V) button, or with the numeric buttons. Or, play
back aprerecorded tape.
Adjust the channel tuning control on the TV (or fine
tuning control) to the point at which the picture and
sound are best.
.,
When using the VCR, set the TV receiver to this channel
(Australia...O or 1, New Zealand...2 or 3). This is your video
channel.
... VCR (Rear)
‘\
““%+}k
.$,,
:....
..>,,
:,,:
...-..”
....’...
d
❑CH1
B!
Cno
Australia
●
HCH3
Hi
CH2
NewZealand
\
6

i
❑
n
The VCR clock setting is made using the remote control
unit. There is no clock function included in the remote
control unit.
When asingle digit number is going to be set, press the
[0/AVl button first and then the desired number.
(ex.: In case of”9”: press [0/AVl and then [9].)
Example: 9:30 December 10,1993
Press the CLOCK button to activate the clock setting
function. The “DATf?’indicator will flash.
Set the date using the numeric buttons.
Example: December 10, 1993 (10/12/93)
Press [1] +[0/AVl +[1] +[2] +[9] +[3].
While the “OK” indicator is flashing press the OK
button to confirm. The “CLOCK” indicator will then
flash.
Set the time using the numeric buttons.
Example: 9:30
Press [0/Aw +[9] +[3]+ [0/AVJ.
~ ~ ........................ ... .../.. .. ......%.m. .....%< ;>
~
$%%............... ... .. .................- .e.e.mm...w,...w,......”’ ,
;
&
While the programme data transfer indicator(7) is
flashing, press the (?)button.
Seconds adjustment
On the VCR side, the seconds counter starts from “00”
seconds immediately upon transmission from the remote
control unit. To adjust the seconds counter accurately,
coordination between the minutes adjustment and the
transmission period is necessary.
In case of mistake...
It is impossible to program illogical settings.
(For example aday setting higher than “31”.)
If one of the programmed settings or if the clock setting is
wrong, press the CLOCK button to erase the clock settings
then start again from step El.
i
Summer time adjustment I
•l Press the STA button on the VCR to advance or retard the
clock setting by one hour, in asingle operation, when
changing from “standard time” to “summer time” and
vice versa.
Press the STA button 1,2 or 3times to obtain the desired
setting. ~4th press will reset the clock to its original setting.
Note: Use athin object, as the tip of apen, to press the STA
button.
Resume function
❑This unit has abackup function that saves the settings
for up to 60 minutes.
If there is apower failure while it is used, everything stops
but will return to normal if the power is restored within 60
minutes.
●As the power is re-established ...
The play, record, fast foward or rewind mode will continue.
The clock ahd timer settings will still be correct.
Note: If the digital display reads “88:88”, the time, date and
recording programmed should be reset.
7

a
c1
The tuning control adjustments are made using the buttons
on the VCR.
This VCR has abuilt-in tuner capable of memorizing up to
39 f$levision channels.
You can select any position from 1to 39 to preset the
channels that can be received in your area.
Before starting
Set the TV receiver channel to the preset video channel or to
the AV mode.
Example: To preset UHF channel “30” to channel position
“2”.
0Press the VIR/TV button to display “VTR” on the VCR
display.
Press the PRESET button on the VCR.
This will activate the channel preset mode and, the
position number will start to blink.
Select the desired channel position number
(Example: “2”) by pressing the (A or V) button.
Then press the OK button.
Select the band “L “, “/f”or “U” (Example: “U”) USkIg
the (A or T) button, then press the OK button.
Notes:
●Select the band “L “, “H”, “u” or the skip function “S” bv
pressing the (A or ~) button. Each time you press one if
these buttons the indicator will change between “L “j “H”t
“U” and “S”.
If “S” is selected at this step, the selected position number
will be skipped.
Band Indicator IChannel range
at the VCR mstrslia New Zealand
“L.” o-5 1-3
“H” 5A-11 4-11
“u” 28-69 21-69
‘“s” Stip function
For all position numbers where no channel has been
programmed select the skip function “S”. These position
numbers will be skipped when tuning achannel on the
VCR.
Press the (A or V) button to tune the broadcast you
want to assign to that position number.
The (A) bu;on will access the following broadcast.
The m) button will access the previous broadcast.
The ~mage of the selected channel will appear on the
screen.
Example: Select the desired broadcast (channel 30) by
pressing the (A or V) button.
When the broadcast from channel 30 is received, press
the OK button when the channel auto-fine tuning
indicator (w) comes on.
Channel 30 has been preset to position number “2”. At that
time position number will change from “2” to “3”.
To assign achannel to another position number, repeat ,
steps ❑to El
ii
When the tuning control adjustment is completed,
press the PRESET button to return to normal
operation.
●During normal use, aposition number can be accessed by
using the (A or V) button or by composing the desired
position number using the numeric buttons.
‘The number of indicators increases as the channel \
number increases.
ExamrMe:Channel 23[-1
Channel 60[-: --] )
m
Tuning indicator
Auto-fine tuning indicator I
T
Channel
❑Band indicator position number
I~R indicator
~flj ,,
‘.*.
_.&—..-...- .----...—-. —---,--,,- ---- .--~--...---
~~...,>,..,..,;
t,x;’,x. s. ......Y..*..—— .,W,....ww.-...--w *.*ww*— —+
.“-._.”K&-K. . . . . . . . ..—.-. .— .- ...—-”- .....-” -. --..”---.---.-..”-..-+
‘[~ppr ‘r! EriY ~I
.j$
-—” . . . . ..-.. —
LA*,,,,,,,,.“e,.,..,..,..,........,.-,,W..i ...., .. ... . . . . . -v ...,l**aTm*.*.*~*h%%%-i:$
.& .+*..y2*x>m,ay&.*:>*,,.. ..,..,.
;
IChannel fine tuning 1
RWhen the tuning of achannel is not optimum, the auto-fine
❑
1.
2.
3.
4.
tuning indicator (Wl) will light and the” best possible fine
tuning will be made.
If the signal is weak or if the broadcast is disturbed by
interference, the reception can be improved by manual fine
tuning.
Press the PRES~ button.
Select the unsatkfacto~ broadcast by pressing the
(A or V) button.
Press the FINE TUNING/TRACKINGW-LOCK (-, +)
controls to obtain the best possible picture and sound.
The auto-fine tuning indicator (WI) will go off.
When the best picture and sound are obtained press the
OK button.
Togo back to auto-fine tuning mode
1. Press the PRESET button.
2. Press the (A or V) button to select the broadcast to return
to the auto-fine tuning mode.
3. Press the OK button, then press the PRESET button to
return to norma( operation.
The auto-fine timing indicator (cM) will light and fine tuning
for that broadcast will be returned to the automatic mode.
8

i
Insert the video cassette.
[Loading I
When avideo cassette is inserted, it will be loaded
automatically and the cassette-in (-) indicator will illuminate.
Erasure-prevention
tab
Erasure-prevention tab
If the erasure-prevention tab on the back of the video cassette
is removed, the cassette cannot be recorded on.
This tab is designed to prevent the accidental erasure of
recorded material.
Note: The tab should be snapped off at its base, and removed
completely.
To record onto the same cassette again, place two layers of
adhesive tape over the space where the tab was, so as to
cover the space completely.
Auto power on
The power is automatically switched on as acassette is
inserted while the VCR is in the stand-by condition.
Unloading
Power off eject
The video cassette will be ejected when the AEJECT button is
pressed, even when the VCR is in stand-by condition.
CAUTION: Do not put your hand or other objects in the
cassette loading slot because of the risk of injury or an
accident.
Be sure to keep smail children away from the VCR.
IAutomatic head-cleaning system I
This VCR is equipped with an automatic head-cleaning system
which automatically cleans the heads every time acassette is
loaded or unloaded. However if during playback noise appears
in the picture, it is recommended to use commercially avaiiable
head-cleaning cassettes to completely clean the VCR heads.
Note: Be careful not to use head-cleaning cassettes too often,
as they may damage the video heads.
Press the ➤PLAY button.
Auto piay
The VCR wiil play back atape automatically when avideo
cassette is inserted whose erasure-prevention tab has been
removed.
To stop the piayback, press the ■STOP button.
.To rewind the tape, press the 44REW button.
.To advance (fast-fonvard)the tape, press the WFF button.
Auto eject
When avideo cassette without an erasure-prevention tab is
played to th~ end of the tape, the tape will be automatically
rewound and then the cassette wiil be ejected.
ITrackina adjustment I
❑Auto-tracking adjustment ...
If the playback picture is disturbed by noise interference press
the ATR button,adjustmentto the optimumpointwill occur
automatically.
❑Manual tracking adjustment
If the playback picture still shows interference, manually adjust
it with the FINE TUNINGflRACKiNG/V-LOCK (-, +) controls,
on the VCR, to minimize the noise.
Note: If you wish to return the tracking adjustment to its
original “centre position” after having changed it,
press both the FINE TUNING/TRACKING/V-LOCK
(-, +) controls simultaneously.
3
i●
#---
I-( t-i 13 ~
i: IJJJ l!..
HMs:
,..”.......... ,.,.,.,., .. ,
II
Noise interference (-) eCentre -+(+)
TV monitor function
This function lets you view aTV programme during video
playback. J
Press ad hold the MONITOR buttonduringplayback.
The programme of the channel that was last selected wiil be
shown on the TV screen as long as the button is held.
You can also monitor other external input sources. To do
so, the input should be set to “AV’* by pressing the [0/AVl
button.
a

IForvvard search I
❑Press the WFF button during playback or fast-forward
op&ation. The picture um be viewed while the tape is
advanced at afast speed.
Cl Normal playback will resume as the ➤PLAY button is
pressed.
IReverse search I
❑Press the 44REW button during playback or rewind
operation. The picture can be viewed while the tape is
rewound at afast speed.
•l Normal playback will resume when the FPLAY button is
pressed.
Note: To search for aparticular scene you can switch from
fast forward to forward search and vice versa by simply
pressing the MFF button, or from rewind to reverse
search by simply pressing the 44 REW button.
IStill picture I
3presstheII PAUSEK3TILL buttonduringplayback. Astill
picturecan be viewed.
•l Normal playback will resume when the FPLAY button is
pressed.
Still vertical lock adjustment
OIf the still picture moves up and down, press the FINE
TUNINGfTRACKING/V-LOCK (-, +) ccmtrols to adjust the
still picture.
IFrame advance 1
Cl Press the II PAUSW3TILL buttonduringstill playback to
advance the picture frame by frame. Each press advances
one frame.
❑Normal playback will resume when the ➤PLAY button is
pressed.
Slow motion. ..WHR-250 only)
o
0
Press the SLOW button during playback or during still
picture.
The picture can be viewed while the tape is advanced at
approximately 1/1Oof the normal speed. The tape speed
can be set from 1/5 to 1/25 of normal speed by pressing the
(-or +) button.
Normal playback will resume when the ➤PLAY button is
pressed.
Notes: “.
●
●
●
If noise bars are visible in the still picture, frame advance or
slow motion modes, use the FINE TUNING/lRACKING/ -
V-LOCK (-, +) controls while in the slow motion mode to
correct.
During special playback modes the picture may contain
some noise or vibration. But this is not amalfunction.
Depending on the type of lV receiver connected to the \
VCR, special playback of tapes recorded in the LP mode’
may give ablack and white image.
However, this does not indicate amalfunction of the VCR.
. If still picture or slow motion playback is cantinued for about
five minutes, the VCR will automatically change to stop
mode in order to prevent the tape from being damaged.
Blue-screen display
The blue-screen display appears when the tape mmes to a
blank segment during playback or when an inactive TV
channel is selected on the VCR.
While the blue-screen display appears on-screen, the sound is
muted.
Insert avideo cassette.
•1
❑
Select the desired tape speed using the SP/LP button.
When you select the LP mode, the “LF’” indicator will
illuminate on the VCR display. ...(VHR-250 only)
Press the VTFUIV button to display “V7R”on the VCR
display.
Press the numeric buttons or the (A or V) button to
selm the channel to be recorded.
Example: Position number “2” (channel 23)
t%
Press the ●REC buttons.
❑Video recording starts. This is the normal video recording
procedure.
Mis-erasure prevention eject
The cassette will automatically be ejected if recording is
attempted on a video cassette without an erasure-prevention
tab.
To stop the recording, press the ■STOP button.
Auto rewind
The VCR automatically rewinds the tape when it reaches the
end. This function does not operate with timer recording or
QSR timer recording.
10

IQuick Start Recording (QSR) timer I
Timer recording IS simple.
You can start arecording and then programme whenthe VCR
is to stop recoding and go to stand-by mode automatically.
Press the ●REC buttons to start recording.
Press the ●REC buttons again and the “OFF- -:- -“
indicationwill start flashing on the VCR display.
OFF .
#..& ---- ●
Within 10 seconds, set the recording end time by using the
.REC and (A or V) buttons.
*
●
●
•1
Each press of the. REC buttons will advance the recording
end time by units of 30 minutes.
Each press of the (A) button willadvance the recording end
time by units of 1minute.
Each press of the (7) button will retard the recording end
time by units of 1minute.
To stop the recording at any time, press the ■STOP
button.
Checking/Changing
When the ●REC buttons are pressed during QSR recording,
the retarding end time will blink for 10 seconds.
The recording end time can be changed by pressing the
.REC and (A or 7) buttons during this 10-second period.
[Other recording possibilities
If you wish to avoid recording unwanted material
1. During recording, press the 11PAUSE/STILL button.
The lV picture and sound will not be recorded.
2. Press the II PAUSE/STILL buttonor ●REC buttons, and
the recording will resume.
Note: If the record pause mode continues for about five
minutes, the VCR will automatically go into the stop
mode in order to prevent damage to the tape:
Recording one programme while watching another
1. Start recording the desired TV programme selected on the
VCR.
2. Press the VTRKV button to erase “WR”on the VCR
display.
3. Select on the TV receiver the programme you want to
watch.
IBlank search function I
The blank search function automatically searches for the
beginning of the next blank (unrecorded) portion of the tape,
and stops the VCR at that position. This is convenient when
you want to continue recording at the end of aprevious
recording.
[n the stop or playback mode, press the INDEX button.
I
Press the FPLAY button.
The blank search function will start.
Notes:
●
●
●
●
If starting in arecorded portion of the tape, the VCR will
look for ablank toward the end of the tape. (lhe end of the
recorded portion.)
If starting in an unrecorded portion of the tape, the VCR will
look toward the beginning of the tape for the beginning of
the unrecorded portion.
The stopping position may vary slightly. Play back afew
seccmds of the tape to make sure it is at the position you
want.
This function may also stop the VCR during slight pauses
(unrecorded portions) between taped programmed.

❑Timer recording enables you to set up to 6programmedto
be recordedupon a period of up to 1year.
Cl Before setting the timer recording programme, be sure that
th&present displayed time and date are correct.
OTmer programming can also be performed while it is
displayed on the TV screen. (See “On-screen display” on
page 14.)
Example: To record aprogramme on channel position 5
from 21:30 to 23:15 on December 24,1993.
Press the PROG button.
The timer programming mode is then activated, to
return to the normal mode press the PROG button
again.
Set the channel position number using the numeric
buttons, for single channel number (Example: “57,
press the [0/AVj button first.
Set the date on which the recording has to take place.
Example: For December 24 (24/12) press the numeric
buttons [2] +[4]+ [1]+ [2], when completed the
“OK”’ indicator will start flashing, press then the OK
button.
...................w .. . . . . . . . . . . . . . . . .... .. . . .... . . . . . .. .. .. .. . .... j
~> >
<
“-..— ..—-... “.-....._...—..-..f j
Set the time at which the recording has to start.
(ON-time)
Example: For 21:30, press the numeric buttons
[2] +[1]+ [3]+ [0/A~, when completed the “OK”
indicator will start flashing, press then the OK button.
Set the time at which the recording has to end.
(OFF-time)
Example:”For23:15, press the numeric buttons
[2] +[3]+ [1]+ [5], when completed the(~)
indicator will start flashing.
OBypressing the SP/LP button,you can select the recording
speed SP or LP.
When in LP mcde, the “f-~” indicator is displayed.
... (VHR-250 only)
./—------------ --3
Press the (?)button.
The preset data is sent to the VCR and it will be
displayed for a3-second period.
Auto-timer stand-by
When the preset data has been transmitted to the VCR, the
(21) indicator will light and the VCR goes into timer stand-by
mode.
\
..
0By repeating steps ❑to E, up to 6different timer
programmed can be preset.
\
12

INotes on timer setting I
When recording from an external source...
●At step El of timer programming instead of programming a
channel position number, press the [WAVI button twice. The
indicator “AV’’will light.
When recording in the everyday mode ...
●At step El of timer programming instead of setting adate,
press the [0/AVl button twice. The indicator “Ed’’will light.
The selected channel will be recorded everyday at the same
time.
Timer setting is not possible, If there is a
transmission error because ...
1. The data has not been properly transmitted from the remote
control unit to the VCR.
Press the (%) button one more time.
2. Achannel position number superior to 39 has been
programmed.
3. February 29 has been programmed for other than aleap
year.
•1 In such acase, the eror indicator “ER’* will flash on the
display for 3seconds.
4. If after having preset 6timer programmed, some more
programmed are transmitted to the VCR.
❑In such acase, the full indicator “FULL” will light on the
display for 3seconds.
5. If on the remote control unit the programmed ON-time and
OFF-time are bothpast, they will be cancelled when
transmitted to the VCR.
Notes:
●If atimer recording with the same ON-time and channel
than aprevious setting is transmitted to the VCR, the
subsequent setting will have priority. “
The timer recording doesn’t operate
1.
2.
3.
If no video cassette is loaded when going into timer stand-
by mode.
The (PI) indicator will flash.
If acxssette with no erasure-prevention tab is loaded.
The (Q) indicator will flash and the cassette will be ejected.
If 5minutes before the ON-time of atimer recording, the
VCR is not in timer stand-by mode (the power is on, in stop,
play or record mode).
The (Fl) indicator will start flashing, you should then press
the o(POWER) button.
Programme priority
●IfSeveraltimer recordings have overlapping recording
times, the recording with the earliest ON-time will be
recorded first, untilthe end.
Notes:
.To stop timer recordings, press the 9STOP buttan.
●If there is apower failure during atimer recording, the
recording will stop at that point. If the power is returned to
the VCR within 60 minutes the recording will resume if the
OFF-time for that recording has not yet been reached.
Confirmation of timer recording data
.Press the CHECK button to display on the VCR, the timer
recording settings.
.With each press of the CHECK button the timer recording
data for each setting will be displayed, then the display
returns to the timer stand-by mode.
Revising timer recording data
1. Select the pragramme you want to modify by pressing the
CHECK button.
2. Press the (A ar V) button to get flashing the data to modify.
3. Modifytife data using the numeric buttons.
4. When finished, press the CHECK button.
The VCR returns to stand-by mode.
Erasing timer recording data
1.
2.
Select the programme you want to erase by pressing the
CHECK button.
When the desired settingis displayed,press the CL button
to erase all the data for that programme.

IOn-screen display I
❑The timer recording programmed setting can easily be
made by displaying all the data on the TV screen.
q====”on
●The timer recording programmed setting screen is
displayed.
TIMER 16.12.93 10:08
------ ----- ------ ----- ---
CH DATE ON OFF
----- ---:- ---:- -
.SP
---- .---- :---- :----
----- ---:- ---:- ---
.
----- --- :---- :----
.
----Q ----: ----: ----
---- ----- :---- :----
Notes:
●To set timer recording of an external source, press the
[0/AV’l button twice at step El-0, instead of setting a
channel pmition number. “A V“ is displayed instead of a
channel position.
.For everyday recording, press the [0/AVl button twice
instead of setting adate. “ED” is displayed instead of a
date.
TIMER 10.12.93 18:00
------- ------- ------- ----
CH
5
12
8
10
2
--
m
—..-..-. . . -..”-. . . . . . . . . . . . .. . . . . . . . . . . . dEve?
Using the numeric buttons set,
0The channel position number
QThe recording date
@The ON-time
0The OFF-time
●At any time between step ❑-0 and step ❑-@:
Press the SPILP button to change the recording speed
(“SP”or “LP”is displayed). ...(VHR-250 only)
Example: To record aprogramme
on channel position number 5, press [0/AVJ +[5];
on December 24 (24/1 2), press [2] +[4] +[1]+ [2];
from 21:30, press [2]+ [1]+ [3] +[0/AVj;
to 23:15, press [2]+ [3]+ [1]+ [5].
.By repeating steps 0to 0 up to 6different timer
programmed can be preset.
TIMER 10.12.93 10:00
------- ------ ------- -----
CH DATE ON OFF
?1
5<24.12)(21 :30~23: 15> SP
----- ---- --- SP
---- ----- :----: ----
---- ---- :---- :----
.
DATE ON OFF
24.12 21:30 23:15~
25.12 10:00 11:00 SP
@l 20:86 28:30 LP
10.91 18:30 19:45 SP
15.02 21:00 22:00 SP
----- -: ---- :--
.SP
lay recording
-Tape speed
(VHR-250 only)
ETWhen finished, press the OSA button to erase the timer
recordincj mwammes setting screen, or Press the
0(POW-ER)&Aton to switch-the VCR to ~mer
recording stand-by mode.
Confirming, revising and erasing timer recording
data ...
.Press the OSA button to display the timer recording
programmed setting screen.
.Press the CHECK button until the desired programme is
flashing;
no revise atimer recording’ setting]
1. Press the (A or V) button to get flashing the data to revise.
2. Revise the data using the numeric buttons.
.When finished,press the (A) button repeatedly until the
display doesn’t flashany more.
no erase the selected timer recording]
●Press the CL button to erase all the data for that
programme.
When finished, press the OSA button to erase the timer
recording programmed setting screen, or press the
o(POWER) button to switch the VCR to timer recording
stand-by mode.
J
>:
-.+.
‘
\
14

i
Copying (dubbing) atape can be done using two video
recorders, aplaybackVCR and arecordingVCR.
VCR B
Camcorder (VCR A)
---.------_------ ---------------- -------------------------------
VHR-250 only
According to the video component to be connected, either
the rear AUDIO/VIDEO IN terminals or the front
AUDIONIDEO INPUT terminals can be used.
●
●
When using the AUDIO/VIDEO IN terminals in the rear, set
the AV/lNPUT selector to the “REAR” position.
When using the AUDIO/VIDEO INPUT terminals in the
front, set the AV/lNPUT selectorto the “FRONT” position.
VCR B
s!?? qp
Camcorder (VCR A)
~
------ ---------- ------ _---. --_----- _----- _--- _--—-------------
Connect VCR A(or Camcorder) and VCR B.
Insert the pre-recorded tape into VCR A(playback
VCR).
Insert the blank video cassette into VCR B(recording
VCR).
Set the VCR Bto the “AV” mode.
●press the [0/AVl button once to display “A Vinstead of a
channel position number or,
●Press the (A or V) button to display “A V“ instead of a
channel position number.
Set VCR Bto record pause mode. (The record pause
mode is set by pressing the ●REC button then the
II PAUSi3STlLL button.)
When the desired starting position is reached on VCR
,A, start recording on VCR Bby pressing the
UPAUSEISTILL button or the ●REC button.
When the copy is completed, press the ■STOP button
on VCR Bthen on VCR A.
This convenient feature for finding the beginning of aspecific
recording etc., is made possible by the “Linear Time
Counter” that indicatesthe tape run time in hours, minutes
andseconds.
Notes:
●
●
Whenever you load acassette tape, the cmunter wili be
reset to ‘60HOOMOOS”.
The counter operates using control signals which are
recorded on the tape, hence if you play back atape or
portion of tape which has nothing recorded on it, the
counter,yill not operate.
Press the RES~ then the MEMORY button before
starting recording or playback. The zero point of the
counter is now memorized and the memory indicator
“M’’will illuminate.
When the 44 REW button is pressed at the end of
recording, or playback, the tape will be rewound
automatically to the memorized position and then stop.
Notes:
●When rewinding further back from position “OHOOMOOs”,
the counter shows figures beginning with “-”.
●The tape stops at the memorized position even when using
fast forward when the counter reading begins with” “-”.
Recording time
.It
is possible to select the recording tape speed by pressing
the Sp/Lp bu~on. ...(VHR-250 Only)
SP mode: for the best image and sound quality
LP mode: for the longest recording duration
Cassette SP made ILP mode
E-30 30 min. 60 min.
E-60 60 min. 120 min.
E-90 J90 min. 180 min.
e20 120 min. 240 min.
E-150 150 min. 300 min.
E-180 180 min. 360 min.
E-195 195 min. 390 min.
E-21O210 min. 420 min.
E-240 240 min. 480 min.
Starl playback on VCR Aby pressing the FPLAY
button.
-.

When arecording is made, an index signal is automatically
placed at the beginning of the recording. This index can be
used to search for the recording you wish to watch.
Index’$ignals are not recorded after arecording pause.
•l While the index is being recorded, the “/d” indicator
flashes.
Note: Make sure that indexes are at least five minutes apart
from each other.
IIndex scan search I
As instructed, ttre VCR will go into the rewind or fast forward
mode, look for an index signal, play back the first five seconds
of the corresponding recording then continue onto the next
index signal. It will do so until the beginning (or the end) of the
tape.
Press the INDEX button while in the stop or playback
mode.
Indexsearch I
If the index number relative to the search start position is
known, it is possible to instruct the VCR to go directly to the
beginning of that recording and to start playback
You can search for an index of arecording !ocated as far as 99
indexes away from the search start position.
Press the INDEX button while in the stop or playback
mode.
Using the numeric buttons, programme the index of the
recording you are looking for. (Example: 5)
Press the WFF button to search toward the end of the
Press the hFF button to search toward the end of the tape or the 44REW button to search toward the
taoe or the 44 REW button to search toward the
beginning of the tape.
b&inning of the tape.
.The VCR then starts searching for the index you
-programmed. Every time an index is found the displayed
number will decrease by one.
(Example: “P:5”+ “P:4”+ “P:3”+ “P:2+ “P: 7“)
When the desired index is found, playback of the recording
you are looking for will start.
●When an index signal is found, the VCR will play back 5
seconds of the corresponding recording.
When the desired recording is found, press the
bPLAY button during that 5-second period to start
playback from that position.
-.
Press the <REW button. IIndex search operation IPress the MFF button.
.
D
981h 3rd 2nd 1St 2nd 3rd
ED
99th
previous previous previous previous following following following
programme programme programme programme programme programme
4
“P .$9 ““P .A4° “P .A3° “P :A2° “P: 1““P .A1“ “P $2” “P ‘3” “P $9 “
16

.—
Two functions, “Endless play” and “All-key lock”, can be
enjoyed by using the hold function.
IEndless play I
This function will play back atape to the end, rewind it then
replay it again, and again until you stop it.
In the stop or playback mode, press the (e) button.
The “Ho/d” indicator will flash.
Press the bPLAY button.
D
The “~” indicator will light, and endless play will start.
The tape is rewound to the beginning and then playback will
start.
If the counter memory function is used in combination with
endless play, the VCR will play back the tape to the counter
reading “M OHOOMOOS”then stafi again from the
beginning.
TO stop the endless play, press the (~), ■STOp or
AEJECT button and the endless play function is
cancelled and the VCR goes in the stop or eject mode.
[All-key lock
When the all-key lock function is engaged, all the keys on the
remote control unit and on the VCR become inoperative.
Press the (+ button.
If You wish to use the all-key lock function during
recording or playback, select first the function you want
to use before pressing the (b) button.
Press the 11PAUSESTILL button.
The all-key lock function is set and, the “~” and
“AL l-lold;’indicators will light.
This VCR is highly sophisticated. It is shipped from the factory
after having been checked and adjusted under the most rigid
quality controland inspectionsystem. Shouldproblemsoccur,
check the following points.
Symptom iCheck flOhltS ~. “
~
●Are the connections between your VCR
.Was tuning correctly preset?
Off the air reception .Thew’deochannel setting of the TV
on the VCR Is poor receiver does not conespond to the video
channel presetting of the VCR.
Playbackpicture ●Thevideo channel setting of the TV
does notappear receiver
does not correspond to the video
channel presetting of the VCR.
interference In ●Adjust the tracking control.
play back picture ●Dust or dirt on video heads.
Take the VCR to an Authorized Service
Station or dealer.
No recording ●l%e erasure-prevention tab on the cassette
has been removed.
Timer recording Is ●The starting day and time have not been ‘
not possible set correctly.
●The clock time is not set correctly.
●There has been apower interruption of
more than 60 minutes.
This VCR is aprecision instrument and, if treated with care, will
provide years of satisfactory performance. However, in the
event of difficulty, the owner is advised not to attempt to make
repairs or open the cabinet. Servicing should always be
referred to your servicing dealer or Authorized Warranty
Station.
To cancel the all-key lock function, press the (-.-)
button.

General
Video format:
Televisionsystem:
.Recor~g system:
Video heads:
Tape speed:
Recording time:
Tuner input:
RF converter:
Converter output:
Timer indication:
Power failure backup:
Timer recording:
ier requirement:
Dimensions (W xHxD):
Weight:
Power consumption:
Electrical characteristics
Video input:
Video output:
Audio input:
Audio output:
Video S/N:
Horizontal resolution:
Accessories
Instruction manual ..................
VHS PAL
CCIR: 625 lines, PAL colour signals
Rota~ two-head helical scan system
2heads ...(VHR-230)
4heads ...(VHR-250)
SP: 23.39 mrn/sec
LP: 11.70 mrnhec ...(VHR-250 only)
SP: 240 minutes with E-240 cassette
LP: 480 minutes with E-240 cassette ...(VHR-250 only)
●Australia
VHF: O-11
UHF: 28-69
.New Zealand
VHF: l-11
UHF: 21-69
Built-in VHF converter
●Australia
On channel Oor 1
●New Zealand
On channel 2or 3
24-hour indication
Approx. one hour
1year 6programmed with everyday recording function
.Australia
240 VAC *1 O%, 50 Hz .,
●New Zealand
230 VAC*107., 50 Hz
360 x85x 335 mm
Approx. 5.6 kg
28W ...(VHR-230)
30W ...(VHR-250)
0.5- 2.OVPp, 75 k5ohms
1.0 f0.2 Vp-p, 75 f5ohms
-8.0 dBs, more than 50 kohms
-8.0 dBs, less than 10 kohms
More than 43 dB
More than 240 lines
............1
Power cord ..........................................l
~erial output Cable ..............................l
jmote control unit .........<...................l
“AA (IEC R6)” size, 1.5-volt battery ....2
Appearance and specifications are subject to change without notice.
\
...
?
18

1AC6P1 0654300
~O+IE CDAlA N7(079?. >J-SYQI}
.-T-
,,1
Sqjillw
0
SANYO Electric Co., Ltd.
printed in Japan
This manual suits for next models
1
Table of contents
Other Sanyo VCR System manuals

Sanyo
Sanyo VWM-950 User manual

Sanyo
Sanyo VHR-330EV User manual

Sanyo
Sanyo 5300 - SCP Cell Phone User manual

Sanyo
Sanyo VHR-489SP User manual

Sanyo
Sanyo P90 Manual

Sanyo
Sanyo SRC-800A User manual

Sanyo
Sanyo VHR-630 User manual

Sanyo
Sanyo VHR-M439 User manual

Sanyo
Sanyo VHR-H803E User manual

Sanyo
Sanyo VHR-310 User manual