Pi dental Orthoflex User manual

Präzisions-Fresgerät
Precision milling unit
Gebrauchsanweisung
Manual
Fogászati Gyártó Kft
1141 Budapest Szugló u. 85.
T:00 36 1 363 22 34, 00 36 1 251 49 44 Fax: 00 36 1 251 48 91

Gebrausanweisung D
z
2

Instructions for use GB
3

Gebrausanweisung D
z
4
1. Contents
Seite
1. Scope of delivery and wearing parts 2
2. Description of unit 3
3. Technical data 3
4. Safety instructions 4
5. Startup 5
6. Work 7
7. Care and maintenance 9
8. Conformity explanation 10
milling spindle with collet chuck Ø 2.35 mm (with bit stop)
Dear customer,
You have made a good decision in buying this unit. It will certainly support you in your work for
many years, particulaarly in light of the fact that it meets high standards of quality and
was developed and built according to recognised engineering principles and the state of the art.
Nevertheless, improper handling as well as use of the unit for purposes other
than that for which it was designed may cause danger and damage. We
therefore request that you read and follow these operating instructions carefully.
2. Scope of delivery and wearing parts
Scope of delivery
Orthoflex® –precision milling unit ______________ Best.-Nr. 4000
▪milling spindle with collet chuck Ø 2.35 mm (with bit stop)
model table,
foot seitch with connecting cable
mains cable
collet chuck wrench and cleaning brush.
Special accessories
Quill,
with 2 collet chucks (Ø1,6mm,2,35mm) , graphite refills Order No.4001
▪Wax blocking-out set

Instructions for use GB
5
for blocking-out of models, especially in partial dentures and for
scraping and forming wax, with 4 instruments( Ø 2.35 mm,)
inclinations 0º/2ºº/4ºº/6ºº) Order No.4002
Waxknife Order No.4003
1.Inhaltsverzeichnis
Seite
4. Lieferumfang und Verschleißteile 2
5. Gerätebeschreibung 3
6. Technische Daten 3
9. Sicherheitshinweise 4
10. Inbetriebnahme 5
11. Arbeiten 7
12. Pflege und Wartung 9
13. Konformitätserklärung 10
Sehr geehrte Zahntechnikerin und Zahntechniker,
mit dem Kauf dieses Gerätes haben Sie eine gute Entscheidung getroffen. Es wird Ihnen sicherlich
viele Jahre bei Ihrer Arbeit behilflich sein, denn es entspricht dem hohen
Qualitätsstandard und wurde nach lange Erfahrung und anerkannten Regeln der Technik entwickelt
und gebaut.
Dennoch können unsachgemäßer Umgang und nicht bestimmungsgemäßer Gebrauch Gefahre und
Schäden hervorrufen. Deshalb bitten wir Sie, diese Bedienungsanleitung durchzulesen und genau zu
behalten.
2.Lieferumfang und Sonderzubehör
Lieferumfang
Orthoflex –Präzisions-Fräsgerät ______________ Best.-Nr. 4000
Frässpindel mit Spannzange 2,35 mm (mit Tiefenanschlag)
Modelltisch,
Fußschalter mit Anschlußkabel,
Netzkabel,
Spannzangenschlüssel und Reinigungsbürste.

Gebrausanweisung D
z
6
Sonderzubehör
Pinole
mit 2 Spannzange (Ø1,6mm,2,35mm) und Grafiteinsatz Best.-Nr.4001
Wachsausblock-Set zum ausblocken von Modellen,
speziell im Modellguß und zum Schaben und
Formen von Wachs mit 4 Instrumenten ( Ø 2,35 mm,)
Neigungen 0º/2ºº/4ºº/6ºº) Best.-
Nr.4002
Wachsmesser Best.-Nr.4003
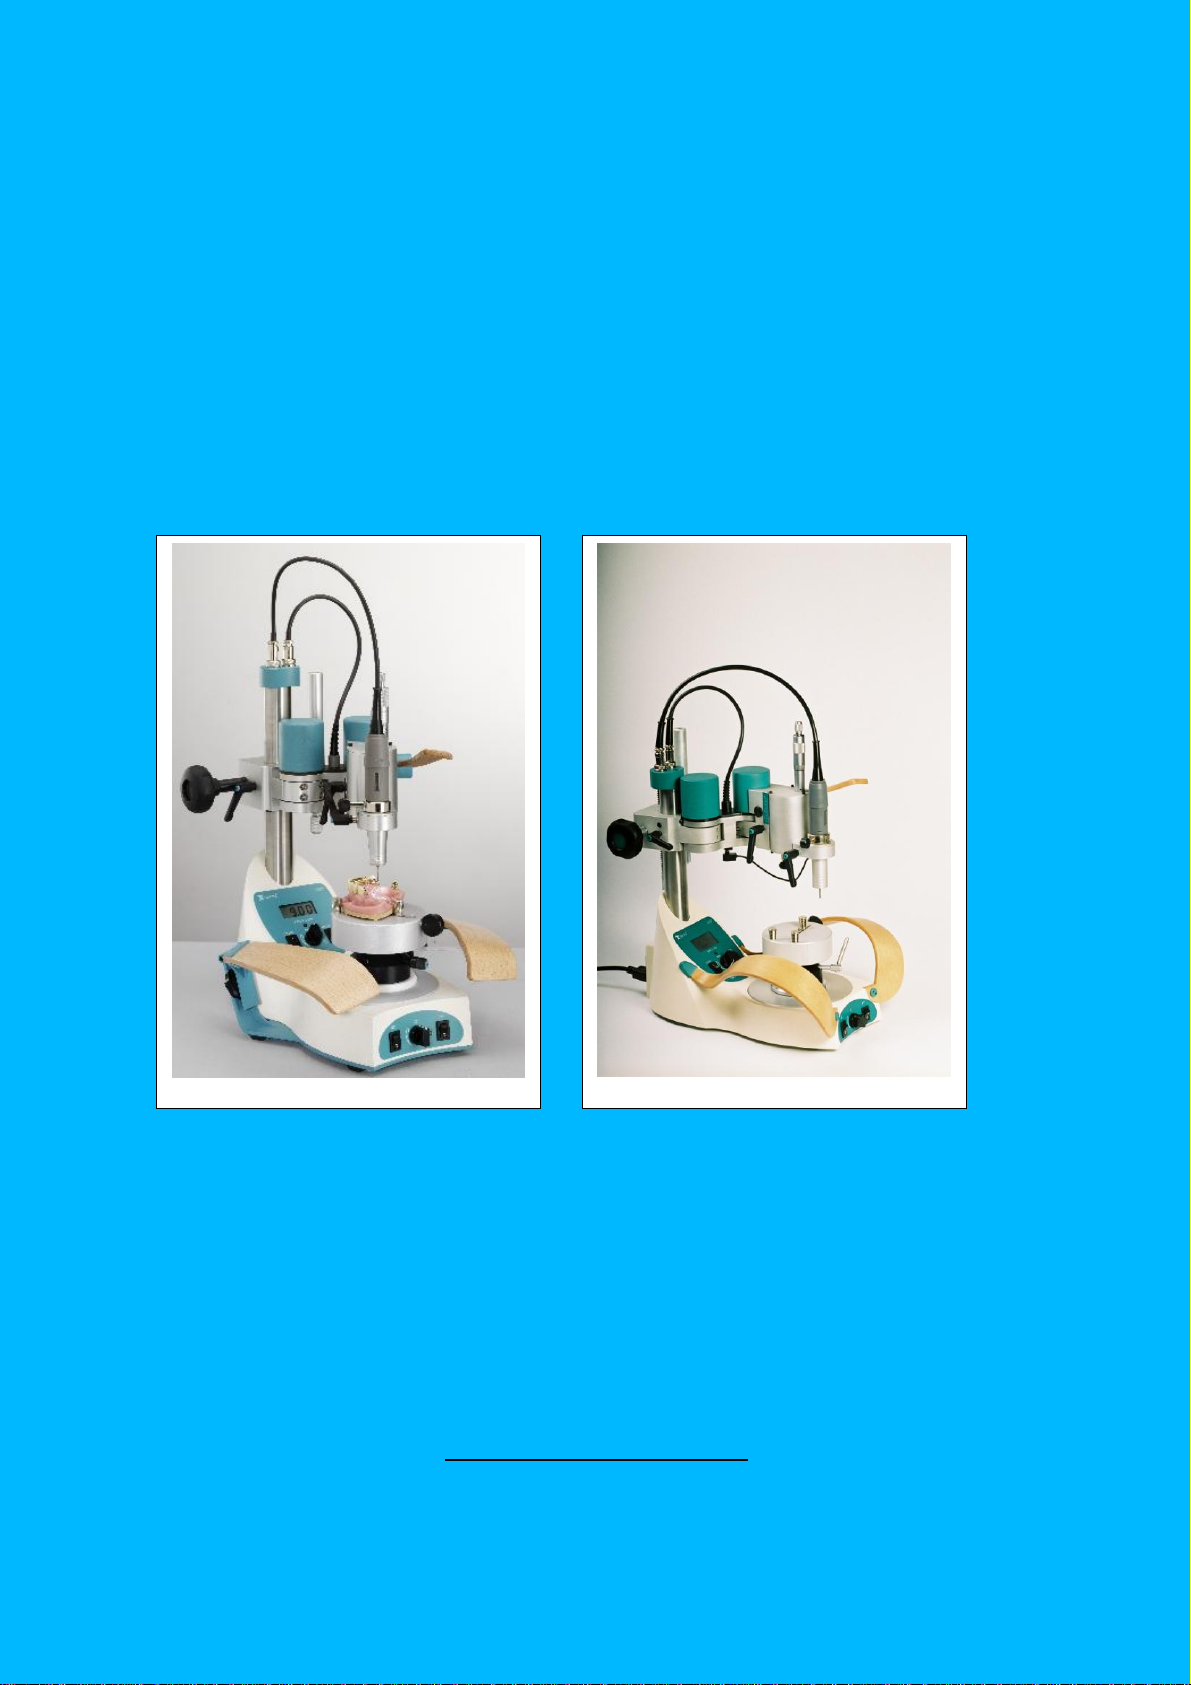
3. Description of the unit
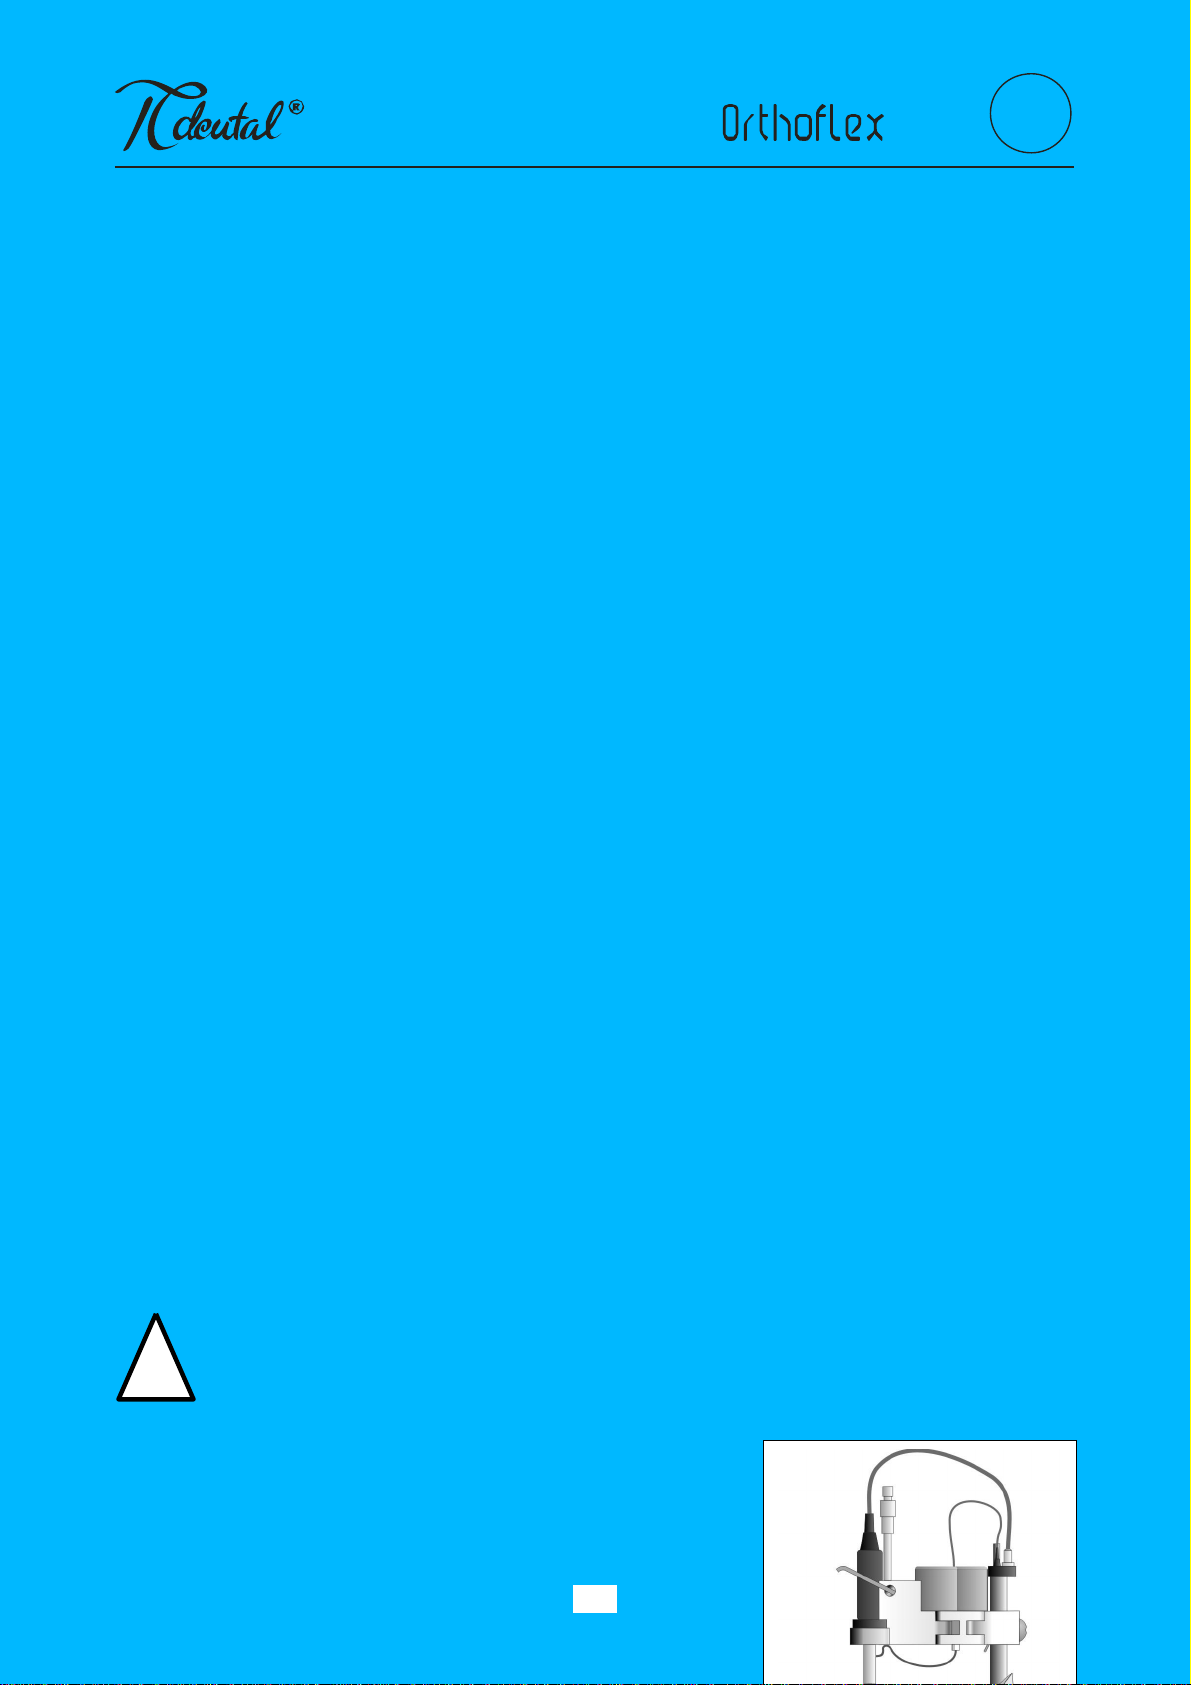
▪ORTHOFLEX® is a precision milling unit in the field of dental technology
for drilling and milling, measuring models and modelling wax as well as
setting attachments .
The extremely rigidly designed milling arm is easy to position thanks to a
refined
bearing system and it can be magnetically locked.
▪The milling unit offers the following advantages:
In the Milling spindle the lighting is die integrated.
The model table is equipped with a ball joing. The horizontal positions snaps into
place.
The working range is very large: the millling arm can be swivelled 225° and
vertically adjusted up to 110 mm. With the vertical carriage the clamped tool
can be moved vertically another 25 mm.
The controls are arranged such that their function and operation are obvious
(elements for adjustment and loosening/locking are positioned opposite each
other).
All operating states are displayed by means of LEDs.
The model table with the clamped model can be quickly and precisely locked on
the milling unit by means of an electromagnet.
4. Technical data
Height 330 .... 440 mm
Width 290mm

Instructions for use GB
7
Depth 380 mm
Rated voltage 230 V, 50/60 Hz
Rated current consumption of the unit 0,25 A
Speed ca. 500 .... 30 000 min -1
Weight 9,9 kg
3. Gerätebeschreibung
Orthoflex ist ein Präzisions-Fräsgerät im Bereich der Zahntechnik zum
Fräsen,Bohren, Modellieren von Wachs und Vermessen von Modellen
sowie zum Setzen von Geschieben.
Der Fräsarm ist durch sorgfältige Lagerung sehr leichtgängig und
magnetisch arretierbar.
Das Fräsgerät zeigt die folgenden Vorteile besonders auf:
In dem Motorspindel ist die Beleuchtung integriert.
Der Modelltisch ist mit einem Kugelgelenk ausgestattet, die waagerechte
Position rastet dabei ein.
Der Arbeitsbereich ist sehr groß: der Fräsarm läßt sich um 225º drehen
und senkrecht um 110 mm verstellen. Mit demVertikalschlitten kann das
eingespannte Wekzeug nochmals um 25 mm senkrecht bewegt werden.
Die Bedienelemente sind so angeordnet, daß
ihre Handhabung einfach ist.
Alle Betriebszustände werden mit
Leuchtdioden angezeigt.
Der Modelltisch mit dem eingespannten Modell kann mittels eines
Elektromagneten auf dem Fräsgerät präszise und schnell arretiert werden.

Gebrausanweisung D
z
8
4. Technische Daten
Höhe 330 .... 440 mm
Breite 290mm
Tiefe 380 mm
Nennspannung 230 V, 50/60 Hz
Stromverbrauch des Apparat 0,25 A
Drehzahl ca. 500 .... 30 000 min -1
Gewicht 9,9 kg
5. Safety instruction
!
1. ORTHOFLEX® is designed for drilling and milling, measuring models and
modelling wax as well as setting attachments in the dental technology field. Any
other use is considered to be improper. We shall not assume liability for damage
resulting from improper use.
2. Signs and stickers must always be kept in easy-to-read condition.
They may not be removed.
3. ORTHOFLEX® may only be operated by staff members who are familiar with
the contents of these operating instructions.
4. The national accident prevention regulations must be observed in addition to
these operating instructions.
5. The unit must never be operated if it has defects which may endanger employees
or

Instructions for use GB
9
5. Sicherheitshinweise
1. Orthoflex ist Fräsgerät zum Bohren und Fräsen, Vermessen von Modellen und
Modellieren von Wachs sowie zum Setzen von Geschieben im Bereich der Zahntechnik
bestimmt.Jede andere Benutzung gilt als nicht bestimmungsgemäß. Für daraus
entstehende Schäden haften wir nicht.
2. Schilder und Aufkleber müssen stets in gut lesbarem Zustand gehalten werden. Sie
dürfen nicht entfernt werden.
3. Orthoflex® darf nur von Mitarbeitern bedient werden, die den Inhalt dieser
Bedienungsanweisung kennen.
!

Gebrausanweisung D
z
10
6. Startup
The unit has been manufactured according to protection Class 1, and is
only permitted to be plugged into an earthed source of electric power ( socket-outlet
with earthing contact). The main power switch on the back of the unit should be easily
accessible.
Switch off main power switch (2) before performing connection work!
!

Instructions for use GB
11
6/1. Connect foot switch. (22)
6/2. Connect the waxknife (21)
6/3. Connect unit to mains network. (1)
6. Inbetriebnahme
VORSICHT!
Das Gerät ist Gemäß Schutzklasse 1 Hergestellt und darf nur an geerdete
Stromquellen ( Steckdosen mit Schutzkontakt) angeschlossen werden. Der Hauptschalter
muss leicht erreichbar sein.
■ Nach dem das Gerät auf einnen geeigneten Platz
aufgestellt worden ist, kann installiert werden.

Gebrausanweisung D
z
12
Vor dem Anschließen Hauptschalter (2) ausschalten!
6/1. Fußschalter anschließen.(22)
6/2. Wachsmesser anschließen (21)
6/3. Gerät am Stromnetz anschließen (1)
6/4. Installing milling spindle
Insert milling spindle(31) up to stop so
that it snaps into the collar. (32)
Screw on milling spindle securely (33) and
!

Instructions for use GB
13
connect. (34)
Connect: in spindle integreated lamp. (23)
6/5. Installing quill
Instead of the milling spindle, insert the quill
and screw on securely. (24)
6/6. Installing tool
Screw tool (26) with collet chuck (25) securely
in quill .(24)
6/4. Frässpindel installieren
▪Frässpindel (31) bis zum Anschlag einschieben,
dabei in den Rand einrasten lassen. (32)

Gebrausanweisung D
z
14
▪Frässpindel mit Knebel festschrauben (33) und
anschließen.(34)
Den Stecker der in der Spindel integrierte Lampe
anschließen.(23) Kabel festklemmen
6/5. Pinole installieren
Anstelle der Frässpindel die Pinole
einsetzen und festschrauben (24)
6/6. Werkzeug installieren
Werkzeug (26) in Spannzange (25) der
Pinole festschrauben.
7. Work
Milling and drilling

Instructions for use GB
15
Comply with safety instructions:!
■ Wear safety glasses!
■ Protect long hair and loose clothing from the milling spindle!
■ Protect foot switch against unintentional actuation.
Important!
■ Allow the milling spindle to rotate only when tool / pin is clamped, otherwise damage
may occur to the spindle.
■ Energized magnets heat. To avoid unnecessary heating, deenergize magnets as often as
possible.
7/1. Clamp tool
(lever to the right: collet chuck open. (16)
7/2. Swithc on master power switch. (2)
7/3. Lock model table (31) : switch on (13)
magnet. (32)
7/4. Loosen locking handle. (35)
7/5. Adjust height. (36)
Screw on locking handle (35) securely.
(If necessary, pull the locking handle and
move to the desired position.)
7/6. Set running direction. (11)
7/7. Switch on lamp. (12)
7/8. Switch on milling spindel with foot
switch (41)
7/9. Set motor speed. (14) see on disply (17)
!

Gebrausanweisung D
z
16
7.Arbeiten
Fräsen und Bohren
Sicherheitshinwese beachten!
■ Schutzbrille tragen!
■ Lange Haare, lose Kleidung vor der Frässpindel schützen!
■ Fußschalter vor unbeabsichtigtem Auslösen schützen.
Wichtig!
■ Die Frässpindel nur mit eingespanntem Werkzeug / Stift rotieren lassen, sonst zur
Beschädigung der Spindel führt.
■ Da, die stromdurchflossene Magnete warm werden, Magnete wann immer möglich
ausschalten, um unnötiges Erhitzen zu vermeiden.
7/1. Werkzeug einspannen.
(Hebel nach rechts: Spannzange offen. (16)
7/2. Hauptschalter einschalten. (2)
7/3. Modell in dem Modelltisch (31) einspannen,
auf dem Magnetplatte stellen, (32) Magnet
mit Schalter (13) einschalten.
7/4. Knebel lösen. (35)
7/5. Höhe einstellen. (36)
Knebel festschrauben. (35)
(Wenn nötig den Knebel ziehen und in
die gewünschte Position versetzen.)
7/6. Laufrichtung einstellen. (11)
(Gegenlauf / Gleichlauf).
7/7. Lampe einschalten (12)
7/8. Frässpindel mit Fußschlater einschalten. (41)
!

Instructions for use GB
17
7/9. Drehzahl regeln (14) Drehzahl wird von
Display (17) angezeigt.
Setting drilling depth
2. Screw loosen: (37) the milling spindle is held
in position through spring mounting.
3. The milling spindle can be lowered with
the lever (38)
4. The drilling depth can be limited with teh
micrometer screw.
▪Lower the milling spindle as far as possible
with lever (38)
▪Tighten micrometer screw (39) to reduce
the drilling depth.
Locking articulated arm
▪Lock articulated arm in the desired position
with the foot switch (42) FASTENING
(switch on magnet):
Changing tool with locked articulated arm
▪Loosen screw (37): milling spindle is held in
position through spring mounting.
▪Lift milling spindle with lever (38) and
change tool.
Blocking out
▪Clamp and connect quill and tool
(see Startup).
▪Press in desired insert. (To take off the old insert,
use the tool provided –see figure.)
▪Set temperature ( see peage 2./1)
Using the Waxnife

Gebrausanweisung D
z
18
▪Switch on (18) heating of waxknife
LED (19)
▪Set temperature (10)
Bohrtiefe einstellen
1. Knebel lösen: (37) die Frässpindel wird durch
Feder in Position gehalten.
2. Mit dem Hebel kann die Frässpindel abgesenkt
werden. (38)
3. Mit der Mikrometerschraube kann die
Bohrtiefe begrenzt werden:
▪Die Frässpindel mit dem Hebel (38)
maximal absenken.
▪Die μm-Schraube (39) zusammendrehen,
um die Bohrtiefe zu verringern.
Gelenkarm arretieren
▪Gelenkarm in der gewünschten Position mit dem
Fußschalter arretieren (Magnet einschalten): (42)
FASTENING
Werkzeug bei arretiertem Gelenkarm wechseln
▪Knebel (37) lösen: Frässpindel wird federnd in
Position gehalten.
▪Frässpindel mit Hebel (38) anheben und Werkzeug wechseln.
Ausblocken
▪Pinole und Werkzeug einspannen
(siehe Inbetriebnahme).
▪Gewünschten Einsatz eindrücken. (Um den alten
Einsatz abzuziehen, das mitgelieferte
Wekzeug benutzen –(siehe Seite 1.Punkt 1.)

Instructions for use GB
19
Benutzung des Wachsmessers
▪Mit der Schalter (18) einschalten
( LED (19) zeigt an.)
▪Mit dem Drehkopf (10) Themperatur einstellen.
8. Care and maintenance
Before performing work related to care and maintenance, always swithc off
the unit and pull out the mains plug! Otherwise there is a danger of injury
due to unintentionally actuated motor or, if the unit is open, due to electric shock!
All joints and moving parts function maintenance-free and are extensively protected against dirt.
Nevertheless, the unit should be protected against above-average accumulation of dust and, in
particular, moisture.
The access to major internal components of the unit is sealed. No liability is assumed for damage
incurred as a result of unauthorised manipulation.
Type of the replaceable fuse: 800 m AT
Cleaning or replacing the collet chuck
▪Remove milling spindle.
▪Clean collet chuck and and the glas of lighting with brush .
Guarantee
!

Gebrausanweisung D
z
20
ORTHOFLEX® is guaranteed for a period of two years subject to the
conditions specified on the guarantee card. Please inform your dental depot in
jthe event of a claim.
Our products are subject to a constant further development. Therefore
alterations in construction and composition are reserved.
8. Pflege und Wartung
Vor jeder Pflege und Wartung das Gerät ausschalten und den Netzstecker ziehen!
Sonst Verletzungsgefahr durch unbeabsichtigt ausgelösten Motor oder –bei offenem
Gerät –durch Stromschlag.
Alle Gelenke und bewegliche Teile arbeiten wartungsfrei und sind weitgehend vor Verschmutzung
geschützt. Trotzdem sollte das Gerät vor überdurchschnittlicher Staubablagerung und vor allem
Feuchtigkeit bewahrt werden.
Der Zugang zu wesentliche Geräteinnenteilen ist plombiert. Für Schäden, die durch eigenmächtige
Eingriffe entstehen, wird keine Haftung übernommen.
Typ der austauschbar Sicherung: 800 m AT
Spannzange reinigen oder wechseln
▪Die Frässpindel ausbauen und in die Hand nehmen.
▪Spannzange mit Bürste (Lieferumfang) reinigen oder auswechseln.
!
Table of contents
Languages:
Other Pi dental Dental Equipment manuals
Popular Dental Equipment manuals by other brands

Shofu
Shofu Dawson Academy Photographic Full with EyeSpecial Camera... quick start guide

DentalEZ
DentalEZ Heritage Simplicity LED Light user manual

Dr. Hinz Dental
Dr. Hinz Dental STOPPi Patient Information

MicroNX
MicroNX Extreme ML-A150 Instructions for use

Renfert
Renfert Waxprofi 1440-0000 instruction manual

Ugin
Ugin DUCATRON QUATTRO Instructions for use