Pinnacle Skillion Series User manual

GardenSHED
3.0W x 1.5D x 2.1Hm | Double Sliding Door
Tools required: Drill, measuring tape, phillips-head screw driver, rivet gun, rubber mallet, sturdy ladder, shifting spanner, 2 saw horses,
3mm steel drill bit, 4mm steel drill bit and a 10mm masonry drill bit.
Assembly instructions
3.0m Skillion Series
Congratulations on purchasing your new Pinnacle Garden Shed. Before assembling, we
recommend you read the instructions thoroughly. Your new shed comes with pre-drilled holes to
make assembly quicker. We recommend you assemble the shed using a trestle table or sawhorses
and planks. This will ensure that you are working o the ground and make it easier for you.
Assembly is a two-person job and should not be attempted in windy conditions.

GardenShed 3.0 x 1.5 x 2.1m
Build your garden shed in 7 easy steps!
Step 1: Check all parts against the component list
Step 2: Assemble the rear wall panels
Step 3: Assemble the side wall panels
Step 4: Assemble the roof panels
Step 5: Assemble the front doors
Step 6: Assemble the front wall panel
Step 7: Fit the panels together
IMPORTANT: It is recommended that your new shed is secured to a concrete slab as per the specifications in this manual.
Concrete slab: Please ensure that your site is level. It is recommended that your slab is 100mm thick and you use builder’s
plastic and F52 reinforcing mesh. We recommend that you make your slab approximately 100mm bigger than the base
dimensions of your shed. This will allow for a 50mm edge around your shed. We recommend that you slope the 50mm edges
downward by 10mm so that rain water can drain away from your shed.
1600mm
CONCRETE SLAB 3100mm
100mm

3
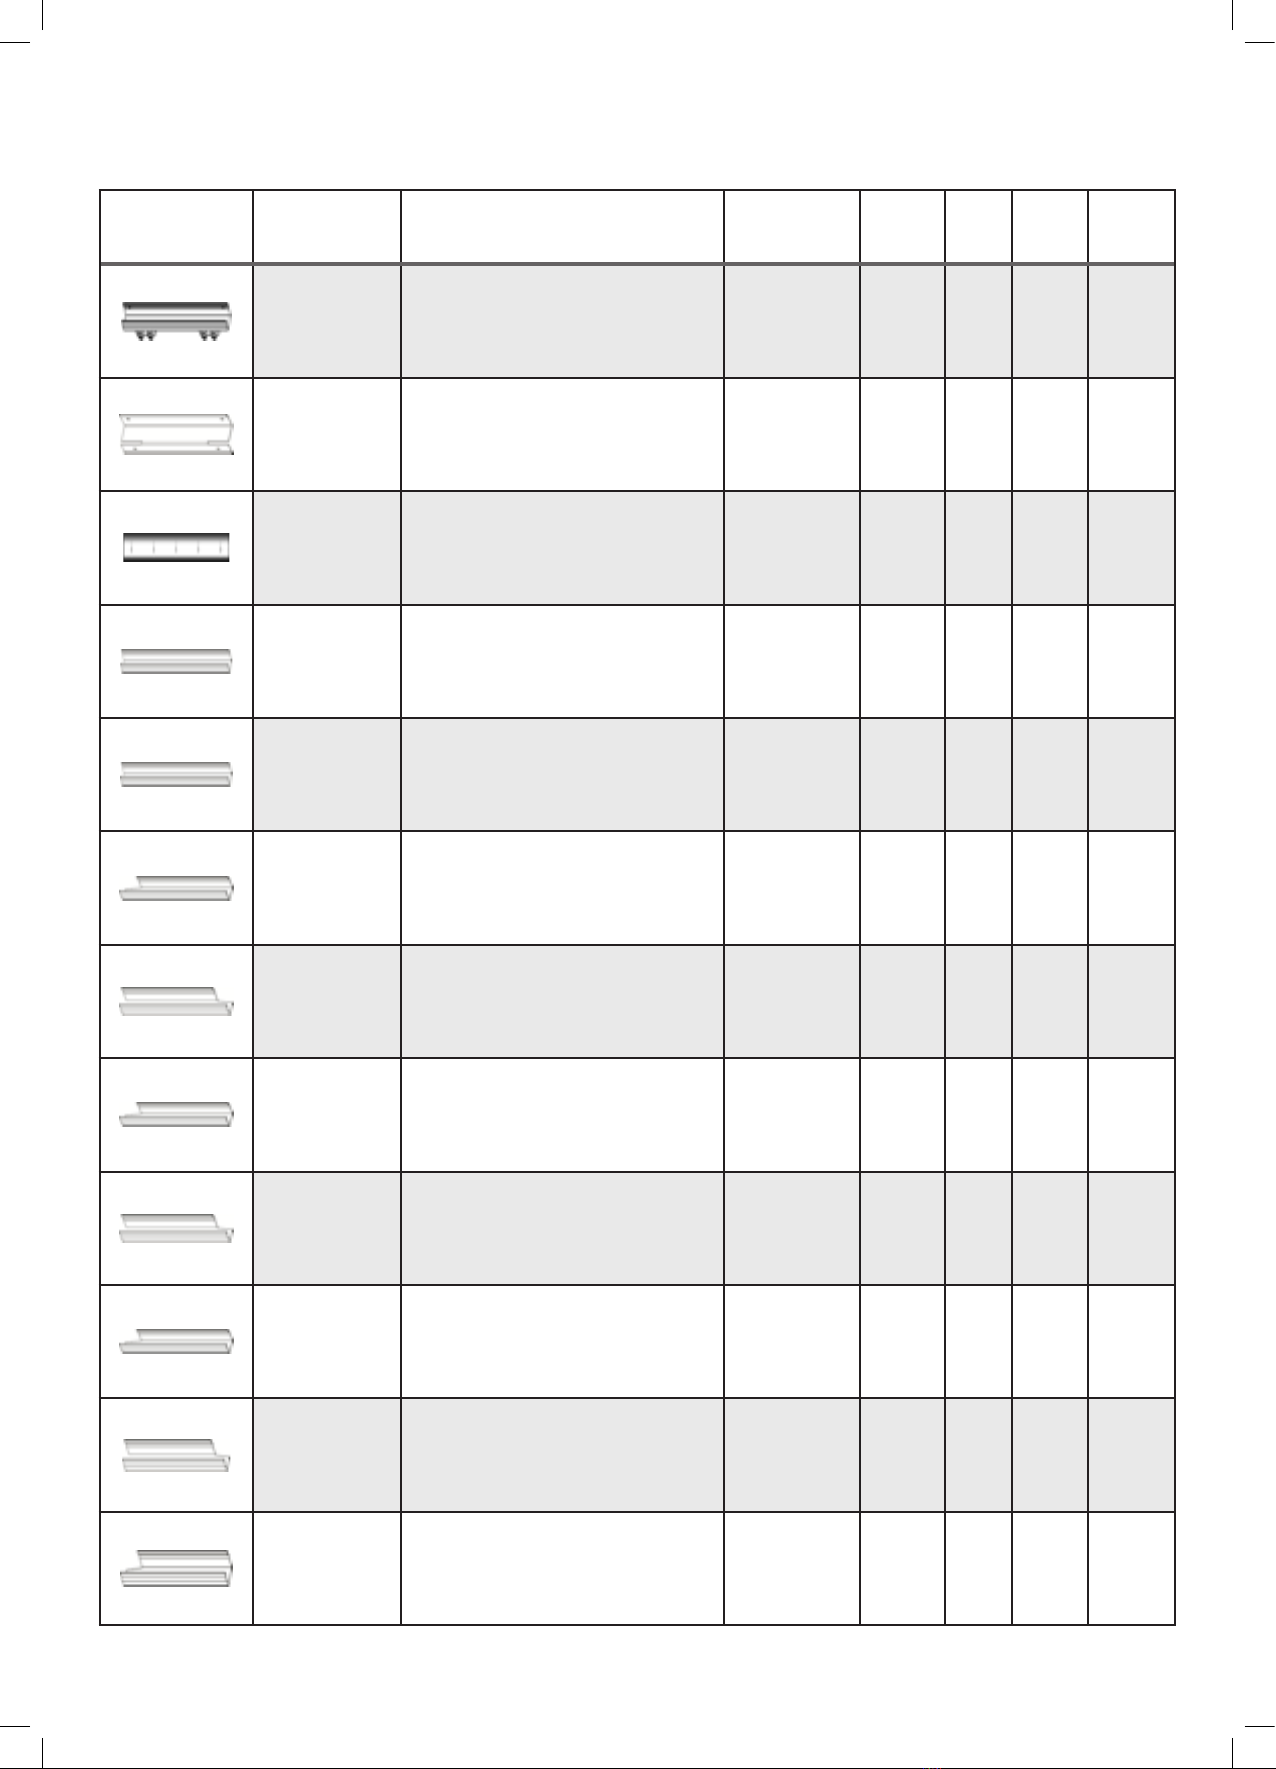
Picture Description Component Location Part
No. QTY BOX Check
Sheet Size: 2057x770mm Rear wall 6A 4 1
Sheet Size: 1977-2057x770mm Side wall 7A 1 1
Sheet Size: 1977-2057x770mm Side wall 7B 1 1
Sheet Size: 1900-1980x770mm Side wall 2D 1 1
Sheet Size: 1900-1980x770mm Side wall 2L 1 1
Sheet Size: 1600x770mm Roof 8 4 2
Sheet Size: 1900x735mm Front SS06 2 2
Door Sheet Size: 1868x770mm Door 5A 1 2
Door Sheet Size: 1868x770mm Door 5F 1 2
Channel Length: 1867mm Door SC29 1 2
Channel Length: 1867mm Door SC30 2 2
Step 1: Check all parts against the component list
Lay out all parts with number facing outwards and check o against parts list.
GardenShed 3.0 x 1.5 x 2.1m
4
Picture Description Component Location Part
No. QTY BOX Check
Channel Channel 768mm Door 21P 4 2
Jamb Length: 1853mm Door J6 1 2
Brace Length: 1075mm Door U4 4 2
Channel Length: 1494mm Roof 27A 2 1
Channel Length: 1494mm Roof 27B 2 1
Channel Length: 1494mm Rear wall 27C 1 1
Channel Length: 1494mm Rear wall 27D 1 1
Channel Length: 1494mm Rear wall 27H 1 1
Channel Length: 1494mm Rear wall 27I 1 1
Channel Length: 1494mm Front 27Q 1 1
Channel Length: 1494mm Front 27R 1 1
Channel Length: 1494mm Front 27S 1 1

5
Picture Description Component Location Part
No. QTY BOX Check
Channel Length: 1494mm Front 27T 1 1
Channel Length: 1514mm Front C26 2 2
Channel Length: 1508mm Side wall 20A 2 2
Channel Length: 1516mm Side wall 25 2 2
Channel Length: 1898mm Front 22E 2 2
Channel Length: 1401mm Side wall SC05 2 2
Channel Length: 1440mm Rear wall SC12 1 1
Channel Length: 1440mm Rear wall SC13 1 1
Top Track Length: 1470mm Front O1 1 1
Top Track Length: 1470mm Front O2 1 1
Bottom
Track Length: 1470mm Front O3 1 1
Bottom
Track Length: 1470mm Front O4 1 1

GardenShed 3.0 x 1.5 x 2.1m
6
Picture Description Component Location Part
No. QTY BOX Check
Jamb Length: 1898mm Corner Z19 1 1
Jamb Length: 1898mm Corner Z44 1 1
Jamb Length: 2055mm Corner Z21 1 1
Jamb Length: 2055mm Corner Z22 1 1
Lip Length: 1601mm Roof 51 2 2
Joining
brace Brace Door W 2 2
Channel
connector Length: 188mm Rear wall
/ roof 66 4 2
Track
connector Length: 178mm Front 66A 2 2
7
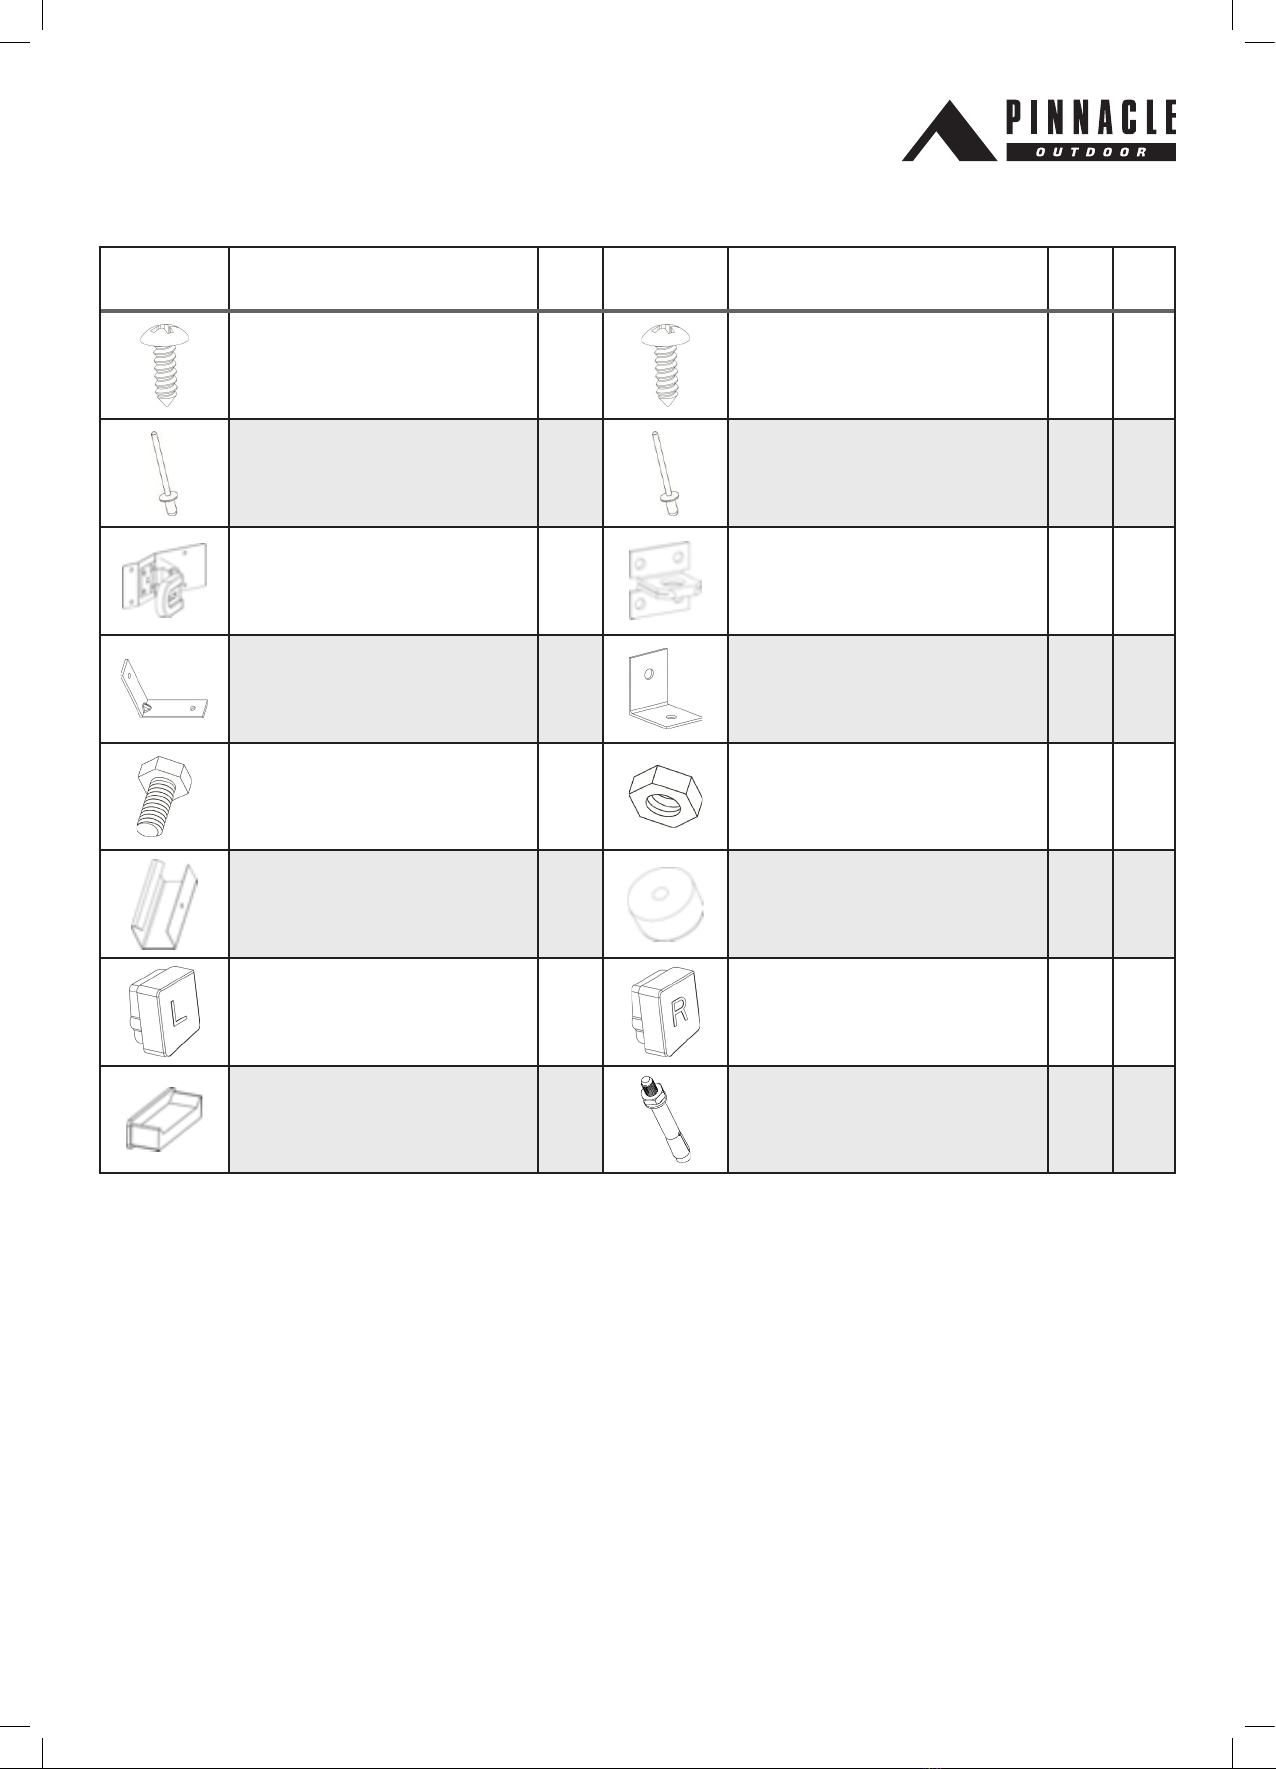
Fittings part list:
Picture Component QTY Picture Component QTY
Self-tapping screws (10mm) 200 Self-tapping screws (16mm) 55
3 x 10mm Rivet 72 4 x 10mm Rivet 26
Hasp (Part C4) 1 Staple 1
Mid wall brace (part 72) 2 Base bracket 7
5/16” x 19mm
hex bolt 7 5/16” Hexagonal nut 7
Mid-wall channel connector 1 Self-tapping screw
safety cover 25
Channel safety cover (Left) 1 Channel safety cover (Right) 1
Plastic Stopper 8 Sleeve anchor bolt 7
Qty checking date: ____ / ____ / _____
Qty checking personal badge number: _______________
Signature: _________________________________________
In the unlikely event that you find you are missing a part, please contact Pinnacle on 1800 349 776. A copy of proof of purchase may be requested.

GardenShed 3.0 x 1.5 x 2.1m
8
Garden shed overview:
8888
27B
27A
27A
27B
51
51
66
66
27H
27I
27C
27D
20A
20A
6A
6A
6A
6A
25
25
7B
2L'
7A
2D
66
66
SC12
SC13 SC05
SC05
SS06
SS06
66A
27S O3
27T
O4
66A
27R
27Q
O2
O1
C26
C26 22E
22E
Z19
Z44
Z21
Z22
W
U4
U4
SC30
SC29
21P
21P
C4
5A
5F
W
U4
U4
SC30
21P
J6
72
21P

9
Step 2: Assemble the rear wall panels
You will find it easier to assemble your shed using sawhorses with timber studs attached (timber needs to be the same length as the
shed (3.0m) or alternatively, a trestle table.
Place 4 x part 6A (Sheet) on your worktable and then position parts 27I, 27H (top channel) and parts 27C, 27D (bottom channel) to
the sheeting by tapping (diagram A) or sliding them into place (diagram B). Make sure the small lip of the channel is always facing
out. This ensures rain water cannot build up inside your shed. Make sure parts 27I and 27H are used as top side channels as per
the diagram below.
RIDGES FACING UP
ROOF TOP EDGE
A
27I
27H
27C
27D
6A
6A
6A
6A
950mm

GardenShed 3.0 x 1.5 x 2.1m
10
RIDGES FACING UP
B
Tip: If panel and screw holes do not line up, try pulling panel to match up holes.
27I
27H
27C
27D
6A
6A
6A
6A
950mm
Other manuals for Skillion Series
1
Other Pinnacle Outdoor Storage manuals


Popular Outdoor Storage manuals by other brands

LIVING AND HOME
LIVING AND HOME 0735940285711 user guide

USP
USP DURAMAX 10 Ft x 8 Ft StoreMax Plus owner's manual

rollaway container
rollaway container ARPCA24 manual

Duratuf
Duratuf GL105 Assembly instructions

Viking
Viking SD5300SS Use & installation guide

USP
USP DURAMAX Apex Pro 10.5 Ft x 8 Ft 40116 owner's manual


