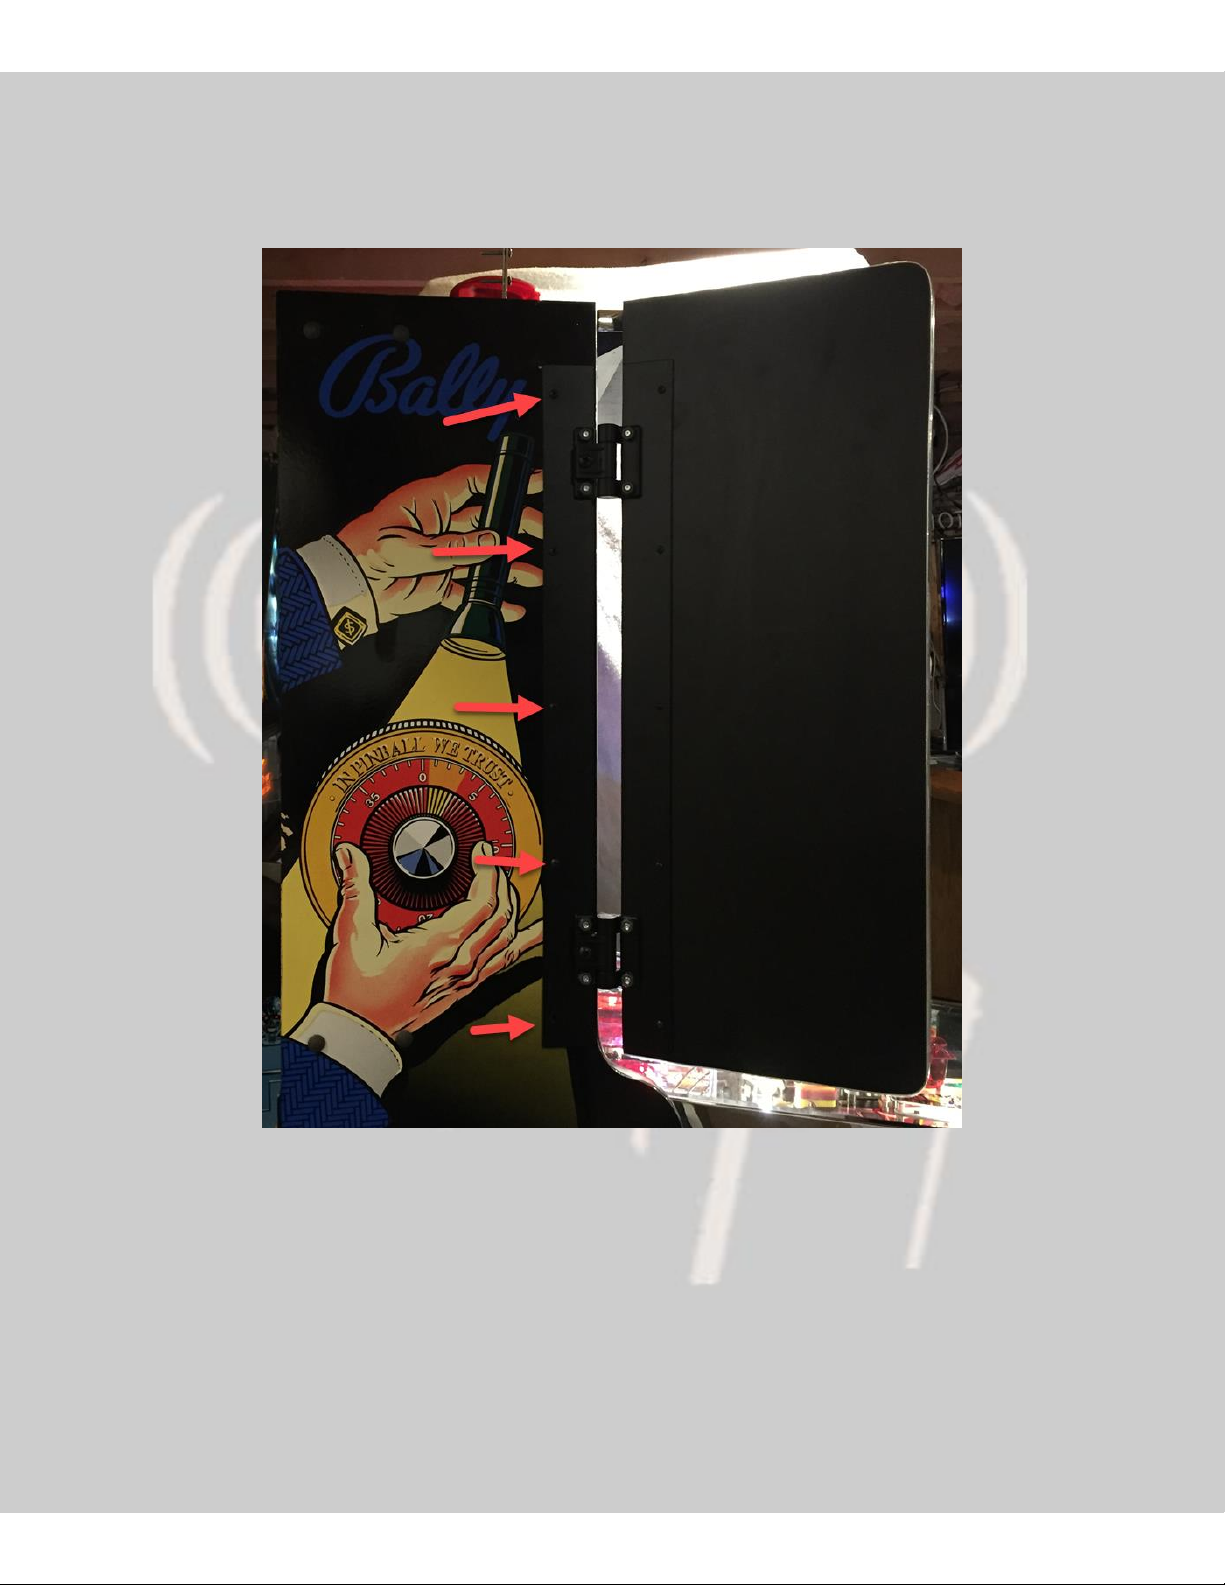
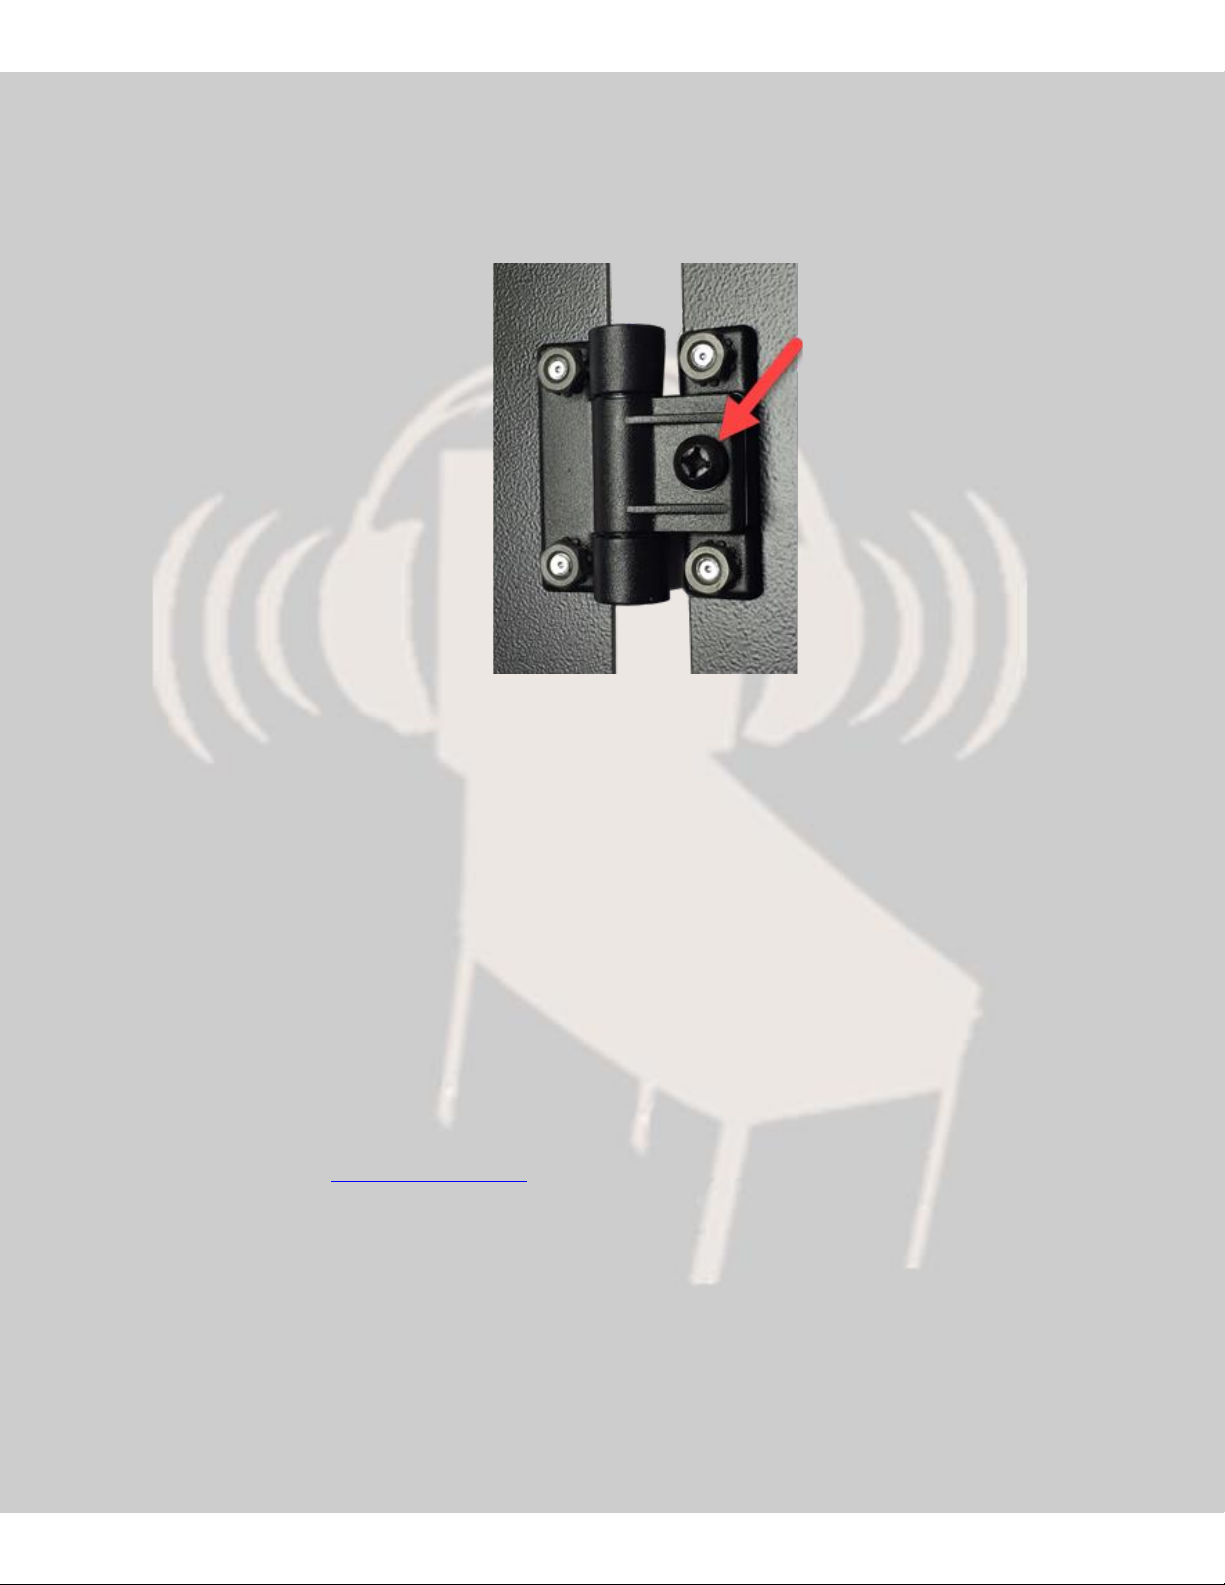
Pinnovators 330.128.000 User manual

1
Installation Manual
for
Safe Cracker Hinge Kit
with doors (330.128.000)
and
Safe Cracker Hinge Kit
(330.129.000)
Version 1.0 June 24, 2023
Contents
Warnings and Agreements ................................2
1. What’s included in the Kits........................3
Safe Cracker Hinge Kit with Doors.................3
Safe Cracker Hinge Kit....................................3
1. Requirements ............................................4
2. Preparation................................................4
3. Back box installation for machines without
doors..................................................................5
4. Decals.........................................................7
5. Door hinge installation for machines with
existing doors.....................................................8
6. Adjustments...............................................9
7. Closing Statements....................................9

2
Warnings and Agreements
Welcome! The Pinnovators Safecracker kit has been designed for simplicity of installation! As with any pinball
machine modification and add on kit there is a required level of expertise for the installation. If you are not
proficient in basic pinball parts installation, we recommend having our kit installed by someone who is proficient
with the basics of pinball repair. Pinnovators requires our kit to be installed by an experienced pinball service
technician with basic electrical skills. As with any electrical piece of equipment a danger does exist and you must
agree not to hold Pinnovators responsible for any injury, damages, etc. before continuing.
Power Cord: ALWAYS UNPLUG THE POWER CORD for safety when working on your pinball machine!
Playfield Propping: Pinnovators highly advise following playfield propping instruction for your pinball machine.
These instructions are typically found inside the Operators Manual for each machine. Failure to follow these
instructions can cause fatal injuries or even death. Pinnovators also recommends having an assistant hold a
propped playfield in the up position when servicing under the playfield.

3
1. What’s included in the Kits
Safe Cracker Hinge Kit with Doors
Item
Part Number
Picture
1 & 2 Doors
Left: 600.067
Right: 600.068
3. Hardware Kit:
Black 8/32 x 3/4
Machine Screw
600.065
Safe Cracker Hinge Kit
Item
Part Number
Picture
1. Hinge
assemblies
600.066
2. Hardware kit
600.070
3. Hardware kit:
Black 8/32 x ¾
Machine Screw
600.065

4
1. Requirements
Tools: Phillips screwdriver. Some systems may require a security bit to remove the attached doors.
2. Preparation
Unplug the pinball machine!

5
3. Back box installation for machines without doors
Remove the five mounting screws on each side of the backbox. Some machines may have security
screws in these locations. You can try and use a small tipped screwdriver to remove those security
screws.

6
Install the left door panel as shown using the included black 8/32 x 3/4 machine screws (Item #3). If for some
reason your machine does not have the factory holes on the back box you can use the included black sheet metal
screws to attach the doors.
Install the right door the same manner.

7
4. Decals
Decals are available on eBay.

8
5. Door hinge installation for machines with existing doors
Remove the existing left and right doors by removing the five mounting screws on each side of the back box.
Some machines may have security screws in these locations. You can try and use a small tipped
screwdriver to remove those security screws.
Remove the angle brackets from the back of the doors.
Attach the new Pinnovators brackets to the doors using the original hardware or the included screws in your kit.
(Item #2)
Install the left door panel as shown using the included black 8/32 x 3/4 machine screws (Item #3). If for some
reason your machine does not have factory holes in the back box you can use the included black sheet metal
screws to attach the doors.

9
6. Adjustments
The door friction can be adjusted using the large Phillips screw on the hinges. The hinges friction is set
for a reasnobale amount but you may want to adjust it to your liking.
7. Closing Statements
We appreciate your business!
Thank you for purchasing our products. We try our best to make pinball products that we find useful and sell them
for a fair price. We keep our eyes open for useful pinball product ideas we are pinball people too!
Warranty and repairs
Pinnovators will stand behind everything we sell. If our product ever fails, contact us and we will make it right!
(Even if you didn’t make the original purchase or break our product)
Contact Us
Please contact us with any ideas or suggestions for making our products better!
We can be reached at: Sales@Pinnovators.com
Thanks,
The Pinnovators team
This manual suits for next models
1
Table of contents
Other Pinnovators Pinball Machine manuals