manuals.online logo
Brands
  1. Home
  2. •
  3. Brands
  4. •
  5. Pioneer
  6. •
  7. Car Receiver
  8. •
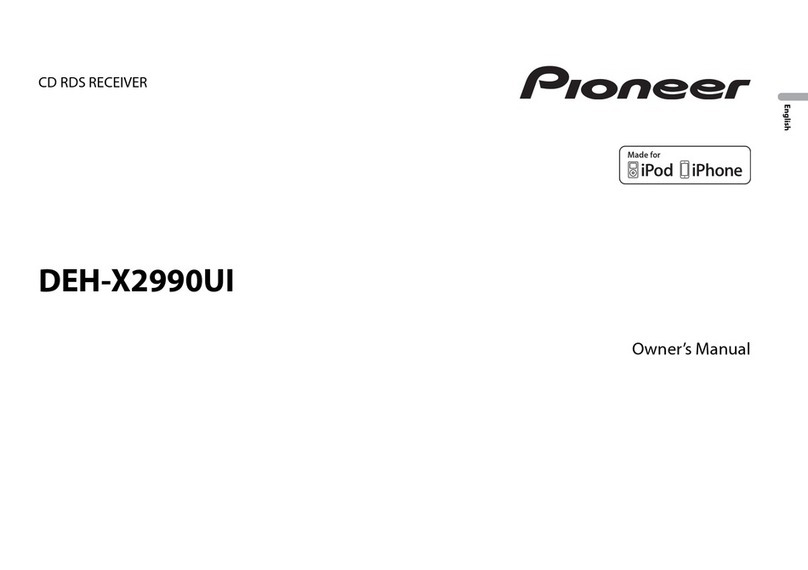
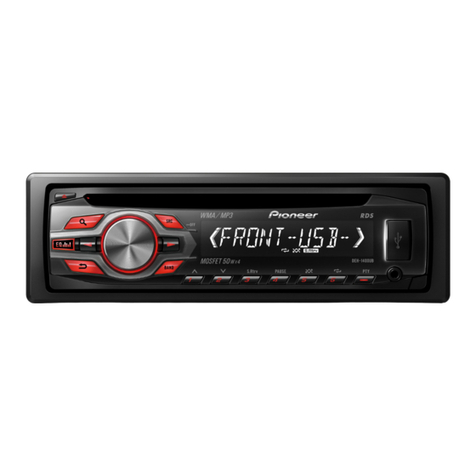
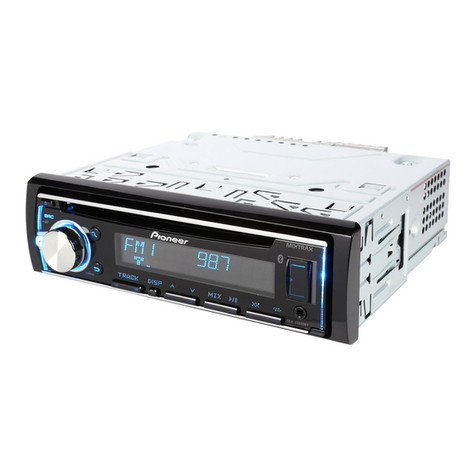
  9. Pioneer DEH-X1650UBG User manual

Pioneer DEH-X1650UBG User manual

Black plate (1,1)
Owner’s Manual
用戶手冊
ﺩﻟﻴﻞﺍﻟﻤﺎﻟﻚ
ﺩﻓﺘﺮﭼﻪﺭﺍﻫﻨﻤﺎﯼﮐﺎﺭﺑﺮ
CD RDS RECEIVER
CD RDS 接收機
ﻣﺸﻐﻞﺍﺳﻄﻮﺍﻧﺎﺕCDﻣﻊﺭﺍﺩﻳﻮRDS
ﺩﺳﺘﮕﺎﻩﮔﯿﺮﻧﺪﻩCD RDS
DEH-X1650UB
DEH-X1650UBG
<QRD3207-A>1
English ﻓﺎﺭﺳﯽﺍﻟﻌﺮﺑﻴﺔ中文
Black plate (2,1)
Thank you for purchasing this PIONEER
product
To ensure proper use, please read through this
manual before using this product. It is especially
important that you read and observe WARN-
INGs and CAUTIONs in this manual. Please
keep the manual in a safe and accessible place for
future reference.
About this unit
WARNING
!Do not attempt to install or service this
product by yourself. Installation or serv-
icing of this product by persons without
training and experience in electronic
equipment and automotive accessories
may be dangerous and could expose you
to the risk of electric shock, injury or
other hazards.
!Do not attempt to operate the unit while driv-
ing. Make sure to pull off the road and park
your vehicle in a safe location before at-
tempting to use the controls on the device.
CAUTION
!Do not allow this unit to come into contact
with liquids. Electrical shock could result.
Also, damage to this unit, smoke, and over-
heating could result from contact with
liquids.
!Always keep the volume low enough to hear
outside sounds.
!Avoid exposure to moisture.
CAUTION
This product is a class 1 laser product classi-
fied under the Safety of laser products, IEC
60825-1:2007.
If you experience problems
Should this unit fail to work properly, please con-
tact your dealer or nearest authorized PIONEER
Service Station.
Head unit
71 4 6
3
2
9
a de
8
5
c
b
1h(eject)
2SRC/OFF
3MULTI-CONTROL (M.C.)
4(list)
5DISP/DISP OFF
6Disc loading slot
7USB port
8EQ
9BAND
a(back)/DIMMER (dimmer)
bc/d
c1/to 6/
dAUX input jack (3.5 mm stereo jack)
eDetach button
CAUTION
Use an optional Pioneer USB cable (CD-U50E)
to connect the USB storage device as any device
connected directly to the unit will protrude out
from the unit, which could be dangerous.
Remote control
f
j
i
g
h
k
9
m
l
b
2
fVOLUME
Press to increase or decrease volume.
gMUTE
Press to mute. Press again to unmute.
h
a/b
Press to recall preset stations.
Press to select the next/previous folder.
iAUDIO
Press to select an audio function.
j
DISP/SCRL
Press to select different displays.
Press and hold to turn dimmer on or off.
ke
Press to pause or resume playback.
lFUNCTION
Press to select functions.
m
LIST/ENTER
Press to display the list depending on the
source.
While in the operating menu, press to con-
trol functions.
Before you start
2
Section
Using this unit
En
01
02
<QRD3207-A>2
Black plate (3,1)
Display indication
21 3 75
9
4 6 8
a
1(list)
2Sub information section
3TA (traffic announcements)
4TP (traffic program identification)
5(sound retriever)
6LOC (local seek tuning)
7(repeat)
8(random)
9
Main information section
!Tuner: band and frequency
!RDS: program service name, PTY infor-
mation and other literal information
!CD player and USB storage device:
elapsed playback time and text informa-
tion
aAppears when a lower tier of folder or menu
exists.
Set up menu
1 After installation of this unit, turn the
ignition switch to ON.
SET UP appears.
2 Turn M.C. to switch to YES.
#If you do not use the unit for 30 seconds, the set
up menu will not be displayed.
#If you prefer not to set up at this time, turn M.C.
to switch to NO.
3 Press M.C. to select.
4 Follow these steps to set the menu.
To proceed to the next menu option, you need to
confirm your selection.
CLOCK SET (setting the clock)
1Turn M.C. to adjust hour.
2Press M.C. to select minute.
3Turn M.C. to adjust minute.
4Press M.C. to confirm the selection.
FM STEP (FM tuning step)
Use FM STEP to set FM tuning step options (seek
step settings).
1Turn M.C. to select the FM tuning step.
100 (100 kHz)—50 (50 kHz)
2Press M.C. to confirm the selection.
!The manual tuning step is fixed at 50 kHz.
MW STEP (MW tuning step)
Use MW STEP to set MW tuning step options
(seek step and manual tuning step settings).
1Turn M.C. to select the MW tuning step.
9(9 kHz)—10 (10 kHz)
2Press M.C. to confirm the selection.
QUIT appears.
5 To finish your settings, turn M.C. to select
YES.
#If you prefer to change your setting again, turn
M.C. to switch to NO.
6 Press M.C. to select.
Notes
!You can set up the menu options from the
system menu and initial menu. For details
about the settings, refer to System menu on
page 7 and Initial menu on page 7.
!You can cancel set up menu by pressing
SRC/OFF.
Basic operations
Important
!Handle the front panel with care when re-
moving or attaching it.
!Avoid subjecting the front panel to excessive
shock.
!Keep the front panel out of direct sunlight
and high temperatures.
!To avoid damaging the device or vehicle inte-
rior, remove any cables and devices attached
to the front panel before detaching it.
Removing the front panel
1Press the detach button to release the front
panel.
2Push the front panel upward (M) and then pull
it toward (N) you.
3Always store the detached front panel in a pro-
tective case or bag.
Re-attaching the front panel
1Slide the front panel to the left.
2Press the right side of the front panel until it is
firmly seated.
Forcing the front panel into place may result in
damage to the front panel or head unit.
Turning the unit on
1Press SRC/OFF to turn the unit on.
Turning the unit off
1Press and hold SRC/OFF until the unit turns
off.
Selecting a source
1Press SRC/OFF to cycle between:
RADIO—CD—USB—AUX
!USB MTP displays while the MTP connection
is in use.
Adjusting the volume
1Turn M.C. to adjust the volume.
English
Using this unit
3
Section
Using this unit
En
02
<QRD3207-A>3
Black plate (4,1)
Note
When this unit’s blue/white lead is connected to
the vehicle’s auto-antenna relay control termi-
nal, the vehicle’s antenna extends when this
unit’s source is turned on. To retract the anten-
na, turn the source off.
Use and care of the remote
control
Using the remote control
1Point the remote control in the direction of the
front panel to operate.
When using for the first time, pull out the film
protruding from the tray.
Replacing the battery
1Slide the tray out on the back of the remote
control.
2Insert the battery with the plus (+) and minus
(–) poles aligned properly.
WARNING
!Keep the battery out of the reach of children.
Should the battery be swallowed, consult a
doctor immediately.
!Batteries (battery pack or batteries installed)
must not be exposed to excessive heat such
as sunshine, fire or the like.
CAUTION
!Remove the battery if the remote control is
not used for a month or longer.
!There is a danger of explosion if the battery is
incorrectly replaced. Replace only with the
same or equivalent type.
!Do not handle the battery with metallic tools.
!Do not store the battery with metallic ob-
jects.
!If the battery leaks, wipe the remote control
completely clean and install a new battery.
!When disposing of used batteries, comply
with governmental regulations or environ-
mental public institutions’rules that apply in
your country/area.
Important
!Do not store the remote control in high tem-
peratures or direct sunlight.
!The remote control may not function properly
in direct sunlight.
!Do not let the remote control fall onto the
floor, where it may become jammed under
the brake or accelerator pedal.
Frequently used menu
operations
Returning to the previous display
Returning to the previous list (the folder one level
higher)
1Press /DIMMER.
Returning to the ordinary display
Canceling the main menu
1Press BAND.
Returning to the ordinary display from the list
1Press BAND.
Radio
Basic operations
Selecting a band
1Press BAND until the desired band (FM1,
FM2,FM3 for FM, MW or SW1,SW2 for short-
wave) is displayed.
Switching preset stations
1Press cor d.
!Select PCH (preset channel) under SEEK to
use this function.
!Use the aand bon the remote control to
switch between preset stations.
Manual tuning (step by step)
1Press cor d.
!Select MAN (manual tuning) under SEEK to
use this function.
Seeking
1Press and hold cor d, and then release.
You can cancel seek tuning by briefly pressing
cor d.
While pressing and holding cor d, you can
skip stations. Seek tuning starts as soon as
you release cor d.
Notes
!For details about SEEK, refer to SEEK (left/
right key setting) on page 5.
!This unit’s AF (alternative frequencies
search) function can be turned on and off.
AF should be off for normal tuning operation
(refer to AF (alternative frequencies search)
on page 5).
Storing and recalling stations
for each band
Using preset tuning buttons
1 To store: Press and hold down one of the
preset tuning buttons (1/ to 6/ ) until
the number stops flashing.
2 To recall: Press one of the preset tuning
buttons (1/ to 6/ ).
Switching the display
Selecting the desired text information
1Press DISP/DISP OFF to cycle between the fol-
lowing:
!FREQUENCY (program service name or
frequency)
!BRDCST INFO (program service name/PTY
information)
!CLOCK (source name and clock)
Notes
!If the program service name cannot be ac-
quired in FREQUENCY, the broadcast fre-
quency is displayed instead. If the program
service name is detected, the program serv-
ice name will be displayed.
!Depending on the band, text information can
be changed.
!Text information items that can be changed
depend on the area.
Using PTY functions
You can tune in to a station using PTY (program
type) information.
Using this unit
4
Section
Using this unit
En
02
<QRD3207-A>4
Black plate (5,1)
Searching for an RDS station by PTY information
1Press (list).
2Turn M.C. to select a program type.
NEWS/INFO—POPULAR—CLASSICS—
OTHERS
3Press M.C. to begin the search.
The unit searches for a station broadcasting
that type of program. When a station is found,
its program service name is displayed.
!To cancel the search, press M.C. again.
!The program of some stations may differ
from that indicated by the transmitted PTY.
!If no station is broadcasting the type of
program you searched for, NOT FOUND is
displayed for about two seconds and then
the tuner returns to the original station.
Function settings
1 Press M.C. to display the main menu.
2 Turn M.C. to change the menu option
and press to select FUNCTION.
3 Turn M.C. to select the function.
Once selected, the following functions can be
adjusted.
!If MW,SW1 or SW2 is selected, only BSM,
LOCAL and SEEK are available.
BSM (best stations memory)
BSM (best stations memory) automatically stores
the six strongest stations in the order of their sig-
nal strength.
1Press M.C. to turn BSM on.
To cancel, press M.C. again.
REGIONAL (regional)
When AF is used, the regional function limits the
selection of stations to those broadcasting region-
al programs.
1Press M.C. to turn the regional function on or
off.
LOCAL (local seek tuning)
Local seek tuning allows you to tune in to only
those radio stations with sufficiently strong sig-
nals for good reception.
1Press M.C. to select the desired setting.
FM: OFF—LV1 —LV2 —LV3—LV4
MW/shortwave: OFF—LV1—LV2
The highest level setting allows reception of
only the strongest stations, while lower levels
allow the reception of weaker stations.
TA (traffic announcement standby)
1Press M.C. to turn traffic announcement
standby on or off.
AF (alternative frequencies search)
1Press M.C. to turn AF on or off.
NEWS (news program interruption)
1Press M.C. to turn the NEWS function on or
off.
SEEK (left/right key setting)
You can assign a function to the left and right keys
of the unit.
Select MAN (manual tuning) to tune up or down
manually or select PCH (preset channel) to switch
between preset channels.
1Press M.C. to select MAN or PCH.
CD/CD-R/CD-RW and USB
storage devices
MTP connection
MTP-compatible Android devices (running
Android OS 4.0 or higher) can be connected by
MTP connection using the USB source. To con-
nect an Android device, use the cable that came
with the device.
Notes
!This function is not compatible with MIX-
TRAX.
!This function is not compatible with WAV.
Basic operations
Playing a CD/CD-R/CD-RW
1Insert the disc into the disc loading slot with
the label side up.
Ejecting a CD/CD-R/CD-RW
1Press h.
Playing songs on a USB storage device
1Open the USB port cover.
2Plug in the USB storage device using a USB
cable.
Stopping playback of files on a USB storage de-
vice
1You may disconnect the USB storage device at
any time.
Selecting a folder
1Press 1/or 2/ .
Selecting a track
1Press cor d.
Fast forwarding or reversing
1Press and hold cor d.
!When playing compressed audio, there is no
sound during fast forward or reverse.
Returning to root folder
1Press and hold BAND.
Switching between compressed audio and CD-DA
1Press BAND.
Switching between playback memory devices
You can switch between playback memory devices
on USB storage devices with more than one Mass
Storage Device-compatible memory device.
1Press BAND.
!You can switch between up to 32 different
memory devices.
Note
Disconnect USB storage devices from the unit
when not in use.
Operations using the MIXTRAX
button
Turning MIXTRAX on or off
You can use this function when USB is selected as
the source.
You cannot use this function with USB MTP.
1Press 3/MIX to turn MIXTRAX on or off.
!For more details about MIXTRAX, refer to
About MIXTRAX on page 7.
!When MIXTRAX is in use, the sound retriever
function is disabled.
English
Using this unit
5
Section
Using this unit
En
02
<QRD3207-A>5
Black plate (6,1)
Switching the display
Selecting the desired text information
1Press DISP/DISP OFF to cycle between the fol-
lowing:
CD-DA
!ELAPSED TIME (track number and play-
back time)
!CLOCK (source name and clock)
!SPEANA (spectrum analyzer)
CD-TEXT
!TRACK INFO (track title/track artist/disc
title)
!ELAPSED TIME (track number and play-
back time)
!CLOCK (source name and clock)
!SPEANA (spectrum analyzer)
MP3/WMA/WAV
!TRACK INFO (track title/artist name/album
title)
!FILE INFO (file name/folder name)
!ELAPSED TIME (track number and play-
back time)
!CLOCK (source name and clock)
!SPEANA (spectrum analyzer)
Selecting and playing files/
tracks from the name list
1 Press to switch to the file/track name
list mode.
2 Use M.C. to select the desired file name
(or folder name).
Selecting a file or folder
1Turn M.C.
Playing
1When a file or track is selected, press M.C.
Viewing a list of the files (or folders) in the se-
lected folder
1When a folder is selected, press M.C.
Playing a song in the selected folder
1When a folder is selected, press and hold M.C.
Operations using special buttons
Selecting a repeat play range
1Press 6/to cycle between the following:
CD/CD-R/CD-RW
!ALL –Repeat all tracks
!ONE –Repeat the current track
!FLD –Repeat the current folder
USB storage device
!ALL –Repeat all files
!ONE –Repeat the current file
!FLD –Repeat the current folder
Playing tracks in random order
1Press 5/to turn random play on or off.
Tracks in a selected repeat range are played in
random order.
!To change songs during random play, press d
to switch to the next track. Pressing crestarts
playback of the current track from the begin-
ning of the song.
Pausing playback
1Press 4/PAUSE to pause or resume.
Function settings
1 Press M.C. to display the main menu.
2 Turn M.C. to change the menu option
and press to select FUNCTION.
Once selected, the function below can be ad-
justed.
S.RTRV (sound retriever)
Automatically enhances compressed audio and
restores rich sound.
1Press M.C. to select the desired setting.
1—2—OFF (off)
1is effective for low compression rates, and 2
is effective for high compression rates.
Audio adjustments
1 Press M.C. to display the main menu.
2 Turn M.C. to change the menu option
and press to select AUDIO.
3 Turn M.C. to select the audio function.
Once selected, the following audio functions
can be adjusted.
!FADER is not available when SUB.W/SUB.W
is selected in SP-P/O MODE. For details, refer
to SP-P/O MODE (rear output and preout set-
ting) on page 8.
!SUB.W and SUB.W CTRL are not available
when REAR/REAR is selected in
SP-P/O MODE. For details, refer to
SP-P/O MODE (rear output and preout set-
ting) on page 8.
!SUB.W CTRL is not available when SUB.W is
selected in OFF. For details, refer to SUB.W
(subwoofer on/off setting) on page 6.
!SLA is not available when FM is selected as
the source.
FADER (fader adjustment)
1Press M.C. to display the setting mode.
2Turn M.C. to adjust the front/rear speaker bal-
ance.
BALANCE (balance adjustment)
1Press M.C. to display the setting mode.
2Turn M.C. to adjust the left/right speaker bal-
ance.
EQ SETTING (equalizer recall)
1Press M.C. to display the setting mode.
2Turn M.C. to select the equalizer.
POWERFUL—NATURAL—VOCAL—CUS-
TOM1—CUSTOM2—FLAT—SUPER BASS
The equalizer band and equalizer level can be
customized when CUSTOM1 or CUSTOM2 is
selected.
If selecting CUSTOM1 or CUSTOM2, complete
the procedures outlined below. If selecting
other options, press M.C. to return to the pre-
vious display.
!CUSTOM1 can be set separately for each
source.
!CUSTOM2 is a shared setting used in com-
mon for all sources.
3Press M.C. to display the setting mode.
4Press M.C. to cycle between the following:
Equalizer band—Equalizer level
5Turn M.C. to select the desired setting.
Equalizer band: 80HZ—250HZ—800HZ—
2.5KHZ—8KHZ
Equalizer level: +6 to –6
!You can also switch the equalizer by pressing
EQ repeatedly.
LOUDNESS (loudness)
Loudness compensates for deficiencies in the low-
frequency and high-frequency ranges at low vol-
ume.
1Press M.C. to select the desired setting.
OFF (off)—LOW (low)—MID (mid)—HI (high)
SUB.W (subwoofer on/off setting)
Using this unit
6
Section
Using this unit
En
02
<QRD3207-A>6
Black plate (7,1)
This unit is equipped with a subwoofer output
which can be turned on or off.
1Press M.C. to select the desired setting.
NOR (normal phase)—REV (reverse phase)—
OFF (subwoofer off)
SUB.W CTRL (subwoofer adjustment)
Only frequencies lower than those in the selected
range are outputted from the subwoofer.
1Press M.C. to display the setting mode.
2Press M.C. to cycle between the following:
Cut-off frequency—Output level—Slope level
Rates that can be adjusted will flash.
3Turn M.C. to select the desired setting.
Cut-off frequency: 50HZ—63HZ—80HZ—
100HZ—125HZ—160HZ—200HZ
Output level: –24 to +6
Slope level: –12—–24
BASS BOOST (bass boost)
1Press M.C. to display the setting mode.
2Turn M.C. to select a desired level.
0to +6 is displayed as the level is increased or
decreased.
HPF SETTING (high pass filter adjustment)
Use this function when wanting to listen only to
high-frequency sounds. Only frequencies higher
than the high-pass filter (HPF) cutoff are output
from the speakers.
1Press M.C. to display the setting mode.
2Press M.C. to cycle between the following:
Cut-off frequency—Slope level
3Turn M.C. to select the desired setting.
Cut-off frequency: OFF—50HZ—63HZ—80HZ
—100HZ—125HZ—160HZ—200HZ
Slope level: –12—–24
SLA (source level adjustment)
This function prevents the volume from changing
too dramatically when the source switches.
!Settings are based on the FM volume level,
which remains unchanged.
!The MW volume level can also be adjusted
with this function.
1Press M.C. to display the setting mode.
2Turn M.C. to adjust the source volume.
Adjustment range: +4 to –4
System menu
1 Press M.C. to display the main menu.
2 Turn M.C. to change the menu option
and press to select SYSTEM.
3 Turn M.C. to select the system menu
function.
Once selected, the following system menu func-
tions can be adjusted.
CLOCK SET (setting the clock)
1Press M.C. to display the setting mode.
2Press M.C. to select the segment of the clock
display you wish to set.
Hour—Minute
3Turn M.C. to adjust the clock.
12H/24H (time notation)
1Press M.C. to select the desired setting.
12H (12-hour clock)—24H (24-hour clock)
AUTO PI (auto PI seek)
The unit can automatically search for a different
station with the same programming, even during
preset recall.
1Press M.C. to turn Auto PI seek on or off.
AUX (auxiliary input)
Activate this setting when using an auxiliary de-
vice connected to this unit.
1Press M.C. to turn AUX on or off.
DIMMER (dimmer)
1Press M.C. to turn the dimmer on or off.
!You can also change the dimmer setting by
pressing and holding /DIMMER.
About MIXTRAX
MIXTRAX technology is used to insert a variety
of sound effects in between songs, allowing you
to experience your music as a nonstop mix com-
plete with visual effects.
Notes
!Depending on the file/song, sound effects
may not be available.
!Turn MIXTRAX off if the visual effects it pro-
duces have adverse effects on driving. Refer
to Operations using the MIXTRAX button on
page 5.
MIXTRAX menu
1 Press M.C. to display the main menu.
2 Turn M.C. to change the menu option
and press to select MIXTRAX.
3 Turn M.C. to select the MIXTRAX func-
tion.
Once selected, the following MIXTRAX functions
can be adjusted. The function is enabled when
MIXTRAX is on.
SHORT MODE (short playback mode)
You can select the length of the playback time.
1Press M.C. to display the setting mode.
2Turn M.C. to select the desired setting.
1.0 MIN (1.0 minute)—1.5 MIN (1.5 minutes)—
2.0 MIN (2.0 minutes)—2.5 MIN (2.5 minutes)
—3.0 MIN (3.0 minutes)—OFF (off)
MIX PATTERN (mix pattern)
The MIXTRAX special effects display changes with
changes in the audio level.
1Press M.C. to display the setting mode.
2Turn M.C. to select the desired setting.
!SOUND LEVEL –The mix pattern changes
according to the sound level.
!LOW PASS –The mix pattern changes ac-
cording to the bass level.
!RANDOM –The mix pattern changes ran-
domly according to the sound level mode
and low pass mode.
DISP FX (display effect)
The MIXTRAX special effects display can be turned
on or off.
1Press M.C. to select the desired setting.
ON (MIXTRAX special effects display)—OFF
(normal display)
CUT IN FX (manual cut-in effect)
You can turn on or off the MIXTRAX sound effects
while manually changing tracks.
1Press M.C. to select the desired setting.
ON (on)—OFF (off)
Initial menu
1 Press and hold SRC/OFF until the unit
turns off.
2 Press M.C. to display the main menu.
English
Using this unit
7
Section
Using this unit
En
02
<QRD3207-A>7
Black plate (8,1)
3 Turn M.C. to change the menu option
and press to select INITIAL.
4 Turn M.C. to select the initial menu func-
tion.
Once selected, the following initial menu func-
tions can be adjusted.
FM STEP (FM tuning step)
1Press M.C. to select the FM tuning step.
100 (100 kHz)—50 (50 kHz)
MW STEP (MW tuning step)
1Press M.C. to select the MW tuning step.
9(9 kHz)—10 (10 kHz)
SP-P/O MODE (rear output and preout setting)
The rear speaker leads output and the RCA output
of this unit can be used to connect a full-range
speaker or subwoofer. Select a suitable option for
your connection.
1Press M.C. to display the setting mode.
2Turn M.C. to select the desired setting.
!REAR/SUB.W –Select when there is a full-
range speaker connected to the rear speak-
er leads output and there is a subwoofer
connected to the RCA output.
!SUB.W/SUB.W –Select when there is a
subwoofer connected directly to the rear
speaker leads output without any auxiliary
amp and there is a subwoofer connected
to the RCA output.
!REAR/REAR –Select when there is a full-
range speaker connected to the rear speak-
er leads output and the RCA output.
If there is a full-range speaker connected to
the rear speaker leads output and the RCA
output is not used, you may select either
REAR/SUB.W or REAR/REAR.
System menu
1 Press and hold SRC/OFF until the unit
turns off.
2 Press M.C. to display the main menu.
3 Turn M.C. to change the menu option
and press to select SYSTEM.
4 Turn M.C. to select the system menu
function.
For details, refer to System menu on page 7.
Using an AUX source
1 Insert the stereo mini plug into the AUX
input jack.
2 Press SRC/OFF to select AUX as the
source.
Note
AUX cannot be selected unless the auxiliary set-
ting is turned on. For more details, refer to AUX
(auxiliary input) on page 7.
Switching the display
Selecting the desired text information
1Press DISP/DISP OFF to cycle between the fol-
lowing:
!Source name
!Source name and clock
Turning the display off or on
%Press and hold DISP/DISP OFF until the
display turns on or off.
If an unwanted display appears
Turn off the unwanted display using the proce-
dures listed below.
1 Press M.C. to display the main menu.
2 Turn M.C. to change the menu option
and press to select SYSTEM.
3 Turn M.C. to display DEMO OFF and press
to select.
4 Turn M.C. to switch to YES.
5 Press M.C. to select.
Using this unit
8
Section
Using this unit
En
02
<QRD3207-A>8
Black plate (9,1)
Connections
WARNING
!Use speakers over 50 W (output value) and
between 4 Wto 8 W(impedance value). Do
not use 1 Wto 3 Wspeakers for this unit.
!The black cable is ground. When installing
this unit or power amp (sold separately),
make sure to connect the ground wire first.
Ensure that the ground wire is properly con-
nected to metal parts of the car’s body. The
ground wire of the power amp and the one of
this unit or any other device must be con-
nected to the car separately with different
screws. If the screw for the ground wire loos-
ens or falls out, it could result in fire, genera-
tion of smoke or malfunction.
Ground wire
Metal parts of car’s body
POWER AMP
Other devices
(Another electronic
device in the car)
Important
!When installing this unit in a vehicle without
an ACC (accessory) position on the ignition
switch, failure to connect the red cable to the
terminal that detects operation of the ignition
key may result in battery drain.
O
N
S
T
A
R
T
O
F
F
ACC position No ACC position
!Use this unit with a 12-volt battery and nega-
tive grounding only. Failure to do so may re-
sult in a fire or malfunction.
!To prevent a short-circuit, overheating or mal-
function, be sure to follow the directions
below.
—Disconnect the negative terminal of the bat-
tery before installation.
—Secure the wiring with cable clamps or adhe-
sive tape. Wrap adhesive tape around wiring
that comes into contact with metal parts to
protect the wiring.
—Place all cables away from moving parts,
such as the shift lever and seat rails.
—Place all cables away from hot places, such
as near the heater outlet.
—Do not connect the yellow cable to the battery
by passing it through the hole to the engine
compartment.
—Cover any disconnected cable connectors
with insulating tape.
—Do not shorten any cables.
—Never cut the insulation of the power cable of
this unit in order to share the power with
other devices. The current capacity of the
cable is limited.
—Use a fuse of the rating prescribed.
—Never wire the negative speaker cable directly
to ground.
—Never band together negative cables of multi-
ple speakers.
!When this unit is on, control signals are sent
through the blue/white cable. Connect this
cable to the system remote control of an ex-
ternal power amp or the vehicle’s auto-anten-
na relay control terminal (max. 300 mA
12 V DC). If the vehicle is equipped with a
glass antenna, connect it to the antenna
booster power supply terminal.
!Never connect the blue/white cable to the
power terminal of an external power amp.
Also, never connect it to the power terminal
of the auto antenna. Doing so may result in
battery drain or a malfunction.
This unit
345
21
1Power cord input
2Rear output or subwoofer output
3Antenna input
4Fuse (10 A)
5Wired remote input
Hard-wired remote control adapter can be
connected (sold separately).
Power cord
Perform these connections when not connect-
ing a rear speaker lead to a subwoofer.








1
8
9
c
d
6
32
4
5
7
a
b
e
f
h
g
LR
F
R
Perform these connections when using a sub-
woofer without the optional amplifier.










1
8
9
c
d
6
32
4
7
a
b
a
b
e
f
h
g
LR
F
SW
i
j
d
c
k l
1To power cord input
2Left
3Right
4Front speaker
5Rear speaker
6White
7White/black
8Gray
9Gray/black
aGreen
bGreen/black
cViolet
dViolet/black
eBlack (chassis ground)
Connect to a clean, paint-free metal location.
fYellow
Connect to the constant 12 V supply termi-
nal.
gRed
Connect to terminal controlled by ignition
switch (12 V DC).
hBlue/white
Connect to system control terminal of the
power amp or auto-antenna relay control ter-
minal (max. 300 mA 12 V DC).
iSubwoofer (4 W)
English
Installation
9
Section
Installation
En
03
<QRD3207-A>9
Black plate (10,1)
jWhen using a subwoofer of 70 W (2 W), be
sure to connect the subwoofer to the violet
and violet/black leads of this unit. Do not
connect anything to the green and green/
black leads.
kNot used.
lSubwoofer (4 W)×2
Notes
!When using a two-speaker system, do not
connect anything to speaker leads that are
not connected to a speaker.
!Change the initial menu of this unit. Refer to
SP-P/O MODE (rear output and preout set-
ting) on page 8.
The subwoofer output of this unit is monau-
ral.
Power amp (sold separately)
Perform these connections when using the op-
tional amplifier.




13
2
4
55
1System remote control
Connect to Blue/white cable.
2Power amp (sold separately)
3Connect with RCA cables (sold separately)
4To Rear output or subwoofer output
5Rear speaker or subwoofer
Installation
Important
!Check all connections and systems before
final installation.
!Do not use unauthorized parts as this may
cause malfunctions.
!Consult your dealer if installation requires
drilling of holes or other modifications to the
vehicle.
!Do not install this unit where:
—it may interfere with operation of the vehicle.
—it may cause injury to a passenger as a result
of a sudden stop.
!The semiconductor laser will be damaged if
it overheats. Install this unit away from hot
places such as near the heater outlet.
!Optimum performance is obtained when the
unit is installed at an angle of less than 60°.
60°
!When installing, to ensure proper heat dis-
persal when using this unit, make sure you
leave ample space behind the rear panel and
wrap any loose cables so they are not block-
ing the vents.
5cmcm
Leave ample
space 5 cm
5 cm
DIN front/rear mount
This unit can be properly installed using either
front-mount or rear-mount installation.
Use commercially available parts when instal-
ling.
DIN Front-mount
1 Insert the mounting sleeve into the dash-
board.
For installation in shallow spaces, use the sup-
plied mounting sleeve. If there is enough space,
use the mounting sleeve that came with the ve-
hicle.
2 Secure the mounting sleeve by using a
screwdriver to bend the metal tabs (90°) into
place.
1
2
1Dashboard
2Mounting sleeve
#Make sure that the unit is installed securely in
place. An unstable installation may cause skipping
or other malfunctions.
DIN Rear-mount
1 Determine the appropriate position
where the holes on the bracket and the side
of the unit match.
2 Tighten two screws on each side.
1
2
3
1Truss screw (5 mm × 8 mm)
2Mounting bracket
3Dashboard or console
Removing the unit
1 Remove the trim ring.
1Trim ring
2Notched tab
!Releasing the front panel allows easier ac-
cess to the trim ring.
!When reattaching the trim ring, point the
side with the notched tab down.
2 Insert the supplied extraction keys into
both sides of the unit until they click into
place.
3 Pull the unit out of the dashboard.
Removing and re-attaching the
front panel
You can remove the front panel to protect your
unit from theft.
For details, refer to Removing the front panel and
Re-attaching the front panel on page 3.
Installation
10
Section
Installation
En
03
<QRD3207-A>10
Black plate (11,1)
Troubleshooting
Symptoms are written in bold and causes in reg-
ular, non-indented text. Regular, indented text is
used to indicate actions to be taken.
The display automatically returns to the ordinary
display.
You did not perform any operation within about 30
seconds.
Perform operation again.
The repeat play range changes unexpectedly.
Depending on the repeat play range, the selected
range may change when another folder or track is
being selected or during fast forwarding/reversing.
Select the repeat play range again.
A subfolder is not played back.
Subfolders cannot be played when FLD (folder re-
peat) is selected.
Select another repeat play range.
NO XXXX appears when a display is changed
(NO TITLE, for example).
There is no embedded text information.
Switch the display or play another track/file.
The unit is malfunctioning.
There is interference.
You are using a device, such as a cellular phone,
that may cause audible interference.
Move electrical devices that may be causing the
interference away from the unit.
Error messages
When you contact your dealer or your nearest
Pioneer Service Center, be sure to note the error
message.
Symptoms are written in bold and causes in reg-
ular, non-indented text. Regular, indented text is
used to indicate actions to be taken.
Common
AMP ERROR
This unit fails to operate or the speaker connection is
incorrect; the protective circuit is activated.
Check the speaker connection. If the message
fails to disappear even after the engine is
switched off/on, contact your dealer or an
authorized Pioneer Service Station for
assistance.
CD player
ERROR-07, 11, 12, 17, 30
The disc is dirty.
Clean the disc.
The disc is scratched.
Replace the disc.
ERROR-07, 10, 11, 12, 15, 17, 30, A0
There is an electrical or mechanical error.
Turn the ignition switch OFF and back ON, or
switch to a different source, then back to the CD
player.
ERROR-15
The inserted disc is blank.
Replace the disc.
ERROR-23
Unsupported CD format.
Replace the disc.
FORMAT READ
Sometimes there is a delay between the start of play-
back and when you start to hear any sound.
Wait until the message disappears and you hear
sound.
NO AUDIO
The inserted disc does not contain any playable files.
Replace the disc.
SKIPPED
The inserted disc contains DRM protected files.
The protected files are skipped.
PROTECT
All the files on the inserted disc are embedded with
DRM.
Replace the disc.
USB storage device
FORMAT READ
Sometimes there is a delay between the start of play-
back and when you start to hear any sound.
Wait until the message disappears and you hear
sound.
NO AUDIO
There are no songs.
Transfer the audio files to the USB storage device
and connect.
The connected USB storage device has security en-
abled.
Follow the USB storage device instructions to
disable the security.
SKIPPED
The connected USB storage device contains DRM
protected files.
The protected files are skipped.
PROTECT
All the files on the connected USB storage device
are embedded with DRM.
Replace the USB storage device.
N/A USB
The connected USB device is not supported by this
unit.
!Connect a USB Mass Storage Class compliant
device.
!Disconnect your device and replace it with a
compatible USB storage device.
CHECK USB
The USB connector or USB cable has short-
circuited.
Check that the USB connector or USB cable is
not caught in something or damaged.
The connected USB storage device consumes more
than maximum allowable current.
Disconnect the USB storage device and do not
use it. Turn the ignition switch to OFF, then to
ACC or ON and then connect only compliant
USB storage devices.
ERROR-19
Communication failed.
Perform one of the following operations.
–Turn the ignition switch OFF and back ON.
–Disconnect the USB storage device.
–Change to a different source.
Then, return to the USB source.
ERROR-23
USB storage device was not formatted with FAT12,
FAT16 or FAT32.
USB storage device should be formatted with
FAT12, FAT16 or FAT32.
English
Additional information
11
Appendix
Additional information
En
<QRD3207-A>11
Black plate (12,1)
STOP
There are no songs in the current list.
Select a list that contains songs.
Handling guidelines
Discs and player
Use only discs that feature either of the following
two logos.
Use 12-cm discs.
Use only conventional, fully circular discs.
The following types of discs cannot be used with
this unit:
!DualDiscs
!8-cm discs: Attempts to use such discs with
an adaptor may cause the unit to malfunction.
!Oddly shaped discs
!Discs other than CDs
!Damaged discs, including discs that are
cracked, chipped or warped
!CD-R/RW discs that have not been finalized
Do not touch the recorded surface of the discs.
Store discs in their cases when not in use.
Do not attach labels, write on or apply chemicals
to the surface of the discs.
To clean a CD, wipe the disc with a soft cloth out-
ward from the center.
Condensation may temporarily impair the player’s
performance. Let it rest for about one hour to ad-
just to a warmer temperature. Also, wipe any
damp discs off with a soft cloth.
Playback of discs may not be possible because of
disc characteristics, disc format, recorded applica-
tion, playback environment, storage conditions,
and so on.
Road shocks may interrupt disc playback.
When using discs that can be printed on label sur-
faces, check the instructions and the warnings of
the discs. Depending on the discs, inserting and
ejecting may not be possible. Using such discs
may result in damage to this equipment.
Do not attach commercially available labels or
other materials to the discs.
!The discs may warp making the disc unplay-
able.
!The labels may come off during playback and
prevent ejection of the discs, which may result
in damage to the equipment.
USB storage device
Connections via USB hub are not supported.
Do not connect anything other than a USB stor-
age device.
Firmly secure the USB storage device when driv-
ing. Do not let the USB storage device fall onto the
floor, where it may become jammed under the
brake or accelerator pedal.
Depending on the USB storage device, the follow-
ing problems may occur.
!Operations may vary.
!The storage device may not be recognized.
!Files may not be played back properly.
!The device may cause audible interference
when you are listening to the radio.
Compressed audio
compatibility (disc, USB)
WMA
File extension: .wma
Bit rate: 48 kbps to 320 kbps (CBR), 48 kbps to
384 kbps (VBR)
Sampling frequency: 32 kHz, 44.1 kHz, 48 kHz
Windows MediaäAudio Professional, Lossless,
Voice/DRM Stream/Stream with video: Not com-
patible
MP3
File extension: .mp3
Bit rate: 8 kbps to 320 kbps (CBR), VBR
Sampling frequency: 8 kHz to 48 kHz (32 kHz,
44.1 kHz, 48 kHz for emphasis)
Compatible ID3 tag version: 1.0, 1.1, 2.2, 2.3, 2.4
(ID3 tag Version 2.x is given priority over Version
1.x.)
M3u playlist: Not compatible
MP3i (MP3 interactive), mp3 PRO: Not compatible
WAV
File extension: .wav
Quantization bits: 8 and 16 (LPCM), 4 (MS
ADPCM)
Sampling frequency: 16 kHz to 48 kHz (LPCM),
22.05 kHz and 44.1 kHz (MS ADPCM)
!You cannot use this function with USB MTP.
Supplemental information
Only the first 32 characters can be displayed as a
file name (including the file extension) or a folder
name.
This unit may not work properly depending on the
application used to encode WMA files.
There may be a slight delay at the start of playback
of audio files embedded with image data or audio
files stored on a USB storage device that has nu-
merous folder hierarchies.
Disc
Playable folder hierarchy: up to eight tiers (A prac-
tical hierarchy is less than two tiers.)
Playable folders: up to 99
Playable files: up to 999
File system: ISO 9660 Level 1 and 2, Romeo, Joliet
Multi-session playback: Compatible
Packet write data transfer: Not compatible
Regardless of the length of blank sections be-
tween the songs from the original recording, com-
pressed audio discs play with a short pause
between songs.
USB storage device
Playable folder hierarchy: up to eight tiers (A prac-
tical hierarchy is less than two tiers.)
Playable folders: up to 500
Playable files: up to 15 000
Playback of copyright-protected files: Not compati-
ble
Additional information
12
Appendix
Additional information
En
<QRD3207-A>12
Black plate (13,1)
Partitioned USB storage device: Only the first par-
tition can be played.
There may be a slight delay when starting play-
back of audio files on a USB storage device with
numerous folder hierarchies.
CAUTION
!Pioneer cannot guarantee compatibility with
all USB mass storage devices and assumes
no responsibility for any loss of data on
media players, smart phones, or other devi-
ces while using this product.
!Do not leave discs or a USB storage device
in any place that is subject to high tempera-
tures.
Sequence of audio files
The user cannot assign folder numbers and
specify playback sequences with this unit.
Example of a hierarchy






Level 1 Level 2 Level 3 Level 4
01
02
03
04
05
: Folder
: Compressed
audio file
01 to 05: Folder
number
1to 6: Playback
sequence
Disc
Folder selection sequence or other operation
may differ depending on the encoding or writing
software.
USB storage device
Playback sequence is the same as recorded se-
quence in the USB storage device.
To specify the playback sequence, the following
method is recommended.
1Create a file name that includes numbers
that specify the playback sequence (e.g.,
001xxx.mp3 and 099yyy.mp3).
2Put those files into a folder.
3Save the folder containing files on the USB
storage device.
However, depending on the system environment,
you may not be able to specify the playback se-
quence.
For USB portable audio players, the sequence is
different and depends on the player.
Copyright and trademark
MP3
Supply of this product only conveys a license for
private, non-commercial use and does not con-
vey a license nor imply any right to use this prod-
uct in any commercial (i.e. revenue-generating)
real time broadcasting (terrestrial, satellite,
cable and/or any other media), broadcasting/
streaming via internet, intranets and/or other
networks or in other electronic content distribu-
tion systems, such as pay-audio or audio-on-de-
mand applications. An independent license for
such use is required. For details, please visit
http://www.mp3licensing.com.
WMA
Windows Media is either a registered trademark
or trademark of Microsoft Corporation in the
United States and/or other countries.
This product includes technology owned by
Microsoft Corporation and cannot be used or
distributed without a license from Microsoft
Licensing, Inc.
Androidä
Android is a trademark of Google Inc.
MIXTRAX
MIXTRAX is a trademark of the PIONEER
CORPORATION.
Specifications
General
Rated power source ......... 14.4 V DC
(allowable voltage range:
12.0 V to 14.4 V DC)
Grounding system ............ Negative type
Maximum current consumption
................................... 10.0 A
Dimensions (W × H × D):
DIN
Chassis ............................ 178 mm × 50 mm × 165 mm
Nose ................................ 188 mm × 58 mm × 16 mm
D
Chassis ............................ 178 mm × 50 mm × 165 mm
Nose ................................ 170 mm × 46 mm × 16 mm
Weight ............................. 1 kg
Audio
Maximum power output ... 50 W × 4
70 W × 1/2 W(for subwoofer)
Continuous power output
................................... 22 W × 4 (50 Hz to 15 000 Hz,
5 % THD, 4 Wload, both chan-
nels driven)
Load impedance .............. 4 W(4 Wto 8 Wallowable)
Preout maximum output level
................................... 2.0 V
Loudness contour ............ +10 dB (100 Hz), +6.5 dB
(10 kHz) (volume: –30 dB)
Equalizer (5-Band Graphic Equalizer):
Frequency ........................ 80 Hz/250 Hz/800 Hz/2.5 kHz/
8 kHz
Equalization range ........... ±12 dB (2 dB step)
Subwoofer (mono):
Frequency ........................ 50 Hz/63 Hz/80 Hz/100 Hz/
125 Hz/160 Hz/200 Hz
Slope ............................... –12 dB/oct, –24 dB/oct
Gain ................................ +6 dB to –24 dB
Phase .............................. Normal/Reverse
CD player
System ............................ Compact disc audio system
Usable discs .................... Compact disc
Signal-to-noise ratio ......... 94 dB (1 kHz) (IEC-A network)
Number of channels ........ 2 (stereo)
MP3 decoding format ...... MPEG-1 & 2 Audio Layer 3
English
Additional information
13
Appendix
Additional information
En
<QRD3207-A>13
Black plate (14,1)
WMA decoding format ..... Ver. 7, 7.1, 8, 9, 10, 11, 12 (2ch
audio)
(Windows Media Player)
WAV signal format ........... Linear PCM & MS ADPCM
(Non-compressed)
USB
USB standard specification
................................... USB 2.0 full speed
Maximum current supply
................................... 1 A
USB Class ....................... MSC (Mass Storage Class)
File system ....................... FAT12, FAT16, FAT32
MP3 decoding format ...... MPEG-1 & 2 Audio Layer 3
WMA decoding format ..... Ver. 7, 7.1, 8, 9, 10, 11, 12 (2ch
audio)
(Windows Media Player)
WAV signal format ........... Linear PCM & MS ADPCM
(Non-compressed)
FM tuner
Frequency range .............. 87.5 MHz to 108.0 MHz
Usable sensitivity ............. 9 dBf (0.8 µV/75 W, mono, S/N:
30 dB)
Signal-to-noise ratio ......... 72 dB (IEC-A network)
MW tuner
Frequency range .............. 531 kHz to 1 602 kHz (9 kHz)
530 kHz to 1 640 kHz (10 kHz)
Usable sensitivity ............. 25 µV (S/N: 20 dB)
Signal-to-noise ratio ......... 62 dB (IEC-A network)
SW tuner
Frequency range .............. 2 300 kHz to 7 735 kHz
(2 300 kHz to 2 495 kHz,
2 940 kHz to 4 215 kHz,
4 540 kHz to 5 175 kHz,
5 820 kHz to 6 455 kHz,
7 100 kHz to 7 735 kHz)
9 500 kHz to 21 975 kHz
(9 500 kHz to 10 135 kHz,
11 580 kHz to 12 215 kHz,
13 570 kHz to 13 870 kHz,
15 100 kHz to 15 735 kHz,
17 500 kHz to 17 985 kHz,
18 015 kHz to 18 135 kHz,
21 340 kHz to 21 975 kHz)
Usable sensitivity ............. 28 µV (S/N: 20 dB)
Signal-to-noise ratio ......... 62 dB (IEC-A network)
Note
Specifications and the design are subject to
modifications without notice.
Additional information
14
Appendix
En
<QRD3207-A>14
Black plate (15,1)
English
15En
<QRD3207-A>15
Black plate (16,1)
感謝您
購買本先鋒產品
為確保使用方式正確,使用本產品前請詳閱本
手冊。尤為重要的是要閱讀並遵照本手冊中的
警告與注意。
請將本手冊存放於安全及將來參
考時方便取得的地方。
關於本機
警告
!請勿嘗試自行安裝或維修本產品。若未經電
子設備與汽車配件方面的專門訓練,或具有
相關的工作經驗即貿然安裝或維修本產品,
則會有導致發生觸電或其他事故的危險。
!請勿嘗試在行駛時操作本機。嘗試使用裝置
的控制鍵之前,請確定將車輛停靠在路邊,
或將車輛停放在安全的位置。
注意
!請勿讓本機接觸到液體。否則可能造成人員
觸電。此外,接觸到液體可能導致本機損
壞、冒煙和過熱。
!請務必保持在適當的低音量,確保能聽見外
面的聲響。
!避免暴露在濕氣中。
注意
本產品為第一級雷射產品,依雷射產品的安
全性規範IEC 60825-1:2007。
遭遇問題時
如果本機無法正常運作,請聯絡您的經銷商或
最近的先鋒授權服務站。
主機
71 4 6
3
2
9
a de
8
5
c
b
1h(退出)
2SRC/OFF
3MULTI-CONTROL (M.C.)
4(清單)
5DISP/DISP OFF
6碟片槽
7USB埠
8EQ
9BAND
a(返回)/DIMMER (顯示幕亮度調整)
bc/d
c1/至6/
dAUX輸入插孔(3.5 mm立體聲插孔)
e拆卸按鈕
注意
使用選購的先鋒USB連接線(CD-U50E)將USB儲
存裝置當成任意裝置直接連接本機時,連接本
機的突出部分可能會造成危險。
遙控器
f
j
i
g
h
k
9
m
l
b
2
fVOLUME
按此按鈕可調高或調低音量。
gMUTE
按此按鈕可靜音。再按一次即可取消靜音。
h
a/b
按下可調用預設的電台。
按此按鈕可選擇下一個/上一個資料夾。
iAUDIO
按下可選擇音訊功能。
j
DISP/SCRL
按此按鈕可選擇不同的顯示模式。
按住該按鈕可開關顯示幕亮度。
ke
按此按鈕可暫停或繼續播放。
lFUNCTION
按此按鈕可選擇各項功能。
m
LIST/ENTER
按下以根據來源顯示清單。
在操作選單中,按下可控制功能。
開始使用前
16
節
使用本機
Zhtw
01
02
<QRD3207-A>16
Black plate (17,1)
顯示指示
21 3 75
9
4 6 8
a
1(清單)
2次要資訊部分
3TA(交通宣布資訊)
4TP(交通資訊節目確認)
5(數位音樂修補)
6LOC(本地頻道搜尋)
7(重播)
8(隨機播放)
9
主要資訊部分
!調諧器:頻段與頻率
!RDS:節目服務名稱、PTY資訊及其他文
字資訊
!CD播放器及USB儲存裝置:已播放的時
間及文字資訊
a存在下一層資料夾或選單時出現。
設定選單
1在安裝本機後,將點火開關轉至ON。
出現SET UP。
2轉動M.C.以切換至YES。
#若您未在30秒內使用本機,設定選單將不會顯
示。
#若您不想現在設定,請轉動M.C.以切換至NO。
3按M.C.以選擇。
4請依照這些步驟設定選單。
為繼續執行下一個選單選項,您需要確認選
擇。
CLOCK SET(設定時鐘)
1轉動M.C.可調整小時。
2按M.C.可選擇分鐘。
3轉動M.C.可調整分鐘。
4按M.C.確認選擇。
FM STEP(FM調頻間隔)
使用FM STEP設定FM調頻間隔選項(搜尋間隔設
定)。
1轉動M.C.選擇FM調頻間隔。
100(100 kHz)-50(50 kHz)
2按M.C.確認選擇。
!手動調頻間隔固定為50 kHz。
MW STEP(MW調頻間隔)
使用MW STEP設定MW調頻間隔選項(搜尋間隔及
手動調頻間隔設定)。
1轉動M.C.選擇MW調頻間隔。
9(9 kHz)-10(10 kHz)
2按M.C.確認選擇。
出現QUIT。
5若要完成設定,請轉動M.C.以選擇YES。
#若您想要再次變更設定,請轉動M.C.以切換至
NO。
6按M.C.以選擇。
註
!您可在系統選單及初始選單中設定選單選
項。如需有關設定的詳細資訊,請參閱第20
頁上
系統選單
及第21頁上
初始選單
。
!按SRC/OFF可取消設定選單。
基本操作
重要事項
!移除或安裝時,請務必小心拿取前面板。
!請避免使前面板受到劇烈撞擊。
!請將前面板遠離陽光直射和高溫。
!拆下前面板前拔除所有連接本機的纜線及裝
置,可避免裝置或車子內部受損。
拆卸前面板
1按下拆卸按鈕以取下前面板。
2向上推起前面板(M),然後向您的方向拉
(N)。
3A請務必將拆卸的前面板存放在保護盒或袋子
中。
重新安裝前面板
1將前面板向左滑動。
2按下前面板右側,直至其固定。
強制固定前面板可能會導致前面板或主機受
損。
開啟本機電源
1按SRC/OFF可開啟本機電源。
關閉本機電源
1按住SRC/OFF直至本機關閉。
選擇播放來源
1按SRC/OFF可在下列項目間切換:
RADIO-CD-USB-AUX
!正在使用MTP連線時,會顯示USB MTP。
調整音量
1轉動M.C.可調整音量。
註
當本機的藍色/白色引線連接至汽車自動天線
中繼控制端子時,汽車天線會在本機播放來源
啟動時伸出。收回天線時,請關閉播放來源。
遙控器的使用與保養
使用遙控器
1將遙控器對著前面板進行操作。
首次使用時,請拉出從托盤伸出的薄片。
更換電池
1滑出遙控器的背板。
2裝入電池,正極(+)與負極(-)端的電極確
實對齊。
警告
!請將電池存放在兒童無法拿取之處。若誤吞
電池,請立即就醫。
!電池(已安裝的電池組或電池)不得暴露在
陽光直射、火源等類似的過熱環境下。
注意
!至少一個月不使用遙控器時,請取出電池。
!如果換用錯誤的電池,則會有爆炸的危險。
僅限換用相同或同類型的電池。
!請勿使用金屬工具夾取電池。
!請勿將電池存放於金屬置物盒中。
!如果電池漏液,請將遙控器徹底擦拭乾淨並
裝上新電池。
!處理廢舊電池時,請遵守政府條例或適用於
貴國或地區的環境公共指令規則。
中文
使用本機
17
節
使用本機
Zhtw
02
<QRD3207-A>17
Black plate (18,1)
重要事項
!請勿將遙控器存放於高溫或陽光直射的區域
中。
!遙控器在陽光直射下可能無法正常工作。
!請勿讓遙控器掉落到地板上,否則可能卡在
煞車或油門踏板之下。
常用選單操作
返回上一個顯示畫面
返回上一個清單(上一層資料夾)
1按/DIMMER。
返回一般顯示畫面
取消主選單
1按BAND。
從清單返回一般顯示畫面
1按BAND。
收音機
基本操作
選擇波段
1按BAND直至所需的頻段(用於FM的FM1、
FM2、FM3、用於短波的MW或SW1、SW2)
顯示。
切換預設電台
1按c或d。
!選擇在SEEK下的PCH(預設頻道)以使用此
功能。
!使用遙控器上的a及b來切換預設電台。
手動調整(逐格)
1按c或d。
!選擇在SEEK下的MAN(手動調頻)以使用此
功能。
搜尋
1按住c或d,然後放開。
搜尋調頻可透過快速按c或d取消。
按住c或d時,您可以跳過電台。搜尋調頻會
在放開c或d的同時啟動。
註
!如需有關SEEK的詳細資訊,請參閱第18頁上
SEEK(左/右按鍵設定)
。
!本機的AF(其他頻率搜尋)功能可開啟及關
閉。AF會在正常調頻操作時關閉(請參閱第
18頁上
AF(其他頻率搜尋)
)。
儲存和調用各頻段的電台
使用預設調頻按鈕
1若要儲存:按下其中一個預設調頻按鈕
(1/至6/),直到號碼停止閃爍。
2若要調用:按下其中一個預設調頻按鈕(1/
至6/)。
切換顯示幕
選擇所需的文字資訊
1按DISP/DISP OFF可在下列項目間切換:
!FREQUENCY(節目服務名稱或頻率)
!BRDCST INFO(節目服務名稱/PTY資訊)
!CLOCK(來源名稱及時脈)
註
!若無法在FREQUENCY中取得程式服務名
稱,將顯示廣播頻率。若偵測到程式服務名
稱,將顯示程式服務名稱。
!視波段而定,文字資訊會變更。
!可變更的文字資訊項目視區域而定。
使用PTY功能
您可利用PTY(節目類型)資訊調頻至所需電
台。
按照PTY資訊來搜尋RDS電台
1按(清單)。
2轉動M.C.以選擇節目類型。
NEWS/INFO-POPULAR-CLASSICS-
OTHERS
3按M.C.開始搜尋。
本機會搜尋廣播該類型節目的電台。找到電台
後,會顯示其節目服務名稱。
!若要取消搜尋,請再按一次M.C.。
!部分電台的節目可能與傳送PTY顯示的不
同。
!若沒有電台廣播您搜尋的節目類型,NOT
FOUND會顯示約兩秒,然後調諧器會返回
原始電台。
功能設定
1按M.C.顯示主選單。
2轉動M.C.可變更選單選項,且按下可選擇
FUNCTION。
3轉動M.C.選擇功能。
選擇後即可調整下列功能。
!若選擇MW、SW1或SW2,則只能使用
BSM、LOCAL及SEEK。
BSM(電台自動存儲)
BSM(電台自動存儲)自動依電台的訊號強度儲存
六個最強的電台。
1按M.C.開啟BSM。
若要取消,請再按一次M.C.。
REGIONAL(區域電台)
使用AF時,區域電台功能會限制選擇廣播區域節
目的電台。
1按M.C.可開關區域電台功能。
LOCAL(本地頻道搜尋)
本地頻道搜尋只能收聽訊號夠強,且接收效果良
好的廣播電台。
1按M.C.選擇所需設定。
FM:OFF-LV1 -LV2-LV3-LV4
MW/短波:OFF-LV1-LV2
最高等級設定僅接收訊號最強的電台。隨著等
級降低,可接收的電台訊號將逐漸減弱。
TA(交通狀況公佈待機功能)
1按M.C.可開關交通狀況公佈待機功能。
AF(其他頻率搜尋)
1按M.C.可開關AF。
NEWS(新聞節目中斷)
1按M.C.可開關NEWS功能。
SEEK(左/右按鍵設定)
您可指定功能至本機的左右按鍵。
選擇MAN(手動調頻)以手動上下調頻或選擇
PCH(預設頻道)切換預設頻道。
1按M.C.以選擇MAN或PCH。
CD/CD-R/CD-RW及USB儲存裝置
MTP連線
相容MTP的Android裝置(執行Android OS 4.0以
上)可透過MTP連線使用USB來源。若要連接
Android裝置,請使用裝置隨附的連接線。
註
!此功能不相容於MIXTRAX。
!此功能不相容於WAV。
基本操作
播放CD/CD-R/CD-RW
1將碟片標籤面朝上插入碟片槽。
退出CD/CD-R/CD-RW
1按h。
使用本機
18
節
使用本機
Zhtw
02
<QRD3207-A>18
Black plate (19,1)
播放USB儲存裝置上的歌曲
1打開USB連接埠護蓋。
2使用USB纜線插入USB儲存裝置。
停止播放USB儲存裝置上的檔案
1您可以隨時中斷連接USB儲存裝置。
選擇資料夾
1按1/或2/。
選擇曲目
1按c或d。
快速前進或快速倒轉
1按住c或d。
!播放壓縮音訊時,快速前進或快速倒轉時無
聲。
返回根資料夾
1按住BAND。
切換壓縮音訊和CD-DA
1按BAND。
在播放記憶體裝置之間切換
您可以在含有多個大容量儲存裝置相容記憶體裝
置的USB儲存裝置中,切換不同的播放記憶體裝
置。
1按BAND。
!您最多可以切換32個不同的記憶體裝置。
註
不使用時,請中斷USB儲存裝置與本機的連接。
使用MIXTRAX按鍵操作
開啟或關閉MIXTRAX
選擇USB作為來源時可使用此功能。
您無法在使用USB MTP時使用此功能。
1按下3/MIX可開啟或關閉MIXTRAX。
!有關MIXTRAX的詳細資料,請參閱第20頁上
關
於MIXTRAX
。
!使用MIXTRAX時,將停用數位音樂修補。
切換顯示幕
選擇所需的文字資訊
1按DISP/DISP OFF可在下列項目間切換:
CD-DA
!ELAPSED TIME(曲目號碼及播放時間)
!CLOCK(來源名稱及時脈)
!SPEANA(頻譜分析儀)
CD-TEXT
!TRACK INFO(曲目標題/曲目作者/光
碟標題)
!ELAPSED TIME(曲目號碼及播放時間)
!CLOCK(來源名稱及時脈)
!SPEANA(頻譜分析儀)
MP3/WMA/WAV
!TRACK INFO(曲目標題/作者姓名/專
輯標題)
!FILE INFO(資料夾名稱/檔案名稱)
!ELAPSED TIME(曲目號碼及播放時間)
!CLOCK(來源名稱及時脈)
!SPEANA(頻譜分析儀)
選擇並播放名稱清單中的檔案/曲目
1按切換至檔案/曲目名稱清單模式。
2使用M.C.選擇所需的檔案名稱(或資料夾名
稱)。
選擇檔案或資料夾
1轉動M.C.。
播放
1選擇檔案或曲目後,按下M.C.。
查看所選資料夾中的檔案(或資料夾)清單
1選擇資料夾後,按M.C.。
播放所選資料夾中的歌曲
1選擇資料夾後,按住M.C.。
使用特殊按鍵操作
選擇重播範圍
1按6/可在下列項目間切換:
CD/CD-R/CD-RW
!ALL-重播所有曲目
!ONE-重播目前曲目
!FLD-重播目前資料夾
USB儲存裝置
!ALL-重播所有檔案
!ONE-重播目前檔案
!FLD-重播目前資料夾
依隨機順序播放曲目
1按5/開啟或關閉隨機播放。
所選擇重播範圍中的曲目以隨機順序播放。
!若要在隨機播放時變更歌曲,請按d切換至下
一首曲目。按下c可重新開始從目前曲目歌曲
的開頭處播放。
暫停播放
1按4/PAUSE可暫停或繼續播放。
功能設定
1按M.C.顯示主選單。
2轉動M.C.可變更選單選項,且按下可選擇
FUNCTION。
選擇後即可調整以下功能。
S.RTRV(數位音樂修補)
自動增強壓縮音訊並還原豐富聲音。
1按M.C.選擇所需設定。
1-2-OFF(關閉)
1對低壓縮率有影響,而2則對高壓縮率有影
響。
音訊調整
1按M.C.顯示主選單。
2轉動M.C.可變更選單選項,且按下可選擇
AUDIO。
3轉動M.C.選擇音訊功能。
選擇後即可調整下列音訊功能。
!在SP-P/O MODE中選擇SUB.W/SUB.W後將
無法使用FADER。如需詳細資料,請參閱第
21頁上
SP-P/O MODE(後置輸出及前級輸出
設定)
。
!在SP-P/O MODE選擇REAR/REAR後將無法
使用SUB.W及SUB.W CTRL。如需詳細資
料,請參閱第21頁上
SP-P/O MODE(後置輸
出及前級輸出設定)
。
!在OFF中選擇SUB.W後將無法使用
SUB.W CTRL。如需詳細資料,請參閱第20頁
上
SUB.W(重低音揚聲器開/關設定)
。
!來源選擇FM後,將無法使用SLA。
FADER(淡化調整)
1按M.C.顯示設定模式。
2轉動M.C.調整前置/後置揚聲器平衡。
BALANCE(平衡調整)
1按M.C.顯示設定模式。
2轉動M.C.可調整左/右揚聲器平衡。
EQ SETTING(等化器調用)
中文
使用本機
19
節
使用本機
Zhtw
02
<QRD3207-A>19
Black plate (20,1)
1按M.C.顯示設定模式。
2轉動M.C.選擇等化器。
POWERFUL-NATURAL-VOCAL-CUS-
TOM1-CUSTOM2-FLAT-SUPER BASS
選擇CUSTOM1或CUSTOM2後,即可自訂等
化器波段及等化器位準。
若選擇CUSTOM1或CUSTOM2,請完成以下
概述程序。若選擇其他選項,請按下M.C.返回
上一個顯示畫面。
!各來源可分別設定CUSTOM1。
!CUSTOM2是所有來源常用的共用設定。
3按M.C.顯示設定模式。
4按下M.C.可在下列項目之間切換:
等化器波段-等化器位準
5轉動M.C.選擇所需的設定。
等化器波段:80HZ-250HZ-800HZ-
2.5KHZ-8KHZ
等化器位準:+6 至–6
!重複按EQ也可以切換等化器。
LOUDNESS(響度)
響度可在低音量時補償低頻及高頻範圍中的不
足。
1按M.C.選擇所需設定。
OFF(關)-LOW(低)-MID(中)-HI
(高)
SUB.W(重低音揚聲器開/關設定)
本機配備可開關的重低音揚聲器輸出。
1按M.C.選擇所需設定。
NOR(正常相位)-REV(反相)-OFF(重
低音揚聲器關閉)
SUB.W CTRL(重低音揚聲器調整)
只有低於所選擇範圍的頻率可以從重低音揚聲器
輸出。
1按M.C.顯示設定模式。
2按下M.C.可在下列項目之間切換:
截止頻率-輸出位準-斜率位準
可調整的比率將會閃爍。
3轉動M.C.選擇所需的設定。
截止頻率:50HZ-63HZ-80HZ-100HZ-
125HZ-160HZ-200HZ
輸出電平:–24 至+6
斜率位準:–12-–24
BASS BOOST(低音增強)
1按M.C.顯示設定模式。
2轉動M.C.可選擇所需的電平。
0至+6隨著電平增大或減小而顯示。
HPF SETTING(高通濾波器調整)
只想要聆聽高頻率的聲音時,請使用此功能。只
有高於高通濾波器(HPF)截斷的頻率才會從揚聲
器中輸出。
1按M.C.顯示設定模式。
2按下M.C.可在下列項目之間切換:
截止頻率-斜率位準
3轉動M.C.選擇所需的設定。
截止頻率:OFF-50HZ-63HZ-80HZ-
100HZ-125HZ-160HZ-200HZ
斜率位準:–12-–24
SLA(音源電平調整)
此功能可在切換來源時防止音量變更幅度過大。
!設定以FM調諧器的音量電平為依據,該音量電
平保持不變。
!也可以使用此功能調整MW的音量等級。
1按M.C.顯示設定模式。
2轉動M.C.調整播放來源音量。
調整範圍:+4 至–4
系統選單
1按M.C.顯示主選單。
2轉動M.C.可變更選單選項,且按下可選擇
SYSTEM。
3轉動M.C.選擇系統選單功能。
選擇後即可調整下列系統選單功能。
CLOCK SET(設定時鐘)
1按M.C.顯示設定模式。
2按M.C.選擇所需設定之時鐘顯示部分。
時-分
3轉動M.C.可調整時鐘。
12H/24H(時間標記)
1按M.C.選擇所需設定。
12H(12小時制)-24H(24小時制)
AUTO PI(自動PI搜尋)
在同一序下,即使在調用預設時,本機也能自動
搜尋不同電台。
1按M.C.可開啟或關閉自動PI搜尋。
AUX(輔助輸入)
使用連接至本機的輔助裝置時,請啟動此設定。
1按M.C.可開關AUX。
DIMMER(顯示幕亮度)
1按下M.C.可開關顯示幕亮度。
!按住/DIMMER同樣可變更顯示幕亮度調整
設定。
關於MIXTRAX
MIXTRAX技術主要用於將各種音效插入歌曲中,
讓您體驗搭載視覺效果的不間斷混音音樂。
註
!視檔案/歌曲而定,可能會無法使用音效。
!若視覺效果會對行車造成不良影響,請關閉
MIXTRAX。請參閱第19頁上
使用MIXTRAX按鍵
操作
。
MIXTRAX選單
1按M.C.顯示主選單。
2轉動M.C.可變更選單選項,且按下可選擇
MIXTRAX。
3轉動M.C.以選擇MIXTRAX功能。
選擇後即可調整下列MIXTRAX功能。開啟MIX-
TRAX時即啟用該功能。
SHORT MODE(簡短播放模式)
您可選擇播放時間的長度。
1按M.C.顯示設定模式。
2轉動M.C.選擇所需的設定。
1.0 MIN(1.0分鐘)-1.5 MIN(1.5分鐘)-
2.0 MIN(2.0分鐘)-2.5 MIN(2.5分鐘)-
3.0 MIN(3.0分鐘)-OFF(關閉)
MIX PATTERN(混合圖案)
MIXTRAX特殊效果顯示畫面會隨音量中的變化而變
更。
1按M.C.顯示設定模式。
2轉動M.C.選擇所需的設定。
!SOUND LEVEL -混合圖案會根據音量變
更。
!LOW PASS -混合圖案會根據低音音量變
更。
!RANDOM -混合圖案會根據音量模式及低
通模式隨機變更。
DISP FX(顯示效果)
可開啟或關閉MIXTRAX特殊效果顯示。
1按M.C.選擇所需設定。
ON(MIXTRAX特殊效果顯示)-OFF(正常顯
示)
CUT IN FX(手動插入效果)
您可開啟或關閉MIXTRAX音效,同時手動變更音
軌。
1按M.C.選擇所需設定。
ON(開啟)-OFF(關閉)
使用本機
20
節
使用本機
Zhtw
02
<QRD3207-A>20

This manual suits for next models

1

Other Pioneer Car Receiver manuals

Pioneer DEH-P700BT - Premier Radio / CD User manual

Pioneer

Pioneer DEH-P700BT - Premier Radio / CD User manual

Pioneer AVX-7000 User manual

Pioneer

Pioneer AVX-7000 User manual

Pioneer Super Tuner III DEH-P90HDD User manual

Pioneer

Pioneer Super Tuner III DEH-P90HDD User manual

Pioneer CX-3250 User manual

Pioneer

Pioneer CX-3250 User manual

Pioneer DEH-80PRS Series User manual

Pioneer

Pioneer DEH-80PRS Series User manual

Pioneer DEH-P6500 User manual

Pioneer

Pioneer DEH-P6500 User manual

Pioneer AXM-P7650 User manual

Pioneer

Pioneer AXM-P7650 User manual

Pioneer AVIC-8000NEX Use and care manual

Pioneer

Pioneer AVIC-8000NEX Use and care manual

Pioneer MVH-P8300BT User manual

Pioneer

Pioneer MVH-P8300BT User manual

Pioneer CRD3569-A User manual

Pioneer

Pioneer CRD3569-A User manual

Pioneer DEH-600BT User manual

Pioneer

Pioneer DEH-600BT User manual

Pioneer DEH-P6700MP User manual

Pioneer

Pioneer DEH-P6700MP User manual

Pioneer AVH-P5150DVD/XN/RC User manual

Pioneer

Pioneer AVH-P5150DVD/XN/RC User manual

Pioneer DEH-P6600 User manual

Pioneer

Pioneer DEH-P6600 User manual

Pioneer KEH-2376ZFA User manual

Pioneer

Pioneer KEH-2376ZFA User manual

Pioneer DEH-P80RS User manual

Pioneer

Pioneer DEH-P80RS User manual

Pioneer DEH-P5750MP User manual

Pioneer

Pioneer DEH-P5750MP User manual

Pioneer XV-HTD7 User manual

Pioneer

Pioneer XV-HTD7 User manual

Pioneer XV-DV515 User manual

Pioneer

Pioneer XV-DV515 User manual

Pioneer GEX-P6400TV User manual

Pioneer

Pioneer GEX-P6400TV User manual

Pioneer SPH-DA360DAB User manual

Pioneer

Pioneer SPH-DA360DAB User manual

Pioneer DEH-X6810BT User manual

Pioneer

Pioneer DEH-X6810BT User manual

Pioneer Premier DEH-P470MP User manual

Pioneer

Pioneer Premier DEH-P470MP User manual

Pioneer Super Tuer III D DEH-P3100UB User manual

Pioneer

Pioneer Super Tuer III D DEH-P3100UB User manual

Popular Car Receiver manuals by other brands

Teac TE-269 installation manual

Teac

Teac TE-269 installation manual

Kenwood KD-AVX12 instructions

Kenwood

Kenwood KD-AVX12 instructions

JVC KD-G544 Installation & connection manual

JVC

JVC KD-G544 Installation & connection manual

Infinity BASSLINK DC quick start guide

Infinity

Infinity BASSLINK DC quick start guide

Blaupunkt FRANKFURT Frankfurt C70 operating instructions

Blaupunkt

Blaupunkt FRANKFURT Frankfurt C70 operating instructions

Kenwood GX-201KHF2 Service manual

Kenwood

Kenwood GX-201KHF2 Service manual

JVC KD-SX950J Installation & connection manual

JVC

JVC KD-SX950J Installation & connection manual

JVC KD-SC800 Schematic diagrams

JVC

JVC KD-SC800 Schematic diagrams

Yamaha M170 owner's manual

Yamaha

Yamaha M170 owner's manual

JVC KS-FX250 - Radio / Cassette Player Manuel d'instructions

JVC

JVC KS-FX250 - Radio / Cassette Player Manuel d'instructions

Skoda Radio Blues owner's manual

Skoda

Skoda Radio Blues owner's manual

Alpine CDA-117 owner's manual

Alpine

Alpine CDA-117 owner's manual

JVC KW-XG700J Service manual

JVC

JVC KW-XG700J Service manual

JVC KD-G322 instructions

JVC

JVC KD-G322 instructions

Clarion ADDZEST DMZ615 owner's manual

Clarion

Clarion ADDZEST DMZ615 owner's manual

Mercedes-Benz Audio 20 Supplement

Mercedes-Benz

Mercedes-Benz Audio 20 Supplement

Sanyo FXD-803LDS operating instructions

Sanyo

Sanyo FXD-803LDS operating instructions

Teac TE-AV300 Installation & connection manual

Teac

Teac TE-AV300 Installation & connection manual

manuals.online logo
manuals.online logoBrands
  • About & Mission
  • Contact us
  • Privacy Policy
  • Terms and Conditions

Copyright 2025 Manuals.Online. All Rights Reserved.