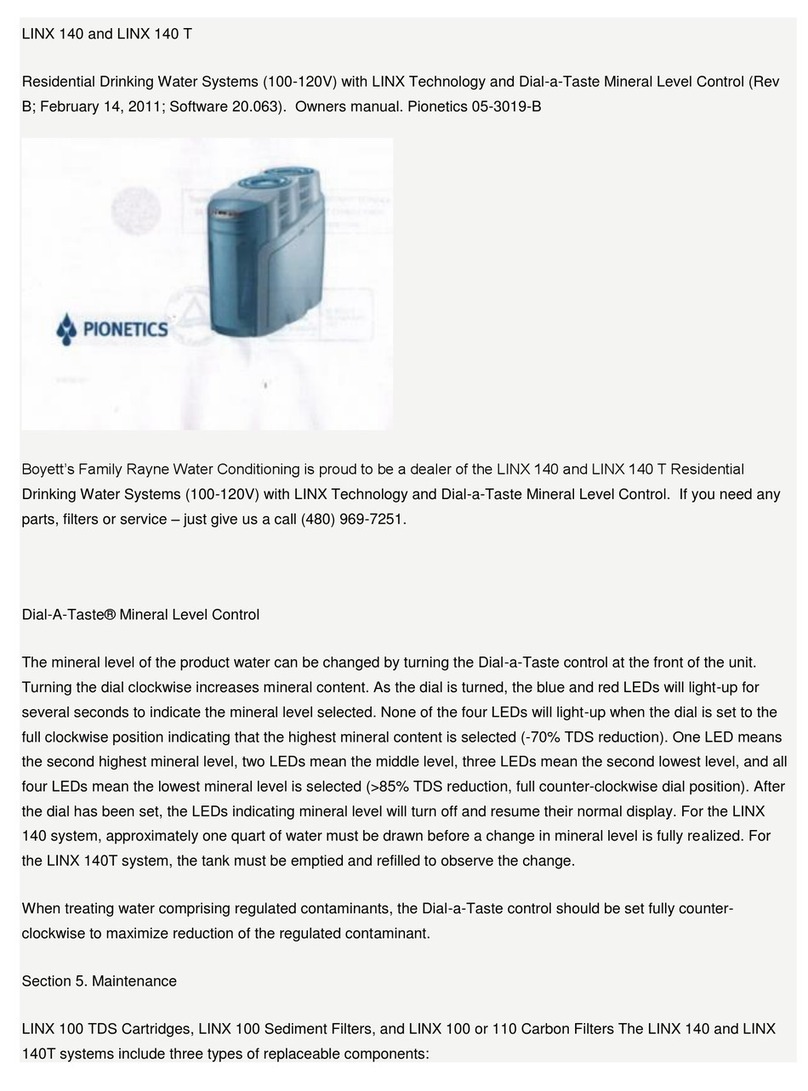
Pionetics LINX 140T User manual

Consumer Install 12.16.2016
1
LINX® 140T
Residential Drinking Water System
with LINX Technology
and Dial-a-Taste® Mineral Level Control
(Software 20.067)
Owner’s Manual
For service related questions call (866) 611-8624 between 8:00 am and 4:30 pm (Pacific time). If you have
problems at other times, then turn off the feed water and unplug the system. The tank should hold enough
water to meet your needs until you can reach technical support.
Tank and faucet sold separately.

Consumer Install 12.16.2016
2
Table of Contents
Section 1 Safety Precautions
Section 2 Overview of the LINX 140T System
System Features
Specification
Section 3 Installation
Section 4 Operation
Selecting Feed Water TDS Level
Pre-Conditioning Procedure
System Operation
Dial-A-Taste® Mineral Level Control
Indicator Lights
Section 5 Maintenance
LINX TDS, LINX Sediment, and LINX Cartridges/Filters
Drain Blockage
Section 6 Troubleshooting
Potential Problems and Remedies
Certified by WQA against NSF/ANSI Standard 53
for the reduction of nitrate/nitrite, as verified and
substantiated by test data.

Consumer Install 12.16.2016
3
Section 1. Safety Precautions
The LINX 140T system should be installed, serviced and maintained to comply with state and local laws
and regulations and in conformance with this owner’s manual.
Read and follow all instructions carefully before using the LINX 140T Drinking Water System.
DO NOT open the cell lids or outer enclosure when the LINX 140T system is powered. There is a risk
of electrical shock.
If the detachable power cord is damaged, it must be replaced.
Install LINX systems upright (not on their side). Use with cold feed water ONLY (33-100˚F; 1-40˚C).
DO NOT use with water that is microbiologically unsafe or of unknown quality without adequate
disinfection before or after the systems.
The systems are designed to operate with supply water pressure in the range of 20-100 psi (130-690 kPa).
If the pressure exceeds 100 psi (690 kPa), a pressure regulator must be installed.
These systems are not intended for use by persons (including children) with reduced physical, sensory or
mental capabilities, or lack of experience and knowledge, unless they have been given supervision or
instruction concerning use of the systems by a person responsible for their safety.
Children should be supervised to ensure that they do not play with the systems.
Grounding Instructions: These systems must be properly grounded. In the event of a malfunction,
grounding will reduce the risk of electric shock. These systems are equipped with a cord having an
equipment-grounding conductor and a grounding plug. The plug must be plugged into an appropriate
outlet that is installed and grounded in accordance with all local codes and ordinances.
Warning: Improper connection of the equipment-grounding conductor can result in a risk of
electric shock. Check with a qualified electrician if you are in doubt whether the systems are
properly grounded. Do not modify the plug provided with the systems. If the plug will not fit
the outlet, have a proper outlet installed by a qualified electrician.

Consumer Install 12.16.2016
4
Section 2. Overview of the LINX 140T System
The LINX 140T Drinking Water System employs an ion exchange process that uses electricity rather than chemicals for operation.
LINX technology does not release chemicals into the environment and it conserves more water compared to other drinking water
systems that provide similar water quality.
LINX technology provides several important benefits:
High flow rates: up to 0.5 gallons/minute (gpm) for the LINX 140 system, and up to 1.0 gpm with a tank.
Wastes 90% less water than reverse osmosis drinking water systems under typical usage conditions.
The Dial-a-Taste control allows adjustment of product water mineral levels for optimum taste.
The LINX 140T system includes the following filtration components that need to be replaced periodically:
One LINX 100 Sediment pre-filter
Two LINX 100 TDS cartridges to reduce nitrate/nitrite contaminants for healthier water and other total dissolved solids
(TDS) for better taste
One LINX 100 Carbon post-filter (GAC)
Optional UV filter – at an additional cost
Specification:
Feed Water Quality: Potable water with maximum TDS of 1000 ppm, <20 grains of hardness (340 ppm
hardness as CaCO3), pH 4 – 10; microbiologically safe
Feed Water Pressure: 20-80 psi (130-550 kPa)
Feed Water and Operating Temperature: 33-100˚F (1-40˚C)
Regeneration: 34 minutes (17 minutes each cell)
TDS Rejection (Maximum Dial)*: ≥85% TDS reduction
LINX System Water Output Flow Rate** 0-600 ppm TDS feed: 0.5 gpm at ≥40 psi
600-800 ppm: 0.25 gpm , 800-1000 ppm: 0.15 gpm
(see Replacement Parts list for flow restrictors)
Water Output Volume per Cycle: 0-400 ppm TDS feed: 3.0 gallons per 34 minute regeneration cycle
400-1000 ppm TDS feed: 1.5 gallons per 34 minute regeneration cycle
Rated Service Flow Rate: ` 0.60 gallons/minute
Rated Capacity: 3.17 gallons/cycle
Rated Life**: 650 gallons for LINX 100 Sediment and LINX 100 Carbon filters
1300 gallons for two (2) LINX 100 TDS cartridges
Warranted Water Output per Day: ≤25 gallons
Water Recovery**: 0-400 ppm TDS feed: 70%; 401-1000 ppm TDS feed: 55%
Operating Voltage, Current: 100-120 Vac, 50/60 Hz, 6 A
Outside Dimensions: 19.1 in (deep) x 8.2 in (wide) x 14.3 in (high)
*TDS reduction was tested and verified at an independent laboratory: Pace Analytical Services, Inc.
**Based on extensive testing by the manufacturer.
The LINX 140 and LINX 140T Drinking Water Systems conform to NSF/ANSI 53 for nitrate/nitrite reduction as verified and substantiated by test data.

Consumer Install 12.16.2016
5
Section 3. Installation
Under the Sink
For video instructions, please go to http://linxdrinkingwater.com/installation/
First locate where you want the faucet at your sink. Your sink may come with a pre-drilled hole for a soap dispenser or
spray hose. You can use that for the faucet. If not determine which side of the sink you want the faucet located and drill a
hole as indicated by the size of the faucet mechanism that will go thru the hole. Be certain that you can reach the faucet
under the sink to tighten it and connect the tubing. Before you start your install the system:
1. Buy an RO Faucet for your LINX System and slide the decorative
plate onto the faucet stem that goes below the counter along with the
washer
2. Insert the faucet stem into the hole
3. Slide the other washer(s) onto the stem and tighten it in place using
the “nut” provided
4. Connect the tubing after installing the LINX system – note if using
an airgap faucet you will need to drill a 3/8” hole in the drain above
the P trap.
5. If you are not using an airgap faucet you simply
connect the water supply line from the back of the
LINX system as shown here:

Consumer Install 12.16.2016
6
6. Then locate the cold-water supply line, the “P” Trap in the drain and the electrical outlet.
7. Determine the size of your cold-water supply and have the right sized T-Fitting (or Angle Stop) available – it will be
either a 1/4, 3/8 or 1/2 inch outside diameter with a 1/4 inch “T” for the tubing that supplies the water to the LINX
system.
8. Determine where you want to locate the storage tank.
9. Determine whether you are using an air gap faucet or not.
10. Confirm that your feedwater pressure is 80 psi or less.
T-Fittings T-Fittings

Consumer Install 12.16.2016
7
In preparation, be certain that you have the following:
A storage tank
A faucet (available through Pionetics or at your local
hardware store)
An air gap if the faucet doesn’t include one
A 110V electrical outlet is required
T-Valve sized according to your cold-water supply
line
Inline Shut off valve
Heavy duty scissors
Teflon plumber’s tape
Vaseline
Plumber’s Tape
Tank Shut Off Valve
This diagram illustrates plumbing connections using an air gap faucet. Feed water is provided from the cold water supply
under the sink via an Angle Stop on the cold water valve. Do not use a saddle valve with puncturing needle because it will not
provide sufficient flow. Actual installation will vary depending on local plumbing codes.

Consumer Install 12.16.2016
8
This diagram illustrates plumbing connections using a dishwasher air gap. Feed water is provided from the cold water supply
under the sink via an Angle Stop on the cold water valve. Do not use a saddle valve with puncturing needle because it will not
provide sufficient flow. Actual installation will vary depending on local plumbing codes.

Consumer Install 12.16.2016
9
1. Locate the Angle Stop/Shut Off Valve on the cold-water line and close it
2. Open the cold water faucet at the sink to be certain that the water is off and to relieve pressure in the line
3. Unscrew the water line to the faucet above the Angle Stop/Shut Off Valve
4. Wrap the threaded end of the Angle Stop/Shut Off Valve and the threaded end of the T Fitting with 2-3 wraps of teflon plumber’s
tape
5. Screw the T Fitting into the Angle Stop/Shut Off Valve and onto the incoming feedwater line above the Angle Stop/Shut Off
Valve
6. Insert tubing into the T Fitting and cut it at 3-4 inches and Install the In-line Shut Off Valve
7. Connect the In-line Shut Off Valve to the back of the LINX unit at the “feedwater” collet – the red one
8. Install the Tank Shut Off Valve on top of the tank – this allows you to turn off the water for future maintenance.
9. Tap into the drain line above the “P” Trap using a ¼ inch drill and install the “drain saddle” and connect the tubing from the
“Drain” collet on the back of the LINX system – the black one.
NOTE: It is strongly recommended that the waste line to the drain be connected to an air gap (dishwasher or faucet air gap).
While LINX systems waste very little water, when they do during regeneration it is in high flow rate bursts (up to 0.5 gpm), and
the air gap must be designed to handle it. A typical dedicated drinking water faucet used with reverse osmosis systems cannot
handle this flow rate – it will spit water and make considerable noise.
Make sure that the saddle clamp and gasket are aligned over the hole in the tail-piece so draining is not obstructed. Installing the
LINX system waste line to the drain below the horizontal arm of the P-trap drain outlet, where the P-trap is full of water, will lead
to the LINX system reporting false drain plug alarms. (A, B, C, D blinking lights, see the Indicator Status Table in the Owner’s
Manual). If this condition is left unchecked, it may eventually damage the system. If there is any concern with sewer back-up,
install a check valve in the drain line tubing to protect the LINX system; this check valve, if used, is susceptible to plugging or
fouling with scale and should be examined during maintenance. It is recommended that
the excess length of waste tubing be secured, for example with tie-wraps, to other
tubing or the cabinet wall to prevent it from slapping and making noise.
10. Connect the faucet to the tubing from the “Product” water collet on the back
of the LINX system – the blue one.
11. Connect the tank to the tubing from the “Tank” collet on the back of the LINX
system – the yellow one.
12. The tank should be pressurized to 7 psi. If you are connecting the LINX
system to an ice maker or refrigerator dispenser we recommend you increase
the pressure to 10 psi (12 psi if you have the system hooked to an ice maker).
You may wish to install a second In-line Shut Off Valve so you can turn off
the water to the refrigerator. This will have no effect on how the LINX system
operates or its water efficiency. The increased pressure will assure better
operation of the ice maker and/or dispenser.
13. If you want to connect the LINX system to your refrigerator, simply install a T
valve in the line from the LINX system to the faucet and run a separate tube to
the refrigerator.
14. Turn on the water and check all connections for leaks.

Consumer Install 12.16.2016
10
Installation - Setting up the LINX System
1. Unpack the LINX unit and be certain that all the items listed on the enclosed Inventory are there. Also, refer to the online
“How to Install the LINX 140T” at www.LINXDrinkingWater.com/install.
2. Locate where you want the faucet and install it according to the directions provided. (If you have a granite counter top you
may want to hire someone to drill the hole for you.)
3. Locate where you want to put the LINX system and the storage tank under the sink
ensuring a 110V Electrical Outlet is available.
4. Remove the blue front cover by removing the 2 screws at the bottom and the blue
lid covers. (See the Figure 1 to identify these parts and location.)
5. To remove the two blue Lid Covers, gently push down on each lid and turn
clockwise and lift up. (See Figures 1 and 2 to identify these parts and location.)
Figure 1
Figure 2 Figure 3

Consumer Install 12.16.2016
11
NOTE: After removing the front blue panel and the two blue lid covers, the lid drivers and the two
front panel black buttons are now visible. These parts will be addressed later. (See Figure 4 to
identify these parts and location.)
6. Locate the sediment filter and carbon filter (see Figure 5 below). They will be found inside their respective filter housings.
Remove the plastic around the filters and return the filters into their respective filter housings. The Sediment Filter can be
inserted into the housing in either direction, but the Carbon Filter needs to be inserted with its black O-Ring (Gasket)
visible to the outside of the Filter Housing.
7. Locate the additional Rubber O-Rings in a small plastic bag provided in your
LINX Kit (See Figure 6 to identify these parts.)
8. Slide each one of these O-Rings around the thread of the Filter Housings
exactly as pictured below (See Figure 7). Apply Vasaline to the outside of both
of the the O-Rings.
Figure 4
Figure 5
Figure 6
Figure 7

Consumer Install 12.16.2016
12
9. Insert the filter housings with the filters placed into their
appropriate place in the manifold (they are labeled). There
is a place for an optional ultra violet light (UV) which
should remain empty. Be sure that the threads are aligned
so that you get a good seal. (See Figure 8 to note where
the respective housing units get installed and to see the
unit installed.)
10. Locate the two LINX TDS cartridges (see Figure 9). Then locate
and lift out the two Lid Drivers from the exposed LINX unit (see
Figure 10 to identify these parts and location.)
11. Slide the “mushroom top” on each TDS cartridge through the slot on
each of the lid drivers (see Figure 11). Drop the cartridges back into
the top of the LINX unit and tighten each Lid Driver using the LINX
Wrench provided in your kit (see Figure 12). NOTE that the center
spine on the lid driver must line up front to back to be fully engaged
(see Figure 13).
Figure 8
Figure 9
Figure 11 Figure 12
Figure 10
Figure 13

Consumer Install 12.16.2016
13
12. Connect the tubing to the plumbing connections as seen from the back of the
LINX 140T system by first removing the “plugs” included for shipping. Then
push the tubing into the color-coded collets as far as possible. You should not be
able to pull them out without excessive force if installed properly (collets
pictured without plugs on Figure 14):
RED: Feed water (cold water only) to the left connector
BLACK: Drain line (to the air gap, then the drain) is connected to the
second-from left connector
YELLOW: Tank to the second-from right connector
BLUE: Dedicated faucet is connected to the right connector
SILVER: Field Service Assistant (FSA) – Not Included in Kit. The FSA is
a hand-held device that is used for a number of functions that helps
optimize LINX system performance. It provides the technician with a
complete system diagnosis and IF service is needed, walks the technician
through the step-by-step service process. If you would like to purchase an
FSA, please call Tech Support at (866) 611.8624.
Installation – Starting Up the LINX Unit
You are now ready to start up the LINX System. The LINX system MUST be pre-conditioned. This is done by:
1. Shut off the valve on top of the tank – turn the handle perpendicular to the tubing.
2. Plug in the system into a live electrical outlet
3. Turn on the water
4. Hold the 2 black buttons on top of the PCB under the blue front panel until the lights start blinking in sequence.
5. Come back in 90 minutes and:
Open the faucet and let the water run until the “carbon fines” are clear – the water will be a “dark color” until they are.
Open the valve on top of the tank
6. The tank will fill:
This will take 6 minutes if the system is set for low TDS feedwater – below 400 parts/million
This will take 45 minutes if the system is set for high TDS feedwater
Figure 14

Consumer Install 12.16.2016
14
Section 4. Operation
The LINX 140T system operations are automatic. The systems employ two flow sensors to measure and
control product and waste water volumes and to indicate when it is time to replace filters and/or cartridges.
The user only has to open and close the faucet to operate the systems. The two blue lid covers on top
must be properly engaged to allow operation. Be certain that the corresponding lid covers are in the correct
positions (Figure 2). There is a FRONT lid cover and a BACK lid cover labeled on top of each lid. Install the
two lids as shown so that the labels read properly from the front of the system.
Figure 2
Selecting Feed Water TDS Level
During installation the LINX 140T system must be configured for low or high feed water TDS using the front panel buttons.
Determine your feed water TDS (refer to your water utility annual report) to determine if it is less than or greater than 400 ppm
(low or high). All LINX systems are set at the factory for low TDS feed water which provides 3 gallons of drinking water at 70%
recovery. The high TDS setting provides 1.5 gallons at 55% recovery. If the feed water is greater than 400 ppm, program for
high TDS. See the “Summary of Front Panel Operation” table in section 3.4 to change the feed water TDS setting.
To determine whether the system is configured for low or high TDS feed water, repower it and check lights: as indicated in the
Front Panel Button Operation table below, the left two lights flash three times if set for low TDS, and the right two lights flash
three times if set for high TDS.
The two buttons required for set-up and maintenance are accessed by removing the blue front panel from the LINX 140T system.
The two securing screws are located at the bottom. To remove the front panel, push down on the top of the white portion of the
enclosure, just behind the panel, and pull the panel forward. This exposes the front panel PCB and filters. The PCB has two
black buttons. See the following table for operation of these two buttons.
Front Panel Button Operation
Operation Left Button Right Button
Activate the LED-UV Filter
(An optional component - not standard equipment)
Press 2 times within 4 sec
Lights A & B will flash three times
Set-up system for operation on low TDS (<400 ppm)
All systems are factory delivered set for low TDS*
Press 4 times within 4 sec
Lights A & B will flash three times ---
Set-up system for operation on high TDS
(400-1000 ppm)
Press 5 times within 4 sec
Lights C & D will flash three times ---
Reset LINX 100 Sediment and Carbon filter volume
counter to zero --- Press 4 times within 4 sec
(B light blinks 3 times)
Reset LINX 100 TDS cartridge volume counter to zero --- Press 5 times within 4 sec
(C light blinks 3 times)
Initiate 90 minute conditioning for new LINX 100 TDS
cartridges
Press and hold
(lights blink back and forth)
Press and hold (at same time as
left button)
*To determine if system is set for low or high TDS, repower to observe the A,B or C,D flashing light signal.
BACK
FRONT
Front of System
BACK
FRONT
Front of System

Consumer Install 12.16.2016
15
Additionally, when operating on greater than 600 ppm feed water TDS, the flow restrictor is replaced with a 0.25 or 0.15 gpm
restrictor according to the table below (see the Replacement Parts List in the Owner’s Manual to procure flow restrictors other than
the 0.5 gpm which is standard equipment). To replace the flow restrictor, remove the two blue lid covers, the blue front panel,
and right-side outer enclosure as shown in Figures 2A,B. Remove the flow restrictor received with the system (0.5 gpm – with
red stripe), and replace with the 0.25 gpm (blue stripe) or 0.15 gpm (yellow stripe) flow restrictor purchased from the manufacturer,
then reassemble the system. The flow restrictors must be installed as shown in the Figure 2B (there is an arrow indicating water
flow direction on the part too).
Figure 2A: Remove front and right-side enclosure parts
Figure 2B: Replace 0.5 gpm flow restrictor with 0.25 or
0.15 gpm restrictor when feed TDS is >600 ppm
Flow Restrictor Selection
TDS (ppm) High Low setting Flow restrictor required Flow Restrictor Color
<400 Low 0.5 gpm Red
400-600 High 0.5 gpm Red
600-800 High 0.25 gpm Blue
800-1000 High 0.15 gpm Ye l lo w
1000-1500* High 0.15 gpm Ye l lo w
* TDS Reduction may be less than 85% above 1000 ppm TDS feed
Pre-Conditioning LINX TDS, Sediment, and Carbon Cartridges/Filters
Whenever powered, the system will automatically fill with water to purge air for 90 seconds (water flows to drain). The indicator
lights will flash back-and-forth during this time. When complete, only the green light under the dial will remain on. To initiate
pre-conditioning of new LINX TDS cartridges, remove the front panel, then press and hold both buttons on the front display.
NOTE: On new LINX 140T systems, even if the lights continue to flash back-and-forth after 90 seconds, still press and hold both
buttons to assure pre-conditioning has started.
When the LINX Sediment and Carbon filters are replaced, after 650 gallons of service, the LINX Carbon filter requires a rinse to
remove fine particles before putting the system back in service (section 4.3). Run the water from the faucet until the water is
colorless. After installation and whenever the LINX TDS cartridges are replaced a 90 minute pre-conditioning stage must be
completed. The faucet must remain closed during this period (section 4.4). If the LINX Carbon filters and LINX TDS
cartridges are replaced at the same time the rinse of the carbon filter must be completed before changing the LINX TDS cartridges.

Consumer Install 12.16.2016
16
Whenever installing or replacing the LINX TDS cartridges and sediment/carbon filters, carefully check for leaks from inadequate
o-ring seals. At the end of service, remove the top two lid covers and check for water in the lid driver crevices, and examine the
filter housing for slow leaks. See sections 4.3 and 4.4 for more details.
System Operation
The two LINX TDS cartridges operate in parallel during normal water production to provide >85% TDS reduction. When the
service volume has been delivered (3 gallons on the low TDS feed setting and 1.5 gallons on the high setting) a 34-minute
regeneration takes place. You may hear water discharging to the drain during regeneration.
After regeneration a “clicking” noise will be heard for 20 seconds during which time the LINX 140 system is cleaning its valves.
Note: While drinking water is always available, the LINX systems are designed for intermittent, not continuous, use. To
obtain the specified ≥85% TDS reduction, the systems must be configured as described in the Specification section. To
maintain the 3-year Warranty, the average daily usage must be <25gallons.
Indicator Lights
Beneath the Dial-a-Taste control knob is a green light indicating that the unit is powered and functioning. The four other
indicator lights, labeled A, B, C and D (see image below) are used to indicate system status as shown in the following table.
When the systems are producing water, blue lights A and C flash indicating both cells are delivering water. A single red flashing
light indicates that regeneration of that cell is in progress. The indicator lights also signal when the blue safety lid covers are not
installed correctly and when service is required (see the table below for the lights observed in each case). For the four “alarms” at
the bottom of the table, repowering will reset the system; if the alarm re-occurs, call Technical Support at 866-611-8624.

Consumer Install 12.16.2016
17
Indicator Status Table
Indicator A
(Blue)
Indicator B
(Red)
Indicator C
(Blue)
Indicator D
(Red)
Maintenance
Both LINX Cells Providing TDS Reduction Blinking Off Blinking Off
Cell 1 Regenerating Off Blinking Off Off
Cell 2 Regenerating Off Off Off Blinking
Conditioning LINX TDS Cartridges (90 min) All 4 lights blink in sequence (left-to-right-to-left)
Alarm Indicators
LINX Carbon and Sediment Filter Life End Off Solid Off Off
LINX TDS Cartridge Life End Off Off Solid Off
Blue Lid Covers Not in Position* Off Blinking Blinking Blinking
Drain Line/Valve Blocked Alarm
No Feed Pressure**
Blinking Blinking Blinking Blinking
External Leak Alarm*** Blinking Blinking Off Blinking
No Power to LINX Cells (poor TDS reduction) Blinking Off Blinking Blinking
*To operate the system both lid covers must be correctly installed (repowering will not do it). For other alarms, repower.
**Operation will resume automatically within 20 minutes of feed pressure being restored
***To turn off the leak sensor buzzer, unplug the LINX system, then after drying sensor pads, repower
Dial-A-Taste® Mineral Level Control
The mineral level of the product water can be changed by turning the Dial-a-Taste control at the front of the unit. Turning the
dial clockwise increases mineral content. As the dial is turned, the blue and red LEDs will light-up for several seconds to indicate
the mineral level selected. None of the four LEDs will light-up when the dial is set to the full clockwise position indicating that
the highest mineral content is selected (~70% TDS reduction). One LED means the second highest mineral level, two LEDs
mean the middle level, three LEDs mean the second lowest level, and all four LEDs mean the lowest mineral level is selected
(>85% TDS reduction, full counter-clockwise dial position). After the dial has been set, the LEDs indicating mineral level will
turn off and resume their normal display. The tank must be emptied and refilled to observe the change.
Section 5. Maintenance
5.1 Replacement of LINX TDS Cartridges, Sediment and Carbon Filters
The LINX 140T systems include three types of replaceable components:
Two LINX TDS cartridges – under the blue lids
One LINX Sediment filter – inside the blue front panel
One LINX Carbon filter (GAC) – inside the blue front panel
The indicator lights signal that it is time for the customer to change the filters or TDS cartridges. (see the Indicator Status Table).
The LINX Sediment and Carbon filters need replacement at 650 gallons, while the LINX TDS cartridges require replacement at
1300 gallons. In this document, see section 4.3 for the LINX Sediment and Carbon filter replacement procedure, and section 4.4

Consumer Install 12.16.2016
18
for the LINX 100 TDS cartridge replacement procedure. The optional LED-UV lamp is designed to operate for the life of the
LINX 140T system.
5.2 Indicator Light Alarm
There are five conditions which prevent operation (water flow):
1. Blue safety lid covers not properly positioned
2. Drain line plugged
3. External Leak
4. No power to LINX cells (no TDS reduction)
Refer to the bottom of the Indicator Light Status Table in Section 4, Operation, for details. To correct the lid cover alarm, the lids
must be installed as shown at the beginning of Section 4. To clear the drain plug, drain leak, no power or external leak alarms
repower the system – unplug it, wait 15 seconds and plug it back in. The lights will flash. If these alarms occur again after
re-powering, service is required.
HARD WATER
When treating hard water, scale will accumulate in the drain valves or line and will eventually plug them. The LINX systems
detect drain plugging which prevents proper regeneration and provides poor TDS reduction. LINX systems will automatically
alarm and shutdown if inadequate drain water volume is detected. This condition could also be caused by loss of feed pressure.
The LINX system will open the valves every 20 minutes to determine if pressure has been restored (flow has resumed), and
automatically disable the alarm if this is the case.
When operating on hard water, the LINX system’s drain valves and plumbing must be periodically inspected and cleaned to avoid
drain line clogging with scale. The high water recovery of LINX systems means that the waste water contains a very high
concentration of hard water ions that promote scale formation in the drain line and in particularly in the drain valves. Refer to
Section 5.5 for Drain Line Maintenance instructions.
LEAKS
Two sensors mounted on the base of the LINX 140T systems detect water leaks. A light indicator and beeper indicate this
external leak alarm, and the feed valves immediately close, shutting off water to the majority of the LINX system. Because the
feed valves are located after the sediment filter and first flow sensor, a leak from these components will not be stopped.
5.3 LINX Sediment and Carbon Filter Replacement Procedure
Replace and rinse the Carbon filter BEFORE replacing/pre-conditioning the LINX TDS cartridges
Before unplugging the system, depressurize it by closing the feed water line valve and then opening the faucet until water
stops flowing. If servicing a LINX 140T system, close the tank valve.
Unplug the LINX system.
Remove the blue front panel from the LINX system. The two securing screws are located at the bottom. Press the white
enclosure plastic just behind the blue enclosure down and pull forward on the front panel.
Remove the front filter housing (sediment) with the filter housing wrench. The housing is removed with clockwise rotation.
Next remove the rear right filter housing (carbon).
Discard the old (used) LINX Sediment and Carbon filters, and replace with the new components AFTER removing all shrink
wrap covering.

Consumer Install 12.16.2016
19
Confirm that each housing has an o-ring, whether they need to be replaced (any deformity or defects?), and that they have
silicon or Vaseline. Tighten each housing using the filter housing wrench.
Reconnect pressure to the feed water line and reconnect power to the LINX system. Draw water until the dark carbon fines
are no longer observed or a total of 5 gallons (Be sure the tank valve is closed during this process to avoid carbon fines
collecting in your tank).
Reset the filter usage counter by pressing the right button 4 times within 4 seconds on the front circuit board until indicator
light B blinks three times. This informs the LINX system that a new set of filters have been installed.
Pressurize the system and carefully examine the housings for leaks at the o-ring seal. Tighten the housings if necessary.
Reattach the blue front panel.
Open the tank valve.
5.4 LINX 100 TDS Cartridge Replacement Procedure
Replace and pre-condition the LINX TDS cartridges AFTER replacing/rinsing the Carbon filter
Depressurize the LINX system by removing pressure on the feed water line and then opening the faucet until water stops
flowing.
Close the tank valve.
Unplug the system. DO NOT REPLACE LINX TDS CARTRIDGES WITH THE LINX SYSTEM POWERED.
Remove the blue front and back lid covers from the top of the unit by turning them clockwise and lifting, approximately the
distance of one air hole diameter. This will expose the LINX cell lid drivers.
Remove the LINX cell lid drivers by twisting counter-clockwise. They may be difficult to remove, so a pair of pliers
inserted handles down into the lid driver will provide a better grip. If it is extremely difficult to remove the lids, the system
may not be fully depressurized. Depressurize the system and try again (open the faucet to drain all water).
Remove the LINX TDS cartridges from both the front and back cells. The LINX TDS cartridges will come out with the
LINX cell lid drivers.
Remove the water from the LINX housings. A suctioning device such as a “turkey baster” (large pipette) is recommended.
DO NOT ALLOW WATER TO SPILL INTO THE LINX SYSTEM – IT MAY DAMAGE OR DESTROY THE POWER
SUPPLY – INVALIDATING THE WARRANTY.
Push the plastic net supporting the outer electrode down to the bottom of the housing – this assures it will not interfere with
the LINX TDS cartridge during the next replacement.
Assure the two o-rings on each cartridge are seated in their top-cap grooves completely.
Attach the LINX cell lid driver to the LINX TDS cartridge. The top of this LINX TDS cartridge has a mushroom shaped
stem which slides and locks into the LINX cell lid driver.
Vertically slide the LINX TDS cartridge attached to the LINX cell lid driver into the housing, taking care not to distort the
electrode held against the inner housing wall. Tighten the lid by rotating clockwise using the LINX TDS cell wrench
included in your accessories box. AVOID ANY WATER SPILLAGE DURING INSERTION OF THE LINX TDS
CARTRIDGES. If water spills, remove more water from the housing before continuing to insert the LINX TDS cartridge.
Ensure that the LINX cell lid driver is secured tightly. It may be necessary to use the inverted pliers to tighten the lid firmly.
Additionally, application of a small amount of food grade wax to the LINX cell lid driver threads will greatly reduce the
friction.
Repeat the procedure for the second LINX 100 TDS cartridge. It is normal for the second new LINX 100 TDS cartridge to
be more difficult to screw-in.
Attach the blue front and back lid covers (see section 3.1). THE LINX SYSTEMS WILL NOT OPERATE UNLESS
THESE LID COVERS ARE ROTATED TO LOCK IN PLACE AND ENGAGE SAFETY SWITCHES.

Consumer Install 12.16.2016
20
Re-pressurize with feed water and connect power to the LINX system. A,B or C,D lights will flash three times to indicate
whether the system is programmed for low or high TDS, then all four lights will flash right-left-right for 90 seconds during
which time water will flow from feed to drain to fill the LINX cells. During this period, open the faucet until water flows to
aid the purging process.
Remove the blue front panel from the unit. The two securing screws are located at the bottom. Press the white enclosure
plastic just behind the blue enclosure down and pull forward on the front panel.
Press the right button 5 times within 4 seconds on the front circuit board until indicator light C blinks three times. This
informs the LINX system that new LINX TDS cartridges have been installed (and resets the volume counter for these
cartridges).
Press and hold both buttons on the front circuit board until the indicator lights begin to move left to right to begin the
90-minute conditioning for new LINX TDS cartridges. Make sure the faucet is closed during conditioning.
Reattach the blue front panel to the LINX system.
Remove the lid covers and check for leaks. Replace the lid covers.
Open the tank valve.
5.5 Cleaners for Outer Enclosure
Use soap and water, rubbing alcohol (isopropanol), Formula 409, or other cleaners specified for plastic to clean the outer enclosure.
DO NOT use other solvents as they will scar the surface. If in doubt, test the cleaner on the bottom of the product first.
Table of contents
Other Pionetics Water Filtration System manuals
Popular Water Filtration System manuals by other brands

Plasma Made
Plasma Made CA-R series Installation and user manual

Aqua Medic
Aqua Medic Systemfilter 10000 Operation manual

Bluewater
Bluewater Spirit 300Cp owner's manual

Ro-Man
Ro-Man 400-600 GPD RO Entire guide

Pure Water
Pure Water Counter Top Installation instruction

AquaticLife
AquaticLife 540372 installation, operation & maintenence