Congratulaons on the purchase of a new SiriusXM Radio UTV antenna. Here
are instrucons on how to install this kit into a UTV. This kit is designed to be
installed on any UTV by using the supplied pipe mounng parts or ush/roof
mounng parts. It is recommended to select a locaon on your UTV that will
allow the antenna to have maximum clearance from a roof or other objects.
The following instrucons show an installaon on a pipe and roof allowing for
maximum clearance.
Installaon Instrucons
SiriusXM Radio UTV Antenna
Model # UTVANT
Pixel Technologies, Inc. | 800.595.0845 | www.pixelsatr
adio.com |
[email protected] | Page 1
Package Includes:
(1) SiriusXM UTV Antenna
(1) Rubber Clamp
(1) L Bracket
(1) Tube of Locte
(1) Mounng Screw
(1) Locking nut
(4) Rubber washers
(1) Rubber cap
Antenna Installaon Tips
• Install the antenna element with the best line-of-sight for opmal performance
• Placing the antenna higher on the vehicle is recommended but not mandatory
• When riding in the northern most parts of the US and Canada, slanng the element southbound a
few degrees will increase the signal strength.
• Try not to stress the molded connector on the end of the antenna wire
• Keep the antenna away from heat and electrical sources
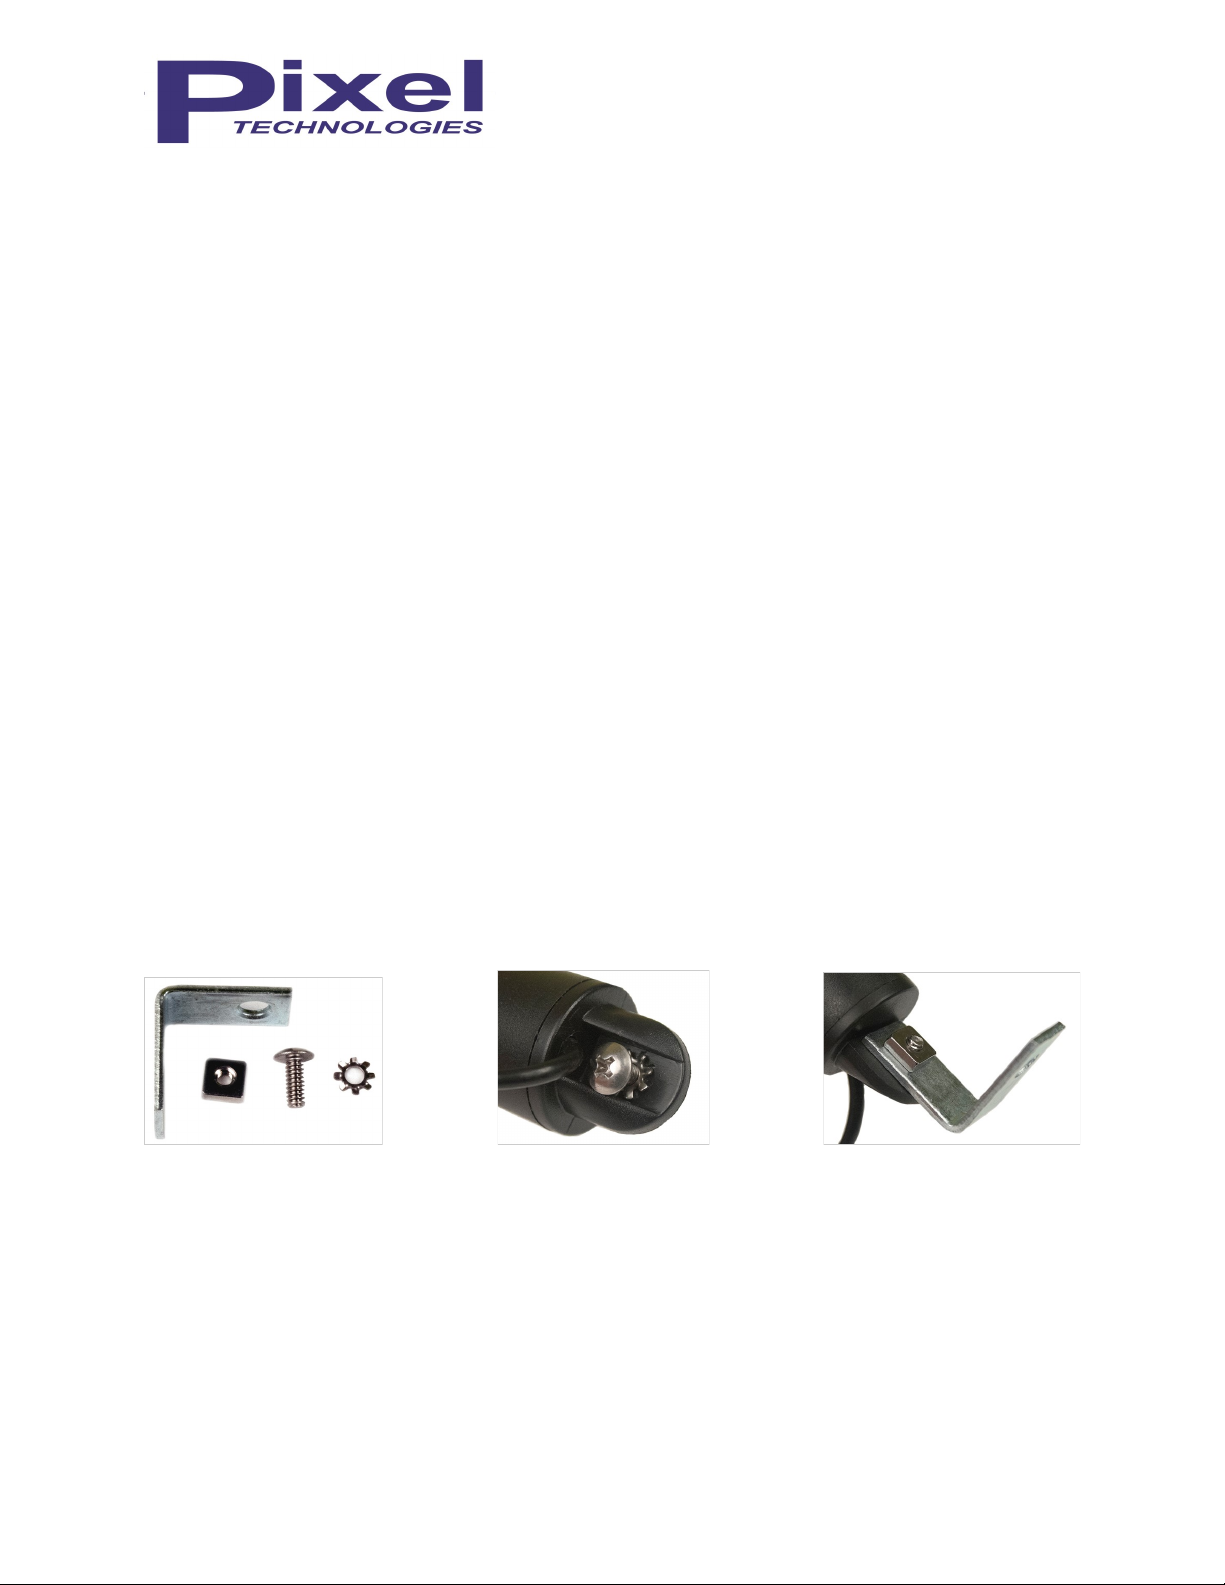
Antenna Base Assembly
1. Select the locaon to install your antenna allowing for maximum clearance.
2. Use the hardware shown in diagram A for this assembly type.
3. Insert the screw and lock washer into the base of the antenna as shown in diagram B.
4. Next install the L bracket and thread the screw through the square nut securing the L bracket as
shown in diagram C.
5. Be sure to ghten the L bracket securely in place.
Diagram A Diagram B Diagram C
Antenna Wire Installaon
1. Run the antenna cable from the antenna either inside the roll cage pipe tubing or along the outside
securing the antenna cable with cable es (not supplied). Be sure not to over ghten the cable es
as the stress could cause damage to the antenna wire.
2. Bring the antenna connecon to the desired locaon to install the gooseneck mount and protec-
ve case. It is recommended to leave about 12 inches of play in the cable at the point of installing
the gooseneck mount and case.