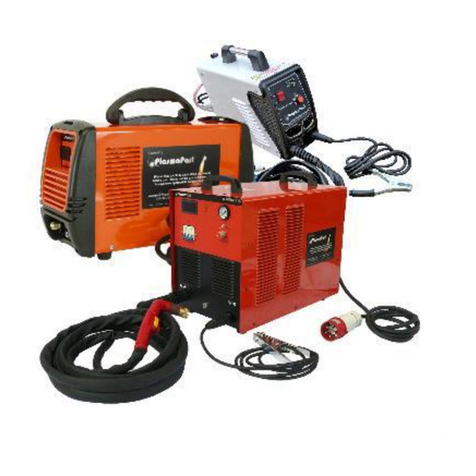
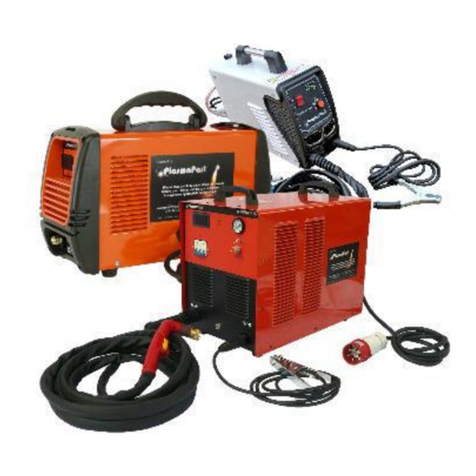
PlasmaPart IndustriCut 100A Use and care manual

Operation
& Safety
manual
IndustriCut 100A
IndustriCut
100A
100Amps DC - Three Phase - 415V
Inverter plasma
cutter

Congratulations on the purchase of your new PlasmaPart product
We are delighted you have chosen us to provide you with high quality plasma cutting
equipment and we will strive to provide you with the best aftermarket service in the
industry. Your product is backed up by our comprehensive guarantee please take a moment
to fill in your warranty details below which will help you if you have to contact us in the
future.
Machine Type ……………………………………..
Invoice Number ……………………………………..
This manual has been written to instruct you in the correct and safe use of your PlasmaPart
product please read and fully understand it before use.
Your understanding of the product is key to your safety, plasma cutting is hazardous, by
taking the correct precautions you can minimise the inherent hazards associated with
plasma cutting.
You have made the right choice in choosing a PlasmaPart product.
PlasmaPart are the plasma cutting brand of choice for a huge range of users and supply a
diverse range of industries and private individuals from aerospace & defence to
boilermakers, our product performance, safety, backup, technical support, service and value
lead the way in the plasma cutting industry we hope you enjoy using your new product.

Important Safety Information
The following information is extremely important and must be
observed, this section is in addition to specific hazard warnings that
are mentioned throughout the manual where appropriate
The operation and routine maintenance of plasma cutting equipment can be
extremely dangerous and hazardous to your health and wellbeing.
The plasma cutting process produces strong electric and magnetic emissions which
may cause improper or non-function of cardiac pacemakers, and other electrical
health equipment & devices. Consult your doctor if you are in any doubt before
using or being in close proximity of a working plasma cutter.
Electric Shock
Electric shock can injure or kill you, the plasma arc process requires high voltages at
high currents to create the high temperature plasma beam. This high voltage and
high current can cause serious injury or death to you or others in the workplace.
Never touch any components or parts that are electrically live or hot
Never change consumables or parts of the torch when the machine is turned on
Always ensure parts and consumables are replaced when they are worn or damaged
Do not operate the machine in damp or wet conditions
Ensure the machine is used in conjunction with an appropriate RCD
Insulate yourself from the work piece and any other parts of the circuit using
appropriate safety equipment such as gloves
Read and follow all instructions in the operation manual, if you are unsure about any
of them please contact us
The work piece should be earthed either direct to ground or to the earth terminal on
the rear of the machine
Fire and Explosion
When plasma cutting there is a risk that sparks, slag, plasma arc, conducted heat or
a combination of these could cause flammable or potentially explosive materials to
ignite or detonate.
Ensure that all combustible materials are removed from the affected area
Protect yourself and flammable materials that cannot be moved
Never cut a container or vessel that has held flammable or volatile substances

Hazardous gases & fumes
Gases produced during the plasma cutting process can be dangerous and may affect
your health. Please take precautions to avoid inhaling them
Ensure your work area is well ventilated, or that you are wearing sufficient
protective equipment to avoid inhaling the fumes
Keep your head out of the direct fume plume
All fumes produced during plasma cutting can be hazardous to health and should not
be inhaled. Certain materials produce more toxic fumes and great care should be
taken when cutting any material made from or containing any of the following:
Antimony
Arsenic
Beryllium
Cadmium
Chromium
Cobalt
Lead
Manganese
Mercury
Nickel
Selenium
Silver
Titanium
Vanadium
Zinc
Any coated, painted, dipped, galvanised or plated material
Residue from chlorinated solvents
If in doubt, consult the MSDS sheet for any material you are cutting or substance
previously applied to it.

Noise
Very high frequency and intensity sound is produced when plasma cutting. Exposure
to high levels of noise can cause hearing damage and potentially permanent hearing
loss.
Protect your hearing with appropriate ear defenders or plugs while plasma cutting
particularly at high power levels and in confined spaces
If you are in doubt it is best to measure the level to ensure it is below recommended
levels of exposure
Plasma Arc Ultraviolet Radiation
Plasma arc radiation can burn your eyes and skin, without adequate protection
your eyes and skin are at risk, if exposed your eyesight can be permanently
damaged please ensure you are wearing adequate PPE.
The following should be treated as a guide as to the minimum shade numbers to use for
eye protection while plasma cutting.
Process: Plasma Cutting
Current used Minimum shade number
< 20amps 4
20-40amps 5
40-60amps 6
60-80amps 8
80-250amps 8
250-350amps 9
350-800amps 11

Declaration of Conformity
PlasmaPart 100A IndustriCut
Manufacturer:
ZHEJIANG ZHONGJIAN (ZOJAN) WELDING EQUIPMENT CO.,LTD
Address: South Of Jiulong Rd., Industrial City, Wenling, Zhejiang, China
Tel.:86-576-81667866
PlasmaPart Limited
Unit 1 Debdale Lane
Keyworth
Nottinghamshire
NG12 5HN
0844 822 80 40
The equipment described in this manual conforms to all applicable aspects and regulations
of the Low Voltage Directive and to the national legislation for the enforcement of this
directive.
The equipment described in this manual conforms to all applicable aspects and regulations
of the EMC directive and to the national legislation for the enforcement of this directive.
PlasmaPart machines are the result of extensive and continuous product development. Our
manufacturing process is two-part and once the base units arrive at our facilities they are
completed to our specification in the UK. Each machine is individually tested and verified
before completion, ensuring the product is safe for use when used in accordance with these
instructions.
PlasmaPart are committed to continual development and improvement of our products, if
you have any comments, concerns, or suggestions please do not hesitate to contact us.

Statement of warranty:
PlasmaPart Limited hereby warrants to the original purchaser that new PlasmaPart
machines sold are free from material defects and defective workmanship, should any failure
arise within a period of three (3) years from the invoice date and the machine has been
treated in accordance with the guidelines stated in this manual, PlasmaPart Limited will
collect the machine, return it to working condition or replace it at our discretion and re-
deliver it to you as quickly a possible –typically within 48 hours.
This warranty is in lieu of any warranty of merchantability or fitness for a particular purpose.
Warranty period: 3 years parts and labour on power source
1 year parts and labour on torch
This warranty is conditional on you retaining the original packaging or being able to pack the
machine so it can be transported safely by our delivery partner. If the machine is damaged
in transit from you to us in the event of a warranty claim, you may be charged some of the
repair costs if the machine has not been packaged adequately.
The warranty explicitly excludes:
Consumables, electrodes, nozzles, swirl rings, o-rings, fuses and filters
Equipment that has been modified, improperly used or installed, misused or
improperly operated according to the guidelines in this manual
Limitation of liability:
We shall not be liable or responsible for any injury, illness, accident, misfortune, loss of
profit, loss of earnings, loss of life however caused as a result of buying and/or using or
misusing the product(s). In no event shall PlasmaPart be liable or responsible to you or any
third party for any personal, mental, physical injury or illness, consequential, direct, indirect,
special or contingent damages arising from the use, misuse or failure of the product(s) sold
or advice given. Our cumulative liability on account of a claimed defect in any product
supplied by PlasmaPart or any damages of whatsoever type caused by the use or misuse of
the products(s) shall in no event exceed the purchase price paid by you.


Power Source Specifications IndustriCut 100A
Supply Voltage
3-ph AC 415±15% V
Supply Frequency
50~60 Hz
Power requirement (at
100A)
15.0 KVA (Max)
Rated input current (at
100A)
26 A (Max)
No-load voltage
300 V
Output current range
20-100 A
Output voltage range
88-96 V
Duty cycle @ 100 Amps
Output
60%
Efficiency
85%
Cut Width
1.0 mm
Arc striking model
HF Pilot
Cos φ (η)
0.93
Air pressure
100 psi
Torch Specification (A-141 Trafimet / Parker Ergo)

A-141 Torch Requirements
Air: Warning –Always turn off the machine before changing tips
100 PSI / 6 BAR whilst air is flowing through the torch
The air must be clean and dry and free from oil and other contaminants
Genuine consumables must be used to ensure reliable starting and maximum life of
the torch and tips, as well as the best possible cut
The principle behind plasma
The plasma beam is essentially a very high energy ionised gas stream. This is created by
passing air at high velocity whilst spinning through a carefully formed arc, the arc is formed
between the hafnium tip of the electrode and the inner surface of the copper nozzle. The
swirl ring that is located between the nozzle and the electrode is primarily present to create
a stable high velocity spinning vortex of air, this stable spinning vortex of ionised gas forms
the plasma beam as it exits the nozzle orifice.
The ionised plasma beam can reach temperatures in excess of 25,000 degrees centigrade,
which allows the plasma cutting system to cut so quickly and effortlessly.
Pilot arc function
The pilot arc function fitted to this machine allows a circuit to be formed and the plasma
beam to be created even when the torch tip is not in contact with the work piece, this is
beneficial if the surface of the material being cut is non-conductive, for example painted,
oxidised or otherwise dirty.
The pilot arc function works by a conductor being in place between the nozzle and positive
(work piece) side of the inverter output allowing current to flow even when the torch is
away from the work piece back to the positive side of the power source output. When the
pilot arc is being used, as soon as you bring the tip close to or in contact with the work piece
the circuit changes and the current then flows through the plasma beam into the work piece
and back to the positive side of the inverter output.

Setup, Operation & Connections
Once unpacked please take a moment to identify the various inputs, outputs and controls
on your new PlasmaPart system –key to its operation are:
Mains Input
In this case a 32A 415V plug is pre-wired to your machine,
if you connect your machine to an extension lead ensure that the conductor size is
adequate for the length of lead and current draw of the machine, in this case at least
6mm2 should be used. If you are in any doubt please consult a qualified electrician.
Always protect yourself and others by using your machine with an appropriately
sized RCD or residual current device.
Compressed air supply
Your new PlasmaPart system is equipped with a PCL type quick air connection. Once
you have attached your regulator to the rear of the machine and tightened the air
supply pipe clamp, plug the connection into your airline. The regulator should be set
to 100PSI / 6 Bar when the air is flowing through the torch with the trigger pressed
(only depress the trigger briefly to check and do so pointing away from you).
The air supply should be dry (compressor tank blown down regularly) and free from
oil and contamination such as dirt particles. You may use compressed air bottles
instead of an airline and compressor, these should be fitted with appropriate high
pressure regulators to drop the output pressure to no higher than 116PSI before
connecting to the input of your PlasmaPart system’s regulator.
All air supply lines should be at least 6mm (1/4”) inside diameter and of suitable
material to safely operate at your airlines pressure –we can supply airlines if
required, please contact us.

On / Off switch and key - this turns the machine on and off
O.C light –this is a general fault light, it will illuminate if the input voltage to the
machine falls below the required level, the machine develops an electronic fault, the
machine overheats, or if the torch parts are incorrectly assembled, please check the
torch with the machine off and ensure the torch is correctly assembled, the swirl ring
is present, and the electrode can move smoothly in and out. If the torch is correctly
assembled and this light still illuminates, check your power connection, and failing
this, call us and we will help you.
Regulator control –this adjusts the output pressure of the compressed air supply to
the PlasmaPart system. In order to adjust this, lift the knob slightly and you should
hear a slight click as the knob engages, you can now turn the knob to adjust the
pressure. Clockwise to increase and anti-clockwise to decrease, when you have
adjusted it correctly push the knob back down and it will click into the locked
position.
Euro torch connection –this is the large connection into which the torch connects, it
carries the signal from the trigger, the pilot line conductors, the compressed air and
the main torch power feed.
This is a simple connection, it orientates only one way with a lug inside and then
threads into position giving a safe, quick and positive connection for the torch.
It is important that the large copper conductor in the centre is not marked or
damaged as this will cause the connection to bind or leak or both, if this is damaged,
usually by dropping on the floor or marked it is possible to gently file the copper
around the site of the damage to enable it to engage properly, however great care
should be taken if this is carried out. If in doubt please contact us.
Output current control –this is an infinitely variable rotational knob, which adjusts
from minimum (fully anti-clockwise) to maximum (fully clockwise) it is linear in
function and with the knob set halfway between the two extremes the output will be
set at the machines mid-point output and so on.
Work piece clamp connection - this is an industry standard Dinze connector and is
used to connect the work piece clamp to.

Using the PlasmaPart cutting system
The following is a typical sequence of operation –for details of each step please see the
previous pages.
Put on appropriate safety equipment, and check surroundings for suitability and fire
hazards
ensure where you are working is clean and dry and free from other hazards
Connect torch
Connect compressed air supply & check operating pressure is correct
Connect work piece clamp lead & attach clamp to your work
Set current to full (fully clockwise on knob) for your first cut while you get a feel for
the machine
Start cutting
The torch fitted to the IndustriCut 100A can be used either in contact with the work piece,
with a wire standoff guide, and with a variety of tips including extended type. Always use
genuine consumables and if you are in any doubt contact us for advice before proceeding as
mis-fitting of tips and incorrect assembly can rapidly cause very expensive damage to the
torch, in some cases incorrect assembly can be dangerous and may also affect your
warranty.
Full torch assembly information can be found in your torch manual and online at
www.plasmapart.com in the manuals section under ‘Trafimet A-141’.
Whilst cutting it should be noted that no pressure should be applied to the torch into the
material, you are aiming for an effortless glide across the material, some find using both
hands gives a steadier cut as can a guide for example made from a steel strip or more
complex template.
When cutting, each material will exhibit its own particular traits. As a rough guide cut quality
is defined by a combination of speed & power, you should set the output current to give a
comfortable speed of cut through the material, when the magic speed and power
combination have been found the underside of the cutting plume should almost “flare” the
sparks will be projecting as a fine volumous spray at roughly 30 degrees from vertical behind
the cut and very little or anything should project back up.

Turn the machine off before changing tips or adjusting the torch. Wear
appropriate safety equipment at all times. Do not allow contact from the
operator with the work piece whilst a cut is made –use suitable gloves.
Cut quality
Cut quality depends quite heavily on a number of different parameters including torch
standoff or contact, torch alignment relative to the work piece, cutting speed, material
being cut, and of course operator ability and experience.
The following pointers should be noted, however a lot is to be gained from practice and
experience. Training and general information days as well as formal welding coding is
available at our facilities or on site with you, please contact us for details.
Try to keep the torch tip perpendicular and vertical to the work piece when cutting –
this gives you the best chance of a straight cut.
Do not raise the torch tip either from contact with the material or the guide from the
material if using one when cutting as the cut quality will decrease as the gap
increases above the material.
Try to ensure the material being cut is as clean as possible before cutting, this will
improve the cut quality and means there is less chance of the contaminants on the
material becoming airborne fumes when they are cut.
Ensure there is a good clean connection between the work clamp and work piece.
Try to plan direction of cut when the edges are critical, due to the rotation of the
plasma gas stream one side of a cut will be perpendicular, the other may have a
slight angle offset, which side this happens on will reverse with direction of travel.
You can reverse the swirl ring to swap which side this affects –this effect is present
in all plasma arc cutting systems and ranges from imperceptible in thinner materials
to more pronounced at higher cut speeds in thicker materials.
For example –to ensure the cut is ‘square’ to the plate when cutting the inside edge of the
circumference of a circle the torch should move counter clockwise. To keep a ‘square’ cut
on the outside edge of the circumference of a circle the torch should travel in a clockwise
direction.

Fault Finding
If you are having problems with any aspect of your machine please contact us, but first
please take a moment to see if your fault is described here:
Arc goes out mid-way through a cut
Check air pressure is correct.
Check condition of electrode and nozzle.
Check the mains plug is securely connected and not loose or under strain.
Check work piece clamp is securely attached to clean metal of the work piece.
Check torch euro connection is fully home.
Check the compressor and moisture trap on the rear of the machine is not full of
water and that the air supply is free from moisture, oil or other contamination or
debris.
Check to ensure the inlet of the compressor is not breathing in exhaust fumes as this
can stop the arc igniting properly.
Arc will not initiate
Check machine is switched on and has correct air supply.
Check work piece connection.
Disassemble torch consumables and check for worn electrode, loose electrode (this
needs to be nipped up but not overtightened), missing or damaged swirl ring, and
correct matching consumables have been fitted.
Check torch euro connection is fully home
Cut is not clean
Check work piece clamp is securely connected to a clean part or the work piece.
Check condition of consumables and that the swirl ring is not damaged or missing.
Check air pressure is correct.
Check there is no other material on the underside of the material being cut such as a
label or some paint as this can spoil the back side of the cut.
Cut does not fully penetrate material
Check to ensure the work piece clamp is attached to a clean metal part of the work
piece.
Check the air pressure is correct.
Check to ensure the current output is set high enough for the material you are
cutting
Check that the material thickness is within the operating parameters of your
machine.

Thank you again for your purchase and
we hope your PlasmaPart cutting system gives you
many trouble free years of operation
If you need to get in touch for advice, to purchase spares, for warranty support,
service or for any other reason you can contact us here
PlasmaPart Limited
Unit 1 Debdale Lane
Keyworth
Nottinghamshire
NG12 5HN
0844 822 80 40
0844 822 80 48
enquiri[email protected]
www.PlasmaPart.com
Table of contents
Other PlasmaPart Welding System manuals

PlasmaPart
PlasmaPart CUT 40 Air Start Quick setup guide

PlasmaPart
PlasmaPart PlasmaOne 50A Use and care manual

PlasmaPart
PlasmaPart WSME 200 User manual

PlasmaPart
PlasmaPart Cut 55CI Eclipse Use and care manual

PlasmaPart
PlasmaPart Cut 45CI Eclipse Use and care manual

PlasmaPart
PlasmaPart 200A MMA CI Use and care manual
Popular Welding System manuals by other brands

Dynaset
Dynaset HWG 220/6K-49 user manual

Sealey
Sealey SGA2.V2 manual

Kemppi
Kemppi Minarc 150 operating manual

Lincoln Electric
Lincoln Electric Invertec V405 Operator's manual

GYS
GYS NEOPULSE 400 CW Translation of the original instructions

Harbor Freight Tools
Harbor Freight Tools VULCAN PROTIG 200 Owner's manual & safety instructions