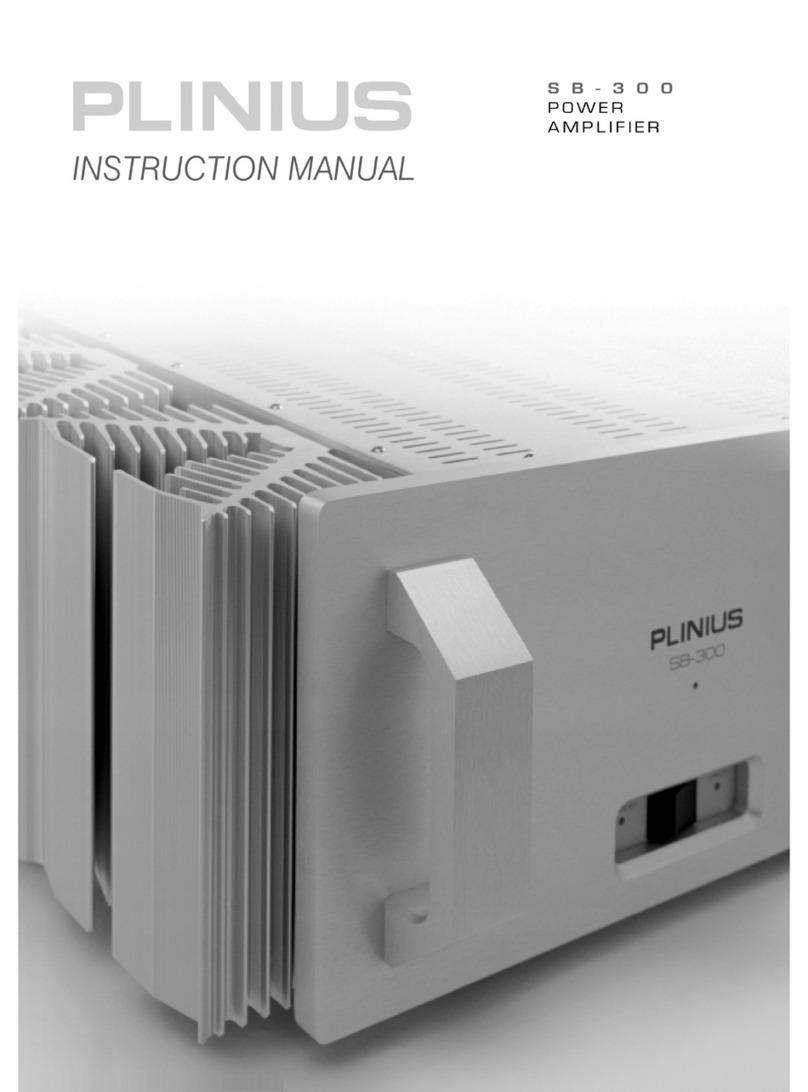
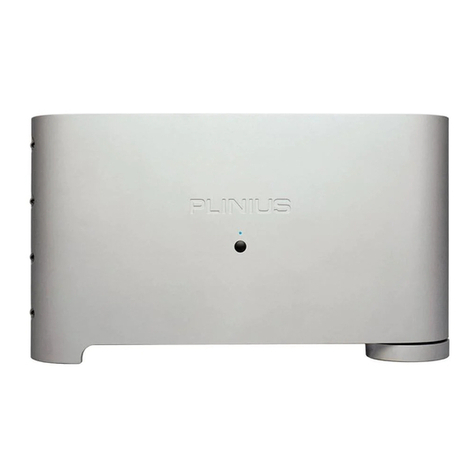
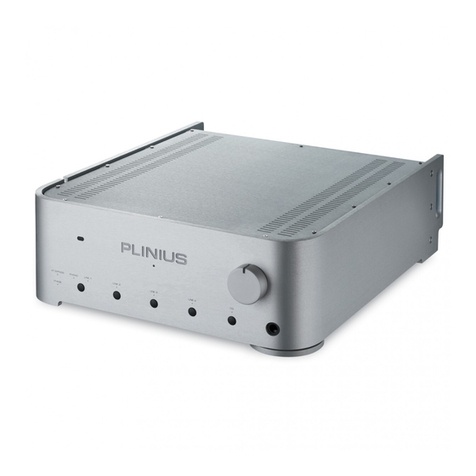
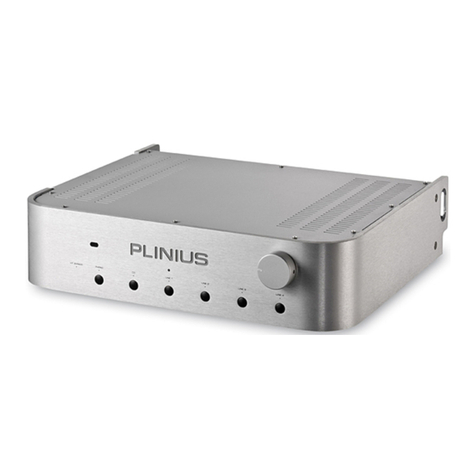
Plinius Reference M-10 User manual

Contents
Introduction ................................................................................ 2
Unpacking..................................................................................... 3
Placement & Ventilation............................................................. 3
Care & Maintenance .................................................................... 4
Precautions .................................................................................. 5
Front Panel Functions ................................................................. 6
Rear Panel Functions................................................................... 7
Remote Control Functions......................................................... 10
Installation & Operation ............................................................. 11
Product Features ........................................................................ 14
Troubleshooting .......................................................................... 16
Specications .............................................................................. 17
Index ............................................................................................. 18
All operational, technical and descriptive material in this publication
is subject to change at any time without notice. For further product
information or queries, please contact your Plinius dealer.
Plinius products are designed and manufactured by
Plinius Audio Limited, New Zealand.

2PLINIUS REFERENCE M-10
Introduction
Congratulations on your decision to become the proud owner of this
Plinius Reference M-10 dual mono preamplier.
This manual has been prepared to help you understand the operation of your preamplier,
and to provide information about its design and the variety of ways it may be used.
We have designed and manufactured this preamplier to reproduce your favourite music
faithfully and accurately. With a little care and a full understanding of the operating
recommendations in this manual, your Plinius Reference M-10 dual mono preamplier will
provide years of high-quality, trouble-free performance.
Please take the time to read this manual thoroughly before using your preamplier.
SERIAL NUMBER
FINAL TEST CERTIFIED BY

PLINIUS REFERENCE M-10 3
Unpacking
Open the box from the top and remove the accessories from
the top foam cap. You may now proceed with the removal of
the top foam cap. Once you have removed the top foam cap
you may now proceed to lift the unit from the box.
Retain the packaging for future transportation of this unit.
Placement & Ventilation
This product may operate at a moderately high temperature, especially during extended
listening sessions. With this in mind, we recommend the following guidelines for
placement and ventilation.
ǞThe ideal location is upon a rigid stand, away from direct contact with any
temperature sensitive materials, furniture or deep pile carpets.
ǞVentilation through and around the preamplier should be kept unimpeded.
ǞEnsure heat vents (slots in the base and lid) are not covered or restricted in any way.
ǞEquipment racks should be of an open type with no closed side panels and no closed
front or rear panels. Ensure a minimum of 100mm clearance on all sides of your
Plinius unit to other equipment and the shelf above.
ǞIf the unit is in an enclosed cabinet, the clearance should be greater than 400mm
on all sides. Ensure the space between the chassis and shelf below the unit is
unobstructed at all times.
ǞWhen stacking separate audio components, ensure a minimum of 400mm clearance
above the top unit is maintained for suitable airow.
ǞNOTE: This unit has been designed for use in moderate climates only, not for tropical
conditions.
The design of this product incorporates a very high level of mechanical decoupling of
the input and output. It can however still be inuenced by acoustical feedback in the
operating environment. The use of acoustic cones or a suitably spiked preamplier stand
or table may further enhance the performance of this preamplier. Consult your Plinius
dealer for further advice if required.

4PLINIUS REFERENCE M-10
Care & Maintenance
With simple care and maintenance your Plinius product can be kept looking and
operating like new for many years to come.
MAINTAINING THE CONNECTORS
Exposed connectors such as the RCA connectors will be subject to environmental
factors, and over time the surface may degrade. This can be greatly reduced by tting
readily available ‘RCA caps’ to reduce the eects of environmental elements on the
RCA connectors. These RCA caps or RCA shorting caps can also provide sonic benets.
Connector cleaning products are also available to clean the RCA and cable connectors and
frequent checks and cleaning will help maintain a good signal connection.
NOTE: DO NOT use RCA shorting caps on output connectors or preamplier input
connectors. Use RCA shorting caps on unused preamplier stage input connectors only.
Standard RCA shielding caps can be used on any unused input or output connectors.
MAINTAINING THE SWITCHES
Switches should be maintained by using each various switch setting periodically. Even if a
switch or a switch setting is not used, it is a good idea to toggle small switches and turn
rotary switches though the full range of the switch several times in succession to keep
the contacts active. Performing this simple action will promote longevity of the switch
contacts.
SURFACE CLEANING
From time to time you may wish to clean the surface of your Plinius equipment to remove
dust, or any material build up from the atmosphere or on commonly used controls. Your
Plinius product is made up of parts that have a hard anodised or a powder coat nish and
will clean easily without being damaged.
Cleaning should be carried out using a soft cleaning cloth, dry or with either a small
amount of water or a very mild surface cleaner, while observing the following guidelines:
ǞAs a safety precaution, always switch the equipment o prior to cleaning
ǞAlways use a cloth that is soft and clean
ǞNever use abrasives or polishing compounds anywhere on the unit
ǞNever apply liquid directly to the surface of the unit
ǞUse the cloth dry or with mild surface cleaners of either liquid or foaming type
ǞApply only small amounts of cleaner to the cloth
ǞDO NOT rub the surface but wipe clean only. Excessive rubbing may dull powder coat
or wear the screen printed text.

PLINIUS REFERENCE M-10 5
Precautions
PLEASE TAKE SPECIAL NOTE OF THE FOLLOWING PRECAUTIONS
BEFORE OPERATING YOUR NEW PREAMPLIFIER.
ǞThe Plinius Reference M-10 dual mono preamplier contains electronic circuits that
are capable of generating heat that could have an adverse eect on other electronic
equipment, furniture, etc.
ǞDO NOT leave ammable material on the preamplier whilst running, as this could
pose a serious re risk.
ǞThis preamplier operates at hazardous voltage levels. We recommend that any work
requiring removal of the lid be referred to a suitably qualied and experienced service
technician.
ǞDO NOT attempt to connect any input of this preamplier to its own outputs.
ǞDO NOT earth any output terminal or connect any of these terminals together
without following the instructions in this manual or seeking qualied assistance.
ǞDO NOT place this preamplier in any position where liquids, or any foreign material
may accidentally enter it.
ǞDO NOT connect any voltage source, short circuit, earth/ground or appliance to the
preamplier output terminals.
ǞDO NOT expose the unit to dripping or splashing.
ǞDO NOT place objects lled with liquids on the unit, e.g. vases.
ǞDO NOT place sources of naked ame on the unit, e.g. candles.

6PLINIUS REFERENCE M-10
Front Panel Functions
The front of the Plinius Reference M-10 dual mono preampli er incorporates all the
facilities you will require on a daily basis.
1. DISPLAY LED
The blue LED on the front panel indicates the mode of operation. When rst switched
on the unit will go into standby and the display LED will vary in brightness. When the unit
is taken out of standby and is ready for use, the LED will remain lit. Whenever mute or a
remote volume button is pressed, the LED will dim. When in error mode, the LED will ash.
2. SOURCE SELECTION BUTTONS
The buttons on the front panel allow selection of any of the di erent inputs available on
the rear panel. This selection is fed to the Pre Out and Line Out of the preampli er.
3. SOURCE DISPLAY LEDS
These small white LEDs communicate the current source selection.
4. HT BYPASS LED
This small white LED is ON when the current source selection is the HT Bypass Input. This
input can be selected using the remote control or activated by the trigger input.
5. PHASE LED
This small white LED is ON when the phase of the input signal is inverted 180°.
This function can be activated using the remote control.
6. VOLUME CONTROL KNOB
The volume control is a motorised unit that will accurately convey the selected source
signal to the line stage of the Plinius Reference M-10 dual mono preampli er. When
using the remote control to alter the volume level, brie y press the button to make small
adjustments, or hold the button down to continuously adjust the volume.
7. BALANCE CONTROL KNOB
The balance control adjusts the volume level between left and right. This can assist with
equalising channel balance where a recording or speaker placement is not optimal.
HT
PHONO
LINE 1
LINE 2
LINE 3
LINE 4
LINE 5
PH
AS
E
4
5
2
3
1
7 6

PLINIUS REFERENCE M-10 7
Rear Panel Functions
This panel incorporates all terminals for connecting the input signals from your CD
player, tuner, etc and the outputs to the mains supply.
Please remember that your Plinius Reference M-10 dual mono preampli er is a high
quality electronic instrument capable of an exceptional level of performance. Be sure that
you understand your system’s requirements fully before you make any connection to this
preampli er.
1. MAINS SWITCH
The heavy-duty rocker switch in the centre of the panel turns the Mains/Line Power to the
preampli er ON or OFF. The preampli er draws a moderately high current when switched
on, so it is not good practice to rapidly turn the Mains switch on and o repeatedly.
2. INPUT TERMINALS
The input terminals for your Plinius Reference M-10 dual mono preampli er are easily
accessible along the top of the rear panel, with the right channel (red) inputs along
the top. All are ‘line level’ inputs, for use with unbalanced signals from line level source
components such as phono preampli ers, CD players, tuners, etc. Consult your Plinius
dealer for further advice if required.
3. XLR INPUT TERMINALS
Below the Phono, Line 1 and Line 2 inputs are an additional set of balanced XLR inputs for
use with source components that feature balanced XLR outputs. Balanced XLR signals are
carried via a three way cable.
The XLR pin con guration used in all Plinius product is:
PIN 1 to GND
PIN 2 to +Signal
PIN 3 to -Signal
NOTE: Because of the way our XLR and balanced inputs are con gured it is not possible to
use both XLR and RCA at the same time.
1
10
9
12
11
6
6
444
8
2 5 7
5
3

8PLINIUS REFERENCE M-10
4. INPUT SELECTION SWITCH
This switch directly above the XLR input is used to select the pair of RCA or XLR input
sockets UP towards the RCA selects the RCA input connections, while DOWN selects XLR
inputs.
5. HT BYPASS INPUT
This input is for use specically with home theatre processors and AV receivers. In some
circumstances you may wish to use the Plinius system as the front two channels of a
surround or home theatre environment. The HT Bypass input can be used for this purpose,
as any signal connected to these inputs will feed to the outputs, bypassing the volume
control. HT Bypass mode is accessed by the remote or the trigger input.
6. PRE OUT
The Pre Out connection is provided to enable the Reference M-10 dual mono preamplier
to be connected to an external power amplier.
7. LINE OUT
These RCA outputs are situated next to Pre Out and are provided to interface to line level
recording devices for archiving, or transferring to portable media. The outputs are always
live with the signal of whichever source is selected at the time of recording.
8. REMOTE TRIGGER INPUT/OUTPUT SOCKETS
In order to integrate more eectively into a home theatre system, the Reference M-10
has a remote trigger input socket on the rear panel. By connecting a processor or source
component with a remote trigger signal to this socket, the Reference M-10 can be
switched between HT Bypass and standby modes. When in standby the preamplier draws
less current and will operate at minimum temperature. This may be of advantage in multi-
amplier and/or remote installations.
The Reference M-10 also features two remote trigger output sockets. By connecting this
trigger output to other system components, the entire system can be put in and out of
standby by the source component.
9. REMOTE IR INPUT
This socket is for connecting to an external remote control sender. Some companies
manufacture these devices to enable multi-room remote control. Please see your Plinius
dealer for further advice.
10. GROUND LIFT SWITCH
This switch allows the signal ground to be disconnected from the chassis. In some
installations a hum loop may exist due to duplicate ground paths from dierent
equipment. Use this switch to remove the connection from 0V to ground thus allowing
some exibility in your particular set-up.
PLINIUS REFERENCE M-10 9
11. GAIN SWITCH
The gain switch allows adjustment of the Lineamp amplication factor.
High gain oers a similar level to most preampliers, while low gain allows further
improvement in distortion levels and can assist where multiple instances of XLR
connections result in too much gain in the complete system.
12. MAINS POWER CORD IEC SOCKET
This connector is where the mains supply cable from your wall connects to the
preamplier. You will notice that a fuse holder is mounted within this connection, and it
holds a mains fuse to provide surge and overload protection for your preamplier.

10 PLINIUS REFERENCE M-10
Remote Control Functions
The Plinius Reference M-10 dual mono preampli er features a full function remote to
control all settings and con gurations of the preampli er.
1. STANDBY
Standby is used to put the unit into a low power mode. This
disconnects the outputs of the preampli er and turns o the white
display LED’s. It also switches o the power supply to the line ampli er,
reducing power consumption to a minimum.
2. DISPLAY
The display button on the remote enables you to adjust the display
brightness of the white LED’s. Pressing the display button repeatedly
will dim the LED in steps until they are o . The next press of the button
will cycle the display back to full brightness.
3. VOLUME CONTROL
Use these two buttons to control the volume level of the Integrated
Ampli er. The right side button increases volume, while the left side
button decreases the volume. Brie y press either button to make
ne adjustments to the volume level. Hold down either button to
continually adjust the volume level. Adjusting volume UP will also take
the preampli er out of Mute.
4. MUTE
Pressing this button toggles the Reference M-10 preampli er in and
out of mute mode.
5. HT BYPASS
The HT button activates the Plinius Reference M-10 preampli er
home theatre bypass mode. Once activated, the volume control is
bypassed and the signal is connected from the HT input to the output.
NOTE: In HT Bypass mode the only buttons that continue to function
are Standby and Display. More information on HT Bypass can be found
in the Installation & Operation section in this manual.
6. PHASE
The phase of the output signal from the preampli er is toggled from absolute (in-phase)
to inverted 180 degrees with each press of this button.
7. SOURCE SELECTION
The input source buttons enable selection of each input for playback from the selected
component through the preampli er. These can also be used to take the unit out of
standby or out of HT mode.
7
7
7
7
7
7
4
5
3
1 2
6

PLINIUS REFERENCE M-10 11
Installation & Operation
WARNING: RISK OF ELECTRIC SHOCK. TERMINALS MARKED WITH
SHOULD BE CONSIDERED HAZARDOUS LIVE AT ALL TIMES.
This preamplier operates at hazardous voltage levels. We recommend that any work
requiring removal of the lid be referred to a suitably qualied and experienced service
technician. DO NOT place this preamplier in any position where liquids or any foreign
material may accidentally enter it.
PLEASE READ AND UNDERSTAND THE PRECAUTIONS WITHIN THIS
MANUAL FOR PLACEMENT & OPERATION OF THIS PRODUCT.
CONNECTIONS
Connections to your Reference M-10 dual mono preamplier should be made in the same
order as they are listed in this section. DO NOT attempt to connect your Reference M-10
dual mono preamplier until you have read and fully understood these instructions.
Should you require further assistance, please contact your Plinius dealer.
DO NOT POWER UP YOUR PREAMPLIFIER UNTIL YOU HAVE
CONNECTED YOUR INPUT/OUTPUTS CORRECTLY FOR YOUR SYSTEM.
SOURCE COMPONENT INPUTS
Connect your Source to the input of the Reference M-10 dual mono preamplier using
suitable single-ended RCA or Balanced XLR interconnect cables only. For RCA, make sure
you connect the red coded cable to the red RIGHT RCA input, and the white cable to the
white LEFT RCA input. Also make sure the RCA connectors are a snug t and are inserted
all the way in.
For CD XLR input connection, make sure you connect the RIGHT XLR input and LEFT XLR
inputs to the right and left outputs from your source respectively. Also make sure the XLR
connectors click into place. Use the input selection switch to select RCA if you are using
RCA inputs or to select XLR if you are using XLR inputs.
NOTE: DO NOT connect XLR and RCA at the same time, use only one or the other. The
phono input should be connected to a suitable source turntable only.
TERMINATION QUALITY
Quality of the connections must be examined to ensure that high-performance, trouble-
free operation is enjoyed. Check the connections are inserted fully and are a rm t. XLR
connectors should latch in place securely.
PHASING (OR POLARITY)
It is important to achieve good stereo imaging in your listening room. If you experience
poor stereo image and/or a lack of bass, check that the loudspeaker wiring has been
connected correctly. If in doubt, consult your Plinius dealer for advice.

12 PLINIUS REFERENCE M-10
Naturally it is also important to make sure all the leads carrying signals for the RIGHT channel
loudspeaker are connected to the RIGHT input to the amplier from your preamplier or
CD player etc. Signals for the LEFT channel should be wired in a similar fashion.
USING HT BYPASS INPUT
The Reference M-10 dual mono preamplier features a home theatre input to bypass
the preamplier stage when used in home theatre or multimedia installations. When HT
Bypass is selected, the signal will pass from the HT Bypass input directly to the Outputs.
This enables the unit to remain in circuit for use with two channel sources (such as CD
players and tuners), as well as a link to the amplier and speakers should you wish to use
your normal stereo set-up in a surround or home theatre environment.
To access the HT Bypass input, press the HT button on the remote control. To exit the HT
Bypass mode and return to using a source component, press HT again, or use the source
buttons to select any desired source component.
NOTE: Only connect a suitable pre out signal to the HT Bypass input. When HT Bypass is
selected, remote volume cannot be accessed.
PRE OUT
Dual preamplier outputs are provided on the back of the Reference M-10 dual mono
preamplier. The signal from this output comes from whatever source is currently
selected. All pre out outputs are live at all times except during Mute or Standby.
USING LINE OUT
A line level output is provided on the back of the Reference M-10 Preamplier for
connection to accessories such as recording devices, headphone ampliers, etc. The level
is xed and carries signal of the selected input, even when the Preamplier is muted.
CONNECTING THE MAINS SUPPLY
Firstly, check that the mains supply voltage printed on the rear of this preamplier is
similar to the mains supply voltage in your area. If in doubt, please consult your Plinius
dealer. Mains supply power connection is via the plug-in lead supplied with your Reference
M-10 dual mono preamplier. Where possible, check the wall outlet is switched OFF, then
connect the local mains plug end of the lead to the wall outlet. Check the preamplier is
switched OFF, and connect the IEC end of the cable to the IEC socket at the back of the
preamplier. With the cord fully connected, switch the wall outlet ON.
Now that your Reference M-10 dual mono preamplier is congured correctly, switch
the power switch on the rear panel to ON. The display LED will cycle in brightness for
approximately ten seconds as the internal circuitry stabilises, after which time the unit will
be in standby mode. Select any input source to exit standby mode. You can now enjoy your
new Plinius Reference M-10 dual mono preamplier.
NOTE: This unit must be connected to a mains socket outlet with a protective earthing

PLINIUS REFERENCE M-10 13
connection. The wall outlet socket or mains switch must be accessible at all times in case
of emergency.
WARM-UP PERIOD
You will nd that the Reference M-10 dual mono preamplier will become noticeably
‘purer’ in sound after being on for a period of time. We usually recommend waiting
at least 24 hours before expecting the best quality of sound reproduction from your
preamplier.

14 PLINIUS REFERENCE M-10
Product Features
REMOTE CONTROL
Provided with your Reference M-10 dual mono preamplier is a 13 function remote
control. Two AAA batteries power the remote, and these are replaced by removing the
single screw on the base of the remote that holds the battery compartment in place.
Replace the two batteries, taking care to ret the new ones with correct polarity.
GROUND LIFT SWITCH
This switch allows the signal ground to be disconnected from the chassis. In some
installations a hum loop may exist due to duplicate ground paths from dierent
equipment. Use this switch to break the connection to 0V to ground thus allowing some
exibility in your particular set-up.

GAIN SWITCH
The gain switch allows adjustment of the Lineamp amplication factor. High gain oers
a similar level to most preampliers, while low gain allows further improvement in
distortion levels and can assist where multiple instances of XLR connections result in too
much gain in the complete system.
LINE OUT
A Line Level output is provided to interface to headphone ampliers, line level recording
devices for archiving, or other accessories that require a line level signal. The outputs are
always live with the signal of whichever source is selected at the time of listening.
REMOTE TRIGGER INPUT/OUTPUT SOCKETS
Remote Trigger Input and Output sockets allow the system components to be connected
in a ‘daisy chain’ arrangement for semi automated operation. This allows a master
component to activate and deactivate standby mode of the other components connected.
Two trigger output sockets are provided for use with monoblock ampliers or other
additional components.
REMOTE IR INPUT
This socket is for connecting to an external remote control sender. Some companies
manufacture these devices to enable multi-room remote control. Please see your Plinius
dealer for further advice.
MAINS/LINE FUSE
A Mains/Line fuse is tted within the IEC socket on the rear of the preamplier. A small
drawer at the bottom of this socket may be removed (after the IEC plug is removed) by
levering it out with a at blade screwdriver. The fuse tted should be rated as specied on
the rear panel.
IMPORTANT: DO NOT FIT A FUSE WITH A HIGHER RATING.

PLINIUS REFERENCE M-10 15
In the unusual event that this fuse should blow, you must rst establish the cause of this
failure (such as power surges, damaged mains cable, etc) before replacing the fuse with
one of the same rating and type. Should the preamplier continue to suer mains fuse
failure, contact your Plinius dealer.

16 PLINIUS REFERENCE M-10
Troubleshooting
NO SOUND FROM THE UNIT
If the unit is not reproducing audio take the following steps:
ǞCheck the source is correctly connected to an appropriate input on the unit. Refer to
the Installation & Operation section.
ǞCheck the source is playing, and not paused or muted. If it has adjustable volume,
check this is at the usual output level.
ǞCheck the unit is set to select the correct source input. Adjust the source selector for
the correct source component.
ǞCheck the volume. Turn the unit volume up to a point just below the normal listening
level. DO NOT turn the volume up to maximum in case the sound begins to come
through the speakers.
ǞCheck the unit is not in Mute. If the Display LED is dim, this indicates the unit is in
Mute mode. The Display LED should be full brightness for operational mode.
POWER FAILURE
The unit may have suered mains fuse failure or be in thermal overload protection mode.
ǞMains Fuse Failure: Check the mains fuse and replace if needed.
Refer to the Product Features section for further information.
NOTE: If the unit immediately or repeatedly suers mains fuse failure there may be a
major problem and you should contact your Plinius dealer.
ERROR MODE
If the input signal our output signal is too large the error mode will be triggered and the
input and output will mute and the power LED will ash. The preamplier will return to
normal operation when the signal is reduced to an appropriate level.

PLINIUS REFERENCE M-10 17
Specications
FREQUENCY RESPONSE
20Hz to 20kHz +/–0.1dB
DISTORTION
<0.001% THD+N
MAXIMUM INPUT VOLTAGE
7V RMS RCA/Unbalanced
7V RMS XLR/Balanced
INPUT IMPEDANCE
7.5kΩ RCA/Unbalanced
47kΩ XLR/Balanced
OUTPUT IMPEDENCE
10Ω RCA/Unbalanced
20Ω XLR/Balanced
MAXIMUM OUTPUT VOLTAGE
7V RMS RCA/Unbalanced
14V RMS XLR/Balanced
POWER/CURRENT CONSUMPTION
80W/0.3A maximum
7W/0.03A standby
DIMENSIONS
Height: 170mm (6.75")
Width: 510mm 20")
Depth: 480mm (19")
Weight: 16kg (35lbs)

18 PLINIUS REFERENCE M-10
Index
Balance Control ...............................................................6
Display LED.......................................................................6
Front Panel Layout ..........................................................6
Fuse Protection................................................................16
Gain Switch.......................................................................9, 14
Ground Lift Switch...........................................................8, 14
HT Bypass..........................................................................8, 10, 12
IEC Power Connector......................................................9, 12
Input Terminals ................................................................7, 11
Line Out ............................................................................8, 12, 14
Mains/Line Fuse ...............................................................14
Mains Supply Connection ...............................................12
Mains Switch ....................................................................7
Operating Temperature .................................................3
Phasing..............................................................................11
Placement.........................................................................3
Pre Out Output................................................................8, 12
Rear Panel Layout............................................................7
Remote Control ...............................................................10, 14
Remote IR Input...............................................................8, 14
Safety Precautions ..........................................................5
Serial Number ..................................................................2
Source Selection Buttons...............................................6
Terminations ....................................................................11
Troubleshooting ..............................................................16
Ventilation ........................................................................3
Volume Control................................................................6, 10
Warm-Up Period ..............................................................13

PLINIUS REFERENCE M-10 19

20 PLINIUS REFERENCE M-10
Table of contents
Other Plinius Amplifier manuals

Plinius
Plinius Tautoro User manual

Plinius
Plinius KORU User manual

Plinius
Plinius 9200 User manual

Plinius
Plinius A-300 User manual

Plinius
Plinius P10 User manual

Plinius
Plinius KIOKIO User manual

Plinius
Plinius M8 User manual

Plinius
Plinius SA-102 User manual

Plinius
Plinius Hautonga User manual

Plinius
Plinius KAITAKI User manual

Plinius
Plinius SA-100 Series User manual

Plinius
Plinius P8 User manual

Plinius
Plinius P7 User manual

Plinius
Plinius INSPIRE 880 Assembly instructions

Plinius
Plinius JARRAH User manual

Plinius
Plinius M12 User manual

Plinius
Plinius PLINIUS M7 User manual

Plinius
Plinius P100 User manual

Plinius
Plinius SA-103 User manual

Plinius
Plinius INSPIRE 880 User manual