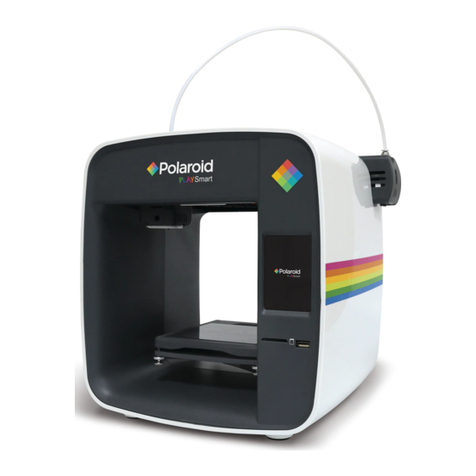
Polaroid PlaySmart User manual

Quick Start Guide

2
Quick Start Guide
1
3
Insert
Insert
PTFE Tube PTFE Tube
Quick Start Guide
Contents
Remove the printer and the contents
from the box.
3D Printer Filament Power Cable
Heated Print Bed PTFETube Precise Filament
Holder & Scale
Quick Start Guide Nozzle kit SD card
Insert one end of the PTFE tube into the printer
head and the other end into the extruder.
Printer
Extruder
To detach the PTFE tube, press the plastic cap
downwards and withdraw the tube. If the tube
does not easily release remove the connector as
well by twisting it.
Tip
2
Switch on
Plug in
Connect the Power Cable at the back of
the printer and switch on the printer.
Please follow the instructions on the LCD
screen.
4
Deutsch
German
Français
French
English
English
Nederlands
Duth
Español
Spanish
Italiano
Italian
Set up your printer

3
5
Twist around
until it breaks
Place the filament
onto the Precise
Filament Holder &
Scale and switch it on.
Top of filament should NOT be
angled.
Keep filament straight when
loading.
Twist off 5cm of filament as
shown above.
10
For further information please visit:
www.polaroid3d.com/playsmart3dprinter
This product is distributed and sold by Environmental Business Products Ltd. ©2019 All Rights Reserved.
Polaroid, Polaroid & Pixel, Polaroid Color Spectrum, and Polaroid Classic Border Logo are trademarks of PLR IP Holdings, LLC, used
under license. PLR IP Holdings, LLC does not manufacture this product or provide any Manufacturer’s Warranty or support.
Made in China.
9Download or design your model (.STL) and then
slice using the Polaroid SmartPrep Software
(www.polaroid3d.com/software). Save to SD card
or USB and then print from the printer.
Insert your SD card or USB and go to ‘New Print’
to start your print.
Gcode files
8Download the Polaroid
PlaySmart App to print
remotely, and then
connect your printer:
Polaroid PlaySmart
3D Printer
Setting
Setting
Pair the
Printer
Pair the
Printer
1
2
3
Scan
QR-code
7Remove any residue of filament from the nozzle
before you start printing.
6
Filament
Load
Squeeze
together
Squeeze
together
Filament
(2cm)
Insert lament
PTFE Tube
Slightly squeeze the levers on the side of the
extruder together and slide the filament up from the
bottom until approx. 2cm is visible in the PTFE tube.
Press ‘Filament’, then ‘Load’ on the LCD screen.

4
Guide de démarrage rapide
1
3
Insérer
Insérer
Tube en PTFE
Tube en PTFE
Guide de démarrage rapide
Contenu
Déballez l'imprimante et le contenu de la boîte.
Imprimante 3D Filament Câble d'alimentation
Plateau d'impression
chauffé Tube en PTFE Support et balance de
précision pour filament
Guide de démarrage
rapide Kit de buse Carte SD
Insérez une extrémité du tube en PTFE dans la
tête d'impression et l'autre extrémité dans
l'extrudeuse.
Imprimante
Extrudeuse
Pour libérer le tube en PTFE, appuyez sur le
capuchon en plastique et retirez le tube. Si vous ne
parvenez pas à libérer le tube facilement, retirez
également le connecteur en le faisant tourner.
Conseil
2
Mise sous tension
Branchement
Branchez le câble d'alimentation au dos de
l'imprimante et allumez l'imprimante.
Veuillez suivre les instructions qui s'affichent
sur l'écran LCD.
4
Deutsch
German
Français
French
English
English
Nederlands
Duth
Español
Spanish
Italiano
Italian
Installez votre imprimante

5
10
Pour plus d'informations, visitez le site :
www.polaroid3d.com/playsmart3dprinter
This product is distributed and sold by Environmental Business Products Ltd. ©2019 All Rights Reserved.
Polaroid, Polaroid & Pixel, Polaroid Color Spectrum, and Polaroid Classic Border Logo are trademarks of PLR IP Holdings, LLC, used
under license. PLR IP Holdings, LLC does not manufacture this product or provide any Manufacturer’s Warranty or support.
Made in China.
9Téléchargez ou créez votre modèle (.STL) puis procédez
au découpage des couches à l'aide du logiciel Polaroid
SmartPrep (www.polaroid3d.com/software).
Enregistrez-le sur la carte SD ou une clé USB puis
imprimez à partir de l'imprimante.
Insérez votre carte SD ou clé USB et sélectionnez
« New Print » (Nouvelle impression) pour lancer
votre impression.
Fichiers Gcode
8Téléchargez l'application
Polaroid PlaySmart pour
pouvoir effectuer des
impressions à distance
puis connectez votre imprimante :
Polaroid PlaySmart
3D Printer
Configuration
Configuration
Appariement de
l'imprimante
Appariement de
l'imprimante
1
2
3
Numérisation
du code QR
7Retirez tout résidu de filament de la buse avant
de lancer l'impression.
6
Filament
Chargement
Pression sur
les leviers
Pression sur
les leviers
Filament
(2cm)
Insertion du lament
Tube en PTFE
Appuyez légèrement sur les leviers sur le côté de
l'extrudeuse et faites glisser le filament du bas vers le
haut jusqu'à ce qu'environ 2 cm de filament soient
visibles dans le tube en PTFE. Appuyez sur « Filament »
puis « Load » (Charger) sur l'écran LCD.
5
Tournez jusqu'à
ce qu'il casse
Placez le filament sur
le Support et balance
de précision pour
filament et allumez-le.
Le dessus du filament ne doit
PAS être coudé.
Gardez le filament droit lors du
chargement.
Débranchez 5 cm de filament
comme indiqué ci-dessus.

6
Schnell Start Anleitung
1
3
Einfügen
Einfügen
PTFE Düse
PTFE Düse
Schnell Start Anleitung
Paketinhalt
Nehmen Sie den Drucker und den weiteren Inhalt
aus der Verpackung.
3D-Drucker Filament Netzkabel
Heizdruckbett PTFE Düse Präzise Filament
Halter & Waage
Schnell Start
Anleitung Düsensatz SD-Karte
Führen Sie ein Ende der PTFE-Röhre in den
Druckkopf und das andere Ende in den
Extruder ein.
3D-Drucker
Extruder
Zum Entfernen der PTFE-Röhre drücken Sie die
Kunststoffkappe nach unten und ziehen Sie die Röhre
heraus. Wenn sich die Röhre nur schwer lösen lässt,
entfernen Sie auch den Anschluss, indem Sie ihn drehen.
Tipp
2
Einschalten
Anschließen
Schließen Sie das Netzkabel an der Rückseite des
Druckers an und schalten Sie den Drucker ein.
Befolgen Sie die Anweisungen auf dem
LCD-Bildschirm.
4
Deutsch
German
Français
French
English
English
Nederlands
Duth
Español
Spanish
Italiano
Italian
Richten Sie Ihren Drucker ein

7
10
Weitere Informationen finden Sie unter:
www.polaroid3d.com/playsmart3dprinter
This product is distributed and sold by Environmental Business Products Ltd. ©2019 All Rights Reserved.
Polaroid, Polaroid & Pixel, Polaroid Color Spectrum, and Polaroid Classic Border Logo are trademarks of PLR IP Holdings, LLC, used
under license. PLR IP Holdings, LLC does not manufacture this product or provide any Manufacturer’s Warranty or support.
Made in China.
9Laden Sie Ihr Modell (.STL) herunter oder gestalten Sie
es, und schneiden Sie es dann mit der Polaroid
SmartPrep-Software (www.polaroid3d.com/software).
Speichern Sie es auf einer SD-Karte oder einem
USB-Stick und drucken Sie es anschließend aus.
Stecken Sie die SD-Karte oder den USB-Stick ein
und navigieren Sie zu „Neuer Druck“, um den
Druckvorgang zu starten.
GCODE-Dateien
8Laden Sie die Polaroid
PlaySmart-App herunter,
um aus der Ferne zu
drucken, und verbinden
Sie dann Ihren Drucker:
Polaroid PlaySmart
3D Printer
Einstellung
Einstellung
Koppeln des
Druckers
Koppeln des
Druckers
1
2
3
QR-Code
scannen
7Entfernen Sie sämtliche Filament-Rückstände
von der Düse, bevor Sie mit dem Drucken
beginnen.
6
Filament
Laden
Zusammendrücken
Zusammendrücken
Filament
(2cm)
Filament einsetzen
PTFE Düse
Drücken Sie die Hebel an der Seite des Extruders leicht
zusammen und schieben Sie das Filament von unten
nach oben, bis ca. 2 cm in der PTFE-Röhre sichtbar sind.
Drücken Sie auf dem LCD-Bildschirm auf „Filament“
und anschließend auf „Laden“.
5
Dreh dich herum,
bis es bricht
Setzen Sie das Filament
auf den präzisen
Filament-Halter mit
Waage und schalten
Sie ihn ein.
Die Oberseite des Filaments
darf NICHT abgewinkelt sein.
Halten Sie das Filament beim
Laden gerade.
5 cm Filament wie oben gezeigt
abdrehen.

8
Guida rapida
1
3
Inserire
Inserire
Tubo PTFE
Tubo PTFE
Manuale di avviamento veloce
Contenuto
Rimuovere la stampante ed i contenuti dalla
scatola.
Stampante 3D Filamento Cavo di
Alimentazione
Letto di stampa
caldo Tubo PTFE Supporto e bilancia di
Filamento Precise
Guida rapida Scatola degli ugelli Scheda SD
Inserire un capo del tubo PTFE nella testa della
stampante e l’altro capo nell’estrusore.
Stampante
Estrusore
Per staccare il tubo PTFE, premere il cappuccio di
plastica verso il basso e rimuovere il tubo. Se il
tubo non viene rilasciato facilmente rimuovere il
connettore ruotandolo.
Consiglio
2
Accendere
Connettere
Connettere il cavo di alimentazione al retro
della stampante ed accendere la stampante.
Per Favore seguire le istruzioni sullo
Schermo LCD.
4
Deutsch
German
Français
French
English
English
Nederlands
Duth
Español
Spanish
Italiano
Italian
Impostare la stampante

9
10
Per maggiori informazioni visitare:
www.polaroid3d.com/playsmart3dprinter
This product is distributed and sold by Environmental Business Products Ltd. ©2019 All Rights Reserved.
Polaroid, Polaroid & Pixel, Polaroid Color Spectrum, and Polaroid Classic Border Logo are trademarks of PLR IP Holdings, LLC, used
under license. PLR IP Holdings, LLC does not manufacture this product or provide any Manufacturer’s Warranty or support.
Made in China.
9Scaricare o disegnare il modello (.STL) e poi
utilizzare il Polaroid SmartPrep Software
(www.polaroid3d.com/software). Salvare nella
carta SD o USB e poi stampare dalla stampante.
Inserire la carta SD o USB ed andare a ‘Nuova
Stampa’ per iniziare a stampare.
Gcode Files
8Scarica la Polaroid
PlaySmart App per
stampare da remoto, a
poi connetti la stampante:
Polaroid PlaySmart
3D Printer
Impostazioni
Impostazioni
Accoppiare la
Stampante
Accoppiare la
Stampante
1
2
3
Scannerizzare
il QR-code
7Rimuovere ogni residuo di filamento
dall’erogatore prima di iniziare a stampre.
6
Filamento
Caricare
Premere
insieme
Premere
insieme
Filamento
(2cm)
Inserire Filamento
Tubo PTFE
Premere leggermente le leve sul lato dell’estrusore
insieme e fare scorrere il filamento dal basso verso l’altro
fino a che non e’ visibile per circa 2 cm nel tubo PTFE.
Premere ‘Filamento’ e poi ‘Carica’ sullo schermo LCD.
5
Girare intorno
fino a quando
non si rompe
Posizionare il
filamento nel Precise
Filament Holder &
Scale ed accendere.
La parte superiore del filamento
NON deve essere angolata.
Mantenere il filamento dritto
durante il caricamento.
Svitare 5 cm di filamento come
mostrato sopra.

10
Guía de Inicio Rápido
1
3
Insertar
Insertar
Tubo de PTFE
Tubo de PTFE
Guía de inicio rápido
Contenido
Retire la impresora y el contenido de la caja.
Impresora 3D Filamento Cable de
alimentación
Cama de impresión
caliente Tubo de PTFE Soporte y balanza de
filamento Precise
Guía de inicio rápido Caja de boquillas Tarjeta SD
Inserte un extremo del tubo de PTFE en el cabezal
de la impresora y el otro extremo en la extrusora.
Impresora
Extrusora
Para desmontar el tubo de PTFE, presione la tapa
de plástico hacia abajo y retire el tubo. Si el tubo
no se suelta fácilmente, retire también el
conector girándolo.
Consejo
2
Encender
Enchufar
Conecte el cable de alimentación en la parte
posterior de la impresora y encienda la
impresora.
Siga las instrucciones en la pantalla LCD.
4
Deutsch
German
Français
French
English
English
Nederlands
Duth
Español
Spanish
Italiano
Italian
Configure su impresora

11
10
Para más información, visite:
www.polaroid3d.com/playsmart3dprinter
This product is distributed and sold by Environmental Business Products Ltd. ©2019 All Rights Reserved.
Polaroid, Polaroid & Pixel, Polaroid Color Spectrum, and Polaroid Classic Border Logo are trademarks of PLR IP Holdings, LLC, used
under license. PLR IP Holdings, LLC does not manufacture this product or provide any Manufacturer’s Warranty or support.
Made in China.
9Descargue o diseñe su modelo (.STL) y luego
utilize el software Polaroid SmartPrep
(www.polaroid3d.com/software). Guarde el modelo en la
tarjeta SD o USB y luego imprima desde la impresora.
Inserte su tarjeta SD o USB en la impresora y
vaya a ‘Nueva impresión’ para comenzar su
impresión.
Archivos
Gcode
8Descargue la aplicación
Polaroid PlaySmart para
imprimir de forma remota y
luego conecte su impresora:
Polaroid PlaySmart
3D Printer
Ajustes
Ajustes
Empareja la
impresora
Empareja la
impresora
1
2
3
Escanear
código QR
7Retire cualquier residuo de filamento en la
boquilla antes de comenzar a imprimir.
6
Filamento
Cargar
Presionar
Presionar
Filamento
(2cm)
Insertar lamento
Tubo de PTFE
Presione ligeramente las palancas del lado de la extrusora y
deslice el filamento hacia arriba desde la parte inferior hasta
ver visible el filamento en el tubo de PTFE (aprox. 2 cm).
Presione ‘Filamento’, luego ‘Cargar’ en la pantalla LCD.
5
Girar hasta
que se rompa
Coloque el cartucho
de filamento en el
Soporte y balanza de
filamento Precise y
enciéndalo.
La parte superior del filamento
NO debe estar en ángulo.
Mantenga el filamento recto
al cargar.
Retuerza 5cm de filamento
como se muestra en la imagen.

12
Snelstartgids
1
3
Invoegen
Invoegen
PTFE-buis PTFE-buis
Snelstartgids
In de doos
Haal de printer en de inhoud uit de doos.
3D-printer Filament Voedingskabel
Verwarmd printbed PTFE-buis
Nauwkeurige
filamenthouder
en -schaal
Snelstartgids Set van spuitkoppen SD-kaart
Plaats het ene uiteinde van de PTFE-buis in de
printkop en het andere uiteinde in de extruder.
3D-printer
Extruder
Maak de PTFE-buis los door de plastic dop naar beneden
te drukken en de buis te verwijderen. Als de buis niet
gemakkelijk is los te koppelen, kunt u ook de connector
verwijderen door deze te draaien.
Tip
2
Inschakelen
Plug-in
Sluit de voedingskabel aan op de achterkant van
de printer en schakel de printer in. Volg de instructies op het LCD-scherm.
4
Deutsch
German
Français
French
English
English
Nederlands
Duth
Español
Spanish
Italiano
Italian
Uw printer instellen

13
10
Ga voor meer informatie naar:
www.polaroid3d.com/playsmart3dprinter
This product is distributed and sold by Environmental Business Products Ltd. ©2019 All Rights Reserved.
Polaroid, Polaroid & Pixel, Polaroid Color Spectrum, and Polaroid Classic Border Logo are trademarks of PLR IP Holdings, LLC, used
under license. PLR IP Holdings, LLC does not manufacture this product or provide any Manufacturer’s Warranty or support.
Made in China.
9Download of ontwerp uw model (.STL) en snijd dit
bij met de Polaroid SmartPrep-software
(www.polaroid3d.com/software). Sla het model op
een SD-kaart of USB op en print vanaf de printer.
Plaats de SD-kaart of USB en ga naar 'Nieuwe
afdrukopdracht' om het afdrukken te starten.
Gcode-bestanden
8Download de Polaroid
PlaySmart-app om op
afstand te printen. Maak
vervolgens verbinding
met uw printer:
Polaroid PlaySmart
3D Printer
Instelling
Instelling
De printer
koppelen
De printer
koppelen
1
2
3
QR-code
scannen
7Verwijder eventuele resten van het filament van
de spuitopening voordat u begint met printen.
6
Filament
Laden
Samenknijpen
Samenknijpen
Filament
(2cm)
Filament plaatsen
PTFE-buis
Knijp de hendels aan de zijkant van de extruder iets
samen en schuif het filament vanaf de onderkant naar
boven totdat ongeveer 2 centimeter zichtbaar is in de
PTFE-buis. Druk op 'Filament' en vervolgens op 'Laden'
op het LCD-scherm.
5
Draai rond totdat
het breekt
Plaats het filament
op de nauwkeurige
filamenthouder en
-schaal en schakel
het filament in.
De bovenkant van de draad
mag NIET schuin staan.
Houd filament recht tijdens
het laden.
Draai 5 cm draad af zoals
hierboven afgebeeld.

14
Utilisable dans les imprimantes 3D et les
stylos 3D FDM / FFF lorsqu’ils sont utilisés
conformément aux tolérances de température
recommandées sur les équipements applicables
Ne pas ouvrir avant d’être prêt à l’emploi.
Conserver dans un endroit propre et sec.
Suitable for use in FDM/FFF 3D Printers and
3D Pens when used within recommended
temperature tolerances on applicable
equipment. Do not open until ready to use.
Store in a clean dry place.
Geeignet für den Einsatz in FDM/FFF
3D-Druckern und 3D-Stiften, wenn sie
innerhalb der empfohlenen Temperaturtoleranzen
an den entsprechenden Geräten verwendet
werden. Vor Gebrauch nicht öffnen. An einem
trockenen Ort aufbewahren.
Designed to work with ALL Polaroid Universal
Filament materials on any suitable FFF/FDM
3D printer.
Always know how much material you have in
weight (g) and length (cm).
Requires 2 x AA batteries (please follow
manufacturer guidelines on use and disposal of
batteries).
Auto power-save mode after 2 mins of
inactivity.
Place your Polaroid Universal Filament in an
optimum position to work with your printer.
Entwickelt, um mit allen Polaroid Universal
Filament Materialien auf jedem geeigneten
FFF/FDM 3D Drucker arbeiten.
Immer wissen, wie viel Material Sie Gewicht
(g) und Länge (cm haben).
Erfordert 2x AA Batterien (Bitte beachten Sie die
Herstellerrichtlinien zur Verwendung und Entsorgung
von Batterien).
Auto Power-Save Modus nach 2 Minuten
Inaktivität.
Legen Sie Ihre Polaroid Universal Filament in
eine optimale Position auf Ihrem Drucker.
Universal Filament Cartridge
Precise Filament Holder & Scale
Universal Filament Cartridge
Universal Filament Kassette
Cartouche filament universelle
Precise Filament Holder & Scale
Präzise Filament Halter & Waage
Support et balance de précision
pour le filament
Conçu pour fonctionner avec TOUS les
matériaux Polaroid Universal Filament sur
n’importe quelle imprimante 3D FFF/ FDM.
Pour toujours savoir combien de matière vous
avez en poids (g) et en longueur (cm).
Requiert 2 piles AA (veuillez suivre les directives
du fabricant sur l’utilisation et l’élimination des piles).
Mode économie d’énergie automatique après
2 minutes d’inactivité.
Placez votre Polaroid Universal Filament dans
une position optimale pour travailler avec votre
imprimante.

15
3D MATERIALS
Adatto per l’uso di stampanti 3D FDM/FFF
e penne 3D quando usato sulle suddette
attrezzature entro i limiti di tolleranza della
temperatura consigliata. Non aprire fino al
momento dell’uso. Conservare in un luogo
asciutto e pulito.
Adecuado para uso en impresoras FDM/
FFF y lápiz 3D que operan dentro del rango
de temperatura recomendado en el equipo
aplicable. No abra hasta que esté listo para
usar. Almacene en un lugar limpio y seco.
Geschikt voor gebruik in FDM/FFF 3D-printers
en 3D Pennen wanneer gebruikt binnen de
toleranties van de aanbevolen temperatuur die
van toepassing zijn op het apparraat. Niet open
voor gebruik. Bewaar in een schone, droge
plaats.
Progettato per funzionare con tutti i filamenti universali
Polaroid su qualsiasi stampante FFF/FDM 3D.
Permette di sapere sampre quanto materiale
si ha a disposizione in termini di peso (g) e
lunghezza (cm).
Richiede 2 batterie AA (si prega di seguire le linee
guida del produttore sull’uso e lo smaltimento delle batterie).
Modalita’ di risparmio energetico automatica
dopo 2 minuti di inattività.
Permette al filamento universale Polaroid di
essere in una posizione ottimale per lavorare
con la stampante.
Diseñado para trabajar con cualquier impresora
3D FFF/FDM y con todos los materiales de
Filamento Universal de Polaroid.
Sepa siempre cuánto material tiene en peso (g)
y longitud (cm).
Requiere 2 pilas AA (siga las instrucciones del
fabricante sobre el uso y la eliminación de las
baterías).
Modo de ahorro de energía automático
después de 2 minutos de inactividad.
Coloque el Filamento Universal de Polaroid
en una posición óptima para trabajar con la
impresora.
Ontworpen voor gebruik van alle Polaroid
universele filament materialen, voor elke
geschikte FFF/FDM 3D printer.
Altijd weten hoeveel materiaal heb je in
gewicht (g) en lengte (cm).
2x AA batterijen vereist (volg de richtlijnen van
de fabrikant over het gebruik en de verwijdering van
batterijen).
Energiebesparingsfunctie automatisch
uitschakelen na 2 min niet te zijn gebruikt.
Plaatst u uw “Polaroid universele filament-
houder” in een optimale positie om te werken
met uw printer.
Cartuccia di Filamento Universale
Cartucho de Filamento Universal
Universele filamentcartridge
Supporto e bilancia di Filamento
Precise
Soporte y balanza de Filamento
Precise
Nauwkeurige filamenthouder
en -schaal

FCC WARNING
This device complies with part 15 of the FCC Rules. Operation is subject to the following two
conditions: (1) this device may not cause harmful interference, and (2) this device must accept
any interference received, including interference that may cause undesired operation.
Any changes or modifications not expressly approved by the party responsible for compliance
could void the user's authority to operate the equipment.
NOTE: This equipment has been tested and found to comply with the limits for a Class B
digital device, pursuant to Part 15 of the FCC Rules. These limits are designed to provide
reasonable protection against harmful interference in a residential installation. This equipment
generates, uses and can radiate radio frequency energy and, if not installed and used in
accordance with the instructions, may cause harmful interference to radio communications.
However, there is no guarantee that interference will not occur in a particular installation.
If this equipment does cause harmful interference to radio or television reception,
which can be determined by turning the equipment off and on, the user is encouraged to try to
correct the interference by one or more of the following measures:
-- Reorient or relocate the receiving antenna.
-- Increase the separation between the equipment and receiver.
-- Connect the equipment into an outlet on a circuit different
from that to which the receiver is connected.
-- Consult the dealer or an experienced radio/TV technician for help.
To maintain compliance with FCC’s RF Exposure guidelines, This equipment should be
installed and operated with minimum 20cm distance between the radiator your body: Use
only the supplied antenna.

This product is distributed and sold by Environmental
Business Products Ltd. ©2019 All Rights Reserved.
Polaroid, Polaroid & Pixel, Polaroid Color Spectrum,
and Polaroid Classic Border Logo are trademarks
of PLR IP Holdings, LLC, used under license. PLR IP
Holdings, LLC does not manufacture this product or
provide any Manufacturer’s Warranty or support.
Made in China.
Other manuals for PlaySmart
1
Table of contents
Languages:
Other Polaroid 3D Printer manuals