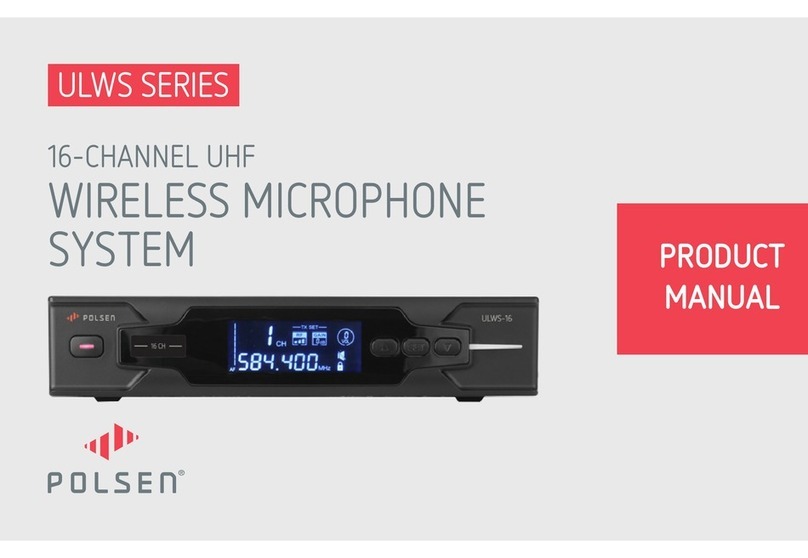
Polsen ULW-96 User manual

PRODUCT
MANUAL
-96
WIRELESS
SYSTEM
96-CHANNEL
CAMERA-MOUNTABLE UHF

2
96-CHANNEL
CAMERA-MOUNTABLE
UHF WIRELESS SYSTEM
ULW-96
THANK YOU FOR CHOOSING POLSEN.
The Polsen ULW-96 is our premier broadcast-quality camera-mountable UHF wireless system
designed for EFP (electronic eld production), ENG (electronic news gathering), and other
professional applications. It provides hands-free mobility where audio cables are not practical.
The ULW-96 is a robust, frequency-agile system with 96 channels to choose from to help avoid
interference. Up to eight systems can be used simultaneously in the same location. To ensure
extremely quiet and reliable operation, the internal electronic components are IECQ-certied to
meet international standards of quality.
The ULW-96 boasts professional features including a line input on the transmitter and a
headphone output on the receiver. There are three selectable output-levels to ensure proper gain-
staging and a headphone level control that allows real-time monitoring at comfortable volumes.
The 20 mW radio frequency (RF) output level enables an operating range of more than 250'
(optimum) with relatively low intermodulation potential. The ULW-96 offers outstanding exibility
for broadcast-quality wireless applications in the eld.
Please read and follow these instructions and keep this manual in a safe place.

3
33
CONTENTS
Introduction...........................................................................................................................2
Precautions ...........................................................................................................................3
Overview
Receiver ................................................................................................................... 4-5
Transmitter ............................................................................................................. 6-7
Handheld Transmitter / Accessories.............................................................8-9
Installing Batteries...................................................................................................... 10-11
Operating Instructions................................................................................................11-14
Mounting the ULW-96..............................................................................................15-16
Stage Direction and Talent Cueing.............................................................................. 17
Using Multiple UHF Wireless Systems...................................................................... 17
Troubleshooting...........................................................................................................18-21
FCC Statement ...................................................................................................................21
Specications / Frequency Chart.........................................................................22-23
One-Year Limited Warranty...........................................................................................24
PRECAUTIONS
• Exposure to high sound levels can cause
permanent hearing loss. Avoid listening at high
volumes for extended periods of time.
• Keep this product away from water and any
ammable gases or liquids.
• Handle this product with care.
• Clean this product with only a soft, dry cloth.
• Keep this product away from children.
• Use only parts provided by the manufacturer.
• To avoid damage to this product, be careful not
to overtighten or improperly thread any of the
threaded ttings.
• All photos are for illustrative purposes only.

4
OVERVIEW
Receiver
2.
1.
3.
4.
5.
6.
7.
8.
9.
10.
11.
13.
12.
14.
15.

5
5
Receiver:
1. Antenna
2. Headphone-level control
Rotate knob clockwise to turn the unit on, and counterclockwise to
turn the unit off. You should feel it click when it turns on and off.
Rotate knob to adjust the volume of the headphones when you’re
monitoring the sound.
3. Headphone output
Plug your headphones into this jack to monitor the transmission in
real time without the latency that often occurs when monitoring via
a camera’s headphone output.
4. Audio output (selectable level)
This can be connected to your camera’s mic input, or to an audio
recorder for remote eld-recording.
5. Audio output-level switch (hi/mid/low)
Slide this switch to adjust the output level.
6. RF LED
The RF LED glows red while power is on and green when the unit is
receiving a strong RF signal.
7. Info button
Press and hold this button to display the transmission frequency on
the LCD.
8. LCD
The LCD will glow for a few seconds when the unit is turned on
and when the Set or Channel up/down buttons are pressed
(see 11. Channel up/down buttons).
9. Battery power icon
10. Channel (transmission frequency in MHz when Info button
is held down)
11. Channel up/down buttons
Press these buttons to change the channel. Press and hold to
rapidly change channels.
12. Two-way belt clip
13. Shoe adapter
14. Battery compartment
Accepts two AA batteries.
15. Charging contacts
For charging via the Polsen ULW-96-BBCH charger
(sold separately).

6
Transmitter
OVERVIEW
2.
1.
3.
6.
5.
7.
8.
9.
10.
11.
12. 13.
14.
15.
4.

7
Transmitter:
1. Antenna
2. Mute button
This two-position button mutes the microphone. When the button is in
down-position, the mute is active.
3. Power switch
Slide this switch to turn the transmitter on or off.
4. Microphone input
This is a mini XLR (TA-3) jack. Fully insert the microphone’s TA-3 plug
and make sure it clicks into place. To remove, press the button on the
connector to release the locking mechanism.
5. Sensitivity switch (hi/mid/low)
Slide the switch to adjust the microphone level.
6. Line input
7. Power LED
The Power LED glows red when the unit is on.
8. Set button
To change the channel, press and hold this button for approximately 3
seconds, until the channel number blinks. Then use the channel up/
down buttons to select a channel and press Set to conrm
(see 12. Channel up/down buttons).
9. LCD
The LCD will glow for a few seconds when the unit is turned
on or when the Set or Channel up/down buttons are
pressed (see 12. Channel up/down buttons).
10. Battery power icon
11. Channel (transmission frequency in MHz when channel
up/down buttons are held down)
12. Channel up/down buttons
Press and hold one of these buttons to display the
transmission frequency in MHz on the LCD.
After using the Set button to enable channel changing
(see 8. Set button), press these buttons to change the
channel. Press and hold to rapidly change channels.
13. Two-way belt clip
14. Battery compartment
Accepts two AA batteries.
15. Charging contacts
For charging via the Polsen ULW-96-BBCH charger
(sold separately).

8
Handheld Transmitter / Accessories
OVERVIEW
1.
3.
15.
16.
4.
7.
6.
8.
5.
9.
10.
11.
12.
13.
14.
18.
17.
19.
2.

9
Handheld Transmitter:
1. Microphone head
2. Three-way AF control (hi/low/mute)
Slide this switch to adjust the transmitter’s AF output.
3. Battery compartment
a. Accepts two AA batteries.
4. Set button
To change the channel, press and hold this button for
approximately 3 seconds, until the channel number
blinks. Then use the channel up/down buttons to select a
channel and press Set to conrm (see 8. Channel up/down
buttons).
5. LCD
6. Battery power icon
7. Channel (transmission frequency in MHz when
channel up/down buttons are held down)
8. Channel up/down buttons
Press and hold one of these buttons to display the
transmission frequency in MHz on the LCD.
After using the Set button to enable channel changing, use
these buttons to select a channel (see Set 4. button). Press
and hold to rapidly change channels.
9. Power LED
The Power LED glows red when the unit is on.
10. Power button
Press and hold for approximately two seconds to turn on or off.
11. Charging-port cap
12. Charging port
For charging via the ULW-96-HCH charger (sold separately).
13. Antenna
Included Accessories:
14. Lavalier microphone
15. Tie clip
16. Foam windscreen
17. Carrying case
18. Output cable (1/8"male to 1/8" male)
19. Four AA batteries (six for ULW-96-HH combo)
Handheld Transmitter / Accessories

10
INSTALLING BATTERIES
The transmitter, receiver, and handheld transmitter are each powered by two AA batteries. To install batteries, follow these steps:
1. Make sure the unit is turned off.
2. Gently remove the battery compartment cover by pressing on the cover and sliding it in the direction of the arrow.
3. Insert two fresh AA batteries in the proper orientations.
4. Close the compartment by pushing the cover so it locks into place.
Rechargeable Batteries:You can use rechargeable AA batteries with the receiver and transmitter and charge them by inserting
both units into the Polsen ULW-96-BBCH charger (sold separately). When using rechargeable batteries with the handheld
transmitter, you can charge them by plugging the unit into the Polsen ULW-HCH charger (sold separately).

11
Important!Use only rechargeable batteries when charging. Do not attempt to charge alkaline batteries—this can damage the unit
and void the warranty.
Battery Power Icon: The battery power icon on the LCD ( ) indicates the remaining battery power. When only one bar appears in
the icon ( ), battery power is low and we recommend changing or recharging the batteries. When the battery power icon is empty
and blinking ( ), the batteries are almost out of power, and you will need to change or recharge the batteries at this point.
Note:Insufcient battery power can decrease the ULW-96’s ability to transmit and receive. Be prepared:make sure your batteries
start out with a full charge when using this system, and always carry spare batteries.
OPERATING INSTRUCTIONS
Testing the RF Environment
Before you hook up the ULW-96 to your camera and talent, it is important to test and set initial parameters in order to reduce the
possibility of RF interference or noise:
1. Turn on the receiver. The RF LED will glow red as the receiver turns on.
2. If the RF LED changes from red to green, there is interference on this channel. Change the channel, repeating as necessary until
you nd a channel that is free of interference.

12
Connecting the Transmitter and the Receiver
The ULW-96 includes a PL-5 omnidirectional lavalier microphone that plugs securely into the transmitter’s mini-XLR microphone
input to prevent accidental disconnection. The omnidirectional polar pattern offers exible positioning options and allows for head
movement without affecting the sound. It can be readily placed on a collar, necktie, or costume via the included tie clip.
In addition to the microphone input, the transmitter is equipped with a line-level input that enables devices such as an audio mixer,
camera output, or audio recorder output to be transmitted to the receiver. This advanced feature provides added exibility that
professionals rely on.
To connect the transmitter and the receiver, follow these steps:
1. Connect the included lavalier microphone to the transmitter’s microphone input or plug a line-level source into the transmitter’s
line input.
Note: If you are connecting the receiver to a sound system, mute the sound system. Do not monitor with headphones at this
stage. Anytime you are changing channels, remove your headphones and mute connected sound systems to avoid audible RF
noise bursts.
2. Turn on the transmitter and the receiver.
3. Set the transmitter and the receiver to the same channel. If you are experiencing interference or noise on one channel, try a
different channel (for the transmitter, see 8.
Set button on page 7 of the Overview).

13
Note: If you are using multiple ULW-96 wireless systems, make sure each system is set to a different channel—set the channels
at least 300 kHz apart to reduce the chance of intermodulation.
4. With the headphone volume low, plug your headphones into the receiver and gradually raise the level to a comfortable volume
for monitoring the transmission.
5. Start with the transmitter’s sensitivity-control switch on “Mid” and adjust as necessary to make sure an ample level is being
transmitted to the receiver. The objective is to transmit the highest possible level without distortion for the best signal-to-noise
ratio throughout the signal path.
6. Once you have determined the transmission quality and level are good, mount the receiver and transmitter.
Connecting the Handheld Transmitter and the Receiver
The handheld transmitter’s capsule has a wide cardioid pattern for ample off-axis response. This helps to clearly capture your
subject’s voice and to reduce unwanted ambience. The handheld operation is ideal for on-camera applications such as reporting,
event coverage, and other situations where a lavalier microphone is impractical, like interviewing multiple people.
To connect the handheld transmitter and the receiver, follow these steps:
1. Turn on the handheld transmitter and the receiver.
Note: If you are connecting the receiver to a sound system, mute the sound system. Do not monitor with headphones at this
stage. Anytime you are changing channels, remove your headphones and mute connected sound systems to avoid audible RF
noise bursts.

14
2. Set the handheld transmitter and the receiver to the same channel. If you are experiencing interference or noise on one channel,
try a different channel.
Note: If you are using multiple ULW-96 wireless systems, make sure each system is set to a different channel—at least three
channels apart as a guard band.
3. With the headphone volume low, plug your headphones into the receiver and gradually raise the level to a comfortable volume
for monitoring the transmission.
4. Adjust as necessary to make sure an ample level is being transmitted to the receiver. The objective is to transmit the highest
possible level without distortion for the best signal-to-noise ratio throughout the signal path.
5. Once you have determined the transmission quality and level are good, mount the receiver.
Note: When holding the handheld transmitter, hold it by the body of the transmitter. Holding
the antenna will degrade the transmission quality.

15
MOUNTING THE ULW-96
Both the receiver and the transmitter mount via a two-way belt clip, allowing you to attach them upside-down. Being able to
mount the body-pack at a variety of angles is helpful when multiple units are in use, especially when on the same person, as it
reduces the risk of intermodulation.
Note: When manipulating the belt clip, be careful not to bend it out of shape.
Receiver
Shoe adapter:The receiver comes with the shoe adapter pre-attached. A 1/4"-20 threaded socket in the shoe adapter allows for
additional mounting options.
To mount the receiver to your camera:
1. Loosen the adapter’s locking wheel and slide the mounting foot all the way into your camera’s shoe mount. Make sure to
position the receiver so the antenna doesn’t enter your image frame.
2. Tighten the locking wheel until secure.
3. Use the included 1/8" (3.5 mm) audio cable to connect the receiver’s audio output to your camera’s microphone input.
To remove the shoe adapter:
1. Push outward on the belt clip at one of the hinges so one side of the clip pops out.
2. Remove the shoe adapter.
3. Reinsert the belt clip.

16
To reattach the shoe adapter:
1. Align the shoe adapter with the belt clip. The slot should line up with the bottom of the belt clip.
2. Insert the two-way belt clip into the body pack, one hinge at a time.
3. If necessary, adjust the adapter under the belt clip.
Reorienting the Belt Clip:The ULW-96’s belt clips can easily be removed and reattached to the body pack so you can mount it
upside down. To reorient the belt clip, follow these steps:
1. Push outward on the belt clip at one of the hinges so one side
of the clip pops out.
2. Push the belt clip out from the other hinge to completely
remove the clip from the body pack.
3. Realign the belt clip with the body pack, making sure the clip is
facing the desired direction.
4. Insert the two-way belt clip into the body pack, one hinge at
a time.

17
Transmitter
1. Use the integrated belt clip to secure the transmitter to your talent.
2. Use the included tie clip to place the microphone on your talent.
3. If you are connecting to a line-level source, use an appropriate cable to connect to the Line In jack.
Note:The line-level input overrides the microphone input.
The receiver’s RF light will glow green when the unit is receiving a strong radio frequency signal.
STAGE DIRECTION AND TALENT CUEING
The ULW-96 can also be used as an impromptu one-way voice communication system for stage directions and talent cueing. In this
case, your talent will operate the receiver instead of the transmitter, and monitor via an earphone (not included) plugged into the
headphone output. The offstage instructor can dictate directions into the microphone/transmitter unit from a remote location, or
send the cues from a broadcast mixer or interruptible feedback (IFB) system via the line input on the transmitter.
USING MULTIPLE UHF WIRELESS SYSTEMS
Since the ULW-96 has 96 channels to choose from, multiple transmitters and receivers can be used in the same location
simultaneously (up to eight). Each system that is added in simultaneous operation increases the potential for intermodulation,
therefore more attention to the RF environment is needed. Each time you add a system, check all of the systems to make sure the
system you added is not causing new interfearence. A good rule of thumb is to keep 300 kHz between systems.

18
TROUBLESHOOTING
Because of the widespread use of wireless technology, many RF signals pervade our environment. This can sometimes make it challenging
to work with a wireless system like the ULW-96. Each system that is added in simultaneous operation increases the potential for
intermodulation and requires more diligence in RF planning and management. In some cases, you may be doing everything correctly and still
be experiencing some difculties. Included in this troubleshooting guide are some tools and tips for dealing with RF signals and interference.
Problem Possible Cause Solution Comment
The audio
is noisy or
distorted. This
can include
drop outs, white
noise, bursts,
pops, and clicks.
RF interference Try a different channel. Make sure both units are on
the same channel.
Try to position the antennas at a 45°angle in relation
to each other.
There can be a lot of RF interference outdoors. Try
moving indoors, where there is less RF interference.
Keep the units’ antennas at least 2' (0.6 m) away
from conductive objects like metal and water.
Overhead telephone lines, uorescent lighting, and
metal fences can all cause interference.
Turn off all nearby computers and mobile phones..
RF planning and management is important when
using a UHF system. Test your RF environment
before recording. To do this, turn on only the
receiver. If there is noise or the RF LED is glowing,
then there is interference on this channel and you
should avoid using it.
Refer to www.fcc.gov/fcc-bin/audio/tvq.html to
nd out what frequencies are being used in your
area by radio and TV stations, so you can avoid
these frequencies.
The batteries are
weak.
Replace or recharge the batteries in the receiver and
transmitter.
Make sure to bring extra batteries with you.
You should replace the batteries on every shoot.
Rechargeable batteries will save money over time.

19
Problem Possible Cause Solution Comment
The audio
is noisy or
distorted. This
can include
drop outs, white
noise, bursts,
pops, and clicks.
The RF signal is
weak.
Make sure there is an unobstructed line of sight
between the receiver’s and the transmitter’s
antennas. Keep in mind that your body, clothes, and
onstage sets are possible obstructions.
Make sure the receiver and transmitter are within the
250' (76.2 m) range.
If there are obstructions, you may need to move closer.
Intermodulation
distortion
If the transmitter antennas are too close on multiple
systems, they can cause intermodulation distortion
between systems. Make sure the antennas are at
least 3' (0.9 m) away from each other.
On a single system, the transmitter and receiver
antennas should be at least 8'apart at all times.
The input level
on the camera,
recorder, or mixer
is too high.
Turn down the audio input level on your camera or
recording device. Lower the audio output level on the
receiver.
Turn down the gain on your mixer.
If there is no adjustment on the device, and the
level is still too high, adjust the microphone level on
the transmitter. Keep this level as high as possible
without distortion.
Make sure the talent is aware of the receiver
and knows not to change the controls unless
instructed otherwise.
Make note of your level settings before recording.

20
Problem Possible Cause Solution Comment
The unit will not
turn on.
The batteries are
dead.
Replace or recharge the batteries. Make sure to bring extra batteries with you.
There is no audio
or the audio is
intermittent.
The batteries in
one of the units
are dead.
Replace or recharge the dead batteries in the proper
unit.
Make sure to bring extra batteries with you.
The audio cable
is unreliable,
or the cable or
microphone is
unplugged.
Check the audio cable to make sure it is reliable and
is not shorting.
Check all cables to make sure they are completely
plugged into the proper inputs.
The line source is
off or not playing
back audio.
If you are transmitting a line-level signal, make sure
there is audio coming out of the line-source device.
The line-level
input overrides the
microphone input.
If you want to record via the microphone input, make
sure there is nothing plugged into the line-level input.
The audio levels
are too low.
Turn up the microphone level on the transmitter.
Make sure it’s not set to Mute.
Adjust the headphone level on the receiver and listen
to make sure the signal is transmitting.
Turn up the input levels on your camera, recording
device, or mixer.
Table of contents
Other Polsen Microphone System manuals
Popular Microphone System manuals by other brands
Shure
Shure DuraPlex DH5 user guide
PROEL
PROEL RMW1000 Series user manual
LightPointe
LightPointe FlightLite 100 Installation and Maintenance
Louroe Electronics
Louroe Electronics ASK-4 #401 Installation and operating instructions
Louroe Electronics
Louroe Electronics TLM-W Installation and operating instructions
Devine
Devine WMD 168 user manual
Hollywood
Hollywood FM-8051 Reference manual
Sennheiser
Sennheiser EW 335 G2 operating instructions
Sennheiser
Sennheiser EW 352 G3 - Product sheet
LIVEXPERT
LIVEXPERT LiveTally Box Operation manual
FrontRow
FrontRow symbio 5201R Installer's guide
schildknecht
schildknecht DATAEAGLE 2 Compact Series Installation and commissioning manual

