CC
CCOO
OORR
RRRR
RREE
EECC
CCTT
TTUU
UUSS
SSEE
EEOO
OOFF
FFTT
TTHH
HHEE
EEPP
PPRR
RROO
OODD
DDUU
UUCC
CCTT
TT
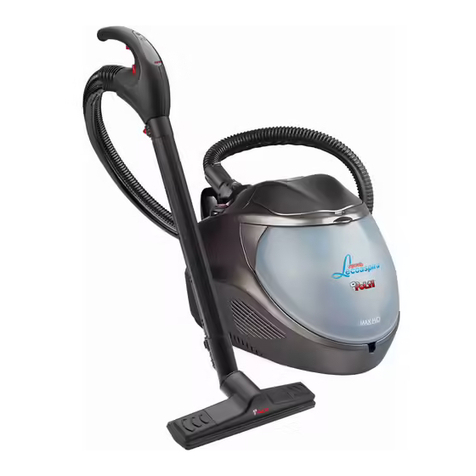
This appliance is intended for use as an aspirator for solids ac-
cording to the descriptions and instructions in this manual. It is
recommended to read these instructions carefully and to store
them for future use.
PP
PPRR
RREE
EEPP
PPAA
AARR
RRAA
AATT
TTII
IIOO
OONN
NNSS
SSFF
FFOO
OORR
RRUU
UUSS
SSEE
EE
•Push the upper cover opening button (8) which is on the up-
per cover (7)
•Lift the upper cover turning it upwards as indicated in fig. 1.
•Fill the "EcoActive-Filter" water container (5) by using the jug
supplied (J), carefully respecting the exact amount of water
indicated on it (fig. 2) (400 ml). For correct operation, it is
important that the amount of water is the one contem-
plated in the jug capacity, neither lower nor higher.
•Put the upper cover (7) back taking care that the two pins (2)
on the cover (7) engage with the two holes (3) on the appli-
ance, pushing the button (8) again.
•Insert the tube (E) into the junction (9) turning it clockwise un-
til it connects (fig. 3).
UU
UUSS
SSEE
EE
OO
OOFF
FFTT
TTHH
HHEE
EETT
TTEE
EELL
LLEE
EESS
SSCC
CCOO
OOPP
PPII
IICC
CC
TT
TTUU
UUBB
BBEE
EE
((
((AA
AA))
))
The tube is about 500 mm long when closed and about 1000
mm. at its maximum extension. To make it longer or shorter,
move the locking button (A1) as shown in fig. 4.
AA
AAUU
UUTT
TTOO
OOMM
MMAA
AATT
TTII
IICC
CC
CC
CCAA
AABB
BBLL
LLEE
EEWW
WWII
IINN
NNDD
DDEE
EERR
RR
Before storing the vacuum cleaner, rewind the power supply ca-
ble by pushing the button (15) as indicated in fig. 5.
The cable winder button (15) can be pushed with your foot with-
out having to bend down.
UU
UUSS
SSEE
EEOO
OOFF
FFTT
TTHH
HHEE
EEAA
AACC
CCCC
CCEE
EESS
SSSS
SSOO
OORR
RRII
IIEE
EESS
SSHH
HHOO
OOLL
LLDD
DDEE
EERR
RR((
((II
II))
))
The accessories holder (I) allows you to fix the accessories on
the body of the appliance or on the handle.
Installation on the handle: insert one of the rings of the acces-
sories holder on the handle. Insert in the rings the accessories
you want to keep at hand.
Installation in the accessories holder on the appliance body:
make the groove of the accessories holder run into the guide on
the back of the appliance, as shown in fig. 6, fixing the acces-
sories as described above.
UU
UUSS
SSEE
EEOO
OOFF
FFTT
TTHH
HHEE
EE
UU
UUNN
NNII
IIVV
VVEE
EERR
RRSS
SSAA
AALL
LLBB
BBRR
RRUU
UUSS
SSHH
HH((
((BB
BB))
))
Insert the brush. If you move the selector (B1) placed on the
brush by pressing with your foot, you can change the suction sur-
face without bending down. The position with the bristles ex-
posed is recommended for all floors. The position without bristles
is recommended for carpets and rugs.
JJ
JJOO
OOKK
KKEE
EERR
RRBB
BBRR
RRUU
UUSS
SSHH
HH
((
((MM
MM))
))
With the Joker brush it is possible to remove all types of solid or
liquid dirt, and it will work on any type of surface.
PP
PPAA
AARR
RRQQ
QQUU
UUEE
EETT
TTAA
AACC
CCCC
CCEE
EESS
SSSS
SSOO
OORR
RRYY
YY
((
((NN
NN))
))
This accessory is for use solely with the Joker brush. Put the
Joker brush into place on the parquet accessory as illustrated in
Figure 6a. Apply the brush to the accessory as indicated by the
arrow so that the two pieces fit onto each other and then hook
them together. To unhook the parquet accessory from the Joker
brush pull the two levers on the sides of the fitting outwards and
then lift the brush off. (Figure 6b).
3
EE
EENN
NNGG
GGLL
LLII
IISS
SSHH
HH
LECOLOGICO ESPECIAL PARQUET
OO
OOPP
PPEE
EERR
RRAA
AATT
TTII
IIOO
OONN
NN
•Unwind the cable until it is completely outside its storage
compartment by pulling the plug (27) towards you (fig. 7).
•Connect the plug to the mains.
•Position 1 of the indicators lights (13) will start to flash. Your
appliance is now in a "stand-by" position (fig. 8).
•Push the mains On/Off switch (11) (fig.9), LECOLOGICO will
start to operate at minimum speed, the first stage of the indi-
cator lights will change from flashing to constant. The mains
On/Off switch (11) can be pushed with your foot without
bending down.
•The power levels are four. We suggest use at the minimum
level for curtains, at the medium- low for couches, armchairs
and pillows, medium-high for carpets and high for floors and
hard surfaces (ceramic, marble etc.).
•To increase the speed, push the + button (12), each press
on the button + (12) will increase the motor power by one
level.
•The increase by one level is indicated by the illumination of
one further stage of the indicator lights.
•By pushing the - button (14), at each press the motor power
will decrease and one stage will switch off.
•To take the appliance back to the "stand-by" position, push
the mains On/Off switch (11), the first stage of the indicator
lights (13) will start to flash again.
•To start vacuum cleaning again, push the mains On/Off
switch (11) again.
““
““BB
BBII
IIOO
OOEE
EECC
CCOO
OOLL
LLOO
OOGG
GGII
IICC
CCOO
OO””
””
"Bioecologico" is available for sanitising while using the suction
function. It is a scented antibacterial product with natural-based
anti-allergenic substances. If it is added regularly to the water
used to fill the water container (5) of the L’ecologico, it will pre-
vent the proliferation of bacteria and micro-organisms and inhibit
the action of allergens. In addition to ensuring a sanitising action,
"Biecologico" will eliminate smells due to the presence of dust in
the water, leaving a pleasant smell of cleanness in the room.
Use: Normally add 5 ml each time you fill the water-based filter.
Bioecologico is sold in household appliance shops or direct from
our authorised Assistance Centres.
HH
HHOO
OOWW
WW
TT
TTOO
OO
EE
EEMM
MMPP
PPTT
TTYY
YY
AA
AANN
NNDD
DDCC
CCLL
LLEE
EEAA
AANN
NN
TT
TTHH
HHEE
EEWW
WWAA
AATT
TTEE
EERR
RR
TT
TTAA
AANN
NNKK
KK
•Switch off the appliance at the mains switch (11) and discon-
nect the power supply cable from the mains.
•Disconnect the tube from the junction by turning it anticlock-
wise.
•Push the opening button (8) on the upper cover (7).
•Lift the cover (7) by turning it upwards as indicated in fig. 1.
•Lift the container handle (6) by taking it to the height of the
tube hole as in fig. 10.
•Take out the container (5) by pulling it out of the appliance
(fig. 11)
•Pull the water filter cage (20) upwards and then pull it out
(fig. 12-13).
•Empty the container (5) and rinse it.
•Unhook the elbow tube locking ring (25) by pulling it out-
wards (fig. 14).
•Pull the elbow tube (26) from the filter body (24) until it slips
off (fig. 15).
•Divide all the components as described in the key and then
rinse them under running water (if the sponge filter is dam-
aged, replace it by contacting a Polti Authorized Service Cen-
tre)
•Before putting the sponge filters (22-23) back, wring them
by using a cloth so as to dry them perfectly.
•Reassemble the water filter group (20) by repeating the op-
eration in reverse.


