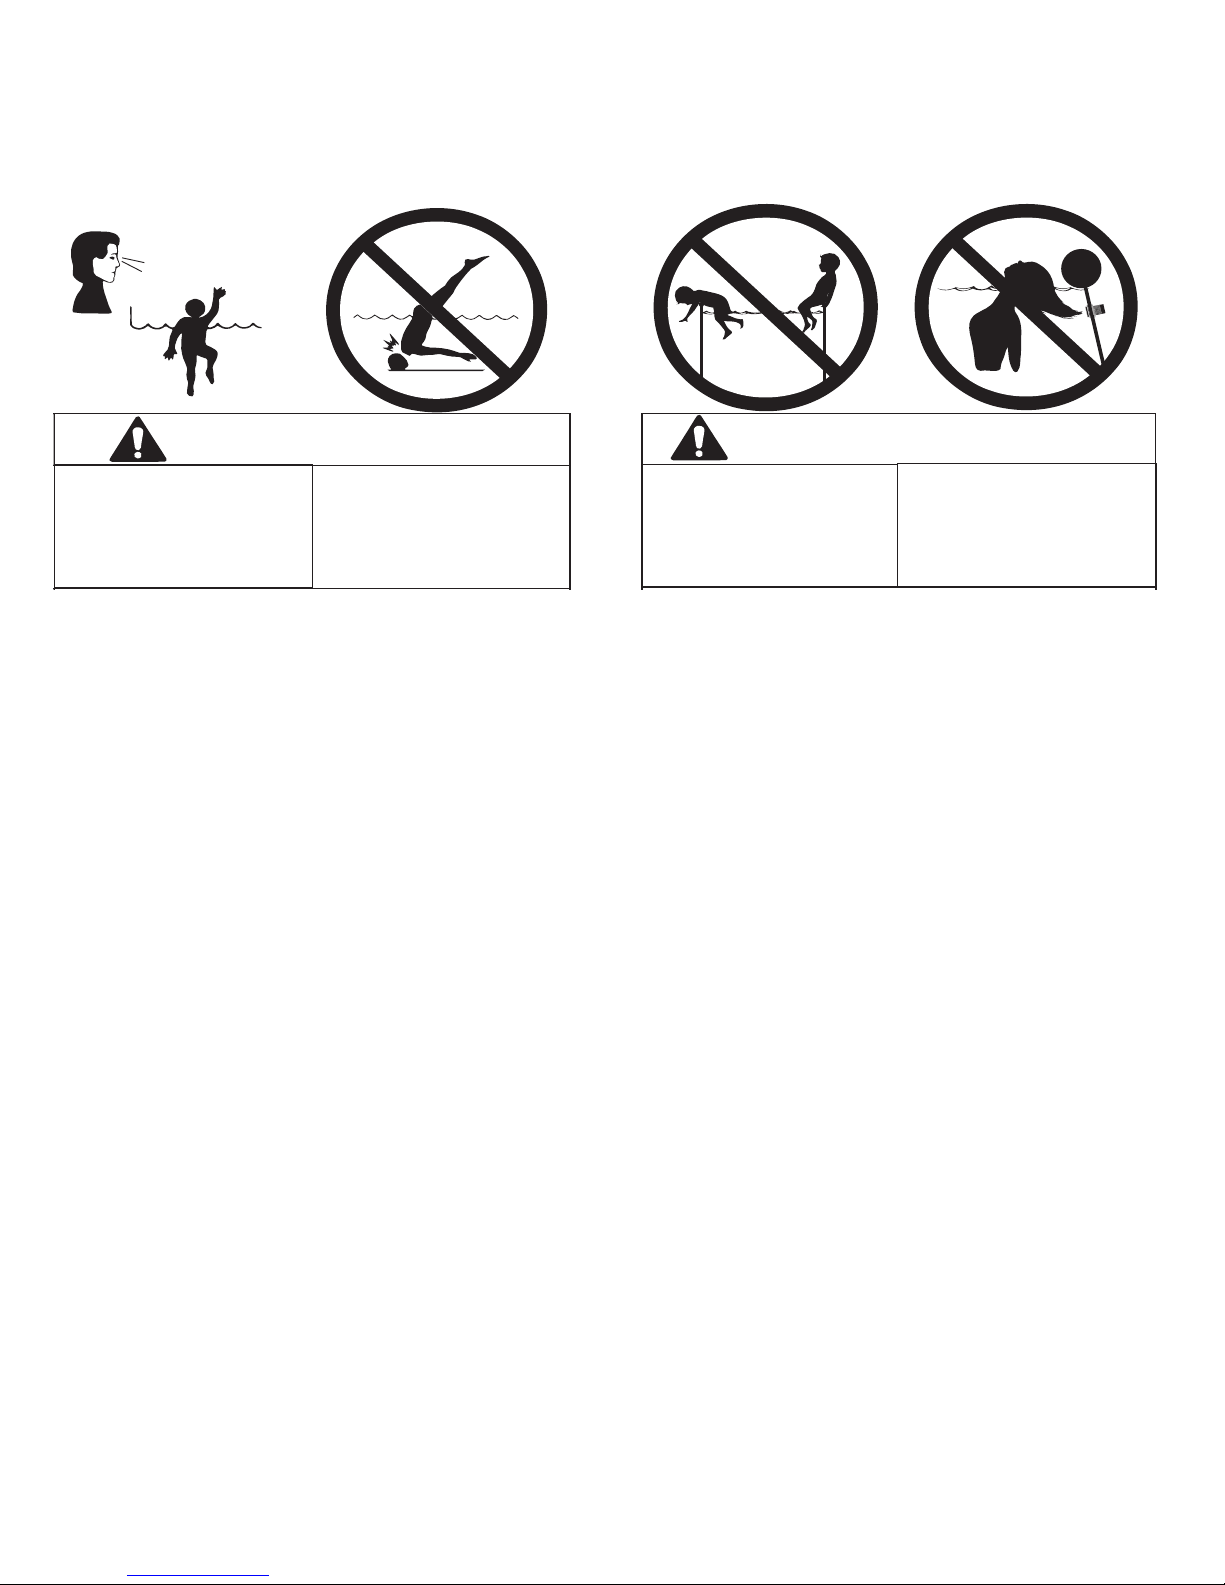
POLYGROUP LIMITED GROUND RECTANGULAR QUICK SET User manual

084-120004
2011
DISTRIBUTED BY: POLYGROUP LIMITED (MCO)
Avenida Xian Xing Hai, Edificio Zhu Kuan, 11 Andar M, Macau
Customer Service Representative: General Foam Plastics Corporation
(800) 813-0206 • www.POLYGROUP.com
ABOVE GROUND RECTANGULAR QUICK SET®SWIMMING POOL
OWNER’S MANUAL
ATTENTION CUSTOMER: STATEMENT OF LIMITED WARRANTY
Polygroup Limited (MCO) warrants to the original purchaser only, the Quick Set®Pool against defects in material and
workmanship for 90-days from the date of purchase. Original Purchaser must retain proof of such purchase in the
form of a store sales receipt and must produce such upon request by Polygroup Limited (MCO) or its customer service
representative, General Foam Plastics Corporation at (800) 813-0206.
If the unit is found to have been consumer damaged or abused, it is not covered by the limited warranty. If this is the
case, you will be advised of the cost of replacement part(s), or the need to return damaged part(s) for warranty replace-
ment.
This limited warranty is not valid if pool is used for commercial purposes or if the damage is caused by accident, act of
God, consumer neglect or abuse, failure to properly follow disassembly and storage procedures, vandalism or improp-
er use of chemicals. This limited warranty will also be voided if pool is not properly installed per instructions. This
warranty does not hold Polygroup Limited (MCO) responsible for cost of installation, labor or transportation related
to replacement of defective parts.
“Splash Guard” Technology
WARNING: DO NOT overfill the pool and / or allow
people to lay over or sit on pool wall- DOING SO CAN CAUSE
PERMANENT INJURY!
DRAIN pool to the proper level after a heavy rain.
NOTE: DO NOT attempt to assemble this pool in adverse weather
conditions, windy conditions or when the temperature is below 60°F.
NOTE: This is a storable pool, which should be disassembled and
stored when temperatures are expected to fall below 32°F.
S
AFETY
I
NFORMATION
___________________2
C
ONSUMER
A
WARENESS
B
OOKLETS
_________3
S
ITE
P
REPARATION
_____________________4
P
OOL
I
NSTALLATION
4____________________
D
ISASSEMBLY
A
ND
S
TORAGE
_____________7
P
OOL
C
OVER
S
AFETY
____________________8
N
OTES
___________________________9
System Info Label

2
2
DANGER
NO DIVING!
NO JUMPING!
Shallow Water - You can
be permanently injured.
PELIGRO
PROHIBIDO LANZARSE
CLAVADOS! NO BRINQUES!
Agua A Poca Profundidad-
Usted Puede quedar
permanentamente invalido
DANGER
WARNING
AVOID
ENTRAPMENT
Stay away from
suction fi ttings -
You may drown
ADVERTENCIA
AVERTISSEMENT
INTERDIT DE PLONGER!
INTERDIT DE SAUTER!
Eau peu profonde risque
de blessures permanentes
PREVENT
DROWNING
Watch children
at all times.
Observe all Safety Rules.
DO NOT SIT ON
OR LAY OVER
POOL WALL
You can be permanently
injured
PREVENGA EL
AHOGAMIENTO
Vigile a los niños todo el tiempo.
Siga todas las reglas de seguridad
PRÉVENEZ
LA NOYADE
Surveillez les enfants constament.
Observez toutes les instructions
de sécurité.
NO SE SIENTE O
RECARGUE SOBRE
LA PARED DE LA
ALBERCA
Puede herirse permanentemente.
NE PAS S’ASSEOIRE
OU S’ÉTENDRE SUR LA
PAROIS DE LA PISCINE
Risque de blessures permanentes
EVITE
ENTRAMPES
Alejese de las aberturas
de succion - puede ahogarse
-
ÉVITEZ
LE PIÉGEAGE
Éloignez-vous des raccords
aspirateurs - risque de noyade
Read and Follow All Safety Information and Instructions.
Keep for Future Reference.
Failure to follow these warnings and instructions can result in serious injury or
death to user, especially children.
1. Children, especially children younger than five years, are at high risk of drowning. Drowning occurs silently and
quickly and can occur in as little as 2 in. (5 cm) of water.
2. Keep children in your direct sight, stay close, and actively supervise them when they are in or near this pool and
when you are filling and emptying this pool.
3. When searching for a missing child, check the pool first, even if the child is thought to be in the house.
4. Very Important: Swimming pool barriers, which restrict access to the pool by small children, may be required by
law. A barrier is necessary to provide protection against potential drowning and near drowning. Barriers are not
a substitute for constant supervision of children. Check state or local laws and codes before setting up pool.
5. The use of artificial pool lighting is at the discretion of the pool owner. Lighting, when installed, should be
in accordance with Article 680 of the National Electrical Code (NEC) or its latest approved edition and in
consultation with a licensed electrical professional.
6. During nighttime pool use, artificial lighting shall be used to illuminate all safety signs, ladders, steps, deck
surfaces and walks.
7. The floor of the pool shall be visible at all times from the outside perimeter of the pool.
8. Local building codes may require obtaining a building or electrical permit. Installer shall follow regulations on
setback, barriers, devices and other conditions.
9. Post a list of emergency telephone numbers such as the nearest available police, fire, ambulance and/or rescue
unit. These numbers are to be kept near the telephone, which is closest to the pool.
10. Toys, chairs, tables or similar objects that a young child could climb shall be at least four feet (4’) [121.92 cm]
from the pool. The pump filter system shall be positioned so as to prevent it being used as a means of access
to the pool by young children. Do not leave toys inside pool when finished using, since toys and similar items
might attract a child to the pool.
11. Basic lifesaving equipment, including one of the following should be on hand at all times:
* A light, strong, rigid pole (shepherds crook) not less than twelve feet (12’) [365.76 cm] long.
* A minimum one-fourth inch (1/4”) [6.35 mm] diameter rope as long as one and one half (1-1/2) times the
maximum width of the pool or fifty feet (50’) [15.24 meters], whichever is less, which has been firmly attached
to a Coast Guard-approved ring buoy having an outside diameter of approximately fifteen inches (15”) [38.1
cm], or similarly approved flotation device.
12. Entrapment Avoidance: There shall be no protrusions or other obstruction in the swimming area, which may
cause entrapment or entanglement of the user. If a suction outlet cover is missing or broken, do not use the pool.
Suction can cause body part entrapment, hair and jewelry entanglement, evisceration, or drowning. Repair or
replace the suction outlet cover before allowing the pool to be used.

3
3
Should you encounter any problems, contact the Customer Service Representative/Parts Department at (800) 813-0206
from 8 AM to 5 PM Mon. thru Fri. EST. Extended operating days and hours during peak season requirements.
13. The pool is subject to wear and deterioration. If not maintained properly, certain types of excessive or
accelerated deterioration can lead to failure of the pool structure that might release large quantities of water that
could cause bodily harm and property damage.
14. Above ground / onground residential swimming pools are for swimming and wading only. No diving boards,
slides or other equipment are to be added to an above ground / onground pool that in any way indicates that an
above ground / onground pool may be used or intended for diving or sliding purposes.
15. Never allow horseplay, diving or jumping into or around the pool. Serious injury, paralysis or death, could result
when this rule is disregarded. DO NOT ALLOW anyone to swim alone without supervision.
16. Safety signs shall comply with requirements of ANSI-Z535 and to use signal wording.
17. The pool is to be assembled by an adult; care should be taken in the unpacking and assembly of the pool, this
pool may contain accessible potentially hazardous sharp edges or sharp points that are a necessary part of the
function of the pool.
18. Become certified in cardiopulmonary resuscitation (CPR). In the event of an emergency, immediate use of CPR
can make a lifesaving difference.
19. Keep all electrical lines, radios, speakers and other electrical appliances away from the pool.
20. Do not place pool near or under overhead electrical lines.
21. Remove pool ladders before leaving the pool. Children as young as 2 years have climbed up ladders and into
pools and drowned.
NOTICE: CUSTOMERS THAT PURCHASE POOLS MAY BE REQUIRED BY LOCAL OR STATE LAW TO
INCUR ADDITIONAL EXPENSES WHEN INSTALLING A POOL, IN ORDER TO COMPLY WITH STATE OR LOCAL
LAWS REGARDING FENCING AND OTHER SAFETY REQUIREMENTS. CUSTOMERS SHOULD CONTACT THEIR
LOCAL BUILDING CODE ENFORCEMENT OFFICE FOR FURTHER DETAILS.
CONSUMER AWARENESS BOOKLETS
Contact: U.S. Consumer Product Safety Commission at www.CPSC.gov/cpscpub/pubs/pool/pdf, Pub. #362 “Safety
Barrier Guidelines for Home Pools”.
Contact: ASSOCIATION OF POOL & SPA PROFESSIONALS ( formerly NSPI) at - www.apsp.org/164/index.aspx
These titles are now available: “The Sensible Way To Enjoy Your Aboveground / Inground Swimming Pool”, “Chil-
dren Aren’t Waterproof”, “Pool and Spa Emergency Procedures For Infants’, Layers of Protection”, and the “ANSI /
NSPI-8 Model Barrier Code for Residential Swimming Pools, Spas, and Hot Tubs”.
DANGER:
Competent supervision and knowledge of the safety requirements
is the only way to prevent drowning or permanent injury
in the use of this product!
Never leave young children unattended.
DANGER: POOL SET-UP
Do not attempt to assemble this pool in adverse weather conditions, such
as in high winds, strong gusts or when the temperature is below 60°F.

4
4
RECTANGULAR FRAME POOL SETUP INSTRUCTION
SHEET
SITE PREPARATION
WARNING - VERY IMPORTANT! SITE MUST BE LEVEL, STABLE, COMPACTED SOIL.
• The pool must be assembled on a smooth and level site of firm soil that is free of stones, gravel, sticks, black-
top or other oil base compounds. Do not install pool on a wooden deck or any type of wooden surface. You can
not use sand and/or uncompacted soil to provide a level surface for this pool; it will only wash out.
• FAILURE TO FOLLOW THE INSTRUCTIONS BELOW WILL CAUSE POOL TO COLLAPSE AND
WILL VOID THE WARRANTY!
1. Select a level area, and completely remove all debris, twigs, stones, etc. DO NOT select an area under overhead
electrical lines, trees or within 15 feet of a house, building, etc. The area should also be at least 10 feet away,
and no more than 21 feet away, from a 110 volt AC outlet, protected by a Ground Fault Circuit Interrupter.
2. Contact your local utilities, checking that no underground cables, telephone lines, gas lines, etc. run beneath the
area you have selected.
POOL INSTALLATION
WARNING: DO NOT overfill the pool and / or allow people to lay over or sit on pool wall doing
so can cause permanent injury. DRAIN the pool to the proper level after a heavy rain.
TIP: It will be much easier to install your pool if you unfold it and let it lay in direct sunlight for about 2
hours prior to installation. This will help to insure a wrinkle-free fit because the pool material will be more pli-
able allowing it to form into shape during installation.
1. Carefully unfold the Quick Set® pool and inspect seams for manufacturing defects. With the sleeve rim on the
top side, lay out the pool in the area selected, making sure the pool bottom is both flat and rectangular-shaped.
Position the power filter mounting area of the pool wall so that it is 10 to 21 feet from the electrical outlet you
plan to use for the
pool pump. You
should have at least
three people to asist
with the assembly
of this pool. Pull out
the rectangular flaps
of wall material
from the base of the
pool, (along each
end and on each side).
2. Locate the four metal (Corner Pieces) of pipe Fig. 1, then place one at every corner of the pool. Now locate the
(Horizontal Beams), insert a (O-Shape Spring) see Fig. 2 in each smaller swedged end of these only to join the
beams together in length, Note:
No O-Shaped Springs are used in
the Horizontal Beam end attach-
ing to the corner pieces or in the
corner pieces themselves, please
see the assembly drawing page 5
for proper O-Shaped spring loca-
tions. The (Horizontal Beams) for the pools ends are (the shorter ones) and (the longer ones) for the long sides.
Place half of the short ones on either (short end of the pool) and half of the long ones along each (long side of
the pool), these along with the (Corner Pieces) make up the support frame of the pool. Begin by sliding the
FIG. 1
FIG. 2
Button
Holes (U-Shape Pipes)
Horizontal Beams
Liner
Sleeve
Corner Piece
Swedged end
Horizontal
Beams
Horizontal
Beams
Note: See
Assembly Dwg.
Page 5 for locations
of O-Shaped Springs
O-Shaped
Spring
Note: Insert First
Horizontal Beams

5
5
(Horizontal Beams) into the sleeve (making certain you work in a clockwise direction around the pool with
all swedged parts pointing clockwise) see Fig. 1 and refer to the “View of All Frame Assembly Parts” shown
on page 5.
5. Connect the (Horizontal Beams) together pushing the button in as you insert one beam into the other beams end.
Look through the locking hole in the beam as you join them, slightly rotate the beams until the button aligns with
the hole and pops up, locking that beams end into the other beams end. Repeat this procedure for the remaining
(Horizontal Beams) making certain the holes in the beams align with the openings in the pool sleeve Fig. 1 these
holes are used for the U-Shape Pipe (end) and (side) supports. Next install the corner pieces (again working in a
clockwise direction with swedged ends pointing clockwise), slide them together and repeat this procedure for
all corners, on the last corner it might be necessary to lift the final joining connection at and angle to allow the
pipes to fit into each other slowly lowering the ends flat again then sliding them together until it fits in complete-
ly, this step may require two people. Now double check all (Horizontal Beam) and (Corner Piece) connections at
this time.
VIEW OF ALL FRAME ASSEMBLY PARTS
SHOWN OUTSIDE OF SLEEVE
Horizontal Beams
(LONG)
Corner Piece
Horizontal Beams
(SHORT)
Sleeve
U-Shape pipe
Rectangular flap
Cap
NOTE: No O-Shaped
Springs used in any
corner connections
O-Shaped Spring
O-Shaped Spring O-Shaped Spring
O-Shaped Spring
O-Shaped Spring
O-Shaped Spring
5
5
Liner
Should you encounter any problems, contact the Customer Service Representative/Parts Department at (800) 813-0206
from 8 AM to 5 PM Mon. thru Fri. EST. Extended operating days and hours during peak season requirements.

6
6
3. Now locate the (U-Shape) pipe frames. Each end of the (U-Shape) pipe will have a cap to be installed on it.
Locate the pipe caps and install those, push the buttons in as you insert the cap onto the pipes end Fig. 3. Look
through the holes in the cap as you in-
stall it and slightly rotate the cap until the
buttons align with the holes and pop up,
locking the cap onto the pipes end. Now
place a (U-Shape) pipe at each of the rect-
angular flaps along the base of the pool.
4. Now insert the (U-Shape) pipe sections
through the end of each rectangular flap
at the bottom of the pool Fig. 4. Note:
The ladder should be assembled prior
to raising the wall to allow helpers easy
access in and out, ladder assembly in-
structions are with the ladder. Next, one or two other persons will
have to support the horizontal beam raising the pool wall from inside
the pool as another person inserts the (U-Shape) pipe supports Fig. 5. Insert the capped ends of the (U-Shape)
pipe into the holes in the horizontal beam assembly by
depressing the lower set of buttons Fig. 5 pushing the
cap end entirely into the horizontal beam until it stops.
Make sure all the (U-Shape) pipes are inserted fully
and check that all connected sections are still securely
fastened. Repeat this step for the OPPOSITE SIDE,
then install the U-Shape frame supports at both ENDS
of the pool.
5. Make sure the drain fitting is plugged securely and the
cap is in place. Start filling the pool with water. After
about 1-inch of water is on the bottom, stop filling and
smooth wrinkles out of the bottom of the pool. Pull
the wall outward at the base all around the bottom of
the pool from the outside or push outward from inside
the pool removing all wrinkles so that it fills evenly
and flat.
6. NOTE: IF MORE THAN 1-2 INCHES OF WATER
COLLECTS ON ANY ONE SIDE BEFORE THE
POOL STARTS FILLING IN THE CENTER, THE
POOL IS NOT LEVEL ENOUGH, AND MUST BE
CORRECTED, SEE “SITE PREPARATION”, PAGE 4. NOTE: THE WEIGHT OF THE WATER WILL PRE-
VENT ANY ADJUSTMENT AFTER THIS POINT.
7. Following the instructions under “Power Filter Installation” in the “Swimming Pool Filter System” owner’s
manual, begin installing your power filter unit according to its manual.
8. Now, once this is done, continue filling the pool to the recommended level. When filling is complete refer back
to the “Swimming Pool Filter System” owner’s manual, and continue through the rest of the installation.
FIG. 3
FIG. 4
FIG. 5
Rectangular
Flap
Pool Liner Sleeve
U-Shape Pipe
U-Shape
Pipe
Press buttons
here
Cap on end
Horizontal
Beam
Cap inserted
into Beam
Cap
U-Shaped
Pipe
Frame
Press In
Press In
Should you encounter any problems, contact the Customer Service Representative/Parts Department at (800) 813-0206
from 8 AM to 5 PM Mon. thru Fri. EST. Extended operating days and hours during peak season requirements.

7
7
DISASSEMBLY AND STORAGE
1. GENERAL INFORMATION: Pool must be stored if temperatures are expected to fall below 32°F.
A. All parts should be cleaned with a mild soap and lukewarm water only - DO NOT use detergent or hot water.
B. Make sure all parts are dry before storing to help prevent mildew from forming.
C. Store all parts in a dry heated area where temperatures do not go below 32° F or above 125° F.
D. Failure to follow the proper storage instructions could cause damage to pool parts and void warranty.
E. YOU MUST FOLLOW THE ASSEMBLY INSTRUCTIONS TO REASSEMBLE YOUR POOL NEXT
SEASON. Pool site must be cleared and leveled again before setting up your pool.
2. QUICK-SET®POOL:
A. To drain the pool, locate the drain plug on the outside of the pool wall and remove the drain cap. A standard
garden hose will thread onto the drain fitting. Extend the hose to the area where the water is to be drained.
When you have placed the garden hose where desired, the drain plug on the inside of the pool can be opened.
B. Once you have drained as much water as possible out of the pool, using the hose connected to the drain fit-
ting, open the air valve and deflate the top ring. Then, carefully push the sides of the pool wall down to allow
remaining water to run out.
C. Remove any remaining water as you wash and completely dry pool using a soft cotton cloth. Push the drain
plug into the fitting and replace the cap.
D. Frame Pools: If your pool has metal frame work, disassemble those pieces by depressing the plastic buttons
sliding those pieces apart or by removing the plastic pins holding them together again sliding those pieces
apart, clean them and wipe them dry. If in doubt of proper disassembly refer to the pools set-up sheet and
reverse those steps. Place them all together in a safe storage place for reassembly next season. Order replace-
ment parts for any damaged, broken, or worn parts
E. Solar blankets, leaf covers, ladders, etc., should be cleaned and dried before storing
Should you encounter any problems, contact the Customer Service Representative/Parts Department at (800) 813-0206
from 8 AM to 5 PM Mon. thru Fri. EST. Extended operating days and hours during peak season requirements.

8
8POOL COVER SAFETY
IF YOU ARE GOING TO USE A POOL COVER, SOLAR COVER OR SOLAR
BLANKET, PLEASE READ THIS INFORMATION.
!WARNING
AVOID DROWNING RISK
STAY OFF COVER - WILL NOT SUPPORT WEIGHT.
KEEP CHILDREN AWAY. CHILDREN OR OBJECTS CAN
NOT BE SEEN UNDER COVER.
REMOVE STANDING WATER - CHILD CAN DROWN ON
TOP OF COVER.
REMOVE COVER COMPLETELY BEFORE ENTRY OF
BATHERS - ENTRAPMENT POSSIBLE.
NON-SECURED OR IMPROPERLY SECURED COVERS
ARE A HAZARD.
FAILURE TO FOLLOW ALL INSTRUCTIONS MAY
RESULT IN INJURY OR DROWNING.
THIS IS NOT A SAFETY COVER.
TYPE OC COVER CLASSIFICATION.
INSTALL COVER WITH LABELS FACING UP.
USE DRAWSTRING TO SECURE COVER TO POOL.
THIS COVER MEETS REQUIREMENTS DESCRIBED
IN SPECIFICATION F-1346 (ASTM).
!WARNING
AVOID DROWNING RISK
STAY OFF COVER - WILL NOT SUPPORT WEIGHT.
KEEP CHILDREN AWAY. CHILDREN OR OBJECTS CAN
NOT BE SEEN UNDER COVER.
REMOVE STANDING WATER - CHILD CAN DROWN ON
TOP OF COVER.
REMOVE COVER COMPLETELY BEFORE ENTRY OF
BATHERS - ENTRAPMENT POSSIBLE.
NON-SECURED OR IMPROPERLY SECURED COVERS
ARE A HAZARD.
FAILURE TO FOLLOW ALL INSTRUCTIONS MAY
RESULT IN INJURY OR DROWNING.
THIS IS NOT A SAFETY COVER.
TYPE OC COVER CLASSIFICATION.
INSTALL COVER WITH LABELS FACING UP.
LAY COVER ON TOP SURFACE OF WATER.
THIS COVER MEETS REQUIREMENTS DESCRIBED
IN SPECIFICATION F-1346 (ASTM).
POOL COVER WARNING
SOLAR COVER WARNING SOLAR BLANKET WARNING
Should you encounter any problems, contact the Customer Service Representative/Parts Department at (800) 813-0206
from 8 AM to 5 PM Mon. thru Fri. EST. Extended operating days and hours during peak season requirements.
DANGER:
Competent supervision and knowledge of the safety requirements
is the only way to prevent drowning or permanent injury
in the use of this product!
Never leave young children unattended.
VERY IMPORTANT
DO NOT USE A POOL COVER, SOLAR COVER OR SOLAR
BLANKET ON THIS POOL IF IT DOES NOT HAVE THIS TYPE OF
WARNING LABEL ON THE COVER.

9
9NOTES:
Should you encounter any problems, contact the Customer Service Representative/Parts Department at (800) 813-0206
from 8 AM to 5 PM Mon. thru Fri. EST. Extended operating days and hours during peak season requirements.
Table of contents
Other POLYGROUP LIMITED Swimming Pool manuals

POLYGROUP LIMITED
POLYGROUP LIMITED PRO-SERIES User manual

POLYGROUP LIMITED
POLYGROUP LIMITED SUMMER WAVES User manual

POLYGROUP LIMITED
POLYGROUP LIMITED Quick Set Pool User manual

POLYGROUP LIMITED
POLYGROUP LIMITED ABOVE GROUND RING QUICK SET User manual

POLYGROUP LIMITED
POLYGROUP LIMITED PRO-SERIES ABOVE GROUND RECTANGULAR QUICK... User manual

POLYGROUP LIMITED
POLYGROUP LIMITED PS20-0827 User manual

POLYGROUP LIMITED
POLYGROUP LIMITED P23-081436 User manual