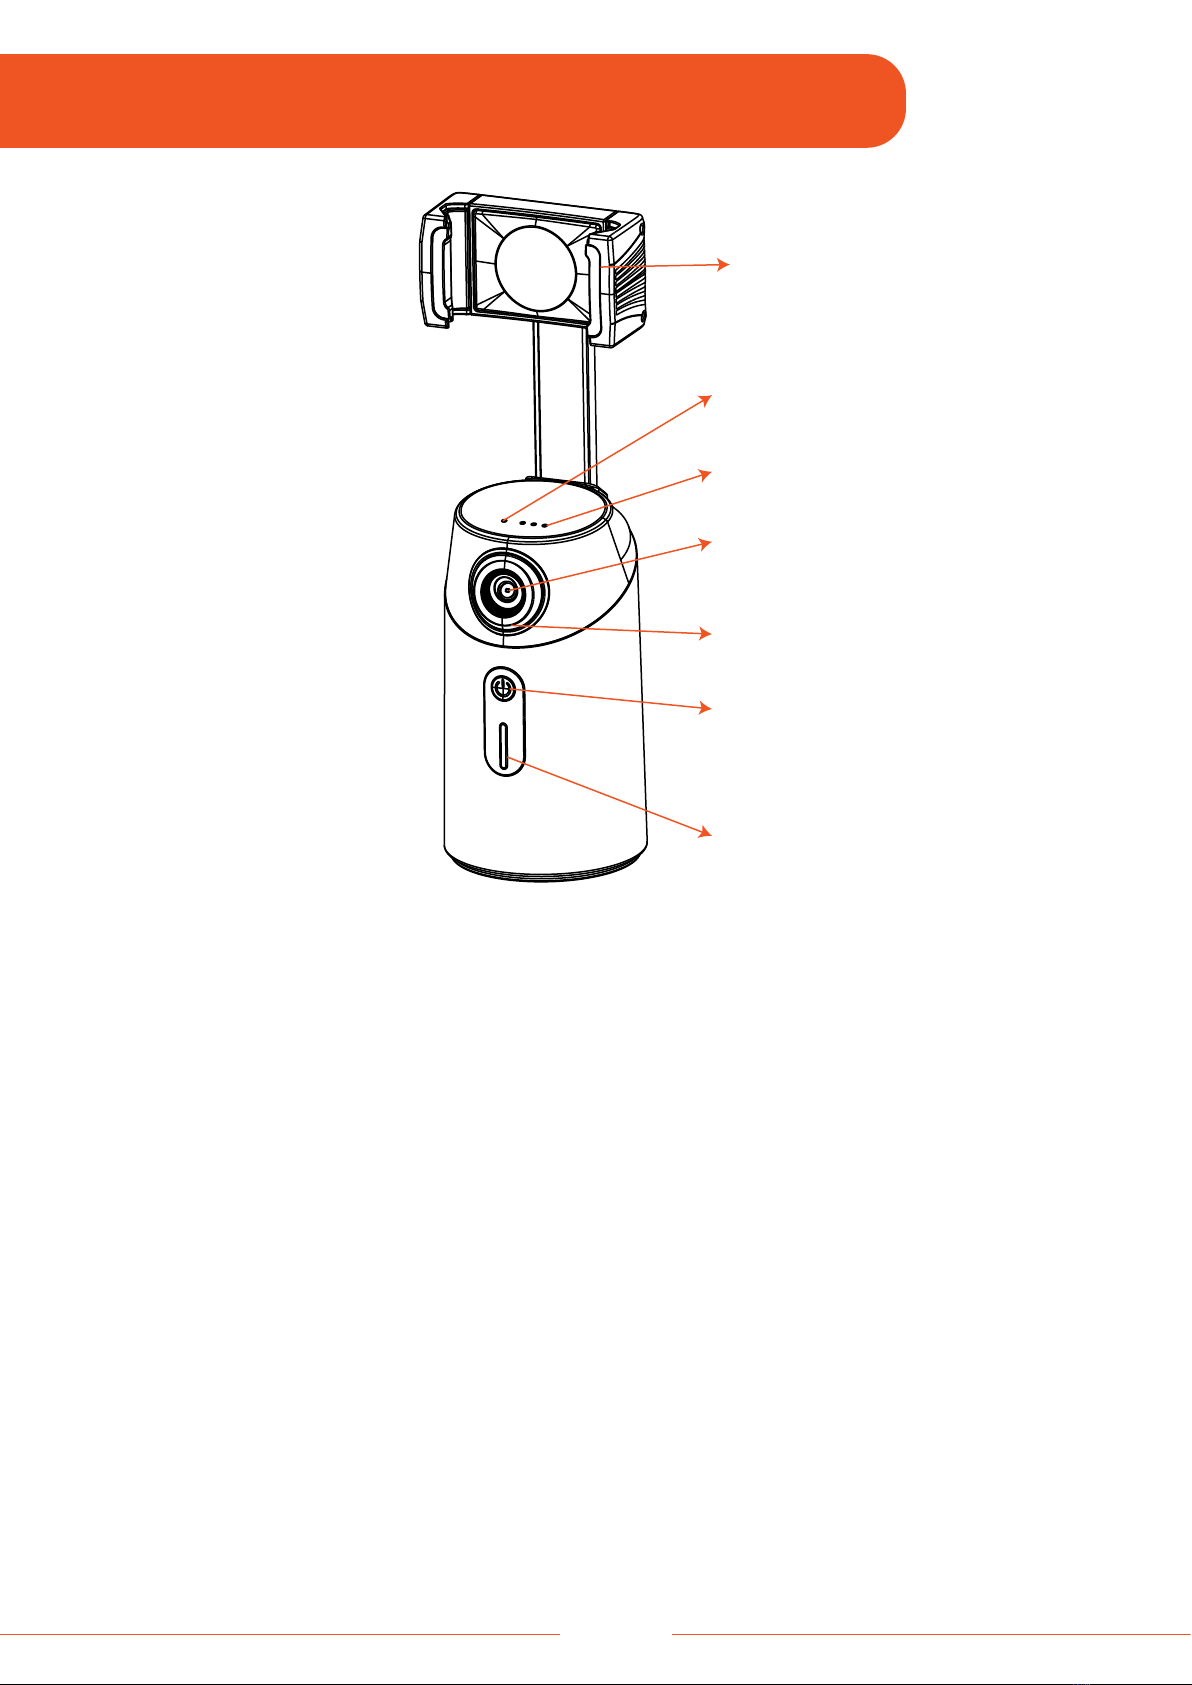
A: Bluetooth/Power Indicator
Red light: Change the battery.
Flashing blue light: The remote is not connected to the Gimbal.
Flashing twice in blue light: The Remote is paired with the Gimbal.
Solid blue light: The remote is successfully connected to the Gimbal.
Note: The remote is connected to the Gimbal via Bluetooth connection.
B: Left Key
(1) Single press: The Gimbal rotates 3° clockwise.
(2) Pressing continuously: The Gimbal rotates continuously in a clockwise
direction.
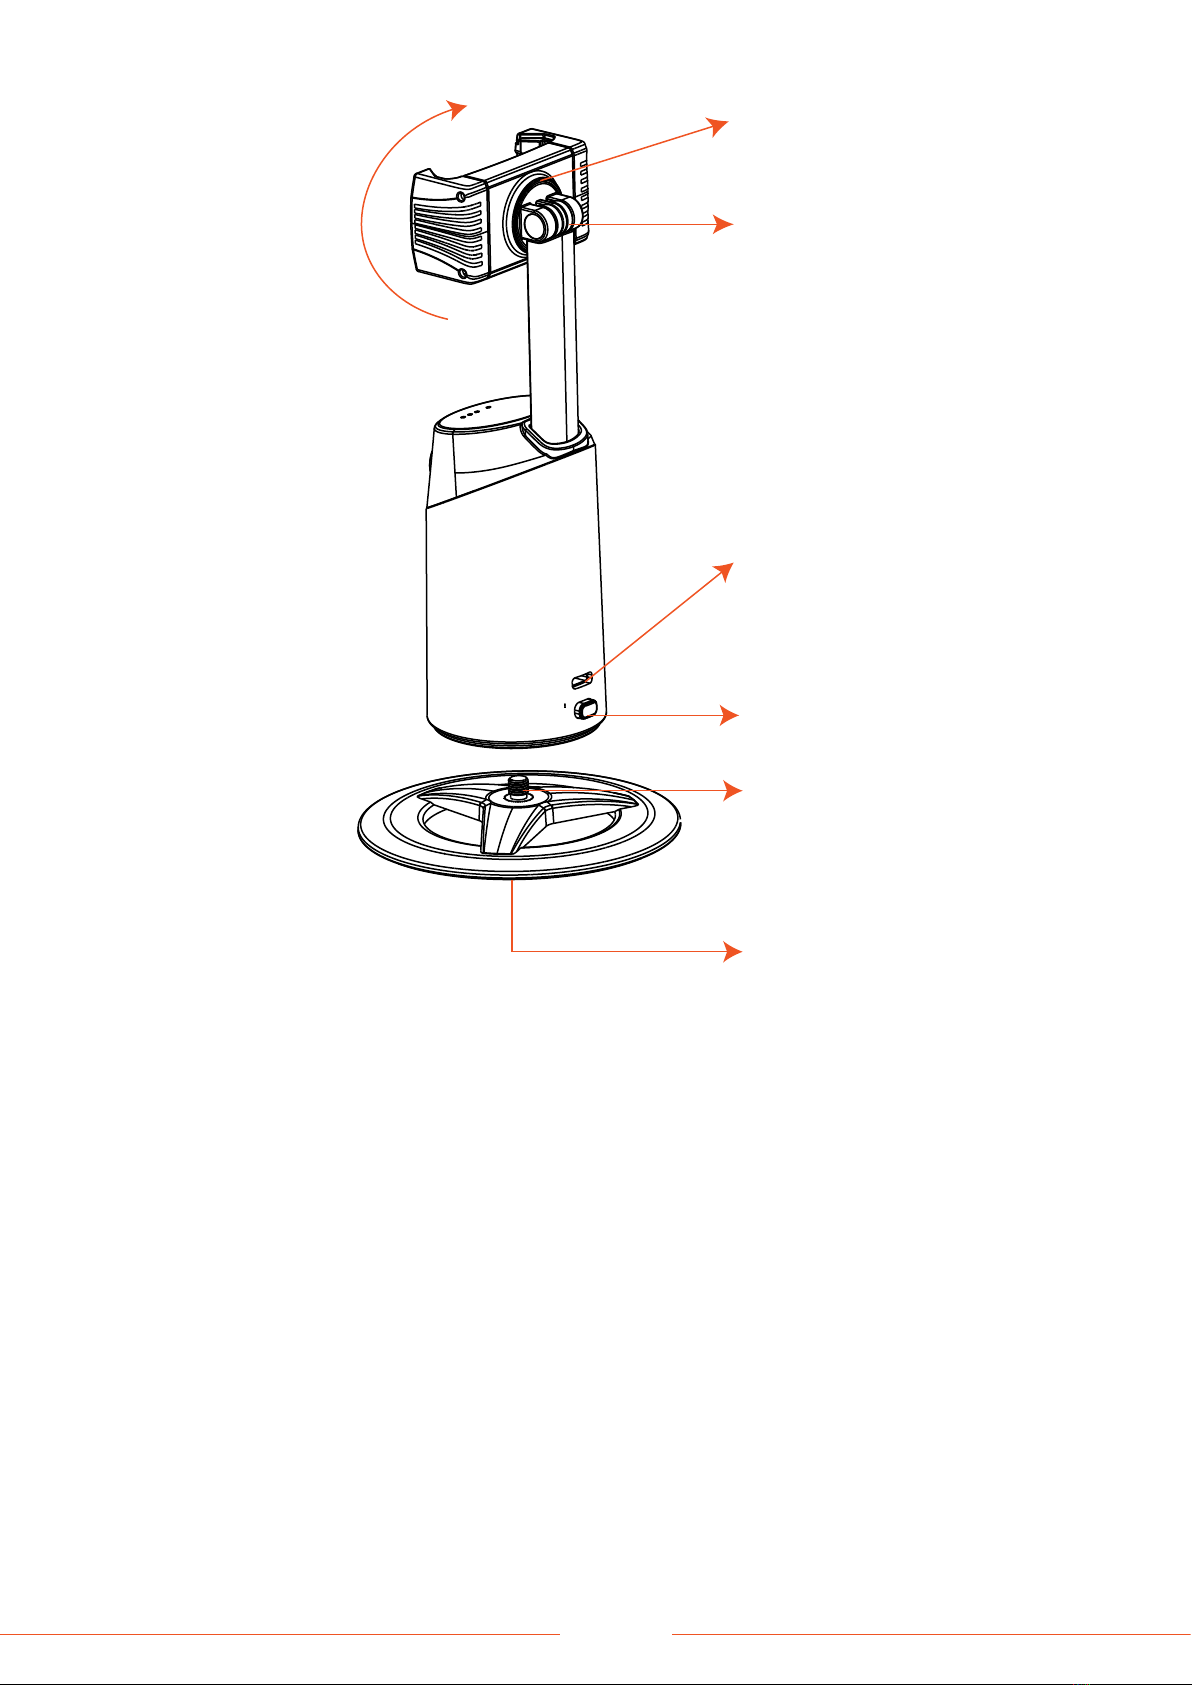
C: Power Button
D: Down Key (Not included in this model)
E: Function Button
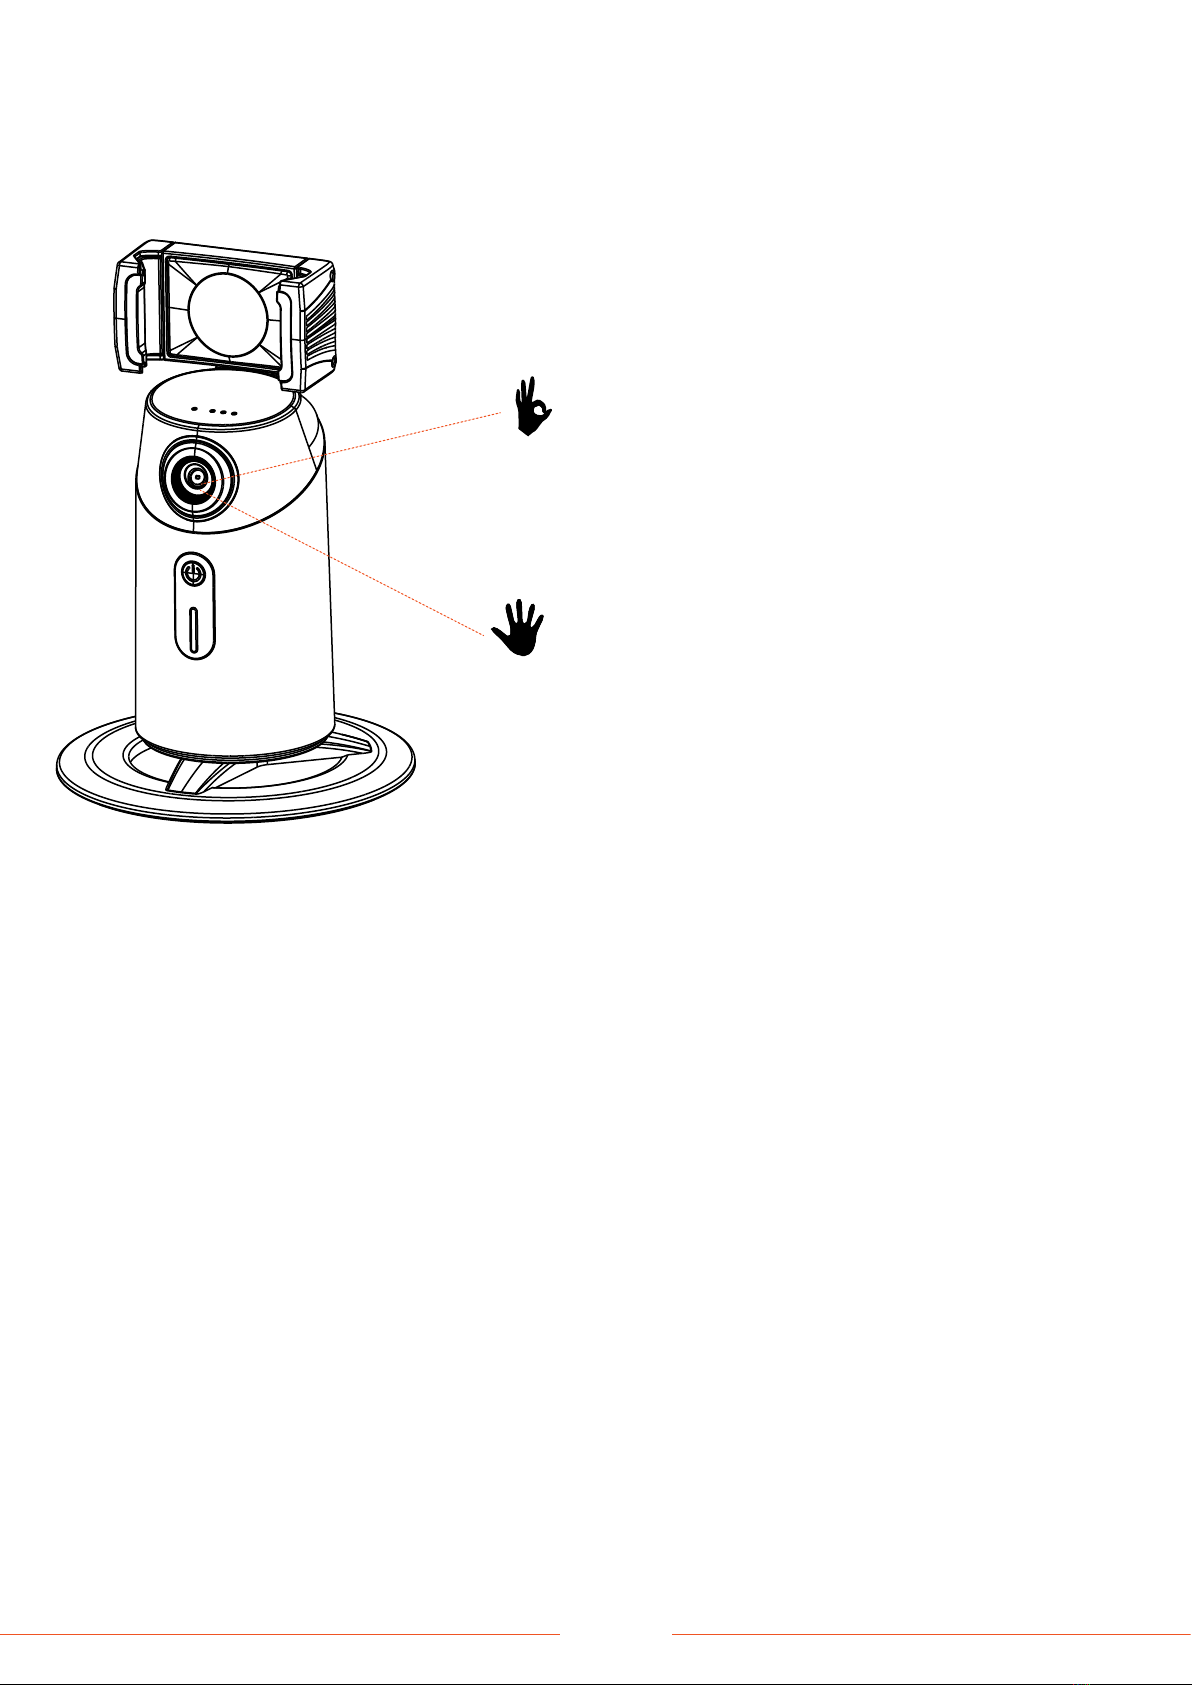
(1) Double press: Activates/Deactivates face tracking feature.
(2) Triple press: Activates/Deactivates gesture recognition feature.
F: Up Key (Not included in this model)
G: Right Key
(1) Single press: The Gimbal rotates 3° counterclockwise.
(2) Pressing continuously: The Gimbal rotates continuously in a counterclockwise
direction.
H: Zoom Button (Not included in this model)
I: Shutter Button
Notes:
1. The 'Down Key', 'Up Key', and 'Zoom Button' are not included in this model.
2. The 'Shutter Button' functions if the remote is connected to smartphone via
Bluetooth.
3. To enable a continuous rotation of the Gimbal, press the Left Key and Right
Key at the same time for 3 seconds.
06