Portek SPRAYMAXX Service manual

1
Read and fully understand
the instructions before operating
the Portek SprayMaxx
Operator's Handbook
portek.co.uk
ATV / UTV
Mounted Sprayer
60 litre &
90 litre models

2Contents
CONTENTS
Before You Start 3
Safety Information 4
Introduction 5
Assembly 6
Set Up 7
Calibration 8 - 9
Filling, Mixing & Spraying 10 - 11
Cleaning, Maintenance & Storage 12 - 13
Parts Diagram & Parts List 14 - 15
Technical Data 16 - 17
Warranty 18 - 19
Declaration of Conformity 20

3
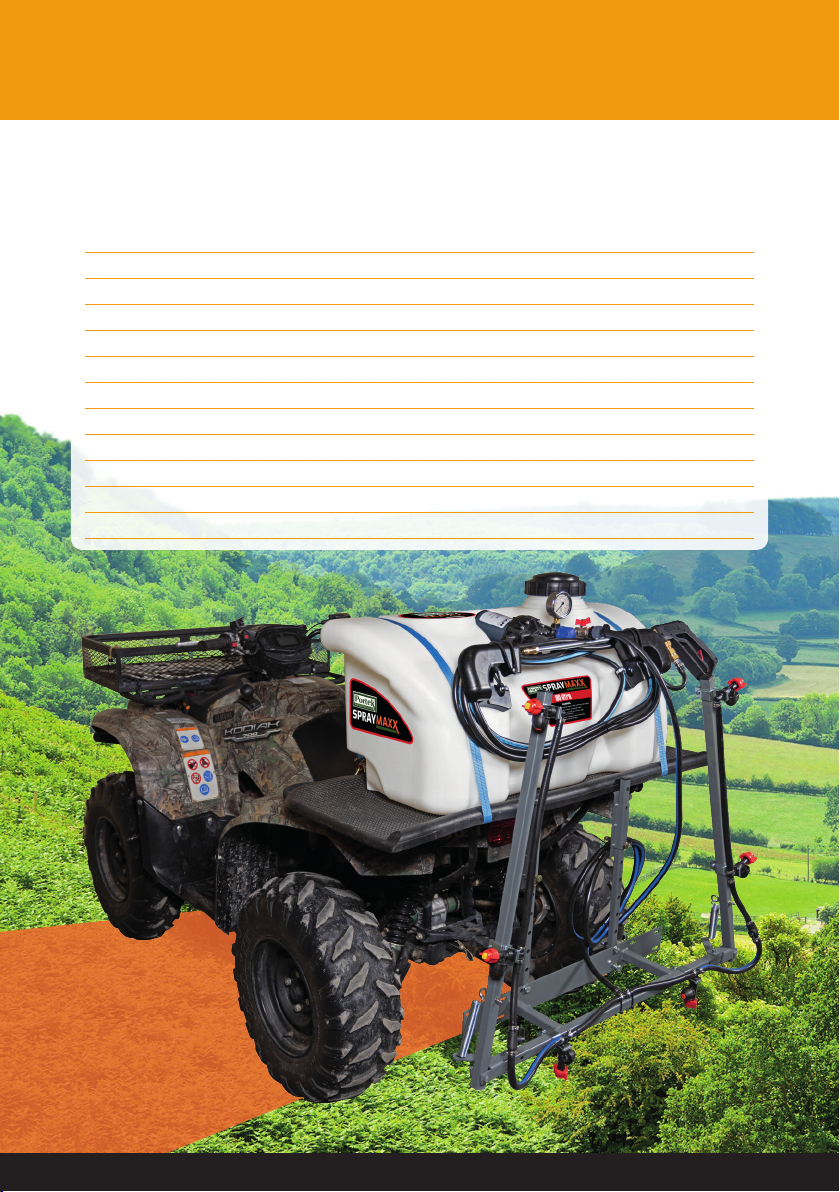
This user manual accompanies the SprayMaxx ATV/UTV Mounted Sprayer and contains
important information on set up and handling. Before using the equipment, read the user
manual carefully. This particularly applies to the safety notes. Failure to do so may result in
personal injury or damage to the equipment. Store the user manual for further use.
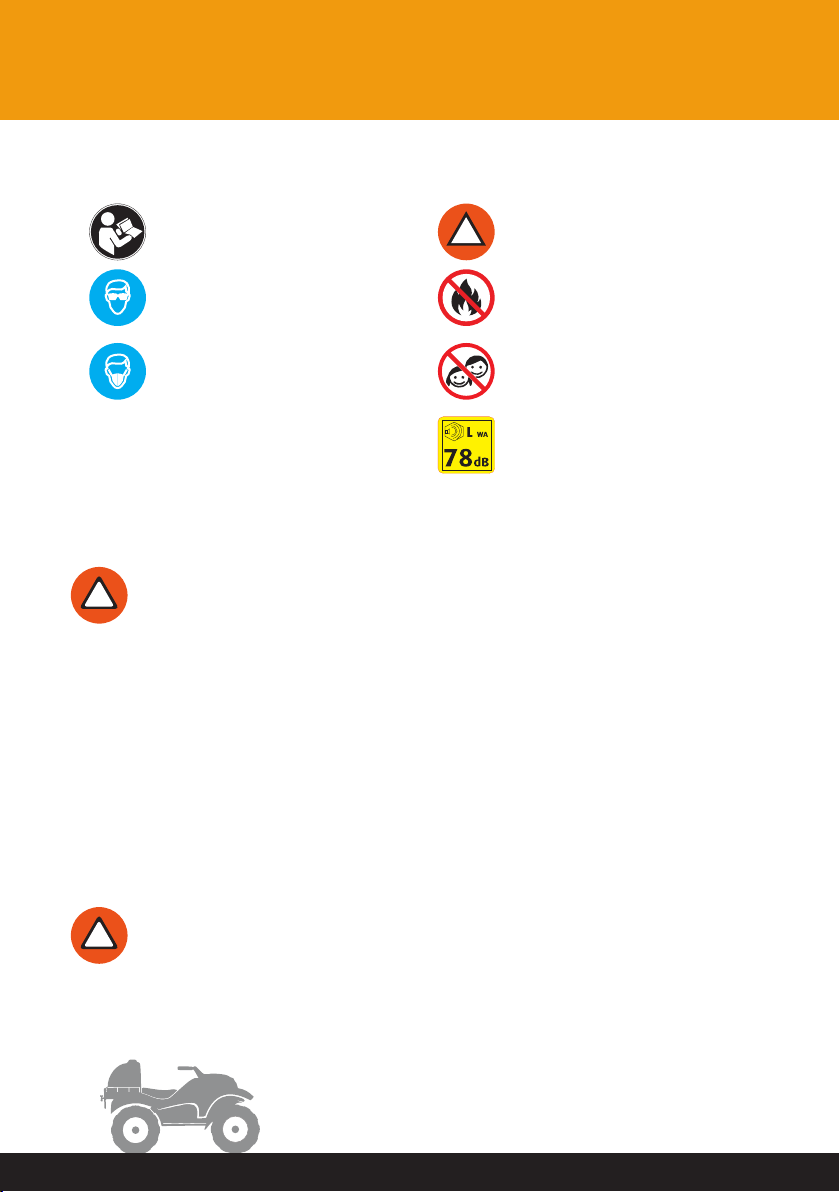
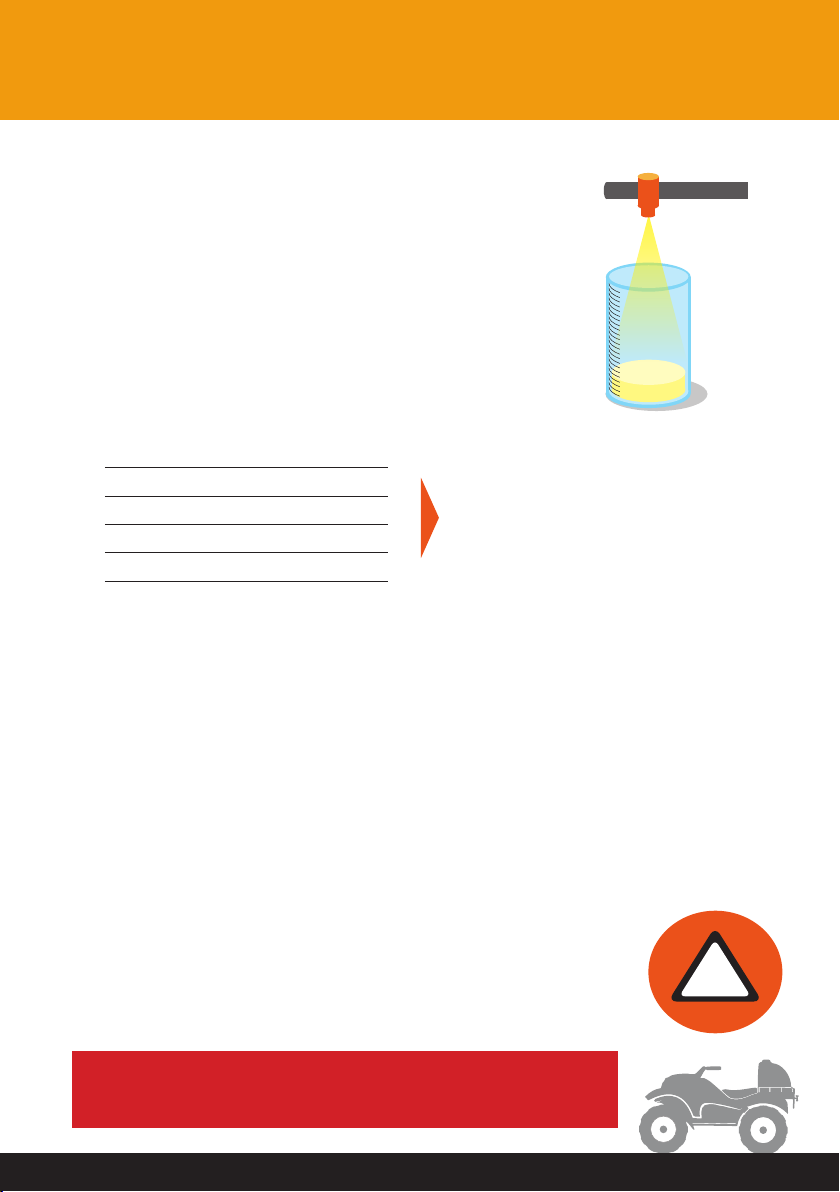
This graphic accompanied by the words WARNING and DANGER
highlights an act or a condition which can lead to SERIOUS INJURY.
ALWAYS WEAR THE CORRECT PROTECTION.
Before You Start
!
READ AND UNDERSTAND THIS MANUAL
FULLY BEFORE OPERATING THE SPRAYMAXX
RESIDUAL RISKS
This machine is only designed for the spraying of herbicides and pesticides. Use the product
only if you fully understand all the functions and can perform without restrictions, or have
received appropriate instructions. Respect technical data and safety precautions. Do not use this
product in any other way as stated for normal use. Not observing general regulations in force
and instructions from this manual does not make the manufacturer liable for damages.
Please note that our equipment has not been designed for commercial, trade or industrial use.
If the equipment is used in commercial, trade or industrial operation or for similar activities, we
cannot assume any liability. Specifications, descriptions and illustrative material in this manual
are as accurate as known at the time of publication, but are subject to change without notice.
Illustrations may include optional equipment and accessories, and may not include all standard
equipment.
Even when the device is used properly and all safety regulations are complied with, there still
may be some residual risks, which cannot be prevented.
ALWAYS WEAR SAFETY CLOTHING IN CONJUNCTION WITH HAND, EYE, HEAD,
HEARING AND FOOT PROTECTION TO HSE/EN SPECIFICATIONS

4
Symbol Meaning Symbol Meaning
Read instruction manual
before use. !Denotes risk of personal
injury or damage to the tool.
Wear eye protection. Do not burn.
Wear face protection. Children shall not play
with the appliance.
Information of the
acoustic power level.
Safety Information
READ ALL SAFETY WARNINGS. FAILURE TO FOLLOW THE
WARNINGS MAY RESULT IN SERIOUS INJURY OR EVEN DEATH.
!
1. Keep children and bystanders away during operation. Distractions can cause you to
lose control and increase risk of injury.
2. Check for signs of wear or damage, before using the SprayMaxx and after any
impact, and repair as necessary.
3. The SprayMaxx is designed for use by adults. Young people over 16 years may use
the tool under supervision only.
4. The manufacturer is not liable for damage which is caused through inappropriate
use or incorrect operation.
WARNING! Use Personal Protective Equipment (PPE). Always wear face
protection when working with the machine. Wear protective clothing, leg
protection, safety gloves and non-slip safety shoes used for appropriate
conditions will reduce personal injuries. Wear ear protectors, as exposure to
noise can cause hearing loss.
!

5
Introduction
INTRODUCTION
Congratulations on the purchase of your SprayMaxx ATV/UTV Sprayer, which has been
designed for the spraying of herbicides and pesticides. The design of the tank enables
the unit to be mounted on to the cargo rack of an ATV, UTV, pick up or trailer.
!
WARNINGS:
• When mounting to any vehicle ensure that you have read the vehicle Owner’s
Manual and make sure you comply with all the weight restrictions as specified by
the vehicle manufacturer, as overloading can cause injury or death.
• To ensure your own safety and that of your employees, if applicable, you must
comply with all relevant environmental, work place health and safety legislation
and codes of practice.
• Select and wear appropriate PPE in accordance with the label of the product you
intend using and your own safe work practices. PPE must still be worn while
cleaning/decontaminating the SprayMaxx.
• Care should be taken when spraying in windy conditions as spray drift may
contaminate the air and may effect the operator or damage adjacent non-target
vegetation.
• Once the spraying operation has been completed, decontaminate the spray
tank and spray accessories. Dispose of tank risings in compliance with current
environmental, work place health and safety requirements.
!
Ensure that all manufacturers'
instructions are followed
regarding the loading
capacity of the ATV.
The correct use of chemicals
MUST be followed at all
times - refer to official
documentation.
Do not drive
across slopes
Do not exceed manufacturers'
loading specifications
WORK SAFELY
ALWAYS WEAR SAFETY CLOTHING IN CONJUNCTION WITH HAND, EYE, HEAD,
HEARING AND FOOT PROTECTION TO HSE/EN SPECIFICATIONS

6Assembly & Operation
ASSEMBLY
The following steps are given as a guide to assemble your SprayMaxx sprayer:
1. Check inside the tank for any foreign objects.
2. Remove the pressure gauge from parts bag and fit onto sprayer.
3. Fit lid on top of the tank.
OPERATION
The following steps are given as a guide to operate your SprayMaxx sprayer:
• When mounting the sprayer to a vehicle using the ratchet tie-down straps, check that the
spray tank is still secure after the first 15 minutes of operation and re-tighten as necessary.
• Partially fill the tank with clean water.
• Connect the battery clips to a 12V DC power supply (red to the positive terminal, black to
the negative terminal) ensuring sufficient current capability (amps) to suit the pump. The
pump’s maximum amperage requirement can be found on its name plate.
• In order to prime the system and enable the pump to reach full pressure, depress the hand
lance trigger to release any trapped air. The pump may automatically switch off when the
hand lance trigger is released.
• Pump cycling may occur with insufficient nozzle delivery. This continual switching on and off
will reduce the battery and motor life. Should this occur, adjust the setting of the nozzle tip
or the regulator until the cycling stops.

7
Set Up
1. Securely fix the two hose wrap brackets to the SprayMaxx tank with the fittings provided.
2. Connect the SprayMaxx wire harness using the bullet connectors at the pump and then
connect to your 12 volt power source/battery.
3. If you would like to mount an optional boom, you can connect it by the 'boom port' on the
side of the pump.
4. Fill the SprayMaxx tank with water.
5. Before running the pump make sure the regulator is fully open to avoid premature wear or
damage to the pump. Squeeze the hand gun trigger to start discharge and then adjust the
pressure to your desired setting while keeping the gun trigger engaged.
NOTE: To maximize the pump's life, maintain pressure settings that do not cause the pump to
pulsate whenever possible.
2
4
3
5
1

8Calibration
1. Measure Nozzle Spacing: Measure the distance
between each nozzle to determine the length of
your travel distance.
2. Measure Distance to Travel: Mark the distance with two flags or between fence posts.
A tape measure capable of measuring further than 60m (200 ft), will make this easier.
3. Drive Measured Distance: Driving the sprayer at the intended spraying speed, time how
long it takes to travel between the marked distance. Repeat this procedure a number of
times and average the measurements. ie average time across the number of runs.
Nozzle Spacing = Distance to Travel
40cm (16”) = 78m (255’)
45cm (18”) = 70m (227’)
50cm (20") = 62m (204’)
55cm (22") = 56m (185’)
60cm (24") = 52m (170’)
Run 1:
40 Seconds
Run 2:
44 Seconds
Distance
to Travel
200' example
Nozzle
Spacing
42 seconds average

9
4. Set Correct Spraying Pressure: With the sprayer
parked and the pump running, set the ideal or
intended pressure. REFER TO CHEMICAL SUPPLIER
5. Catch Output From Each Nozzle: Catch the fluid
output in a container (marked in oz) for the
same number of seconds it took to drive the measured
distance in step 3 (42 seconds).
Calculate the ‘average nozzle output’ by adding the individual
outputs and then dividing by the number of nozzles tested.
6. Analyse Results: The amount of liquid captured per nozzle equals the gallons per acre
application rate. (example: 16 gallons per acre).
7. Clean Nozzles: If the output of any nozzle deviates from the manufacturers’
guidelines by more than 10%, the nozzle should be replaced or cleaned. A toothbrush
works perfectly for this task.
8. Compare Recommended Rate: If the 1 gallon per acre rate is not within 5%
of the intended rate, you will have to adjust the pressure you spray at or the speed you
travel. You will have to repeat steps 3 - 7.
Calibration
Nozzle 1 16.5 oz
Nozzle 2 16.3 oz
Nozzle 3 15.9 oz
Nozzle 4 15.3 oz
Total = 64.0 oz
64 ounces divided by 4 nozzles =
16 gallons per acre.
At this point only can the figure be
converted to metric equivalent
eg. 72.3 litres
NOTE: This is only a basic guide on how to set up the
calibration for your sprayer, there are many factors to
consider when doing this process, we recommend you
research the best calibration for the sprayer, the application
and choice of chemical to be used before each use.
ALWAYS REFER TO THE CHEMICAL
MANUFACTURERS' TECHNICAL INFORMATION
!
Nozzle 1

10 Mixing & Filling
• Read the product label and follow the instructions carefully, taking special note with regard
to the order in which the products are added to the tank.
• Calibrate your sprayer according to the calibration method on page 9 using water only.
Calibration must be done with the nozzle tip that has been selected for the spraying task.
• Measure out the correct quantity of pesticides using clean measuring jugs used only for this
purpose.
• Half fill the SprayMaxx with clean water, then add the measured pesticide/chemical.
• Rinse out the measuring jug and empty the container. Pour all rinsings into the spray tank.
Agitate by stirring with a suitable round edged paddle.
• Top up the tank with water to the required level, ensure that the tank is not over-filled and
the outside is clean and dry before handling.
• Safely dispose of empty containers in compliance with current regulations.
• Mixing sites must be well away from watercourses and other environmentally sensitive
areas. Children and animals must be kept away.

11
Spraying
Planning to Spray Safely
• Before commencing spraying, plan the work effectively to reduce potential contamination.
• Wind direction and speed must be taken into account. Avoid spraying on still, hot and sunny
days or when wind speed exceeds 6.5km/h.
• Do not spray if the operator, bystanders, watercourses or any non-target vegetation appears
to be in danger from spray drift contamination.
• Drift can be reduced by lower nozzle height, lower pressures or by fitting larger nozzles.
Setting Up Your Spray & Adjusting the Regulator
• Prior to commencing spraying, you will need to adjust the regulator knob (blue) to suit the
desired pressure and spraying style.
• Winding the regulator clockwise will increase spraying pressure. Winding it anti-clockwise
will return liquid to the tank, increasing mixing and reducing spraying pressure.
• To begin, turn on the pump and activate the trigger or boom valve. Adjust the regulator to
achieve the desired pressure on the gauge. Turn off the hand lance/boom valve and check
to ensure the pump is not turning rapidly on and off or cycling. If the pump is cycling, you
will need to reduce the spraying pressure slightly until this stops.
NOTE: To operate the hand spray lance on-demand (where the pump activates only when the
trigger is pulled), wind the regulator clockwise completely until it stops. No water can return to
the tank and the pump pressure switch will control the pump operation.
When Spraying
• Spray at a constant speed (as used during calibration) and shut off the hand lance trigger at
the end of each swath or before changing direction.
• Work in parallel lines at the correct spacing when spraying a large area – this is better than
moving the hand lance from side to side in a swinging movement which causes damage by
overdosing.

12 Cleaning
• Drain Tank and Rinse: Rinse all liquid out of the tank. When flushing the sprayer, pay
attention to where the chemical will run. Always clean in an area that will not contaminate
water supplies, streams or crops.
• Pressure Wash Inside Tank: After draining the tank, rinse the inside by spraying clean
water with a pressure washer.
• Add Clean Water: It’s now time to shut the pump off and fill the tank with clean water.
• Flush Clean Water Through System: Turn the pump on and spray the clean water through
the boom and hand lance.
• Add Cleaning Solution and Water: Add the recommended cleaning solution to the tank
of water. To mix, run the agitator inside the sprayer. Operate for 5-10 minutes to mix the
cleaning solution with the water.
• Let Sprayer Sit For 8 Hours: With the water and cleaning solution left in the sprayer tank,
let it sit for about eight hours. This will allow the solution to remove any herbicide from the
residues inside the tank.
• Clean Nozzles, Screens, and Filters: It’s now time to rinse all nozzles, screens and filters.
To clean thoroughly, put them in a bucket of cleaning agent and water.
• Rinse Entire System with Water: When all nozzles, etc. are back in place, give the entire
system a complete rinse to ensure all cleaning solution is flushed through the unit.

13
Maintenance & Storage
MAINTENANCE
• After use, the SprayMaxx must be thoroughly decontaminated including the tank, pump,
hoses and the hand lance to avoid damage to crops from harmful spray residue and to the
sprayer from corrosion or blockage.
• After spraying, flush the tank, hose and the hand lance by running it with clean water plus a
recommended cleaning fluid. It is best to clean sprayers in the field or area just treated.
• The suction strainer attached to the pump suction line should be cleaned periodically.
Unscrew lid, remove filter and flush with clean running water.
• Nozzle filters (if fitted), nozzle tips, nozzle caps and gaskets should be cleaned by soaking
in water, brushing with a nozzle brush and allowed to dry. Never blow through the nozzles
with your mouth, nor use wire or pins to clear any blockages.
• When storing your spot sprayer ensure that it is clean and dry and kept in a well
ventilated place.
STORAGE
• Drain Tank: Fill the tank with clean water, start the pump and open all spray ends. If you
have a spray gun or boom, make sure you spray until clean water is coming through.
• Blow out Plumbing Lines: Using compressed air, blow out the hose lines to remove all
water from the system.
• Flush with Anti-freeze: Pour a small amount of anti-freeze into the tank and run the pump
until there is no more coloured liquid coming through the spray ends.
• Store Sprayer Inside: Turn off the sprayer ends so the remaining anti-freeze does not leak
out. If you have a boom attachment that hangs lower than the sprayer, we suggest you set
the sprayer on a few pallets.

14 Parts List
22
Hose Wrap Kit Assembly - supplied pre-assembled.
16
18
9
12
17
17
3
3
6
8
18
15
14
7
110
2
4
5
21
22
11
10
EXPLODED DIAGRAM
For both 60 & 90 litre capacity
SprayMaxx with a 12 volt pump.
NOTE: Tank pictured is not indicative of every
model but basic equipment is the same.
19 20
13

15
Parts List
No. Part No. Description No. Part No. Description
1 088/007 Powerjet Spray Lance 13 088/042 3/4” Ball Drain Valve
1 088/008 Economy Spray Lance 14 088/022 1/2” Mini Ball Valve F/F
2 088/136 60L Sprayer Tank 15 088/023 Reducer 1/2”m x 3/4”m
2 088/137 90L Sprayer Tank 16 088/014 Suction Filter (10mm)
3 088/003 3.8L/min Pump 16 088/011 Suction Filter (13mm)
3 088/004 8.3L/min Pump 17 088/070 1m Spray Hose (10mm)
3 088/005 15.0L/min Pump 17 088/097 1m Spray Hose (13mm)
4 088/006 150mm Screw Lid 18 088/068 3/8” Hose Clamp
5 088/045 Basket Filter 19 088/016 3/8” Top Hat Grommet (Suction)
6 088/017 2.4m 12v Electrical Leads 19 088/015 1/2” Top Hat Grommet (Suction)
7 088/019 Pressure Regulator 20 088/015 1/2” Top Hat Grommet (Return)
8 088/021 12mm Threaded Elbow 21 088/025 M5 x 25 Screws BZP
9 088/020 19mm Elbow x13mm HB 22 088/024 M5 Washer
10 088/068 3/8” Hose Clamp
23 088/146
Hose Wrap Kit includes:
wrap brackets, fixings, bungee
loop and hose clip (must be
positioned where shown)
11 088/070A 6m Spray Hose (10mm)
12 088/018 Gauge 0-100 Psi

16 Technical Data
Order No. 081-602
Capacity 8.3L/min
Dimensions
(W x L x H mm) 1000 x 370 x 400
Weight (full) 75 kg
8.3L/min Pump
• 60PSI 12 Volt Pump
• Pressure Regulator & Gauge
• 6m Hose and Hand Lance
• 2.4m Power Wiring c/w Battery Clips
• 2x Ratchet Straps
Order No. 081-601
Capacity 3.8L/min
Dimensions
(W x L x H mm) 1000 x 370 x 400
Weight (full) 72 kg
3.8L/min Pump
• 40PSI 12 Volt Pump
• 6m Hose and Hand Lance
• 2.4m Power Wiring c/w Battery Clips
• 2x Ratchet Straps
Order No. 081-603
Capacity 15.0L/min
Dimensions
(W x L x H mm) 1000 x 370 x 400
Weight (full) 75 kg
15L/min Pump
• 60PSI 12 Volt Pump
• Pressure Regulator & Gauge
• 6m Hose & Hand Lance
• 2.4m Power Wiring c/w Battery Clips
• 2x Ratchet Straps
Easily mounted on the back on an ATV (such
as a quad bike), these sprayers are fitted
with a hand lance that provides thorough and
adjustable spray coverage. Spray booms and
boomless sprayers are available.
60 Litre 3.8 60 Litre 8.3
60 Litre 15
60 Litre Range

17
Technical Data
Order No. 081-902
Capacity 8.3L/min
Dimensions
(W x L x H mm) 1000 x 370 x 500
Weight (full) 107 kg
8.3L/min Pump
• 60PSI 12 Volt Pump
• Pressure Regulator & Gauge
• 6m Hose and Hand Lance
• 2.4m Power Wiring c/w Battery Clips
• 2x Ratchet Straps
Easily mounted on the back on an ATV (such
as a quad bike), these sprayers are fitted
with a hand lance that provides thorough and
adjustable spray coverage. Spray booms and
boomless sprayers are available.
Order No. 081-903
Capacity 15.0L/min
Dimensions
(W x L x H mm) 1000 x 370 x 500
Weight (full) 107 kg
15L/min Pump
• 60PSI 12 Volt Pump
• Pressure Regulator & Gauge
• 6m Hose & Hand Lance
• 2.4m Power Wiring c/w Battery Clips
• 2x Ratchet Straps
90 Litre 8.3 90 Litre 15
90 Litre Range

18 Warranty & Procedures
The following warranty is the only warranty applicable to SprayMaxx products, and to the
maximum extent permitted by law, overrides any other conditions or warranties expressed or
implied on SprayMaxx products. Other than legislative obligations to the contrary, Portek will
not be liable for incidental or consequential damages arising from the ownership or use
of a product.
No person, including any dealer or representative of Portek, is authorized to make any
representation or warranty on behalf of Portek in addition or inconsistent with these provisions.
Purchasers to whom these provisions apply agree to hold Portek not liable for claims by their
customers in excess of the obligations of Portek expressly set forth herein.
All products sold by Portek Limited are guaranteed to be free from defect in materials
workmanship or manufacture for a period of 12 months from the initial date of purchase,
excepting the following exclusions:
• Any parts/products found by Portek to be defective, either in material or workmanship will
be replaced or repaired within this period, at no cost to the initial purchaser if following
conditions are met:
• The item has been operated in accordance with all instructions and warnings provided.
• Item is still owned and operated by original purchaser – proof of purchase is required to
obtain warranty.
If you have any questions regarding the operation or warranty of this product, please
contact us directly.

19
Warranty Exclusions
Commercial Use
All SprayMaxx machines are covered for a period of 1 year (unless stated
otherwise) from the date of purchase by the Owner, when used for the
designed purpose of that product by Domestic Users or if stated otherwise.
When used for commercial or hire purposes the warranty is only valid for
3 months from date of purchase. Claims under warranty will be accepted
up to 15 months from date of invoice to the distributor, after which proof
of date of purchase is required. Charges for dealer repairs to SprayMaxx
products under warranty, will only be accepted if agreed in advance.
Abuse
Failure as a result of neglect, such as improper operation. Lack of service/
maintenance or continued operation after discovery of a defect that leads
to further damage.
Alterations Any unauthorised alteration, modification, attachments or unauthorised
repair to equipment.
Clean-Up Time Portek does not pay for cleaning of products, parts or accessories or work
area before or after the warranty repair.
Damage
Damages or machine/component failure caused by carelessness/
recklessness or accidental damage, improper operation, excessive speed,
inappropriate storage or transportation.
Environmental
Conditions and
Application
Deteriorated or failed components such as o-rings, diaphragms, hoses,
seals and connections damaged by corrosive chemicals, dirt and sand,
excessive heat, moisture or other environmental impacts. Warranty
determination on these type of failures will be made by Portek, only after
inspection of the failed component.
Inability/
Unsuitability
In no event shall Portek be liable to any person for indirect or
consequential damages or for injury or commercial loss resulting from any
use or inability to use any SprayMaxx product.
Incorrect
Maintenance
Component failure due to failure to perform maintenance services such
as, oil and grease changes/top-ups, failure to clean tanks, pumps filters,
nozzles and spray lines. Failure to tighten or replace loose or missing bolts,
nuts, fittings, shields and covers.
Use of Non-
Genuine Parts
Use of parts other than Portek parts for repair of warranted items will
automatically negate any warranty. Warranted components must be
replaced with genuine parts.

20
Portek Ltd.
Bryn Hall, Knolton Bryn
Overton-on-Dee
Wrexham, LL13 0LF
Tel: 01234 889 454
Fax: 01234 889 464
General enquiries
Declaration of Conformity
Portek Ltd, Bryn Hall, Knolton Bryn, Overton on Dee,Wrexham, LL13 0LF declare that the
machinery named below conforms to the requirements of EC Council Machinery Directive
Annex II.
Designation of Machinery: Portek SprayMaxx ATV Mounted Sprayer.
Relevant EC Council Directives:
2014/30/EU
2006/42/EC
2011/65/EU
The unit complies with all applicable Essential Requirements of the Directives.
Signature of Manufacturer's Representative:
Declaration made by Hugh David
Managing Director on 06/12/2021
Declaration of Conformity
Table of contents
Other Portek Paint Sprayer manuals