Powerlink Speedy2 PT-H10DN-1W User manual

Wireless N USB Adapter
Installation Manual
Part#: PT-H10DN-1W
Model: Speedy2
V. 0613

Part#: PT-H10DN-1W
Page 2
Contents
Chapter 1 Getting Start .......................................................................................3
Chapter 2 Installation Guide...............................................................................5
Installing the Drivers for Mac OS X...............................................................10
Uninstall the Drivers & Client Utility...............................................................12
Chapter 3 Connection Guide ......................... ...................................................14
Connecting with Windows.............................................................................14
Connecting with Mac OS...............................................................................21
Chapter 4 Trouble Shooting................................................................................25

Part#: PT-H10DN-1W
Page 3
Chapter 1 Getting Start
Minimum System Requirements
Pentium® 300 MHz or higher compatible processor
At least one available USB 2.0 or 1.1 port
50Mbytes free hard disk space.
Windows 2000, XP, XP professional, Vista, Windows 7, Windows 8
If you do not have a USB 2.0 port on your computer, the throughput of the USB
adapter will be limited to the 14 Mbps of the USB 1.1 standard.
Windows XP users must install SP2 or above for the Hot fix which fixes the USB 2.0
Host controller driver.
Before you proceed with the installation, please read the following notes:
1. If you have installed the WLAN USB driver & utility before, please uninstall the old version
first.
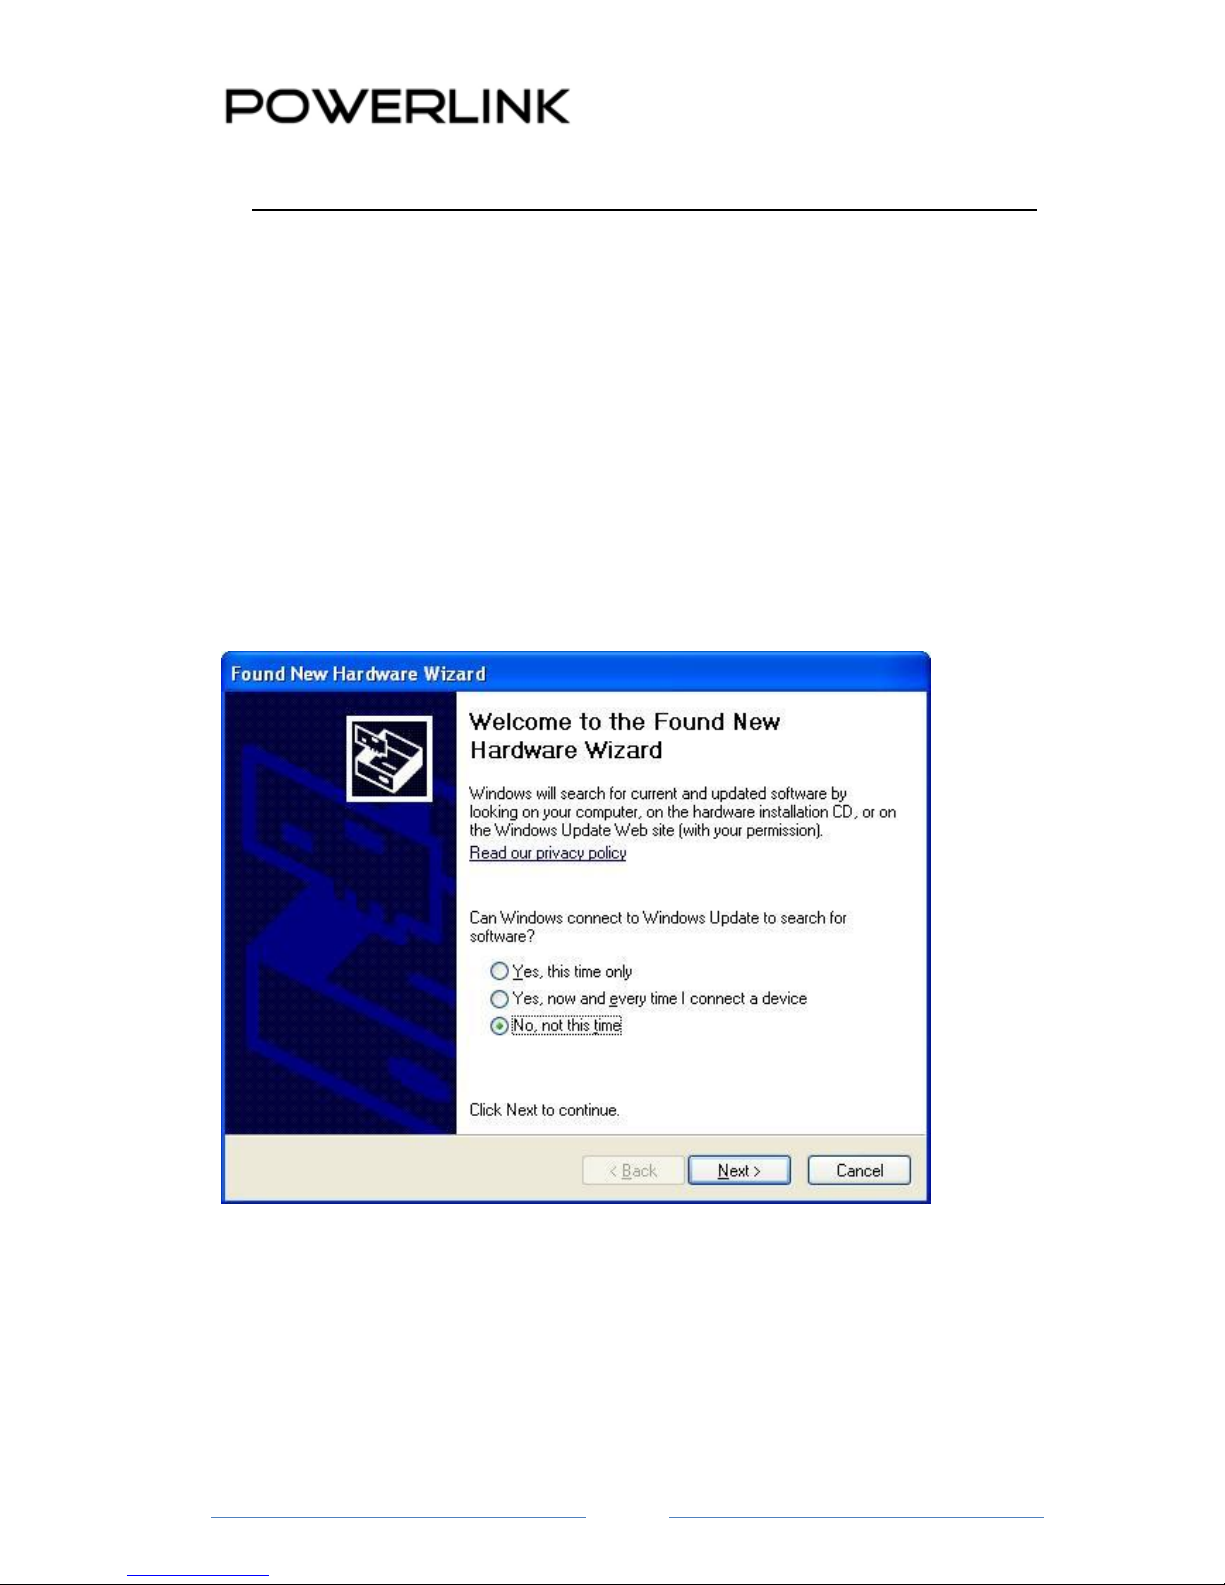
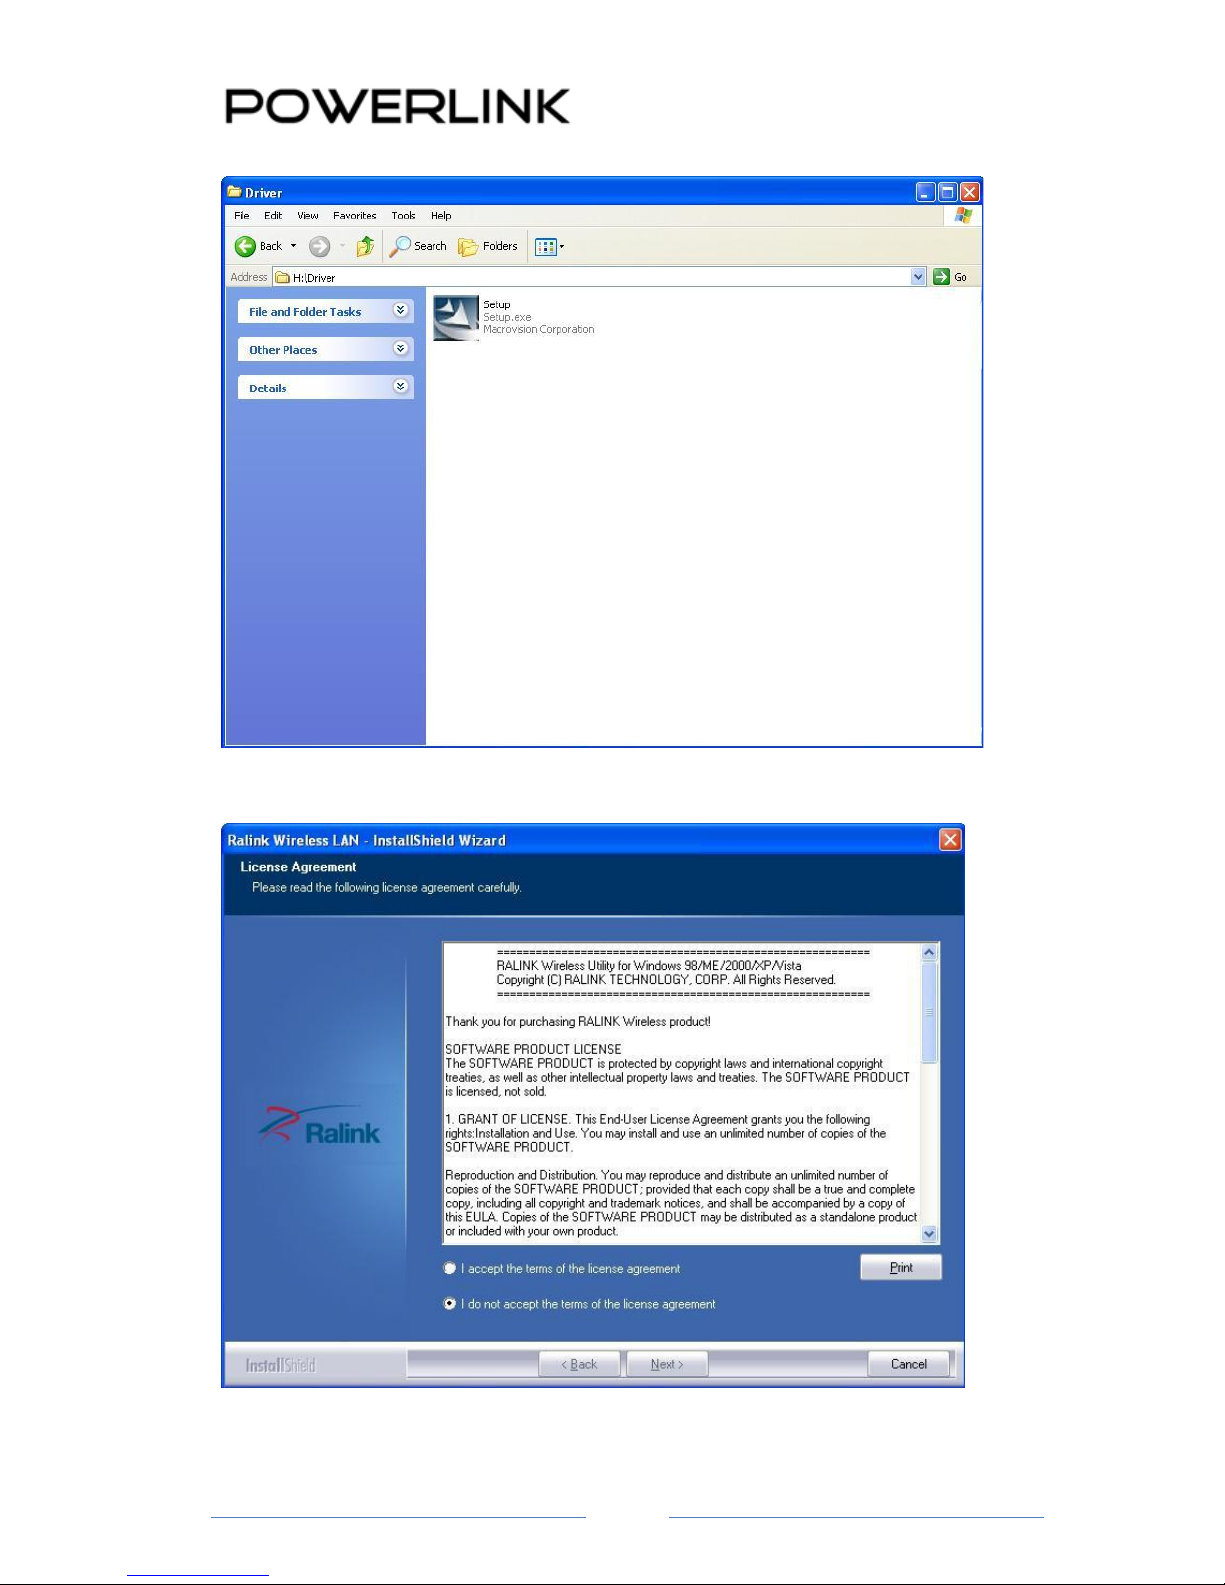
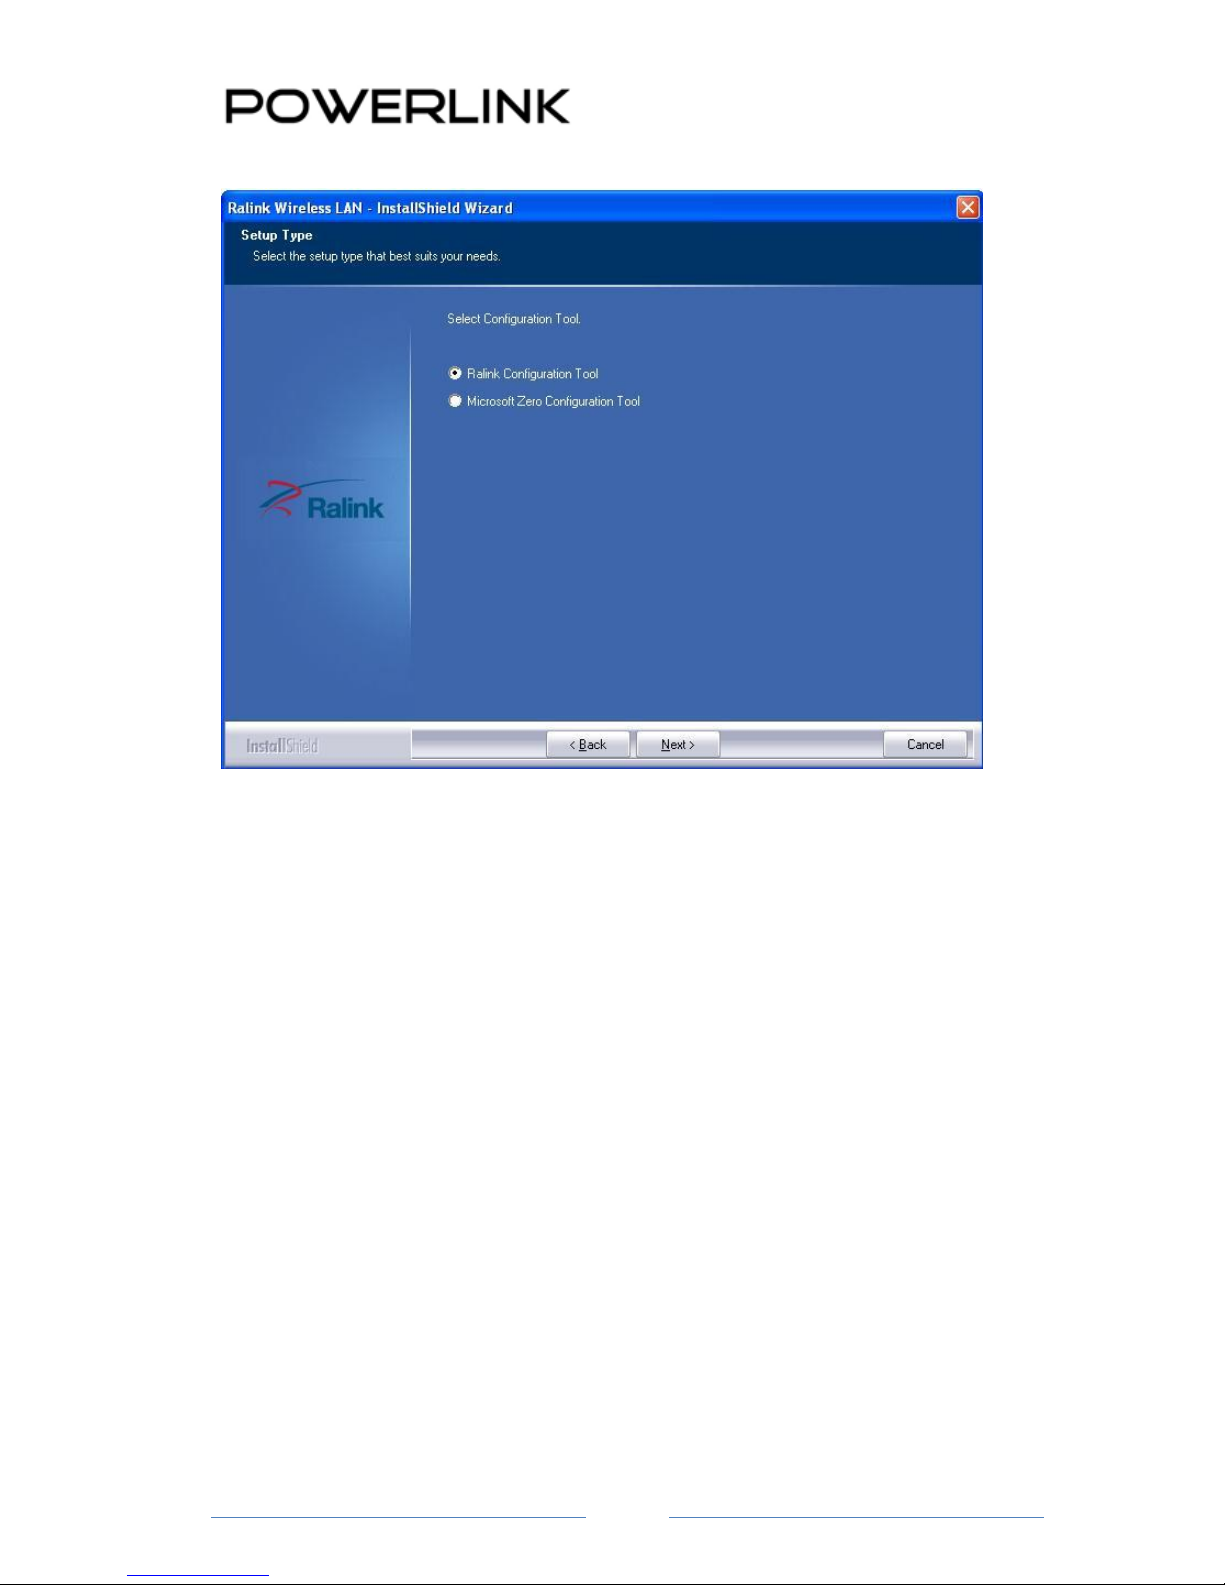
2. The following installation was operated under Windows XP. (Procedures are similar for
Windows 98SE/Me/2000.)
3. The installation guide herein is operated under Windows system. For Linux or Mac driver
installation guide, please refer to the instruction in README at directory the driver has
stored in CD-Rom.
Optimize Wireless Performance
The speed and wireless coverage range of your connection can vary significantly based on the
location of AP/router. You should choose a location for your AP/router that will maximize the
network performance.
You can refer to the following methods to maximize AP/router performance.
Choose placement carefully for your AP/Router.
Place your AP/router at the center among your computers.
Place your AP/router at an elevated location.
Avoid obstacles to wireless signals.
Keep your wireless devices far away from metallic file cabinets, refrigerators, pipes,
metal ceilings, reinforced concrete, and metal partitions.

Part#: PT-H10DN-1W
Page 4
Keep away from large amounts of water such as fish tanks and water coolers.
Reduce interference
Keep away from computers, cordless phones, cell phone, coping machine and fax
machines.
Keep away from microwave oven.
Site survey nearby wireless devices to determine your operating channel.
1.1 Features
Complies with IEEE 802.11g and IEEE 802.11b standards
Compliant with USB 2.0 Standard
Provides up to 300Mbps transmission rate and up to 300 meters transmission distance
Auto-detects and changes the network transmission rate
Provides two work modes: Infrastructure and Ad-Hoc
Supports Soft AP to establish your wireless LAN networking
supports PS3, PSP, Wii and Nintendo DS connecting with Internet and XLink Kai to
enjoy on-line gaming
Supports 64/128-bit WEP, WPA, WPA2 encryption methods and 802.1x security
authentication standard
Supports Wireless Roaming function
WPS (Wi-Fi Protected Setup) simplify the security setup and management of Wi-Fi
networks.
Supports WMM for Multimedia Applications with Quality of Service in Wi-Fi® Networks
Supports Windows 2000 / XP / Vista / 7 / 8, Macintosh, and Linux
1.2 Package Contents
Open the package carefully, and make sure that none of the items listed below are missing.
Do not discard the packing materials, in case of return; the unit must be shipped in its original
package.
802.11b/g/n Wireless LAN USB Adapter
2pcs High Gain 5dBi Dipole Antenna
5ft USB Cable
Driver/Manual CD

Part#: PT-H10DN-1W
Page 5
Chapter 2 Installation Guide
2.1 Installing the Drivers for Windows
NOTE:
Snap-shot screens of the following installation procedure are based on Windows XP. Installation
procedures will be similar for other windows operating systems.
1. Power on your PC, let the operating system boot up completely, and log in as needed.
2. Attach the external antenna to antenna port.
Then insert into a USB slot of your computer
3. Select Cancel when Found New Hardware window appears.
4. Insert Installation CD to your CD-ROM drive. Browse CD and
double-click Setup.exe in Driver folder to execute it. The wizard will run and install all necessary
files to your computer automatically.

Part#: PT-H10DN-1W
Page 6
5. Click Next to accept the Agreement. Or click Cancel to cancel the installation.

Part#: PT-H10DN-1W
Page 7
6. Select Install driver and Ralink WLAN Utility or Install driver only then click Next.
7. Select Ralink Configuration Tool or Microsoft Zero Configuration Tool then click Next.
a. It’s recommended to select Ralink Configuration Tool, which provides fully access to all function
of PT-H10DN-1W.
b. If you prefer to use the wireless configuration tool provided by Windows XP or Vista, please
select Microsoft Zero Configuration Tool.

Part#: PT-H10DN-1W
Page 8
8. Click Install to start installation. Or click Cancel to cancel the installation.

Part#: PT-H10DN-1W
Page 9
9. Click Finish to complete the software installation.

Part#: PT-H10DN-1W
Page
10
You will see a tray icon appear in your system tray at the bottom of the screen after the
software and hardware installation completed successfully
2.2 Installing the Drivers for Mac OS X
Follow the steps below in order to install the USB adapter drivers:

Part#: PT-H10DN-1W
Page
11
1. Insert the CD-ROM that was provided to you in this package. The setup should run
automatically. If the setup does not run automatically, then you must manually select the
Macintosh.dmg file from the CD-ROM drive.
2. Click on the Continue button to configure the next step.
3. Select the Macintosh HD and then click on the Continue button.

Part#: PT-H10DN-1W
Page
12
4. Click on the Continue button to configure the next step.
5. The installation is complete. Click on the Restart button.
6. Carefully insert the USB adapter into the USB port. MAC OS X will then detect and install
the new hardware.
7. The Client Utility is installed in the Applications folder.

Part#: PT-H10DN-1W
Page
13
2.4 Uninstall the Drivers & Client Utility
If the USB client adapter installation is unsuccessful for any reason, the best way to solve
the problem may be to completely uninstall the USB adapter and its utility and repeat the
installation procedure again.
Follow the steps below in order to uninstall the client utility:
1. Click on Start > Ralink Wireless > Uninstall –RT2870
Figure 2-9
2. The un-installation process will then begin.
3. Click on the Yes button to confirm the un-installation process and then click on the
Next button.
4. The un-installation process is complete. Select Yes, I want to restart my computer
now radio button and then click on the Finish button. Then remove the USB adapter.
Figure 2-13

Part#: PT-H10DN-1W
Page
14
Chapter 3 Connection Guide
3.1 Connecting through Ralink Utility
Clicking the Ralink icon on your desktop will bring up the utility main window. Users can
find the surrounding AP signal in the list. You can use the advanced tab to configure other
advanced features provided by Ralink's wireless NIC.
3.2 Steps to add wireless signal with Ralink Utility for one time use
This section will lead you to link your wireless signal with your PT-H10DN-1W. Please
follow the Figure 3-1 in adding the signal, and Figure 3-2 to set up Authentication and
Encryption
1. Click “Rescan”: Click on Rescan to search for all wireless signals near
you.

Part#: PT-H10DN-1W
Page
15
Figure 3-1
2. Select your desire SSID you want to connect: Double Click the highlighted
SSID to go to the Profit Settings. See Figure 3-2 and Figure 3-3
Figure 3-2

Part#: PT-H10DN-1W
Page
16
Figure 3-3
3. Under the Profile Settings, if there is password and security for SSID you chose,
please following the steps to set up the Authentication and Encryption (You need
to know the security type and password). See Figure 3-4
Figure 3-4
4. When you have input all correct info for security, it should appear like Figure
3-5.

Part#: PT-H10DN-1W
Page
17
Figure 3-5
3.3 Steps to add wireless signal with Ralink Utility for future use
1. Click “Profit Setting" and click Add to Profile : This part will help your
wireless adapter memorize the signal and password for your future use. See
Figure 3-6, Figure 3-7 and Figure 3-8
Figure 3-6

Part#: PT-H10DN-1W
Page
18
Figure 3-7
Figure 3-8
3.4 Connecting with Microsoft Zero Configuration for Window XP (Window 7 is similiar)
1. After specifying the Microsoft Zero Configuration tool to configure your wireless
network, right click on the icon on system tray as below. Select “View
available wireless Networks” to specify your wireless network.

Part#: PT-H10DN-1W
Page
19
Figure 3-6
2. The tool shows the available wireless networks. Select your network SSID to
connect with like Figure 3-7.
Figure3-7
3. If your wireless Network has encryption enable, you will be ask to enter the
password like Figure 3-8. Please enter your wireless password at “Network key”
section twice and click “Connect” to confirm.

Part#: PT-H10DN-1W
Page
20
Figure 3-8
4. If your wireless Network does not contains encryption, select the intended access
point and click "Connect". Then click "Connect Anyway" like Figure 3-9
Figure 3-9
5. Once completed, you should see like Figure 3-10 as your computer is now
“Connected” with your wireless Network.
Table of contents
Other Powerlink Adapter manuals

Powerlink
Powerlink High Power Wireless LAN 802.11b/g/n USB... User manual

Powerlink
Powerlink PT-H9DN-ROC User manual

Powerlink
Powerlink pl-2814n User manual

Powerlink
Powerlink PL-H5DN-3070 User manual

Powerlink
Powerlink PL-GM5 User manual

Powerlink
Powerlink PL-2814N Outdoor Plus User manual

Powerlink
Powerlink 30017744 User manual

Powerlink
Powerlink Hermes PL-18N User manual