Powertrain Air Rower User manual

Air Rower
USER MANUAL
Important-please read these instructions fully before assembly or use.
These instructions contain important information which will help you get the best
from your equipment and ensure safe and correct assembly, use and maintenance.

Please read the following carefully before using this equipment:
1. It is very important to read the user manual before installation and use
2. Incorrect installation, maintenance or use of this equipment may cause injury or damage to
the product
3. Consult with a medical practitioner before commencing any fitness and training program
4. Incorrect or excessive exercise may harm your health. If you feel unwell seek medical
advice immediately and before resuming use of the product and your training program
5. This equipment is intended for use by adults. Keep children and pets away from this
equipment
6. Set up the Powertrain Air Rower on a flat surface ensuring the flooring is protected
7. Ensure there is at least 0.5m of free space around the equipment.
8. Please make sure that the screws and nuts are locked before use.
9. Inspect Powertrain Air Rower before use, if you notice any faults or defects contact your
supplier for assistance and do not use the product
10. Wear appropriate sports attire during exercise loose clothing may cause damage to the
equipment or cause injury
11. This equipment is only suitable for indoor and domestic use. The maximum load-bearing
capacity is 150KG
12. Please store this manual and installation tools properly
13. This product is not to be used as a medical device
14. Do not lean forward or backward more than 45° during use
15. Do not stop using the rower suddenly, doing so may cause injury or product damage
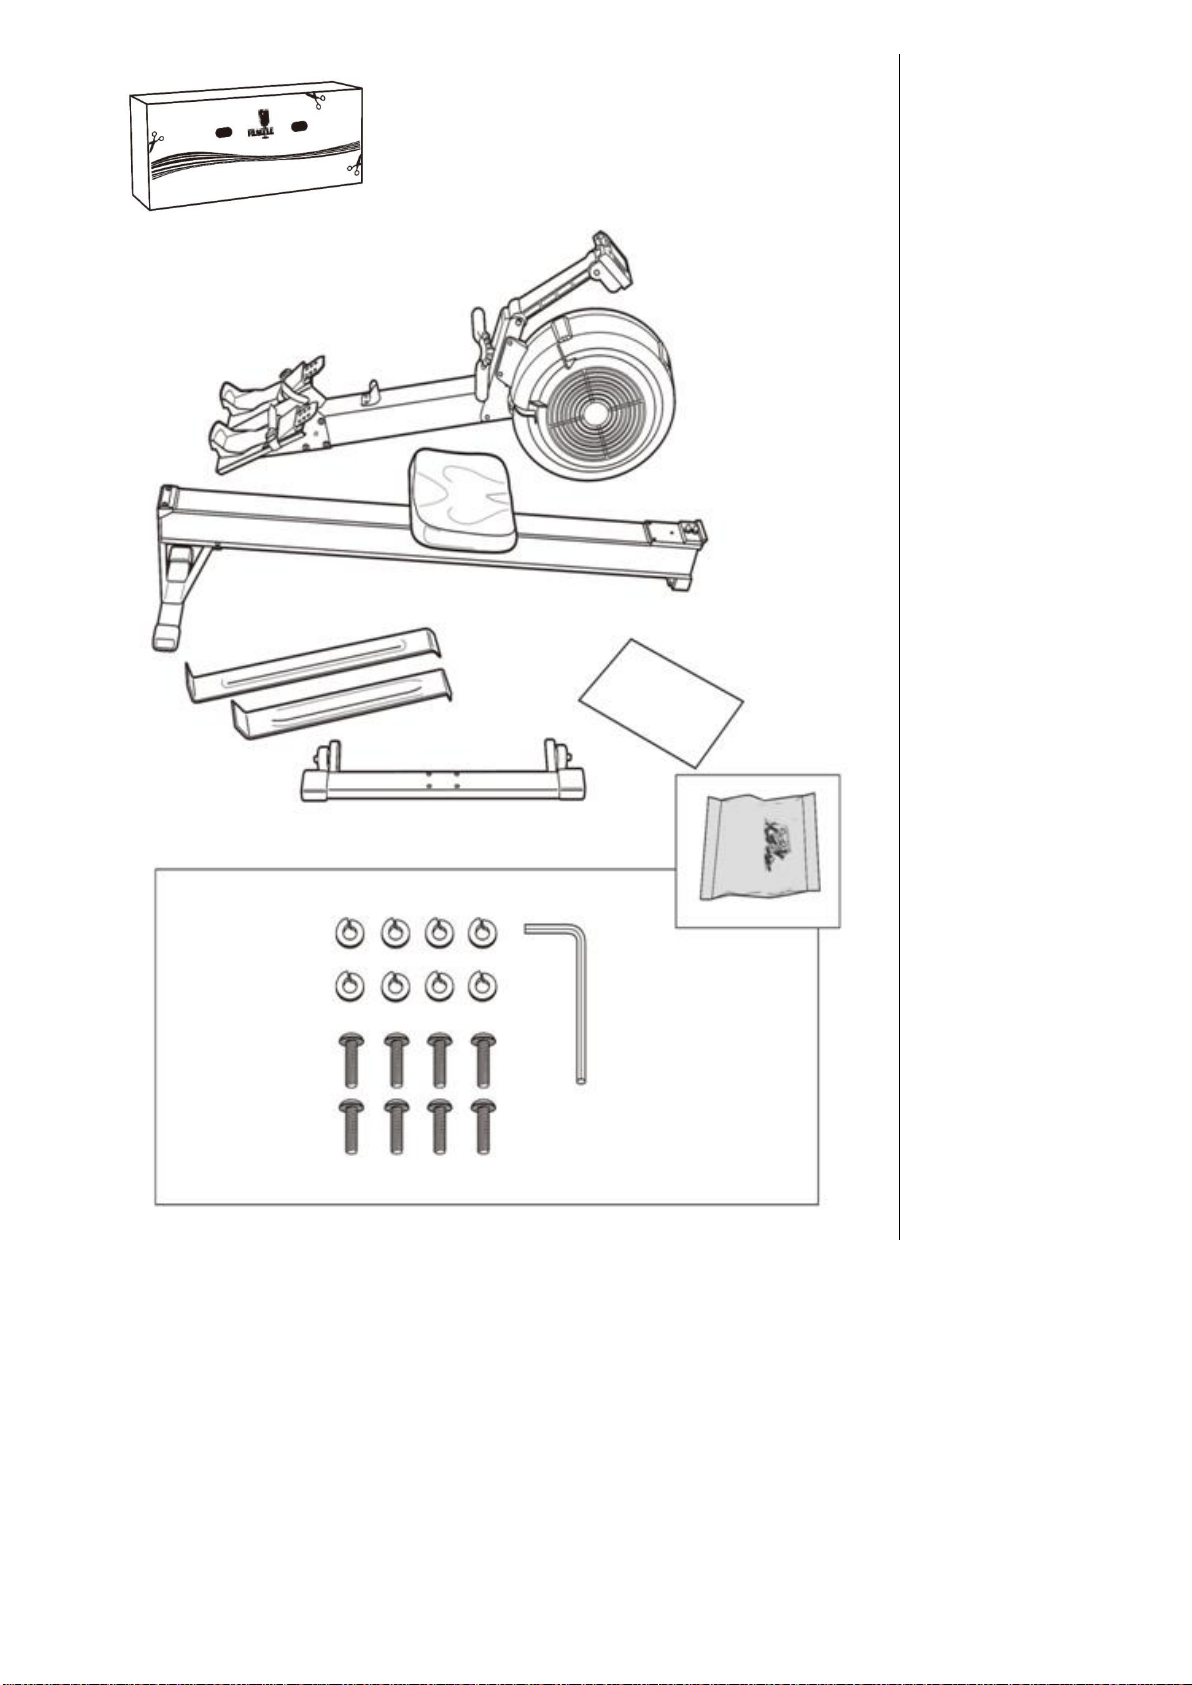
Supplied are the following parts for your
Powertrain Air Rower in the shipping box.
If any parts are missing contact your supplier
◆ASSEMBLY
PN 1936
PN 1946
PN 1173
PN 1172
PN 1935
CONTENTS OF PARTS BAG (PN1752)
PN 1205
PN 1248
PN 1225
USER MANUAL
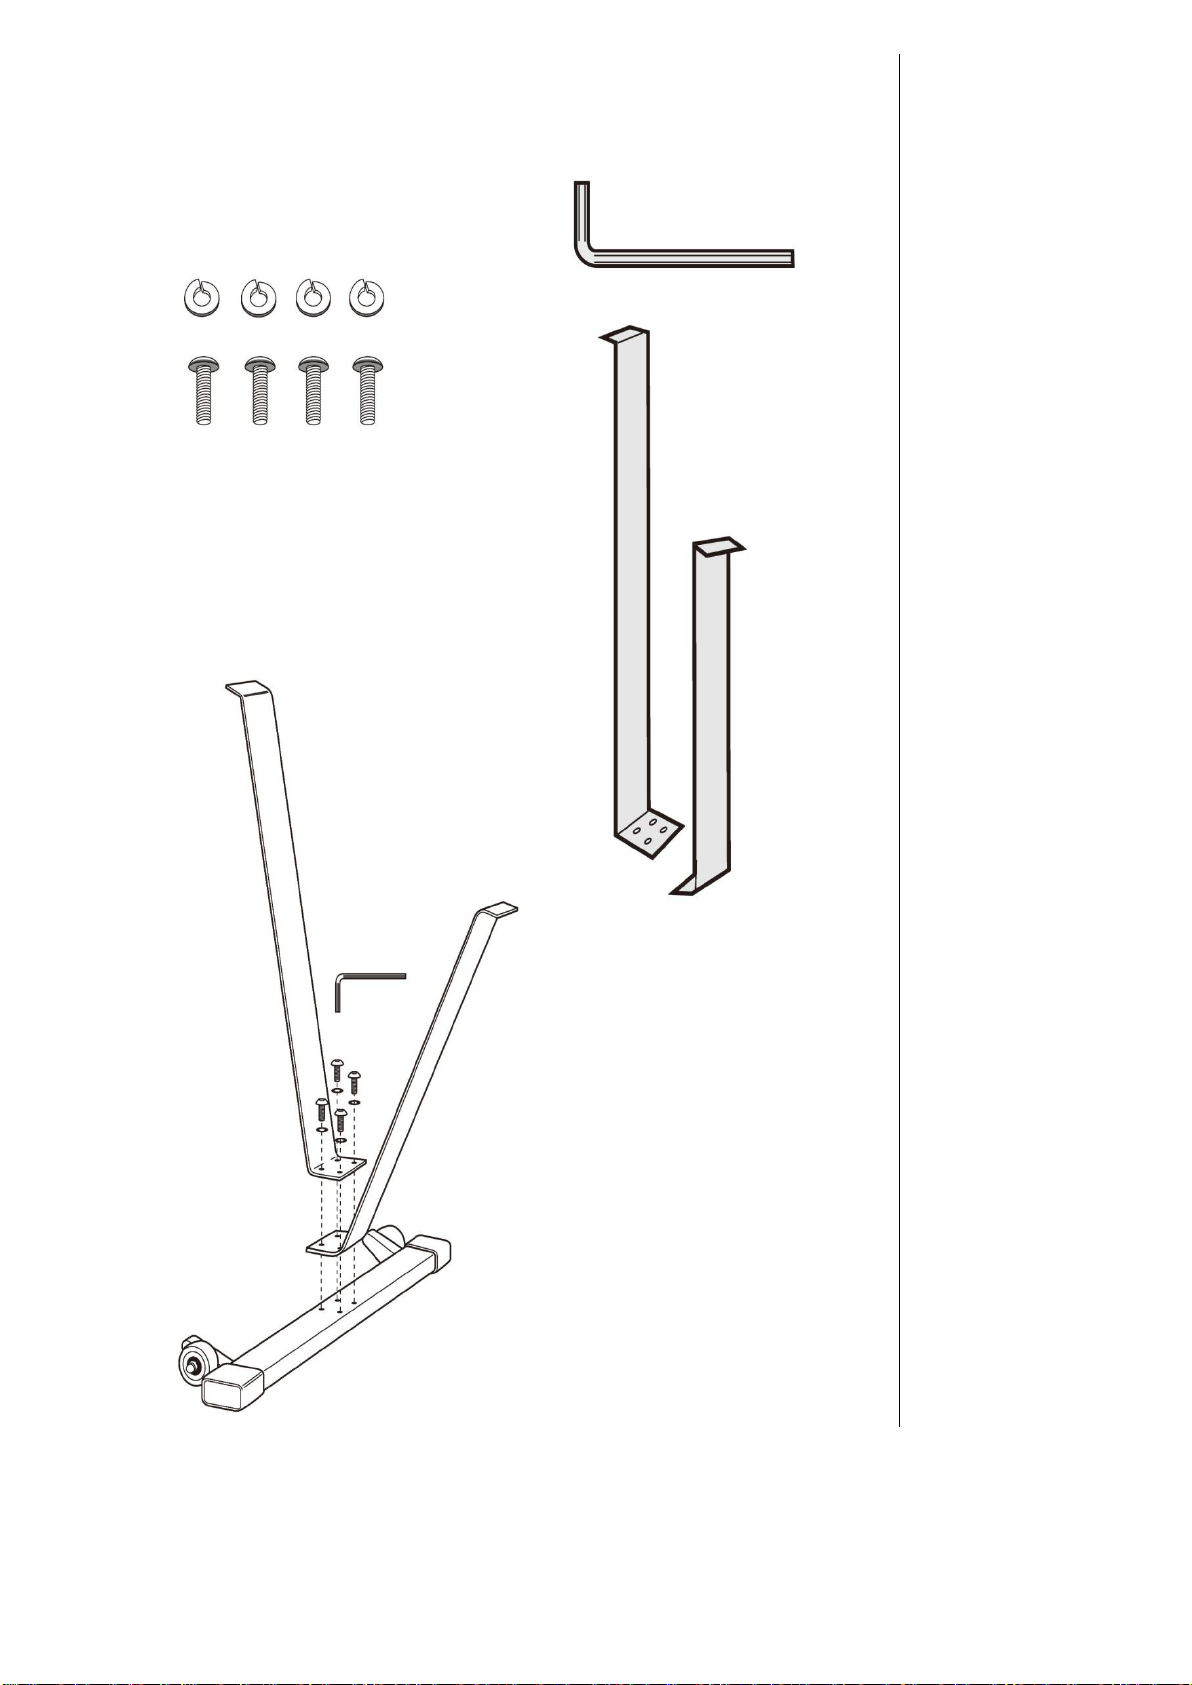
※Assembling
the Front Leg
PARTS NEEDED:
4 washers
4 screws
TOOL NEEDED:
Allen Wrench (provided)
23.5”
(60cm)
long
leg
19”
(49cm)
Short
leg
①
②
①
②
3/4”
Or 2cm
Note that the longer leg (1)
attaches to same side as the
wheels

※Attaching
the Front Leg
PARTS NEEDED:
4 washers
4 screws
Attach the front leg as shown in the illustration.
( Note the leg lengths )
49cm
This is an illustration of the bottom view of the front
end/flywheel housing showing the screw positions
TOOL NEEDED:
Allen Wrench
60cm
3/4”/ 2cm
Table of contents


