PowerXL CRISP 'N BAKE TO6135-0SP User manual

CRISP ’N BAKE™
Use & Care Manual
Manual de uso y cuidado
AIR FRY 6-SLICE TOASTER OVEN
HORNO TOSTADOR AIR FRY DE 6 REBANADAS
TO6135-0SP

23
PowerXL™CRISP ‘N BAKE™
Air Fry Toaster Oven
Appliance Specications
BEFORE YOU BEGIN
The PowerXL™ CRISP ‘N BAKE™ will provide you many years
of delicious family meals and memories around the dinner table.
But before you begin, it’s very important that you read this entire
manual, making certain that you are completely familiar with this
appliance’s operation and precautions.
Model
Number Supply
Power Rated
Power Unit
Capacity
Temperature External
Dimensions Cord
Length
TO6135-0SP ??? ?? ??
??? ?? ??

23
Important Safeguards 4
Getting To Know Your Air Fry Toaster Oven 6
Getting Started 7
Cooking Function Information 8
Care And Cleaning 10
Air Fry Cooking Chart 11
Recipes 12
Table of contents

45
Please Read and Save this Use and Care Book.
IMPORTANT SAFEGUARDS.
When using electrical appliances,basic safety precautions should always be followed to reduce the
risk of re, electric shock, and/or injury, including the following:
• READ ALL INSTRUCTIONS BEFORE USING.
• Do not touch hot surfaces. Use handles or knobs.
• To protect against electrical shock, do not
immerse cord, plug, or appliance in water or
other liquid.
• Close supervision is necessary when any
appliance is used by or near children.
• Unplug from outlet when not in use and before
cleaning. Allow time to cool before putting on or
taking off parts.
• Do not operate any appliance with a damaged
cord or plug, or if the appliance malfunctions
or has been damaged in any manner. Contact
consumer support at the toll-free number listed
in the warranty section.
• The use of accessory attachments not
recommended by the appliance manufacturer
may cause injuries.
• Do not use outdoors.
• Do not let cord hang over edge of table or
counter, or touch hot surfaces.
• Do not place on or near a hot gas or electric
burner, or in a heated oven.
• Extreme caution must be used when moving an
appliance containing hot oil or other hot liquids.
• To disconnect, turn the Timer and Toast shade
knobs to the O position (OFF). Then unplug from
wall outlet.
• Do not use appliance for other than intended
use.
• Use caution when removing tray or disposing of
hot grease.
• Do not clean oven with metal scouring pads.
Pieces can break off the pad and touch electrical
parts, causing risk of electric shock.
• Do not attempt to clean the heating elements.
• Oversized foods or metal utensils must not be
inserted in a toaster oven, as they may create re
or risk of electric shock.
• A re may occur if the toaster oven is covered
or touching ammable materials including
curtains, draperies, walls, and the like, when in
operation. Do not store any item on top of the
unit while in operation.
• Extreme caution should be exercised when
using containers constructed of other than metal
or glass.
• Do not store any material, other than
manufacturer’s recommended accessories, in
this oven when not in use.
• Do not place any of the following materials in
the oven: paper, cardboard, plastic, and other
items not constructed of oven safe metal and
glass pans.
• Do not cover crumb tray or any part of this oven
with metal foil. This will cause overheating in the
oven.
• This appliance is not intended for use by
persons (including children) with reduced
physical, sensory or mental capabilities, or
lack of experience and knowledge, unless they
have been given supervision or instructions
concerning use of the appliance by a person
responsible for their safety.
• Children should be supervised to ensure that
they do not play with the appliance.
• The appliance is not intended to be operated by
means of an external timer or separate remote-
control system.
• Do not leave unattended while in operation.
Food ignition may occur. If this happens, unplug
the unit, but DO NOT open door. To reduce the
risk of re, keep oven interior completely clean
and free of food residues, oil, grease and other
combustible materials.
45
GROUNDED PLUG
As a safety feature, this product is equipped with a grounded plug, which will only t into a three-prong outlet.
Do not attempt to defeat this safety feature. Improper connection of the grounding conductor may result in
the risk of electric shock. Consult a qualied electrician if you are in doubt as to whether the outlet is properly
grounded.
TAMPER-RESISTANT SCREW
Warning: This appliance is equipped with a tamper-resistant screw to prevent removal of the outer cover. To
reduce the risk of re or electric shock, do not attempt to remove the outer cover. There are no user-serviceable
parts inside. Repair should be done only by authorized service personnel.
ELECTRICAL CORD
a) A short power-supply cord is provided to reduce the risks resulting from becoming entangled in or tripping
over a longer cord.
b) Extension cords are available and may be used if care is exercised in their use.
c) If an extension cord is used:
1) The marked electrical rating of the extension cord should be at least as great as the electrical rating of the
appliance;
2) If the appliance is of the grounded type, the extension cord should be a grounding-type 3-wire cord; and
3) The cord should be arranged so that it will not drape over the counter top or tabletop where it can be pulled
on by children or tripped over.
Note:
If the power cord is damaged, please contact the warranty department listed in these instructions.
SAVE THESE INSTRUCTIONS.
This product is for household use only.
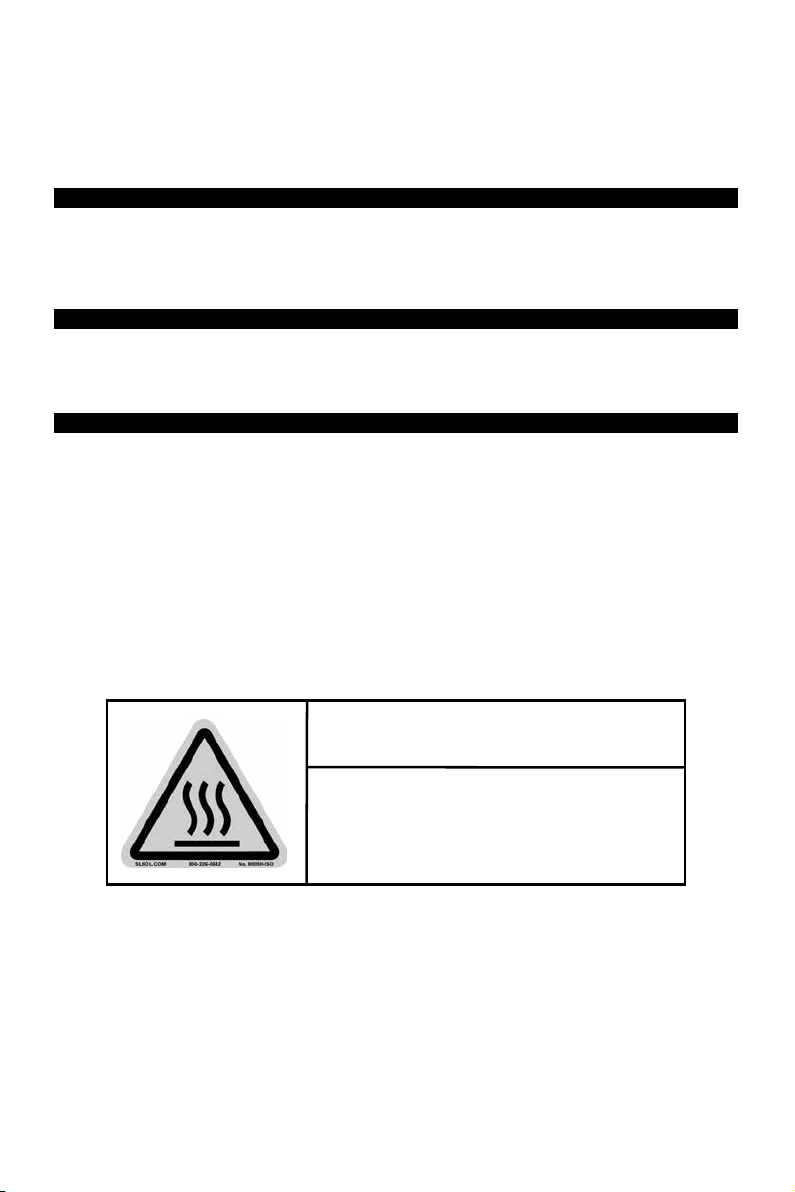
CAUTION
THIS OVEN GETS HOT.
WHEN IN USE, ALWAYS USE OVEN MITTS OR
POT HOLDERS WHEN TOUCHING ANY OUTER
OR INNER SURFACE OF THE OVEN.

67
Product may vary slightly from what is illustrated.
There are three ways to turn the toaster oven ON:
• Turn Timer knob past 20 and then to desired time.
• Turn Timer knob to “Stay On”.
• Turn the Toast shade knob past medium shade and then to desired
toast shade.
• To turn OFF turn the Timer and Toast shade knobs to the position.
1. Air Fry mesh cooking rack
2. Rack
3. Bake pan/drip tray
4. Easy-view glass door
5. Power indicator light
6. Temperature/cooking function knob
7. Timer knob
8. Toast shade knob
9. Crumb tray*
*See Getting Started section for correct
position.
Getting To Know Your Air Fry Toaster Oven
67
This appliance is intended for household use only.
• Remove all packing material, any stickers, and the plastic band around the power
plug.
• Remove and save literature.
• Please go to www.prodprotect.com/powerxl to register your warranty.
• Wash all removable parts as instructed in Care
and Cleaning Section.
• Select a location where this unit is to be used,
allowing enough space from
the back of the unit and wall to allow heat to
ow without damage to cabinets and walls.
During operation, the unit should have 6
inches or more of clearance around sides,
back, and top.
• Before use, make sure that the crumb tray is
inserted below the heating elements.
Important information about using your oven
• This oven gets hot. When in use, always use oven mitts or potholders when
touching any outer or inner surface of the oven.
• When using the oven for the first time, you may notice smoke or a slight odor
during the first few minutes. This is normal.
• Be sure food or baking pan does not come within 1 1/2 inches (3.8 cm) of the top
heating elements.
• Food should not extend beyond the edges of the baking pan to avoid
drippings from falling onto the heating elements.
• Many factors influence cook times such as altitude, humidity and variations in
electrical grids. For best results, monitor the end of the cook cycle.
•
Cooking Containers: Metal, ovenproof glass or ceramic bakeware can be used
in your oven. Follow the manufacturer’s instructions. Be sure the top edge of the
container is at least 1 1/2 inches (3.81cm) away from the upper
heating elements.
• Temperatures in the oven will be lower than your set point. This is due to advanced
heating elements used in this oven. Temperature dial settings have been calibrated to
provide expected results for most recipes taking into account the advanced heating
elements.
• You must set the timer or select Stay On for the oven to function.
• You can cook your food 3 ways:
-Use the bake pan/drip tray placed on the slide rack.
-Place the bake pan/drip tray under the slide rack / broil rack.
-Place food on Air Fry mesh rack
Note: For best results, when baking or cooking, preheat the oven for at least 10
minutes at the desired temperature setting.
heating
elements
crumb tray
Getting Started

89
Note: This oven has been designed to cook rapidly. Please inspect your items earlier
than the prescribed cook time for a conventional oven to ensure that they do not get
overcooked.
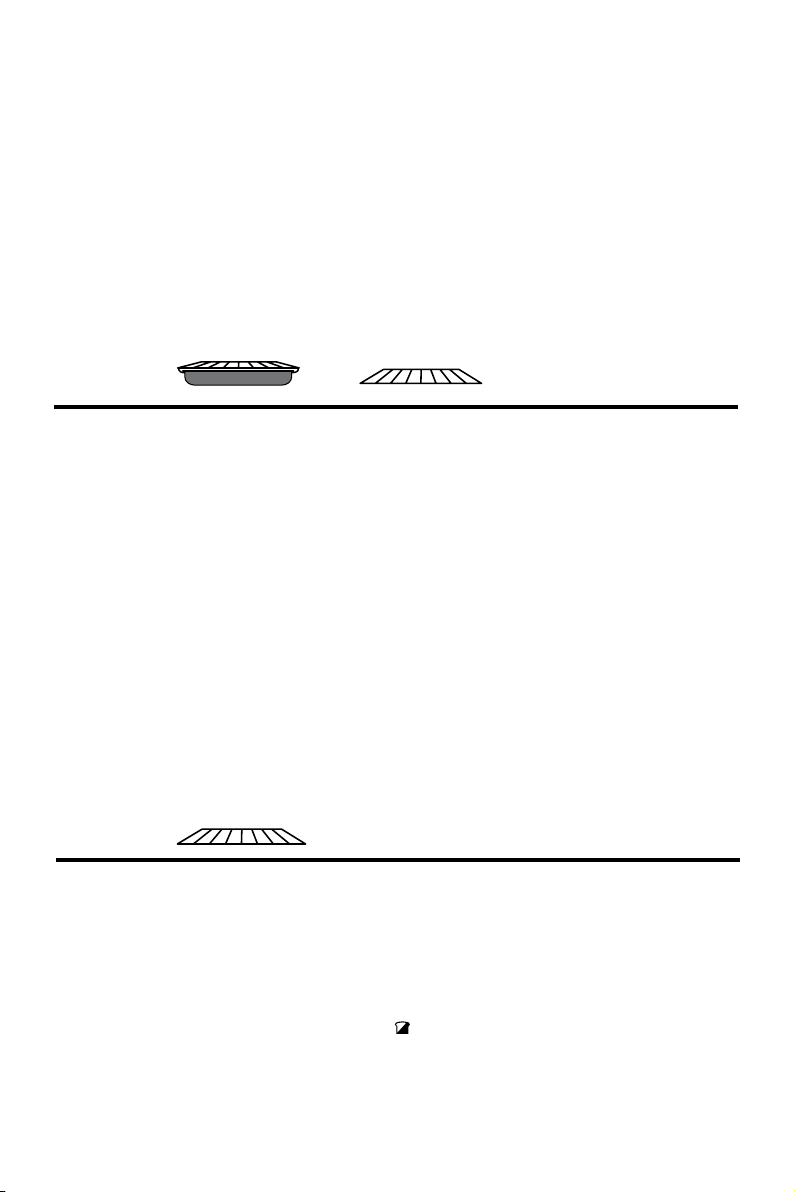
Open oven door and insert rack to the middle rack position.
1. Place items to be baked directly on wire rack or place pan on wire rack.
2. If the items are going to be placed directly on the wire rack, slide the baking pan into
the guide under the wire rack to catch drippings during baking.
3. Set temperature selector knob to the desired temperature.
4. Turn TIMER selector knob to 20 and then turn to desired baking time. Select Stay On to
bake longer than 60 minutes or to control cooking time yourself. The power indicator
light comes on and remains on during the entire baking time.
Note:
You must set the timer for the oven to function.
5. Once oven has preheated, open oven door and insert food. Close oven door.
6. If using the oven timer, there will be an audible signal once the baking cycle is
complete. The oven turns off and the power indicator light goes out. If not using the
oven timer, turn the oven off once the cooking cycle is complete.
7. Open the oven door. Using oven mitts or pot holders, slide the rack out to remove the
cooked food.
8. Unplug appliance when not in use.
Air Fry technology uses high intensity hot air to bake, brown, and crisp your favorite
fried foods with little to no oil.
This mode operates the oven at 425°F. Use the cook times listed in the cooking chart
on page 10 or follow the food package recommendations for baking. Adjust the cook
time as needed to achieve your preferred crispiness.
Note: It is not necessary to preheat the oven for air frying.
Note: Arrange your food in a single layer on the mesh rack for optimal air frying
results. Stacking food in multiple layers may result in improperly cooked food and
slower cook times.
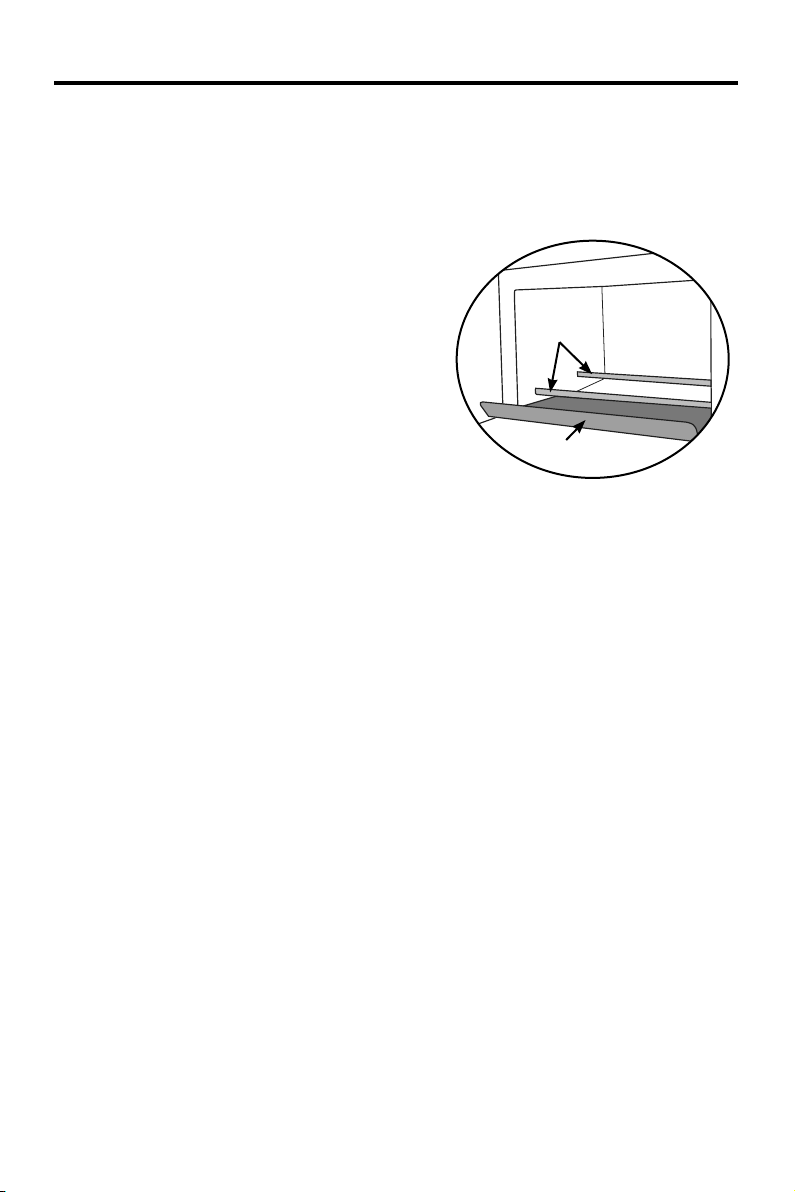
Note: When cooking greasy food, insert the baking drip tray under the wire rack as
shown. (A) This will prevent smoking that is caused by grease landing on the heating
element.
1. Place food on Air Fry mesh rack. No other racks,
pans, or trays are needed. Make sure that the crumb
tray is inserted below the heating elements.
2. Open door and slide Air Fry mesh rack with food
into the middle or lower rack position.
3. Set Temperature selector knob to AIR FRY position.
A
BAKE OR
+
AIR FRY
89
4. Turn TIMER selector knob to 20 and then turn to desired Air Frying time. Select Stay On
to air fry longer than 60 minutes or to control cooking time yourself. The power indicator
light comes on and remains on during the entire Air Frying time.
Note:
You must choose Stay On or set the timer for the oven to start.
5. If using the oven timer, there will be an audible signal once the Air Fry cycle is
complete. The oven turns off and the power indicator light goes out. If not using the
oven timer, turn the oven off once the cooking cycle is complete.
6. Open the oven door. Using oven mitts or pot holders, slide the rack out to remove the
cooked food.
Note:
Clean out the crumb tray frequently when using the air fry setting.
7. Unplug the appliance when not in use.
For optimal results use
upper
rack position. Be sure food or baking dish does not
come within 1 1/2 inches of the top heating element.
1. Set temperature selector knob to BROIL.
2. Set the timer selector knob to 20 then turn back or forward to desired broiling time.
Select Stay On to bake longer than 60 minutes or to control cooking time yourself. The
power indicator light comes on and remains on during the entire broiling time.
Note:
You must set the timer for the oven to function.
3. Once the oven is preheated, open oven door and insert food. Close oven door.
4. If using the oven timer, there will be an audible signal once the broiling cycle is
complete. The oven turns off and the power indicator light goes out. If not using the
oven timer, turn the oven off once the cooking cycle is complete.
5. Open the oven door. Using oven mitts or pot holders, slide the rack out to remove the
cooked food.
6. Unplug appliance when not in use.
Note:
For best results when broiling meat, turn over the meat half-way through broiling.
It is not necessary to preheat the oven for toasting.
1. Set temperature selector knob to TOAST position.
2. Open oven door and insert rack in the lower rack position. The toaster will hold a
maximum of 6 slices of bread, placed in a single layer.
3. Place items to be toasted directly on slide rack in the lower rack position and close the
door.
4. Turn toast shade selector knob to middle and then turn to desired toast shade.
5. The power indicator light comes on and remains on until toasting cycle is complete.
6. When toast cycle is complete, there will be an audible signal. The oven and the power
indicator light will turn off.
BROIL OR
TOAST

10 11
7. Open the oven door. Using oven mitts or pot holders, slide the rack out to remove the
toast.
8. Unplug appliance when not in use.
Note:
You must set the toast shade selector knob as desired for the oven to begin toasting.
1. Place rack in the middle rack position.
2. Set Temp selector knob to Warm position.
3. Turn Timer knob to “Stay On” or turn Timer knob past 20 and then to desired time.
4. Open the oven door. Using oven mitts or pot holders, slide the rack out to remove the
food.
5. Unplug appliance when not in use.
This product contains no user serviceable parts. Refer service to qualied service
personnel.
Important: Before cleaning any part, be sure the oven is off, unplugged, and cool.
Note: Do not allow food debris to accumulate in oven cavity. Do not use aerosol or
spray oven cleaners.
1. Clean the glass door with a sponge, soft cloth, or nylon pad and dish soap and warm
water. Do not use a spray cleaner.
2. Remove crumb tray, wire rack, air fry mesh cooking rack, and bake pan and wash them
in hot water with dish soap. To remove stubborn spots, use a polyester or nylon pad.
Note:
The rack and air fry mesh cooking rack, are dishwasher safe. We recommend
washing the bake pan and crumb tray by hand in hot water with dish soap.
3. Wipe the outside of the oven with a damp cloth or sponge. Dry thoroughly.
4. Do not attempt to clean the heating elements. Any food that comes into
contact with the elements will burn off on its own.
If additional assistance is needed, please contact our consumer service team at
1-800-577-1557.
KEEP WARM
CARE AND CLEANING

10 11
FOOD COOK
TEMP COOK TIME*
Frozen Food
Chicken Nuggets 425°F / 215°C 13-16 min. or until crisp and golden brown.
Chicken Strips 425°F / 215°C 25-28 min. or until crisp and golden brown.
Fish Sticks 425°F / 215°C 10-12 min. or until crisp and golden brown.
Breaded Onion Rings 450°F / 230°C 10-12 min. or until breading is crisp.
Breaded Mushrooms 425°F / 215°C 16-20 min. or until breading is crisp.
Mozzarella Sticks 425°F / 215°C 10-12 min. or until breading is crisp.
Jalapeño Poppers 425°F / 215°C 14-16 min. or until breading is crisp.
Corn Dogs 425°F / 215°C 23-25 min. if frozen. Rotate front to back halfway
through cooking.
Potato Skins 450°F / 230°C 13-15 min. or until hot and cheese is melted.
Straight or Crinkle Cut
Fries 450°F / 230°C 18-24 min. or until golden brown.
Thick Steak Fries 425°F / 230°C 20-25 min. or until golden brown.
Thin Shoestring Fries 425°F / 215°C 14-18 min. or until golden brown.
Seasoned Potato Nuggets 450°F / 230°C 20-25 min. or until golden brown.
Broccoli (Frozen) 425°F / 215°C 18-20 min. Spray orets with a little pan spray.
Season with salt and pepper.
Cauliower (Frozen) 425°F / 215°C 18-20min Spray orets with a little pan spray.
Season with salt and pepper.
Fresh Vegetables
Potato Wedge/Fries 425°F / 215°C 20-25 min. or until golden brown.
Broccoli 400°F / 200°C 12-14 min. Toss orets in 1-2 Tbsp. of oil.
Season with salt and pepper.
Cauliower 400°F / 200°C 15-17 min. Toss orets in 1-2 Tbsp. of oil. Season
with salt and pepper.
Poultry
Chicken Wings (Thawed/
Fresh) 400°F / 200°C 25-35 min. or until internal temp is
165°F / 75°C.
Chicken Drumsticks
(Thawed/Fresh) 425°F / 215°C 25-35 min. or until internal temp is
165°F / 75°C.
*For these and other foods, please review manufacturer suggested cook times for
baking or air frying.
Note: Do not air fry frozen raw meats (i.e. burgers, steaks).
*Cook with drip tray underneath wire rack
Air Fry Cooking Chart

12 13
Directions:
1. Add the butter to a medium frying pan, over medium heat. Crack the eggs into a
small bowl and scramble. Stir in garlic, salt and pepper. Pour into the frying pan.
2. Sprinkle the bacon and cheese on top of the eggs and stir to incorporate until the
eggs are cooked through.
3. Lay an egg roll wrapper on a at surface so that one point is facing you (think
diamond). Brush the edges with water. Place 3 tablespoons of the egg mixture onto
the center of the wrapper. Fold the sides in to the center and then fold the point
closest to you over the egg mixture. Roll tightly away from you and seal the top point
with more water to help seal the egg roll.
4. Over a sink spray the air fry basket with pan spray and then place the egg rolls on
the basket. Insert basket into oven.
5. Turn oven to air fry, set the time to 10 minutes, and press start.
6. Serve warm.
Ingredients:
1 tsp. unsalted butter
4 eggs
1 tsp. minced garlic
Salt and pepper to taste
4 slices of bacon (or meat of your choice)
cooked, and crumbled
½cup cheddar cheese, shredded
5 egg roll wrappers
Small bowl of water
Pan spray
Prep Time: 10 minutes Cook Time: 10 minutes Total Time: 20 minutes
Servings: 5 egg rolls Serving Size: 1 egg roll
Breakfast Egg Rolls

12 13
Directions:
1. In a sauté pan over medium heat add a tsp. or two of oil or butter and add onion,
corn, black beans, sweet potato, and garlic. Sauté until vegetables are heated
through and slightly softened. Add spices and sauté for a minute or two then add
enchilada sauce. Adjust any seasonings to taste.
2. Next, working in small batches of maybe 3-4 tortillas, place tortillas on a plate and
microwave on high for 30 seconds. Tortillas should be warmed through to make
them more pliable.
3. Add a line of veggie lling to the center of the bottom half of each tortilla about 1
inch thick.
4. Top it off with a layer of cheese and fold in the sides. Roll up to form a burrito.
Repeat from Step 2 until all the ingredients are used up.
5. Over a sink spray the air fry basket with pan spray, then lay 4 of the nished
burritos on the basket and insert into the oven.
6. Turn the dial to the Air Fry function, set the time to 7 minutes and press start. Cook
until burritos are warmed through and starting to brown.
7. Serve warm with additional toppings. Enjoy!
Ingredients:
8 fajita sized our tortillas
1 cup black beans
(drained and rinsed)
1 cup canned chipotle corn
1 medium sweet potato,
cooked and diced
¼cup diced onion
1 tsp. minced garlic
½tsp. chili powder
½tsp. garlic powder
1 Tbsp. minced fresh cilantro
½tsp. cumin
¼tsp. cayenne pepper
4-6 oz. shredded cheese
1-2 Tbsp. enchilada sauce
Salt and pepper to taste
Olive oil spray
Optional Toppings:
Cilantro, chopped
Salsa or Pico de Gallo
Sour cream
Lime, sliced
Guacamole
Prep Time: 25 minutes Cook Time: 10-20 minutes Total Time: 45 minutes
Servings: 8 servings Serving Size: 1 autas
Black Bean & Sweet Potato Burritos

14 15
Ingredients:
2 oz. cooked pulled pork
1 mini naan bread
(approx 6-in. diameter)
1 Tbsp. Dijon mustard
3 heaping Tbsp. Swiss cheese
1-2 slices ultra-thin ham
Salt to taste
1-2 sliced hamburger pickles
Hot sauce (optional for topping)
Cilantro, chopped
(optional for topping)
Directions:
1. Place naan bread on air fry basket, spread evenly with Dijon mustard, ham, pork,
pickles, and Swiss cheese. Insert basket into oven.
2. Turn to air fry function, set timer to 5 minutes and press start.
3. Air fry until cheese is melted then pull from oven and top with hot sauce and
cilantro if desired.
NOTE: If your naan is larger than 6-in. in diameter, adjust the amounts of other
ingredients to accommodate.
NOTE: This recipe is easy to double, triple, etc.
Prep Time: 10 minutes Cook Time: 5 minutes Total Time: 15 minutes
Servings: 1 serving Serving Size: 1 mini pizza
Mini Cuban Naan Pizzas

14 15
Directions:
1. In a large bowl, add broccoli, oil, salt and pepper. Toss to coat.
2. Place broccoli in the air fry basket. Insert into the oven.
3. Turn to air fry function, set the time for 18-20 minutes, press the start button, and fry
until orets are crispy.
4. Carefully remove the air fry basket and return the broccoli to the large bowl. Toss
with lemon juice and parmesan cheese. Serve immediately.
Ingredients:
1 (10 oz.) bag broccoli orets (frozen); cut
larger pieces so orets are as uniform
as possible
4 Tbsp. olive oil
1 tsp. salt
½ tsp. pepper
½ large fresh lemon, juiced
2 Tbsp. shredded parmesan cheese
Prep Time: 5 minutes Cook Time: 20 minutes Total Time: 25 minutes
Servings: 4 servings Serving Size: 1/3cup
Simple Roasted Broccoli

16 17
Ingredients:
1 lb. russet potatoes cut into wedges
2 Tbsp. olive oil
2 tsp. salt
1 tsp ground pepper
Fry Sauce:
½ cup mayonnaise
¼ cup ketchup
½ tsp. garlic powder
½ tsp. smoked paprika
¼ tsp. salt
½ tsp. ground yellow mustard
½ tsp. dill pickle juice
¼ tsp. ground black pepper
Directions:
1. Whisk together oil, salt and pepper in a large bowl. Add the potatoes wedges and
stir to coat. Transfer the potatoes to the air fry basket and spread around so the
wedges are not touching.
2. Slide the air fry basket into the oven. Turn the function knob to air fry. Turn the
time dial to 25 minutes and press start.
3. Potato wedges are done when they start to brown. If the wedges are thicker it may
take them a little longer than 25 minutes to air fry.
4. While the potatoes are cooking make the fry sauce.
5. In a medium bowl combine all the ingredients and whisk together. Cover and
refrigerate until ready to serve.
Prep Time: 10 minutes Cook Time: 25 minutes Total Time: 35 minutes
Servings: 4 servings Serving Size: 3-4 wedges
Air Fried Potato Wedges
with Fry Sauce

16 17
Directions:
1. In saute pan, season the ground beef with the taco seasoning. Cook on medium-
high heat until browned and cooked through. Add onions and cook until softened.
2. Add refried beans and corn to beef taco meat. Set aside.
3. Roll out pizza dough and cut out circles using a large circle cutter. Discard the
scraps.
4. Lay out a circle and put two tablespoons of beef taco lling on the lower half of the
circle then top with a tablespoon of cheese.
5. Fold the circle down over the lling so that it forms a half moon. Seal the edges
with a fork. Repeat with rest of circles and lling.
6. Over a sink spray the air fry basket with pan spray. Place 4 empanadas on the
basket and insert the basket into the oven.
7. Turn the dial to air fry, set the timer for 10 minutes and press start.
8. Air fry until empanadas are lightly browned. Repeat with rest of empanadas.
9. Serve warm with taco sauce
Ingredients:
1 package of pizza crust
or empanada discs
½ pound ground beef
¼ onion, diced
½ packet taco seasoning
1/3cup refried beans
1 cup Monterrey Jack cheese,
shredded
½ can of Chipotle Corn
Round circle cutter
Pan spray
Taco sauce for serving
Prep Time: 15 minutes Cook Time: 20 minutes Total Time: 35 minutes
Servings: 12 servings Serving Size: 1 empanada
Taco Empanadas

18 19
PowerXL™Horno y Freidora de aire
CRISP ‘N BAKE™
Especicaciones técnicas
Número
de modelo Alimentación
eléctrica
Potencia
nominal Capacidad
de la cesta
Temperatura Dimensiones
externas Longitud
del cable
TO6135-0SP ????? ???? ???? ???? ??? ???
ANTES DE COMENZAR
La freidora de aire PowerXL™ CRISP ‘N BAKE™ le brindará
muchos años de deliciosas comidas familiares y grandes
recuerdos alrededor de la mesa. Pero antes de comenzar, es
muy importante leer el manual completo, asegurándose de
estar completamente familiarizado con el funcionamiento y las
precauciones de este aparato.

18 19
Medidas de seguridad importantes 20
Conozca su horno tostador con freidora de aire 22
Antes del Primer Uso 23
Información de las funciones de cocción 24
Cuidado y limpieza 27
Freír con aire Tabla de cocción 28
Recettes 29
Table de contenidos

20 21
Por favor lea este instructivo antes de usar el producto
INSTRUCCIONES IMPORTANTES DE SEGURIDAD.
Cuando se utilizan aparatos eléctricos, siempre se debe respetar ciertas medidas de segu-
ridad a fin de reducir el riesgo de incendio, descarga eléctrica y/o lesiones a las personas,
incluyendo las siguientes:
• Por favor lea todas las instrucciones.
• No toque las supercies calientes. Use las asas o las
perillas.
• A n de protegerse contra un choque eléctrico y
lesiones a las personas, no sumerja el cable, los
enchufes ni el aparato en agua ni en ningún otro
líquido.
• Todo aparato eléctrico usado en la presencia de los
niños o por ellos mismos requiere la supervisión de
un adulto.
• Desconecte el aparato del tomacorriente cuando
no esté en uso y antes de limpiarlo. Espere que el
aparato se enfrie antes de instalare o retirarle piezas
y antes de limpiarlo.
• No opere ningún aparato con un cable o enchufe
dañado, que haya fallado, o haya sido dañado de
cualquier otra manera. Llame al número de servicio
para el consumidor que aparece en este manual.
• El uso de accesorios no recomendados por el
fabricante del aparato puede ocasionar incendio,
choque eléctrico o lesiones a las personas.
• No use este aparato a la intemperie.
• No permita que el cable cuelgue del borde de la
mesa o del mostrador ni que entre en contacto con
supercies calientes.
• No coloque el aparato sobre ni cerca de las hornillas
de gas o eléctricas ni adentro de un horno caliente.
• Para desconectar, gire las perillas “Timer” y “Toast”
a la posición “0” (apagado). Luego, desenchufe del
tomacorriente.
• Este aparato se debe usar únicamente con el n
previsto.
• Utilice extrema precaución cuando extraiga la
bandeja o deseche grasa caliente.
• No use almohadillas de bras metálicas para limpiar
el aparato. Las bras metálicas podrían entrar
en contacto con las piezas eléctricas del aparato,
resultando en el riesgo de un choque eléctrico.
• No intente limpiar los elementos de calor.
• A n de evitar el riesgo de incendio o choque
eléctrico, jamás introduzca alimentos demasiado
grandes ni utensilios de metal adentro del aparato.
• Existe el riesgo de incendio si el aparato permanece
cubierto mientras se encuentra en funcionamiento
o si éste llegase a entrar en contacto con cualquier
material inamable, incluyendo las cortinas y las
paredes. Asegúrese de no colocar nada sobre el
aparato mientras se encuentre en uso.
• Asegúrese de no colocar nada sobre el aparato
mientras se encuentre en uso.
• No coloque ninguno de los siguientes materiales
en el horno: papel, cartón, plástico y ningún otro
artículo que no esté construido de metal y bandejas
de vidrio aptos para horno.
• A n de evitar que el aparato se sobre caliente, no
cubra la bandeja para los residuos como ninguna
otra supercie del aparato con papel de aluminio.
• Si no está cocinando, simplemente desenchufe
el cable del tomacorriente. Para apagar el horno
mientras cocina, presione la perilla TIME (tiempo
de cocción). Las palabras NOW COOKING (ahora
cocinando) mostradas en la pantalla se apagarán y
el horno emitirá un bip por tres veces.
• Este aparato no está diseñado para ser usado por
personas (incluído niños) con capacidad limitada
física, mental o sensoriales disminuidas y falta de
experiencia o conocimiento que les impida utilizar
el aparato con toda seguridad sin supervisión o
instrucción.
• Se debe asegurar la supervisión de los niños para
evitar que usen el aparato como juguete.
• Este aparato no está diseñado para operar por medio
de un temporizador externo o control remoto.
• No deje el horno desatendido mientra esté
funcionando. En caso de que ocurriera un incendio
mientras se cocinan los alimentos, desenchufe
el horno pero NO abra la puerta. Para reducir el
riesgo de incendio, mantenga el interior del horno
completamente limpio y libre de residuos de
alimentos, aceite, grasa, o de cualquier otro material
combustible.
• Se debe ejercer extrema precaución cuando se utilizan
recipientes de metal o vidrio.
Table of contents
Languages:
Other PowerXL Kitchen Appliance manuals


