Operation and Safety Manual ™
Model 330IK SA Semi-Automatic Gear Driven Gravity Feed Slicer
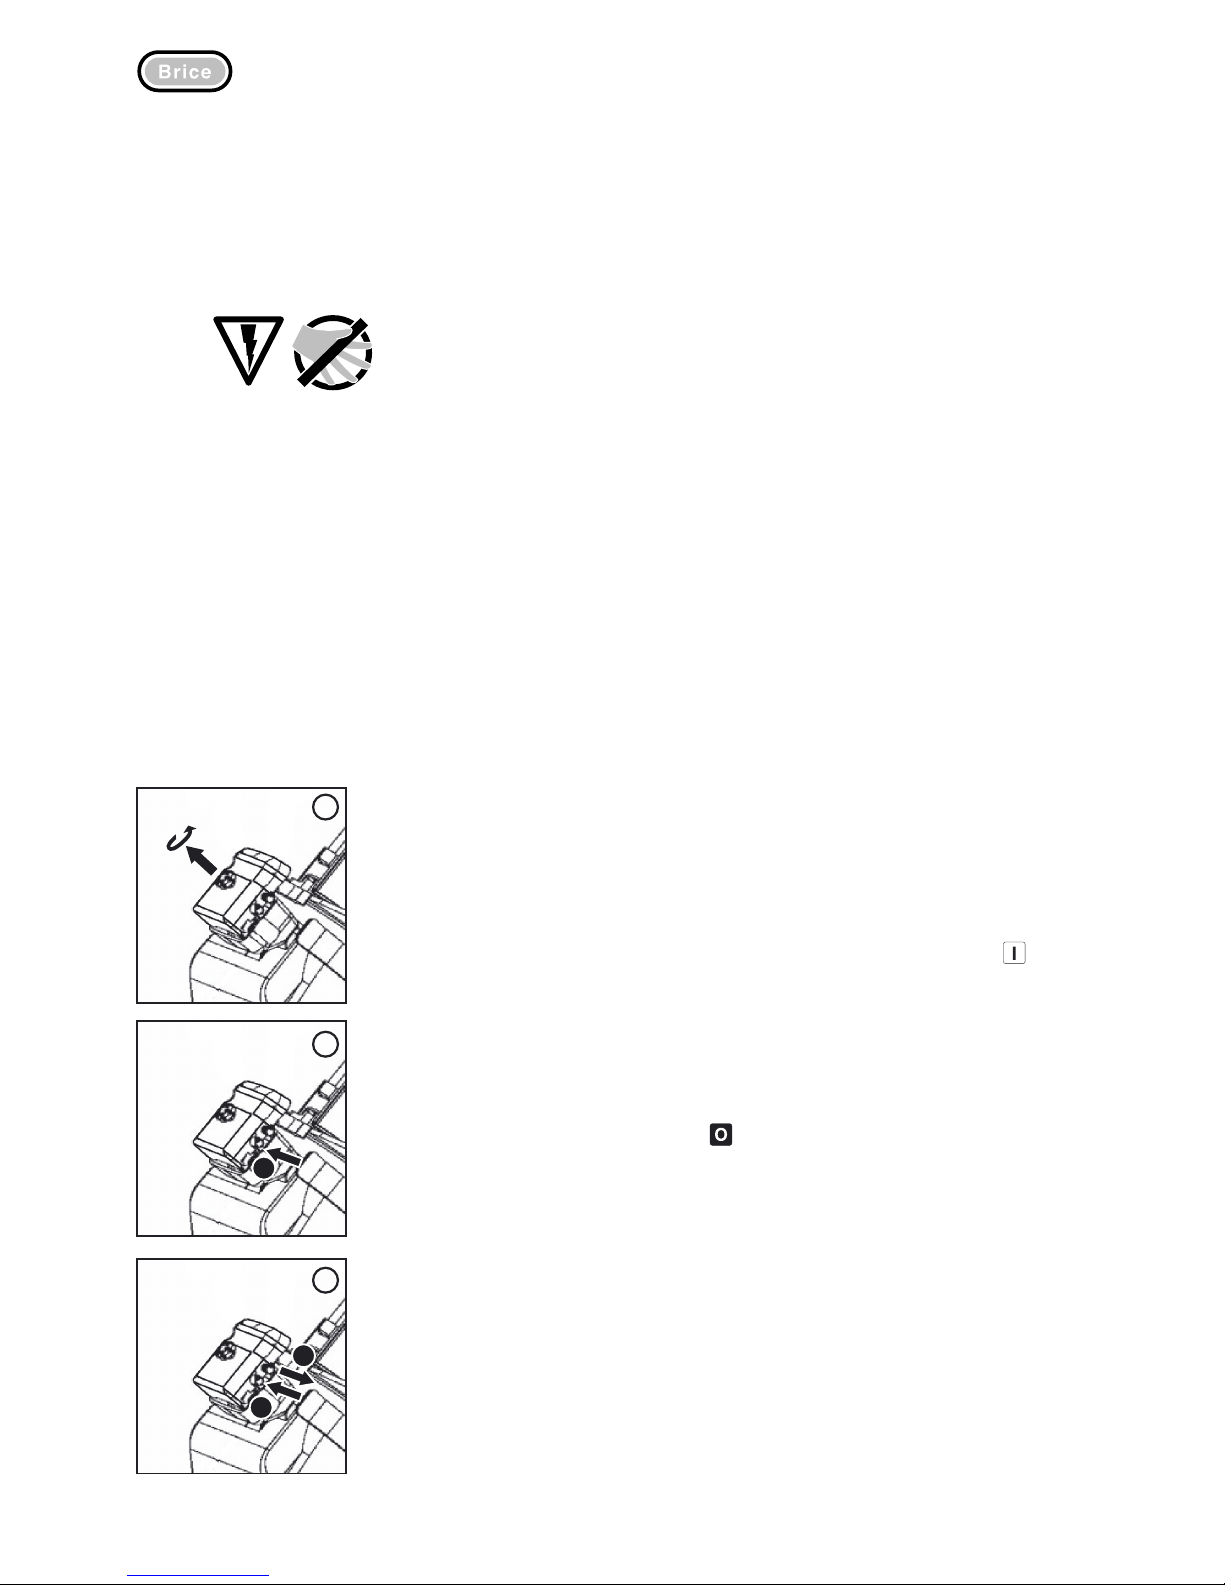
Electrical safety
The 330IKSA is fitted with safety cut-out switches that will automatically stop the machine if,
while running, the blade cover securing knob is released or the blade binds or jams. If any of
these events occurs, either replace the relevant component or disconnect the slicer from the
power supply, clear the jam and switch the machine back on.
Troubleshooting
The following table is a guide to the more routine problems encountered with the operation of a
slicer. These are not particular or unique to the 330IKSA.
If in doubt about a particular fault or problem, the SAFEST course of action is to switch the
machine OFF at the powerpoint, and contact a Brice Service technician.
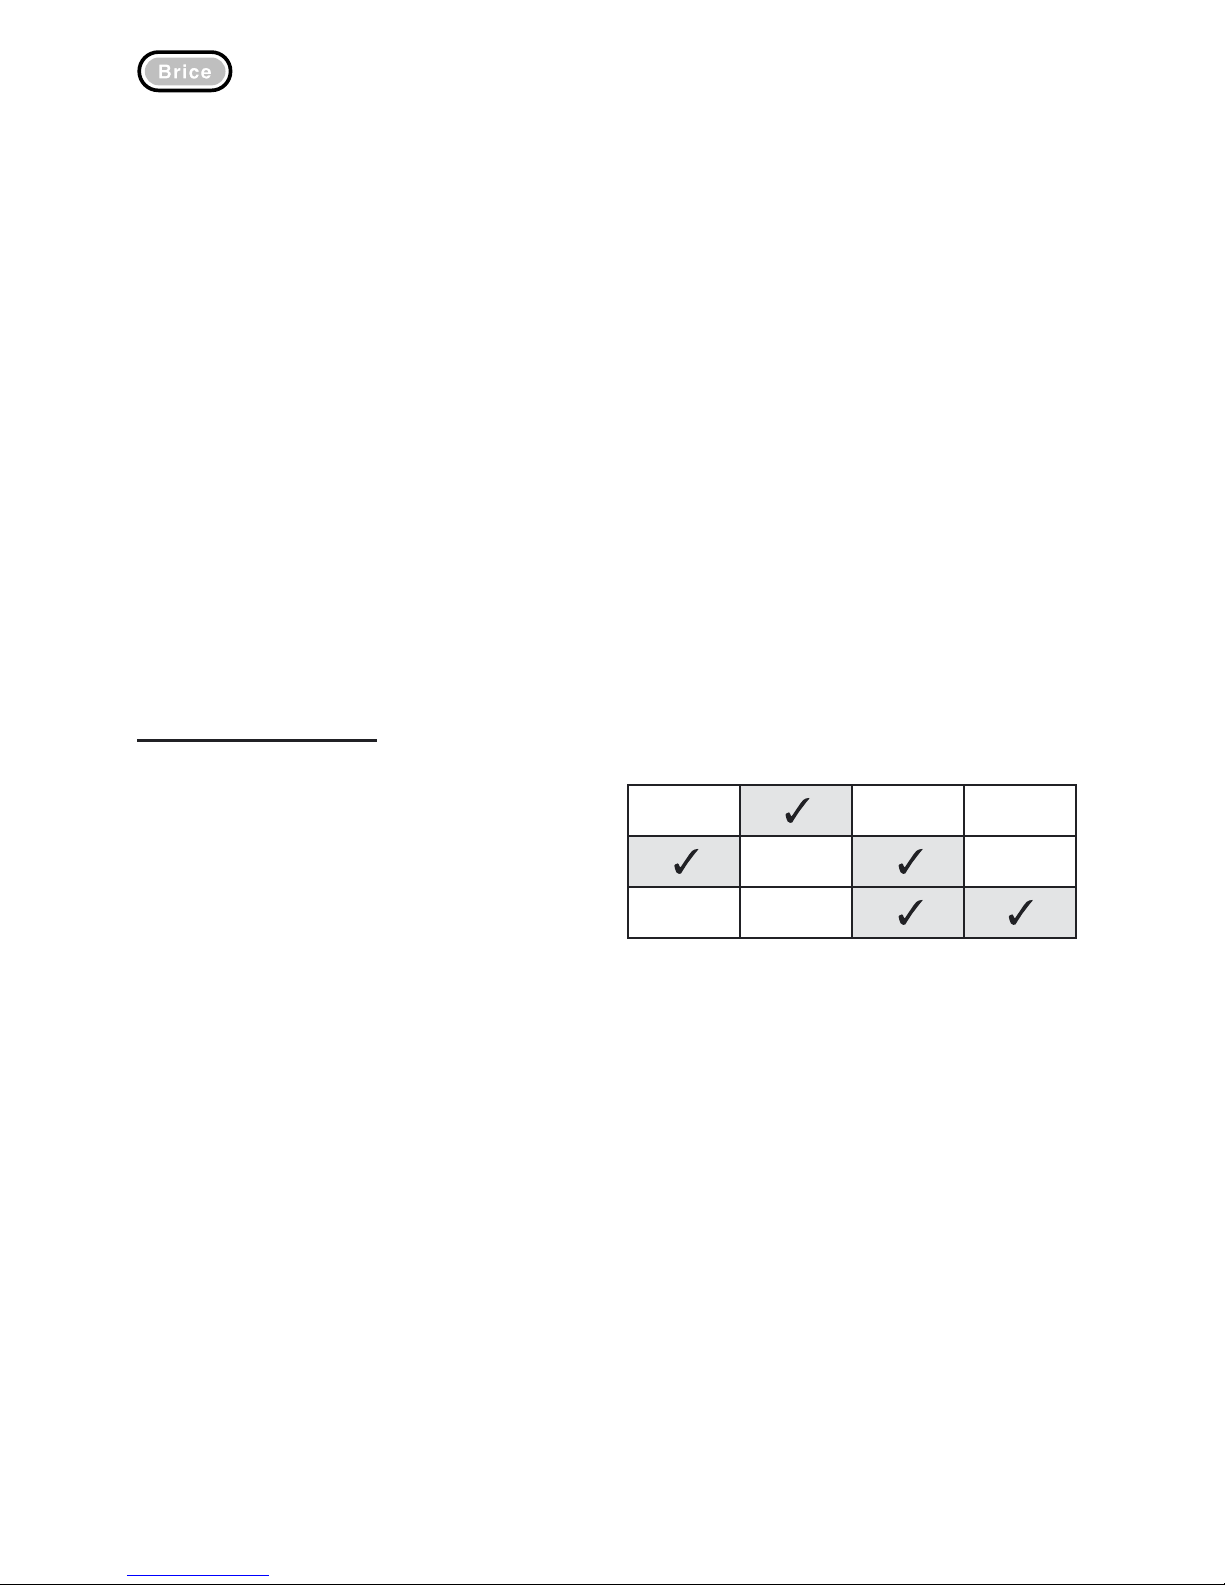
Maintenance 4.3
Problem Cause Solution
Blade doesn’t turn when the ON
( ) key is pushed.
Machine is not plugged in and switched on at
the power point.
Plug in and switch on at the powerpoint.
Blade may be jammed. Switch machine off at powerpoint and contact an
authorised Brice Service technician.
Drive gear may be damaged.
Blade motor may be damaged.
Overload fuse may have blown.
Scraping or grinding noise when the
blade is turning.
Blade cover not properly secured. Re-secure blade cover.
Blade cover or guard dirty. Clean blade cover or guard in accordance with the
instructions in the Cleaning section of this manual.
Food carriage moves sluggishly (in
auto mode) or is hard to push (in
manual operation)
Food carriage rails not sufficiently oiled;
Carriage rails may be dirty.
Clean and oil the food carriage guides in accordance with
the Routine Maintenance section of this manual.
Carriage doesn't move when the
( ) is pressed.
Carriage microswitch inoperative; Carriage
start button inoperative; carriage motor
damaged.
Contact an authorised Brice Service technician.
Carriage starts and then stops at the
end of the stroke beyond the blade.
Faulty limit switches; faulty controller Contact an authorised Brice Service technician.
Product does not slice cleanly, or has
ragged edges
Blade needs sharpening. Sharpen the blade in accordance with the Blade
Sharpening section of this manual.
Blade is physically damaged. Replace the blade. Brice recommends that this procedure
be performed by an authorised Brice Service technician.
Thickness plate out of alignment. Switch machine off at powerpoint and contact an
authorised Brice Service technician.
Slicer blade doesn’t maintain a sharp
edge, even after sharpening.
Blade worn. Replace the blade. Brice recommends that this procedure
be performed by an authorised Brice Service technician.
Sharpening stones worn. Replace the sharpening stones. Brice recommends that
this procedure be performed by an authorised Brice
Service technician.
Sharpener misaligned. Contact an authorised Brice Service technician.