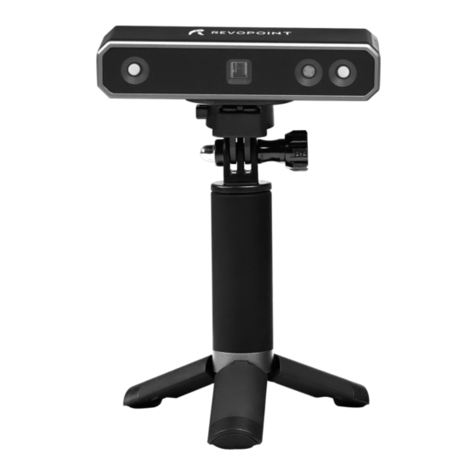
Precipoint Fritz User manual

Quick
start guide
Fritz

23
Power
Switch
USB 3.0
Hardware set-up
Step-by-step list
Connect the computer to the microscope
Use the USB 3.0 cable to connect the microscope and the compu-
ter. Make sure to use enclosing screws on the microscope. The PC
port has to be USB 3.0, not USB 2.0. Use prefered the Display Port
(DP) or HDMI Cable to connect the monitor to the computer.
1
Plug in the power cords
Use the delivered power cables to plug the microscope, the computer
and the monitor into the multiple socket. Check that the plug is rmly
placed in the connector. Plug the multiple socket into the wall socket.
2
Connect the stage to the microscope
Plug and screw in the Stage-Cable on the back of the microscope and
connect it to the plug on the side of the stage. Don‘t use force, make
sure the plugs are properly aligned to prevent damage to the pins.
On the right side you can see how to align the proper 45° angle.
3
Start the system
First turn on the computer and wait until the computer is completely
nished with booting. Next switch on the microscope by using the
toggle switch on its back. Push “I”to turn the microscope on and “0”
to turn it o.
4
Stage
Plug 2
Power
Plug
Stage
Plug 1

23
Microscope – Front
Connection diagram
USB 3.0
Microscope – Back
Computer
Multiple socket
Monitor
DP/HDMI
Stage Cable
O
I
O
I
Please read this “Operating Manual PreciPoint M8 or O8”(separate volume) carefully to fami-
liarize yourself with safe and eective usage. Please retain this manual for future reference.
O
I

45
Soware quick use
Getting started
Start MicroPoint
Aer turning on the microscope, wait for about 30 seconds.
Then,
double-click on the white desktop shortcut MicroPoint.
Alternati-
vely you can start the soware by a Double Tap on the screen, when
using a touchscreen device.
1
Wait to initialize the hardware
Aer starting MicroPoint, it will rst initialize the hardware.
Wait until all components are initialized. Aer the initialization has
been completed, the buttons at the bottom will be activated/unlo-
cked. Aer the initialization is done, make sure, that the mounted
objective matches the one shown in the dialogue picture. If change
is needed, select the matching objective by clicking the “Change
Objective”button.
2
MicroPoint desktop icon
Buttons are unlocked
Change Objective button
Initialization status: completedInitialization status: ongoing
Buttons are locked

45
Choose your operating mode
Choose between Live View, Instant Scan and Slide Scan.
Live View. This mode operates the microscope like a conventional
microscope , showing only the eld of view of the currently selected
objective.
Instant Scan. You can get a fast overview over the whole slide,
using real-time scanning. Navigate and zoom through the details
and use annotations, measurements, counting and image manipu-
lation tools.
Slide Scan. You can digitize your samples to view them virtually
later or to send them to your colleagues.
In the next step, you will be asked to place the slide into the designa-
ted mount of the x-y-stage.
3
Insert slides
Move the slide mount to the right by using the handle.
Hold this position while changing slides. Always insert the slides with
the label pointing to the right side. Put the rst slide gently onto the
glass plate with your le hand and move the slide to the back of the
holder until the stop is reached.
Repeat this step to insert a second slide. When all slides are moun-
ted, release the handle. The slide mount closes automatically.
When all slides are inserted, press “Continue”in the dialogue window
of the soware. The device continues operation by generating an
overview image of the inserted sample.
4
Changing slide dialogue
Press “continue”to operate

67
Explore the sample
InstantScan mode
Get an overview of the sample
Aer selecting Instant scan mode, you can start to navigate through
the sample. The experience is similar to zooming and scrolling with
current car map navigation soware. An overview of the specimen
is available (top le) while zooming seamlessly through the details
of the sample. Navigating and zooming through the sample requires
no change of objective.
This mode is also well suited to identify regions of interest for later
digitization in the slide scan mode. By clicking “ExpToSlide”the
currently viewed region is selected to be scanned. Before clicking
“ExpToSlide”, wait until the device nishes its movements.
1
Overview picture Viewing area
Snapshot and
Image manipulation
Scale Annotations
(IC) Illumination
Correction
Autofocus
Manual focus

67
Annotate, measure, count and analyse
Besides, the Instant Scan mode oers annotations, measurements
and counting tools as well as image manipulation lters, such as
changes to contrast and brightness, that all enable rapid analysis
and processing of the image on the screen. The image, the lters
and all annotations can be saved and exported. Overall, you may
process large areas of a specimen without the need for scanning a
whole slide image rst.
2
Click to switch between
“
Navigation-
”
and
“
Annotation mode
”
Annotation mode
Counting tool
ExpToSlide
Line measure tool
Marker tool
Circle area tool
Polyline measure tool
Polygon area tool
Annotation details
Annotation box
Annotation box
Navigation mode
Navigation mode
Annotation mode
Change operating mode
Insert new slides
Change operating
mode with buttons

89
How to scan slides
SlideScan mode
Dene the scanning area
Select your region of interest with the selection-tool. To mark the
scanning area, drag and adjust the selection over the area you want
to digitize. Add or remove additional scan areas using the large “+”or
“-” symbol in the user soware.
You can adjust the size of the selection by dragging it by the small
handles outside of the selection.
Once you are happy with the selected areas, continue to choose a
scan algorithm.
It is always possible to switch between operating modes:
1
Scan selection
“+”
Add scan area
“-”Remove scan area
Selection handles
Change operating
mode with buttons

89
Choose scan algorithm
Scanning is always a trade-o between time and quality: the more
extensive the digitization process, the higher the probability that
the best image quality can be achieved. The best ratio of quality/
time can usually be achieved by using the “Predictive Focus”and
“Intelligent Focus” scanning algorithms. Assign a le name as soon
as all parameters are set.
Predictive Focus:
The computer automatically sets focus points,
calculates a focal plane and scans the area by taking one image per
x-y position.
Intelligent Focus:
The computer automatically sets focus points,
calculates a plane of focus, and scans the area by taking several pic-
tures in a predened height range (default: 14 μm) per x-y position,
depending on the calculated plane of focus, and saves the sharpest
image for each.
To adjust the focus points and the Illumination Correction, right-click
inside the scanning area. You can move focus points via drag & drop.
Add or remove focus points by double clicking on the sample region.
You can learn more about the Illumination Correction and Focus
Planes on the next pages.
Start the scan by clicking on the large “Play” sign and dene the
destination folder. The scan will now start.
2
Select scan algorithm
Name the le
Right c
lick to manually adjust
focus points and Illumination
Correction
Illumination Correction
Start scan
Focus point
Start the scan

10 11
Good to know
Illumination Correction (IC) adjustment
Switch to InstantScan mode
Select InstantScan Mode either aer starting MicroPoint or by
changing the operating mode in the upper right corner of the user
interface.
1
Focus on the sample
Move the stage to a region with sample content e.g. by clicking on
a specic area on the overview image. Click on the button “AF”in
order to autofocus on the sample.
2
Perform an IC
Move the stage to a region without sample content, but still underne-
ath the cover glass. Click on the button “IC”to update the Illumina-
tion Correction. The region within the red square should not contain
any dust or sample fragments. Perform an IC by clicking on the “Ok”
button. Aer that, conrm in the next window.
3
Check IC
Check if any patterns similiar to the ones in the picture below are visible.
If so, redo the IC once again for another, more appropriate region.
4
Illumination Correction failure
If an error message “Camera image brightness is too low/high”
appears, retry performing the IC with an adapted exposure time.
5
Incorrect Illumination Correction
Default
exposure
time
Adjust
exposure time
“Ok”to
start IC
Change operating
mode with buttons

10 11
Good to know
FocusPlane (FP) adjustment
Switch to LiveView mode
Select LiveView mode either aer starting MicroPoint or by
changing the operating mode in the upper right corner of the user
interface.
1
Refocusing
Move the stage to a region with sample content. Move towards the
sample using ne and coarse drive scrollbars. Fine drive is used to
move short distances whereas coarse drive is used to move long
distances. Both drives are controlled in a dierent way.
2
Setting of the FP
When you have reached an image in focus, save the focus plane by
clicking on the button “FP”. Conrm in the next window. If the micro-
scope is not moving down anymore, save the focus plane to move
down further. Repeat this until you reach an image in focus.
3
Scroll
Klick & Stay
Coarse drive
Fine drive
High speed
upwards
Low speed
up/down
High speed
downwards
Set Focus Plane (FP)
Change operating
mode with buttons

12 13
Start and close TeamViewer session
Check if all users are connected to the Internet. Recommended
Internet speed: 80,000 Mbit/second, min. 30,000 Mbit/second. If
you haven’t installed TeamViewer yet, download the application on
www.teamviewer.com. As soon as TeamViewer has been downloa-
ded, start the application on your computer.
In the box “4”(see above) on the computer where the microscope is
connected, you nd the relevant log-in data. Forward that to the col-
league connecting remotely. Enter the log-in data on the colleague‘s
computer in the box “5”(see above).
Once a remote connection has been established, the microscope
can be controlled remotely.
You may terminate the connection at any time.
Aer disconnecting TeamViewer, turn the microscope o using the
switch at the back. Wait 10 seconds before turning the computer o.
1
Work remotely with our microscope
Telemicroscopy
4 5
TeamViewer desktop icon

12 13
Use InstantScan mode
Insert slides, labels to the right. Press “Continue”. Wait while over-
view pictures are taken.
Use the objective buttons (5x – 100x) to operate and navigate.
Or the navigation buttons (+/-, 1:1, overview) as well as the mouse.
The local user makes a pre-scan of the whole tissue at approx. 10x.
This pre-scan signicantly facilitates the work and operation of the
connected viewer.
Use the “AF”button for autofocus.
Use the “eye” icon for manual focus (helpful to see dierent layers
of tissue).
When changing slides, use the button “Ch. Slide”.
2
Objective buttons
Autofocus
Manual focus
Press “continue”
aer inserting slides
Press to insert new slides

14 15
Troubleshooting
Quick help for common errors
1. Microscope system does not initiate
a) Make sure all cables are correctly connected, screwed in and/or
b) Restart microscope (wait 15 seconds) and/or
c) Restart computer and the microscope
2. Tissue is not in focus
a) Use auto focus or manual focus to re-focus.
b) Use button top right to change mode to “LiveView” mode. Now
use manual focus to set right Focus Plane. Set new focus level by
using button “FP“. Note: When lowering the Focus Plane, you
might have to press “FP“ rst, then lower the Focus Plane again,
now press “FP“again and so on.
3. You see lines in the image
a) Use auto focus or manual focus to re-focus.
b) Redo Illumination Correction.
4. Cameras do not initiate
a) Check if the USB 3.0 cable is correctly plugged into a blue
Superspeed (SS) USB 3.0 (not USB 2.0) port at the PC.
b) Check if the USB 3.0 cable is correctly screwed into the back of
the device.
5. Stage does not initiate
a) Check if the stage cable is correctly screwed into the back of the
microscope.
b) Check if the stage cable is correctly screwed into the interface
at the stage in the correct angle (see section Hardware set-up).
Do never use force while connecting, as the pins could bend or
break.
6. Image pattern visible in InstantScan / SlideScan
a) InstantScan: Follow the instructions given in the section
Illumination Correction (IC) Adjustment on page 10.

14 15
b) SlideScan: Pattern in performed scans: Check the automatically
set IC region by right-clicking on the region of interest (ROI) to be
scanned and choosing “Edit Illumination Correction”. Move the
yellow square to a white region in the background with no tissue,
dust or structures underneath the coverglass (if present). Redo
scanning.
Or deactivate the option “Perform Illumination Cor-
rection” before scanning. Now MicroPoint uses the IC, that you
have
performed in InstantScan before like described in section
Illumination Correction (IC) adjustment (p.10).
7. Blurry scan
a) Right-click on the region of interest (ROI) to be scanned and
choose “Edit Focus Points”.
b) Add/Remove (double-clicking) or move focus points so that
they are equally distributed across the scanning area. Ensure
that all points are aiming on content/tissue.
c) Move the blue focus point to another region on the content/tissue
d) Check focusing in “Live Image” window aer starting the scan. It
should run through focused image for all focus points.
8. Black/White camera image, autofocusing not
working, slow/unstable MicroPoint
a) Open your le explorer and type %localappdata% into the
address line, conrm.
b) Go to path: PreciPoint\TouchMicroscopy\
c) Go into the folder of the recently used MicroPoint version (delete
all other folders) and choose the folder CameraParameters.
d) Delete all .ini les with a 10-digits number “xxxxxxxxxx.ini”
(e.g. 4103461808.ini)
e) Restart MicroPoint.
9. PreciPoint soware running slow
a) Check the settings of your anti-virus soware running in the
background.
b) Dene exceptions for the used PreciPoint soware or
c) If possible, deinstall the anti-virus soware.

How can we help you?
Phone support: +49 (0) 8161 – 976 93- 98
PreciPoint GmbH
Alois-Steinecker-Str. 22
85354 Freising, Germany
www.precipoint.com
Company
Since 1982, we have made more than 15,000 installations of diverse
systems and devices all over the globe. They are produced in Germany
and made to the highest German engineering standards. Our key
competence is the digitization of measurement and automation
technology in the eld of microscopy and micropositioning systems.
Service and Support
Our commitment to quality does not end with your purchase.
We oer dierent service packages tailored to your requirements.
You can expect long-term support and maintenance, that accom-
panies you throughout the entire service life of your product.
Email support: support@precipoint.de
This manual suits for next models
2
Table of contents
