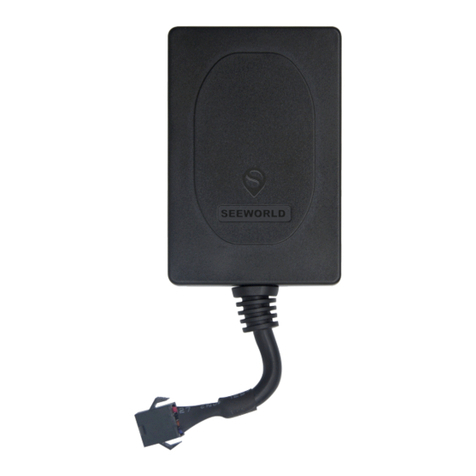
Precise Innovation kidsport gps User manual

USER GUIDE

Let the FUN Begin! The goal of Kidsport GPS is simple…to give parents greater
peace of mind, and children a greater sense of freedom when they should be
focusing as much on fun as on safety.
In addition to GPS tracking, Kidsport GPS also contains an SOS button, which will
allow the wearer to simply press a button to ALERT others. This will give caregivers
the ability to FIND their kids, allow them to have FUN, and give them the FREEDOM
to live! And if the band is ever taken o , Mom and Dad will also be alerted that their
child is no longer wearing the device.
VERY IMPORTANT: Kidsport GPS is not a substitute for supervision of any person
wearing the product. Accuracy of location is determined by GPS satellite and
cell signal strength, and will NOT give a location at ALL times. For example, GPS
accuracy may be a ected while the band is indoors, being used in urban areas (GPS
doesn’t like big buildings!), as well as other factors. PLEASE DO NOT RELY ON
YOUR KIDSPORT AS THE PRIMARY METHOD FOR LOCATING YOUR CHILD.
Your Kidsport band is designed to be waterproof, however, to increase the life of
the silicone band, we recommend your child takes the band o when bathing or
swimming.
Kidsport transmits its location data through cell towers so please note that
there is a $9.95 monthly charge for you to locate your child on your app. But
fear not…there are no monthly contracts and you can cancel your service at
any time!
WHAT CAN KIDSPORT GPS DO?
• Locate your child from a mobile app, computer or tablet
• SOS button alerts caregivers on mobile app that button was hit
• Let you know when the wearer takes it o
Things you will need to ACTIVATE
Your Account and Band:
• A fully charged Kidsport GPS band (2 hours to full charge)
• Kidsport GPS Box contains activation numbers you will need, so PLEASE DON’T
THROW IT OUT. It’s also a great idea to record these two numbers. (IMEI and ICCID)

There is only one button on the Kidsport band. This is an
SOS/ALERT button that will trigger a message to those
that have the app loaded on their mobile device, and have
cell connectivity. This message will also be sent to a web
application so it can be viewed on a computer or tablet.
There is no ON/OFF button on the band. It is designed to
transmit locations at all times, as long as it is charged. This in
an important safety feature.
Wearer should hold down on button for three seconds to
trigger.
The Safety Latch on the Kidsport Band is an awesome
feature designed to keep kids safe! It is also designed to be
“moderately di cult” to remove. In other words, we want
it to be di cult for kids (or strangers) to be able to remove,
but easy enough for parents or caregivers to do it.
Here are the steps:
• Use the supplied golf tee (or any other golf tee for that
matter), a pen, or paperclip. Insert it into the hole of the
latch, and then push down.
• At the same time as pushing down, pull the two sides of the
band apart
• When the latch is opened, an ALERT will be sent to your
mobile device (assuming you downloaded and logged
into the app). This alert may take between 1-3 minutes,
depending upon the cell coverage in your area.
SOS Button
KIDSPORT
GPS BUTTON
KIDSPORT GPS
SAFETY LATCH

STEP 1:
STEP 2:
PLUG IN
CHARGE
The charging pins of the Kidsport band MUST
be inputted correctly or the band will not
charge. Make sure they point upward, facing
toward the LED light on the charger.
After plugging in your Kidsport, simply lay
the rest of the band on the Kidsport logo.
The band must charge TWO HOURS to get
a complete charge. On a 100% charge, your
band will last a full day (between 20-24
hours). After plugging in your band, simply
rest Kidsport right on your charger as seen
below.

STEP 3:
DOWNLOAD MOBILE APP
Your band will charge in any standard USB
charging port including one in your computer.
Again, it is IMPORTANT that your charging
pins are face UP. Charge times will take a bit
longer when charging in a computer. Give it an
extra hour and you will be good to go.
Note: Some computers will not transfer
enough power to the Kidsport to charge the
band. In this case, you will need to nd an
alternate solution such as the included power
charger.
Go to the App Store (iPhone) or Google
Play (Android) and search for the app called
MyKidsport. The app is free to download and
needed for you to locate Kidsport bands.
You can also activate your Kidsport GPS by
going to MyKidsportGPS.com

STEP 4:
MOBILE APP AND MAPPING INSTRUCTIONS
SET UP NEW USER ACCOUNT
ACCOUNT REGISTRATION
Go to the App Store (iPhone) or Google Play (Android)
and search for the app called MyKidsport. The app is
free to download and needed for you to locate Kidsport
bands.
You can also activate your Kidsport GPS by going to
MyKidsportGPS.com
Input the information into the app to create your
account.

TERMS OF SERVICE
Please read the terms of service.
If you agree with the Terms of Service, Click:
I Agree. A complete description of the terms of service is
located at the end of the User Guide.

ACCOUNT VERIFICATION
We will send you a veri cation code (to keep your account
secure). Select email or SMS (text message). Then click
Proceed. The message should come immediately so if
checking email, make sure to check your Junk mailbox.
After checking your email or SMS account, be sure to
write down your special code and enter it into the app.

ACCOUNT ACTIVATED
ADD BAND
Congratulations, your account is now activated. Click on
+Activate New Band.
It’s now time to add the special Kidsport GPS codes into the system. There are TWO
VERY IMPORTANT codes you will need.
Both codes can be found on the bottom of your Kidsport box.
• Band ID (IMEI): This will be the fi rst code you scan into your mobile application.
• ICCID: This is the second code you will scan in.

ENTER CODES USING SCANNER
You can manually input the codes. Or simply hit the Scan
button to upload the IMEI code directly to your app.
Some phone’s scanners are a bit “touchy.” If your scanner
cannot upload the number, no problem…simply manually
input the numbers that are under the codes. REMEMBER,
FOR ICCID, ONLY INPUT THE LAST 4 NUMBERS (No
letter).
SELECT MONTHLY PLAN
Your Kidsport Plan costs $9.95 a month. The band is
programmed to automatically send location every 5
minutes but will also allow you to request location
manually ON DEMAND. Which means, if you need to
know where your child is right now, you simply hit the
EMERGENCY LOCATE button on your app to request an
“extra” location.
Your plan includes unlimited location updates every 5
minutes and 30 Additional EMERGENCY Location updates
each month. If you go over 30 Emergency Updates in a
month, your credit card will be charged only $5 for the
extra peace of mind.

PAYMENT
BAND ACTIVATED
Simply put in your credit card information and press PAY.
Your credit card has now been approved and your band
is in the process of being activated into the Kidsport
Tracking Platform
***This will take between 10 and 15 minutes. You
will receive an email and SMS noti cation once your
activation is complete.
Once you receive the email telling you that your band has
been activated, AFTER YOUR BAND IS FULLY CHARGED
FOR TWO HOURS, take it outside with a clear view of
the sky for at least ten minutes. This will give the band
an opportunity to “grab” the satellites and get your rst
location.
Then click View My Bands.

DASHBOARD
DASHBOARD (SIDE SWIPE)
This is mission control for your Kidsport Bands. From here
you can view bands, track bills, edit your pro le, view
noti cations, set up geofences (safe zones) and view your
User Guide right from your app.
You can also view your Dashboard by simply swiping right
with your nger.

MY BANDS
MAP FUNCTION
To view an individual band location and to adjust settings
for that band, click on it.
You can also ADD a new band to your account by clicking
the (+) sign in the upper right corner.
On this screen you will see your child’s name and address
location. Band location will update every 5 minutes.
Band Latch Open
Band Latch Closed
Battery Level
Refresh Current Location
Directions to Band
Emergency Locate on Demand
Band Latch Open
Band Latch Closed
Battery Level
Refresh Current Location
Directions to Band

Band Latch Open: If the band’s latch is opened for any
reason, it will send an immediate Push Alert. The band icon
will then go from Green to Red during the next interval
location update
Band Latch Closed: When the band’s latch is closed, it will
send a message to your app letting you know. This message
will be sent when the next interval send occurs.
BATTERY LEVEL: Battery should last approximately 20
hours before it needs to be charged again. When the level
hits 4%, you will be given an ALERT email, letting you
know it’s time to charge.
DIRECTIONS FROM BAND: The app will show your
mobile device location as a blue dot. By hitting this
button, you will be taken to a Google Map that will show
you how to get to the band location.
EMERGENCY LOCATE: There may be times when you
need an immediate location and can’t wait for the map to
update at the regular interval. When this happens, press
the Emergency Locate button on your app. It will send
a signal to the band telling it to transmit it’s immediate
location. This update will come between 45 seconds
and 2 minutes…based on cell coverage. You receive 30
Emergency Locates per month and will receive a message
letting you know how many you used.

ADDITIONAL ICONS
MAP SETTINGS
First thing to do from the Map screen is to adjust the
settings of your band. Click on the icon in the lower right
corner of your screen.
Location History
Check your band usage data
Alerts and Noti cations
Settings

ADD PICTURE
The rst setting to change is the Band Name/Photos.
Click on Update Band Name, then Change Photo. This is
a chance for you to put in your Kid’s most entertaining
photo!

GEOFENCE (SAFE ZONES)
From the main menu in your app, you will create a library
of Geofence safe zones that you can “designate” to your
Kidsport band(s).
For example, you may choose to create a Geofence for
the bus stop area, or perhaps one for your neighborhood,
or one for day care. Click Geofence from the Dashboard
to be taken to a screen to create.
Keep in mind, this is only the area where you CREATE
Geofences. Once they are created, you will then go back
to the individual Settings for a speci c band and then
ASSIGN your created Geofences to that band. It’s a bit
like “cutting and pasting” on a computer. You rst create
the fence, and then you have to tell each band which
Geofence it is programmed with.
Press on the (+) button in the upper right corner
to Add a Geofence location to your library.

GEOFENCE TIP
Follow the tips to create your Geofence.
NAME GEOFENCE
Name your Geofence then press your nger on the
map to designate the boundary of the safe zone. When
nished, hit CREATE. That Geofence is now loaded into
your library and can then be assigned to any band in
your account.

ASSIGN GEOFENCE
Geofences only work if you “put them
somewhere.” Which means we need to tell
your Kidsport Band which Geofences it will
work with.
To assign a Geofence to your band, go to the
band’s map screen, then hit Settings in the
lower right corner.
ASSIGN GEOFENCE
Press on Geofence.

ASSIGN GEOFENCE
Press the Icon that says Assign Geofence.
ASSIGN GEOFENCE
The list of Geofences that you created in your
Library will appear. Click on one that you
created and want to assign.
Table of contents
