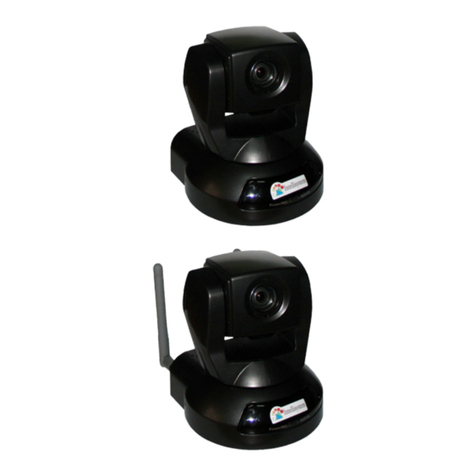
Preliminary RGBlink 12X User manual

RGBlink 4K vue PTZ camera
User Manual

RGBlink 4K vue PTZ camera User Manual
1
Content
Declarations ...........................................................................................................................................................3
FCC/Warranty ..................................................................................................................................................................... 3
Operators Safety Summary ................................................................................................................................................ 4
Installation Safety Summary .............................................................................................................................................. 4
Chapter 1 Your Product ..........................................................................................................................................6
1.1 In the Box ..................................................................................................................................................................... 6
1.2 Product Overview .........................................................................................................................................................6
1.2.1 Dimension ............................................................................................................................................................. 6
1.2.2 Main Features ....................................................................................................................................................... 6
1.2.3 Technical Specification .......................................................................................................................................... 7
Chapter 2 Install Your Product ............................................................................................................................ 8
2.1 Interface and Switch .....................................................................................................................................................9
2.2 Quick Start ....................................................................................................................................................................9
2.3 Installation ..................................................................................................................................................................10
2.3.1 Wall Mount ......................................................................................................................................................... 10
2.3.2 Ceiling Mount ......................................................................................................................................................10
Chapter 3 Use Your Product .................................................................................................................................12
3.1 Remote Controller ......................................................................................................................................................12
3.2 GUI Settings ................................................................................................................................................................13
3.2.1 MENU .................................................................................................................................................................. 13
3.2.2 EXPOSURE ........................................................................................................................................................... 13
3.2.3 COLOR ................................................................................................................................................................. 14
3.2.4 IMAGE ................................................................................................................................................................. 14
3.2.5 P/T/Z .................................................................................................................................................................... 15
3.2.6 NOISE REDUCTION .............................................................................................................................................. 15
3.2.7 SETUP .................................................................................................................................................................. 15
3.2.8 COMMUNICATION SETUP ................................................................................................................................... 16
3.2.9 RESTORE DEFAULT ............................................................................................................................................... 16
3.3 WEB Settings .............................................................................................................................................................. 17
3.3.1 Access Camera .................................................................................................................................................... 17
3.3.2 Control Camera ................................................................................................................................................... 17
3.3.3 Video Settings ..................................................................................................................................................... 19
3.3.4 Image Settings .....................................................................................................................................................20
3.3.5 Audio Settings ..................................................................................................................................................... 21
3.3.6 System Settings ................................................................................................................................................... 21
3.3.7 Network Settings .................................................................................................................................................22
3.3.8 System Settings ................................................................................................................................................... 23
3.3.9 Download Upgrade Program .............................................................................................................................. 23
Chapter 4 Ordering Codes ....................................................................................................................................24

RGBlink 4K vue PTZ camera User Manual
2
4.1 Product Code ..............................................................................................................................................................24
Chapter 5 Support ............................................................................................................................................... 25
5.1 Contact Us .................................................................................................................................................................. 25
5.2 Troubleshooting ......................................................................................................................................................... 26
Chapter 6 Appendix ............................................................................................................................................. 27
6.1 Terms & Definitions ....................................................................................................................................................27
6.2 Revision History ..........................................................................................................................................................33

RGBlink vue PTZ camera User Manual
3
Thank you for choosing our product!
This User Manual is designed to show you how to use this PTZ quickly and make use of all the features. Please
read all directions and instructions carefully before using this product.
Declarations
FCC/Warranty
Federal Communications Commission (FCC) Statement
This equipment has been tested and found to comply with the limits for a class A digital device, pursuant to Part
15 of the FCC rules. These limits are designed to provide reasonable protection against harmful interference when
the equipment is operated in a commercial environment. This equipment generates, uses, and can radiate radio
frequency energy and, if not installed and used in accordance with the instruction manual, may cause harmful
interference to radio communications. Operation of this equipment in a residential area may cause harmful
interference, in which case the user will be responsible for correcting any interference.
Guarantee and Compensation
RGBlink provides a guarantee relating to perfect manufacturing as part of the legally stipulated terms of
guarantee. On receipt, the purchaser must immediately inspect all delivered goods for damage incurred
during transport, as well as for material and manufacturing faults. RGBlink must be informed immediately in
writing of any complains.
The period of guarantee begins on the date of transfer of risks, in the case of special systems and software on the
date of commissioning, at latest 30 days after the transfer of risks. In the event of justified notice of compliant,
RGBlink can repair the fault or provide a replacement at its own discretion within an appropriate period. If this
measure proves to be impossible or unsuccessful, the purchaser can demand a reduction in the purchase price or
cancellation of the contract. All other claims, in particular those relating to compensation for direct or indirect
damage, and also damage attributed to the operation of software as well as to other service provided by RGBlink,
being a component of the system or independent service, will be deemed invalid provided the damage is not
proven to be attributed to the absence of properties guaranteed in writing or due to the intent or gross negligence
or part of RGBlink.
If the purchaser or a third party carries out modifications or repairs on goods delivered by RGBlink, or if the goods
are handled incorrectly, in particular if the systems are commissioned operated incorrectly or if, after the transfer
of risks, the goods are subject to influences not agreed upon in the contract, all guarantee claims of the purchaser
will be rendered invalid. Not included in the guarantee coverage are system failures which are attributed to
programs or special electronic circuitry provided by the purchaser, e.g. interfaces. Normal wear as well as normal
maintenance are not subject to the guarantee provided by RGBlink either.
The environmental conditions as well as the servicing and maintenance regulations specified in this manual must
be complied with by the customer.

RGBlink 4K vue PTZ camera User Manual
4
Operators Safety Summary
The general safety information in this summary is for operating personnel.
Do Not Remove Covers or Panels
There are no user-serviceable parts within the unit. Removal of the top cover will expose dangerous voltages. To
avoid personal injury, do not remove the top cover. Do not operate the unit without the cover installed.
Power Source
This product is intended to operate from a power source that will not apply more than 230 volts rms between the
supply conductors or between both supply conductor and ground. A protective ground connection by way of
grounding conductor in the power cord is essential for safe operation.
Grounding the Product
This product is grounded through the grounding conductor of the power cord. To avoid electrical shock, plug the
power cord into a properly wired receptacle before connecting to the product input or output terminals. A
protective-ground connection by way of the grounding conductor in the power cord is essential for safe operation.
Use the Proper Power Cord
Use only the power cord and connector specified for your product. Use only a power cord that is in good condition.
Refer cord and connector changes to qualified service personnel.
Use the Proper Fuse
To avoid fire hazard, use only the fuse having identical type, voltage rating, and current rating characteristics. Refer
fuse replacement to qualified service personnel.
Do Not Operate in Explosive Atmospheres
To avoid explosion, do not operate this product in an explosive atmosphere.
Installation Safety Summary
Safety Precautions
For all PTZ installation procedures, please observe the following important safety and handling rules to avoid
damage to yourself and the equipment.
To protect users from electric shock, ensure that the chassis connects to earth via the ground wire provided in the
AC power Cord.
The AC Socket-outlet should be installed near the equipment and be easily accessible.
Unpacking and Inspection
Before opening PTZ shipping box, inspect it for damage. If you find any damage, notify the shipping carrier
immediately for all claims adjustments. As you open the box, compare its contents against the packing slip. If you

RGBlink 4K vue PTZ camera User Manual
5
find any shortages, contact your sales representative.
Once you have removed all the components from their packaging and checked that all the listed components are
present, visually inspect the system to ensure there was no damage during shipping. If there is damage, notify the
shipping carrier immediately for all claims adjustments.
Site Preparation
The environment in which you install your PTZ should be clean, properly lit, free from static, and have adequate
power, ventilation, and space for all components.
Electric Safety
Installation and operation must accord with electric safety standard
Polarity of power supply
The power supply of the product is ±12V, the max electrical current is 2A .Polarity of the power
supply drawing.
Careful of installation
Never move the camera by seizing the camera head. Don’t rotate camera head by hand; otherwise, mechanical
trouble will occur.
This series item must be put on the smooth desk or platform, and it can not be installed slant ways;
If the camera is installed on TV or computer, the base can be fixed by four double-sided adhesive trays.
Don’t apply in corrosive liquid, as or solid environment to avoid the cover which is made up of organic material.
To make sure no obstacle in rotation range.
Never power on before installation is completed.
Don’t disassemble discretionarily.
We are not responsible for any unauthorized modification or dismantling.

RGBlink 4K vue PTZ camera User Manual
6
Chapter 1 Your Product
1.1 In the Box
Name
Qty.
Camera
1
International Power Adapter (cable included)
1
RS232 Cable
1
Remote Control
1
User Manual
1
1.2 Product Overview
1.2.1 Dimension
1.2.2 Main Features
AI Tracking: With the help of the AI computing power of the chip, the camera is equipped with advanced AI
algorithms to realize humanoid tracking, which can realize automatic tracking of scenes such as education,
conferences and live broadcasts.

RGBlink 4K vue PTZ camera User Manual
7
NDI|HX2 (Optional): NDI|HX2 has the characteristics of low delay and plug and play, which is convenient for
project implementation and deployment. It has good ecology and supports the simultaneous transmission of
audio, video and control commands. It is a new generation of network video transmission mode.
4K UHD: 12X adapts 1/2.5-inch high-quality UHD CMOS sensor with a maximum of 8.51 million effective
pixels, 20X adapts 1/1.8-inch high-quality UHD CMOS sensor with a maximum of 8.42 million effective pixels
can realize 4K (3840x2160) ultra-high-resolution high-quality images. And downward compatible with 1080p,
720p and other resolutions.
16X Optical Zoom: It adopts 4K ultra long focal lens with high quality and 8.5 million ultra-high resolution,
16x optical zoom, and the maximum field angle is 81°.
HDMI 2.0: Support HDMI 2.0 interface, which can directly output 4KP60 uncompressed digital video.
Low Light: The application of 3D noise reduction algorithm greatly reduces image noise. Even under the
condition of ultra-low illumination, it still keep the picture clean and clear, and the SNR of image is as high as
55dB.
Multiple Interfaces: Support HDMI and 12G-SDI interface. HDMI or 12G-SDI, USB, LAN can output three HD
digital signals at the same time.
Remote Control: Through the RS232 and RS485 serial ports, the camera can be controlled remotely.
Gravity Sensor: It supports automatic image flipping function, which is convenient for engineering
installation and use.
1.2.3 Technical Specification
Model
12X
20X
Camera Parameters
Sensor
1/2.5 inch, CMOS
1/1.8 inch, CMOS
Effective Pixels
8.51M
8.42M
Focal Length
f=3.47mm~41.65mm
f=6.25mm ~ 125mm
Output Resolutions
HDMI & SDI
3840x2160p60/59.94/50/30/29.97/25 | 1080p60/59.94/50/30/29.97/25 | 1080i60/59.94/50 |
720p60/59.94/50
Network (H.265 / H.264 / MJPEG)
3840x2160, 1920x1080, 1280x720 etc.
(First Stream: 32kbps~51200kbps Second Stream: 32kbps~20480kbps)
Aperture
F1.84~F3.72
F1.58 ~ F3.95
Horizontal View Angle
81°~ 7.5°
60°~ 3.5°
Vertical View Angle
50°~ 4.3°
36°~ 2.0°
Horizontal Rotation Range
±170°
Vertical Rotation Range
-90° ~ +210°
Pan Speed Range
1.8°/s ~ 100°/s
Tilt Speed Range
1.5°/s ~ 60°/s
Scanning Mode
Progressive
Lens
12x, f = 3.4mm ~ 41.6mm, F1.8 ~ F3.7
Digital Zoom
16x
Scanning Method
Progressive
Minimum Illumination
0.5 Lux @ (F1.8, AGC ON)
Digital Noise Reduction
3D Digital Noise Reduction
White Balance
Auto / Manual/ One Push/ Indoors/ Outdoors/VAR
Focus
Auto / Manual
Iris
Auto / Manual
Shutter
Auto / Manual
Backlight Compensation
ON/OFF

RGBlink 4K vue PTZ camera User Manual
8
Dynamic Range
OFF/ Dynamic Level Adjustment
Video Adjustment
Brightness/Hue/Saturation/Contrast/Sharpness/B/W Mode/Gamma Curve
Signal Noise Ratio
≥55dB
Image Flip
Auto / Manual
Image Freeze
Support
PoE+
Support
Number of Preset
255
Preset Accuracy
0.1°
USB Features
Operate System
Windows 7/8/10, Mac OS X, Linux, Android
Color System/
Compression
3.0 (Optional): YUY2/H.264/H.265/MJPEG
USB Type-C: H.264/H.265/MJPEG
Video Format
YUY2: (USB 3.0 support)max to 1080P@30fps, USB 3.0/Type-C support
H.264 AVC: max to 2160P@30fps
H.265 HEVC: max to 2160P@30fps
MJPEG: max to 2160P@30fps
USB Audio
Support
USB Video Protocol
UVC 1.1 ~ 1.5
UVC PTZ
Support
Network Features
Video Compression
H.264/H.265/MJPEG
Video Stream
First Stream,
Second Stream
First Stream Resolution
3840x2160, 1920x1080, 1280x720, 1024x576, 720x480, 720x408, 640x480, 640x360
Second Stream
Resolution
720x480, 720x408, 640x480, 640x360, 480x320, 320x240
Bit Rate Control
CBR, VBR
Frame Rate
50Hz: 1fps ~ 50fps
60Hz: 1fps ~ 60fps
Audio Compression
AAC | G.711A
Audio Bit Rate
96Kbps, 128Kbps
Protocols
NDI®|HX2 (*NDI model supported only), RTSP, RTMP, ONVIF, Pelco-D,Pelco-P,VISCA,FreeD
Input/Output Interface
HDMI Interface
1 x HDMI: Version 2.0
12G-SDI Interface
1 x 12G-SDI: BNC type, 800mVp-p, 75Ω. Along to ST2082-1 | ST2081-1 | ST424 | ST292-1 standard
LINE IN Interface
1 x LINE IN: 3.5mm Audio Interface
Communication Interface
1 x RS485/RS422: 4pin phoenix port (RS485-2PIN | RS422-4PIN), Max Distance: 1200m,
Protocol: VISCA/Pelco-D/Pelco-P
1 x RS232 IN: 8-pin Min DIN, Max Distance: 30m, Protocol: VISCA/Pelco-D/Pelco-P
1 x RS232 OUT: 8-pin Min DIN, Max Distance: 30m, Protocol: VISCA network use
USB Interface
1 x USB: Type-C
LAN(PoE+) Interface
1 x LAN: 1000M
Adaptive Ethernet Port, support PoE+
Power Jack
JEITA type (DC IN 12V)
Physical Parameter
Tally Indicator
1
Power Indicator
1
Status Indicator
1
Restore Key
1
Power Switch
1
Input Voltage
DC 12V/PoE+(802.3at)
Input Current
Max. 2A
Operating Temperature
0°C ~ 40°C
Storage Temperature
-40°C ~ 60°C
Power Consumption
Max. 18W
Dimension
212mm x 176mm x 232mm
Net Weight
12X: 2.27 Kg
20X: 2.14 Kg
Gross Weight
12X: 3.40 Kg
20X: 3.25 Kg

RGBlink 4K vue PTZ camera User Manual
9
Chapter 2 Install Your Product
2.1 Interface
2.2 Quick Start
Item
Name
1
RESTORE Key
2
HDMI Interface
3
12G-SDI Interface
4
LINE IN Interface
5
RS422/485 Interface
6
USB Interface
7
RS232 OUT Interface
8
RS232 IN Interface
9
LAN(PoE+) Interface
10
DC 12V Interface
11
Power Switch
1
2
3
4
5
6
7
8
9
10
11

RGBlink 4K vue PTZ camera User Manual
10
1) Please check connections are correct before starting.
2) Connect the power adapter to the power connector on the rear panel of the camera. The power indicator on
the front panel of the camera is on.
3) After the camera is powered on, it starts to initialize, right up to the limit position, and then both horizontal
and vertical go to the middle position, the motor stops running, and the initialization is completed.
(Note: If preset 0 is saved, PTZ will be move to preset 0)
2.3 Installation
2.3.1 Wall Mount
2.3.2 Ceiling Mount

RGBlink 4K vue PTZ camera User Manual
11
Note: The installation diagram is for reference only. The brackets and screws are not standard. For packing
accessories, please refer to the actual product.

RGBlink 4K vue PTZ camera User Manual
12
Chapter 3 Use Your Product
3.1 Remote Controller
1. Standby Key
Press to enter standby mode
2. Number Key
Press to set preset or call preset.
3. *Key
Use with other keys
4. PRESET Key
Set preset: [PRESET] + Number key (0-9)
5. Home Key
Confirm selection or press to turn PTZ back to the middle position
6. Return Key
Press to return to the previous menu
7. Zoom Key
SLOW: Zoom In [+] or Zoom Out [-] slowly
FAST: Zoom In [+] or Zoom Out [-] fastPress Key: Right
8. L/R SET Key
Standard: Simultaneously press L/R SET + 1
Reverse: Simultaneously press L/R SET + 2
9. FOCUS Key
Auto/Manual/Far/Near focus
10. CAMERA SELECT Key
Press to select and control the camera
11. #Key
Use with other keys
12. IR Remote Control Key
[*]+[#]+[F1]: Address 1
[*]+[#]+[F2]: Address 2
[*]+[#]+[F3]: Address 3
[*]+[#]+[F4]: Address 4
13. RESET Key
Clear preset position: [RESET] + Number key (0-9)

RGBlink 4K vue PTZ camera User Manual
13
14. PTZ Control Key
PTZ moved according to the arrow indicates
15. MENU Key
Press to enter or exit OSD Menu
16. BACKLIGHT Key
Backlight ON/OFF: Press repeatedly to enable or disable the backlight compensation.
NOTE:
Effective only in auto exposure mode.
If there is a light behind the subject, the subject will become dark, press the backlight key to enable the
backlight compensation. Press again to disable this function.
17. P/T RST (PTZ Reset) Key
PTZ starts to self-test after pressed it
18. Shortcut Key
[*]+[#]+[1]: OSD menu default English
[*]+[#]+[3]: OSD menu default Chinese
[*]+[#]+[4]: Display current IP address
[*]+[#]+[6]: Quickly recover the default
[*]+[#]+[8]: View the camera version
[*]+[#]+[9]: Quickly set up inversion
[*]+[#]+[MANUAL]: Restore default IP address
3.2 GUI Settings
3.2.1 MENU
Press [MENU] key to display the main menu on the normal screen, using arrow key to move the cursor to the item
to be set. Press the [HOME] key to enter the corresponding sub-menu.
MENU
Exposure
Color
Image
P/T/Z
Noise Reduction
Setup
Communication Setup
Restore Default
[Home] Enter
[Menu] Exit
3.2.2 EXPOSURE
Move the main menu cursor to [Exposure], and press [HOME] key enter the exposure page, as shown in the
following figure.
EXPOSURE
Mode
Auto
ExpCompMode
Off

RGBlink 4K vue PTZ camera User Manual
14
EXPOSURE
Backlight
Off
Gain Limit
10
Anti-Flicker
50Hz
Meter
Average
DRC
1
Select Item
Change Value
[Menu] Back
Mode: Auto, Manual, SAE, AAE, Bright.
ExpCompMode: On, Off (Effective only in Auto mode).
ExpComp: -7 ~ 7 (Effective only in ExpCompMode item to On).
Backlight: On, Off (Effective only in Auto mode).
Bright: 0 ~ 17 (Effective only in Bright mode).
Gain Limit: 0 ~ 15 (Effective only in Auto, SAE, AAE, Bright mode).
Anti-Flicker: Off, 50Hz, 60Hz (Effective only in Auto, AAE, Bright mode).
Meter: Average, Center, Smart, Top.
Iris: F1.8, F2.0, F2.4, F2.8, F3.4, F4.0, F4.8, F5.6, F6.8, F8.0, F9.6, F11.0, Close (Effective only in Manual, AAE mode).
Shutter: 1/30, 1/60, 1/90, 1/100, 1/125, 1/180, 1/250, 1/350, 1/500, 1/725, 1/1000, 1/1500, 1/2000, 1/3000,
1/4000, 1/6000, 1/10000 (Effective only in Manual, SAE mode).
Gain: 0 ~ 7 (Effective only in Manual mode).
DRC: 0 ~ 8.
3.2.3 COLOR
Move the main menu cursor to [Color], and press [HOME] key enter the color page, as shown in the following
figure.
COLOR
WB Mode
Auto
RG Tuning
0
BG Tuning
0
Saturation
100%
Hue
7
Select Item
Change Value
[Menu] Back
WB Mode: Auto, Indoor, Outdoor, One Push, Manual, VAR.
RG: 0 ~ 255 (Effective only in Manual mode).
BG: 0 ~ 255 (Effective only in Manual mode).
RG Tuning: -10 ~ +10 (Effective only in Auto, One Push, VAR Mode).
BG Tuning: -10 ~ +10 (Effective only in Auto, One Push, VAR Mode).
Saturation: 60% ~ 200%.
Hue: 0 ~ 14.
Color Temp: 2500K ~ 8000K (Effective only in VAR mode).
3.2.4 IMAGE
Move the main menu cursor to [Image], and press [HOME] key enter the image page, as shown in the following
figure.
IMAGE
Luminance
6
Contrast
9
Sharpness
3
Flip-H
Off
Flip-V
Off
B&W-Mode
Off
Style
Default

RGBlink 4K vue PTZ camera User Manual
15
IMAGE
Select Item
Change Value
[Menu] Back
Luminance: 0 ~ 14.
Contrast: 0 ~ 14.
Sharpness: 0 ~ 15, auto.
Flip-H: On, Off.
Flip-V: On, Off.
B&W-Mode: On, Off.
Style: Default, Norm, Bright, PC.
3.2.5 P/T/Z
Move the main menu cursor to [P/T/Z], and press [HOME] key enter the P/T/Z page, as shown in the following
figure
P/T/Z
SpeedByZoom
On
AF-Zone
Front
AF-Sense
High
L/R Set
STD
Display Info
On
Image Freeze
Off
Digital Zoom
Off
Call Preset Speed
24
Pre Zoom Speed
5
Select Item
Change Value
[Menu] Back
SpeedByZoom: On, Off.
AF-Zone: Front, Top, Center, Bottom.
AF-Sense: Low, Normal, High.
L/R Set: STD, REV.
Display Info: On, Off.
Image Freeze: On, Off.
Digital Zoom: Off, 2x, 4x, 8x, 16x.
Call Preset Speed: 1 ~ 24.
Pre Zoom Speed: 0 ~ 7.
3.2.6 NOISE REDUCTION
Move the main menu cursor to [Noise Reduction], and press [HOME] key enter the noise reduction page, as
shown in the following figure.
NOISE REDUCTION
NR3D-Level
6
Select Item
Change Value
[Menu] Back
NR3D Level: Off, 1 ~ 9.
3.2.7 SETUP
Move the main menu cursor to [Setup], and press [HOME] key enter the setup page, as shown in the following
figure.
SETUP
Language
EN
DVI Mode
HDMI
Video Format
1080P30

RGBlink 4K vue PTZ camera User Manual
16
SETUP
Auto Scan Shoot
Off
Video Mode
Other
Select Item
Change Value
[Menu] Back
Language: EN, Chinese, Russian.
DVI Mode: HDMI, DVI.
Video Format: 4KP25, 4KP29.97, 4KP30, 4KP50, 4KP59.94, 4KP60, 1080P30, 1080P25, 1080P50, 1080P60,
1080P59.94, 1080P29.97, 1080I50, 1080I60, 1080I59.94, 720P60, 720P59.94, 720P50.
Auto Scan Shoot: On, Off.
Video Mode: SDI-12G Mode, Video Output.
SDI-12G Mode: LEVEL-A, LEVEL-B.
Video Output: HDMI, SDI.
Other: Auto Inversion, Tally Mode, USB Type-C Audio.
Auto Inversion: On, Off.
Tally Mode: On, Off.
USB Type-C Audio: On, Off (Only for USB Type-C).
3.2.8 COMMUNICATION SETUP
Move the main menu cursor to [Communication Setup], and press [HOME] key enter the communication setup
page, as shown in the following figure.
COMMUNICATION SETUP
Protocol
VISCA
V_Address
1
V_AddrFix
Off
Net Mode
Serial
Baudrate
9600
Select Item
Change Value
[Menu] Back
Protocol: Auto, VISCA, PELCO-D, PELCO-P.
V_Address: 1 ~ 7 (Effective only in Auto, VISCA protocol).
V_AddrFix: On, Off (When set to On, useless in 88 30 01 FF Command).
P_D_Address: 0 ~ 254 (Effective only in Auto, PELCO-D protocol).
P_P_Address: 0 ~ 31 (Effective only in Auto, PELCO-P protocol).
Net Mode: Serial, Paral.
Baudrate: 2400, 4800, 9600, 38400.
3.2.9 RESTORE DEFAULT
Move the main menu cursor to [Restore Default], press [HOME] key enter restore default page, as shown in the
following figure.
RESTORE DEFAULT
Restore?
No
Change Value
[Home] OK
[Menu] Back
Restore: Yes, No.
Note: GUI menu and parameters are subject to change without notice.

RGBlink 4K vue PTZ camera User Manual
17
3.3 WEB Settings
3.3.1 Access Camera
Access http://192.168.100.88 to pop up the login window, then input username (default: admin) and password
(default: admin). After login, it will show as below:
3.3.2 Control Camera
All pages include two menu bars:
Real time monitoring: displaying video image Parameter setup: with function buttons.
A. Video Viewing Window
Video viewing window must be same as video resolution, the bigger the resolution is, the bigger the playing area
is. Double click viewing window, will show full-screen, double click again, will return to initialized size.
Status bar in viewing window shown as below:
4:48
1) Video playback pause button: control real-time video pause, stop the last picture, click recoverable video again.
2) Audio control buttons: can adjust the volume or set silent mode.
3) Full screen switch button.
B. PTZ Setup

RGBlink 4K vue PTZ camera User Manual
18
Zoom In Zoom O ut
Focus In Focus O ut
10
10
Pan Speed
Tilt Speed
5
Zoom Speed
5
Focus Speed
Set Call
Preset
PTZ Back
1) Pan and Tilt Control
Up, Down, Left and Right arrows and the home button allow you to manually drive the camera to the desired
position.
2) Zoom
Zoom In and Zoom Out buttons allow for wide or narrow view of the space.
3) Focus
Focus In and Focus Out buttons allow for fine manual focus adjustment if the camera has any problems auto
focusing on the difficult object.
4) PTZ Speeds
Pan speed can be set at any rate between 1 ~ 24, Tilt speed can be set at any rate between 1 ~ 20. Zoom and
Focus speeds can be set at any rate between 1 ~ 7.
5) PTZ Presets
After manually setting up a shot that you would like to return to later, you can save presets for quick recall of
these positions. Type a number between 0 and 254 into the Preset box.
Click the “Set” button to save the current location with that preset number. Click the “Call” button to cause the
camera to return to that position. This enables smooth, quick and convenient control without the need to
manually drive the camera.
You can set up preset that user want as below.
Method: Type preset number into the Preset box.
Set Call
Preset
Preset: Optional items: 0 ~ 254.
6) PTZ/OSD Dropdown
From the dropdown menu, clicking the OSD option will open the on-screen display menu of the camera giving you
control from within the IP interface.
C. Language Selection
Language
中文(简)
Русский
English
Click either “Chinese”, “English” or “Russian” to change the language of the webpage.

RGBlink 4K vue PTZ camera User Manual
19
3.3.3 Video Settings
Video Settings
H D M I
H D M I/SDI O utput
1920x1080/30p
Video Form at
m ainprofile
Encode Level
First stream
H 264
Encode Protocol
1920x1080
Resolution
4096
Bit Rate
25
Fram e Rate fps
25
I Key Fram e Interval
CBR
Bit Rate Control
Second stream
H 264
Encode Protocol
640x360
Resolution
4096
Bit Rate
25
Fram e Rate fps
25
I Key Fram e Interval
CBR
Bit Rate Control
Subm it Cancel
1) HDMI/SDI Output
Support HDMI and SDI Output.
2) Video Format
HDMI output support 3840x2160/60p, 3840x2160/59.94p, 3840x2160/50p, 3840x2160/30p, 3840x2160/29.97p,
3840x2160/25p. Both HDMI and SDI output support 1920x1080/60p, 1920x1080/59.94p, 1920x1080/50p,
1920x1080/60i, 1920x1080/59.94i, 1920x1080/50i, 1920x1080/30p, 1920x1080/29.97p, 1920x1080/25p,
1280x720/60p, 1280x720/59.94p, 1280x720/50p.
3) Encode Level
Support mainprofile and highprofile two levels.
4) Encode Protocol
Support H.264, H.265 and MJPEG protocols.
5) Resolution
First stream support 3840x2160, 1920x1080, 1280x720, 1024x576, 720x480, 720x408, 640x480, 640x360. Second
stream support 720x480, 720x408, 640x480, 640x360, 480x320, 320x240; The bigger resolution is, the clearer the
image will be, more network bandwidth will be taken.
6) Bit Rate
The user can specify the bit rate. Generally speaking, the larger of the bit rate, the clearer of the image. However,
the configuration of the bit rate needs to be combined with the network bandwidth. When the network
bandwidth is narrow and the bit rate is configured larger, the video stream cannot be transmitted normally, and
the visual effect is worse.
This manual suits for next models
1
Table of contents

