INSTRUCCIONES DE SEGURIDAD
Lea atentamente las siguientes instrucciones de seguridad antes de usar la unidad:
•No toque las superficies calientes de la unidad, use siempre las manijas y perillas.
•Este alerta cuando use la unidad cerca de niños.
•No sumerja la unidad ni su cable de energía en agua ó en cualquier otro liquido, con el fin de evitar
choques eléctricos.
•Evite que el cable de energía quede colgando en el borde de la mesa ó que entre en contacto con
superficies calientes
•No use la unidad si el cable de energía se encuentra dañado. Remita cualquier arreglo, reparación o
mantenimiento a personal de servicio técnico calificado.
•Use solo accesorios recomendados por el fabricante.
•No coloque la unidad cerca de fuentes de gas caliente ó quemadores eléctricos.
•Cuando opere la unidad deje suficiente espacio libre por todos sus lados, para permitirle una
adecuada ventilación.
•Desconecte la unidad del tomacorriente antes de realizarle mantenimiento o de limpiarla.
•Antes de desconectar la unidad gire el controlador a la posición OFF. Recuerde desconectarla
siempre del enchufe y no halando del cable.
•Tenga mucha precaución cuando retire la bandeja, estantes o cuando deposite recipientes con
líquidos calientes en su interior.
•No cubra partes de la unidad con papel aluminio, ya que esto podría sobrecalentarla.
•Evite limpiar el interior de la unidad con estropajos de metal, ya que algunas piezas se pueden
romper y tocar partes eléctricas causando riesgo de choque eléctrico.
•Alimentos muy grandes o utensilios de metal no deben ser insertados en la unidad.
•No cubra la unidad ni permita que este cerca de material inflamable, con el fin de evitar incendios.
•Tenga extremada precaución cuando use recipientes que no estén construidos especialmente para
hornear.
•Asegúrese que nada toque los elementos superiores ó inferiores de la unidad.
•No Coloque ninguno de los siguientes materiales en el horno: Cartón, plástico, papel, a cualquier
material similar.
•No almacene en la unidad cualquier otro material diferente a los accesorios recomendados por el
fabricante cuando esta no este en uso.
•Use ropa protectora adecuada, como lo son guantes con aislamiento cuando inserte o retire ítems
con el horno caliente.
•Esta unidad tiene en la puerta un vidrio de seguridad templado. Este vidrio es mas fuerte que un
vidrio ordinario y mas resistente al quiebre. El vidrio templado puede romperse alrededor de los
bordes, por lo tanto debe evitar rallar la superficie de la puerta ó mellar los bordes.
•La unidad esta apagada cuando el control de cronometro esta en la posición OFF.
•No use esta unidad en exteriores
•Deposite la unidad siguiendo las normas de su localidad. Comuníquese con su gobierno local para
mas información.
•Esta unidad no ha sido diseñada para ser usada por personas (Incluyendo niños) con capacidades
físicas, mentales o sensoriales reducidas o con falta de experiencia a menos que estas sean
supervisadas por una persona adulta responsable de su seguridad.
•Los niños deben ser supervisados para evitar que jueguen con la unidad
•No use esta unidad en camas o en lugares similares.
•La temperatura de las superficies puede ser muy alta cuando la unidad se encuentra en
funcionamiento, tenga mucha precaución.
•Esta unidad es solo para uso domestico.
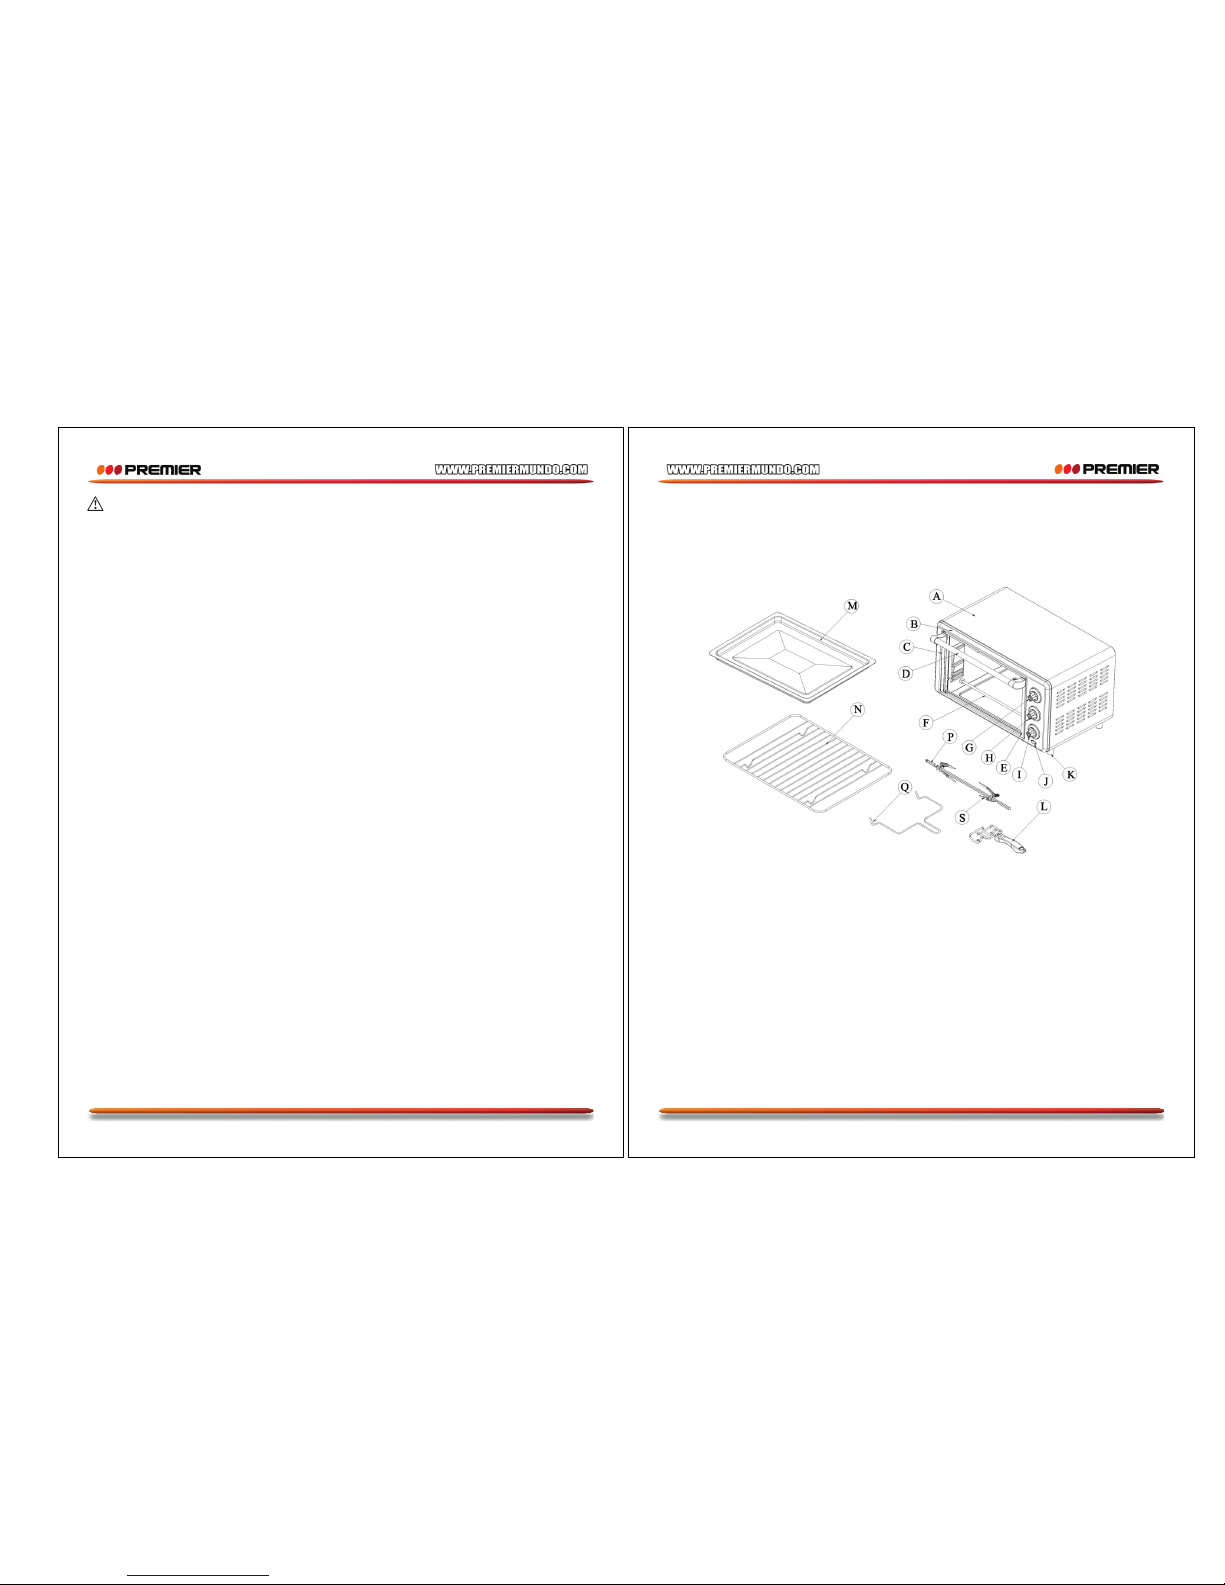
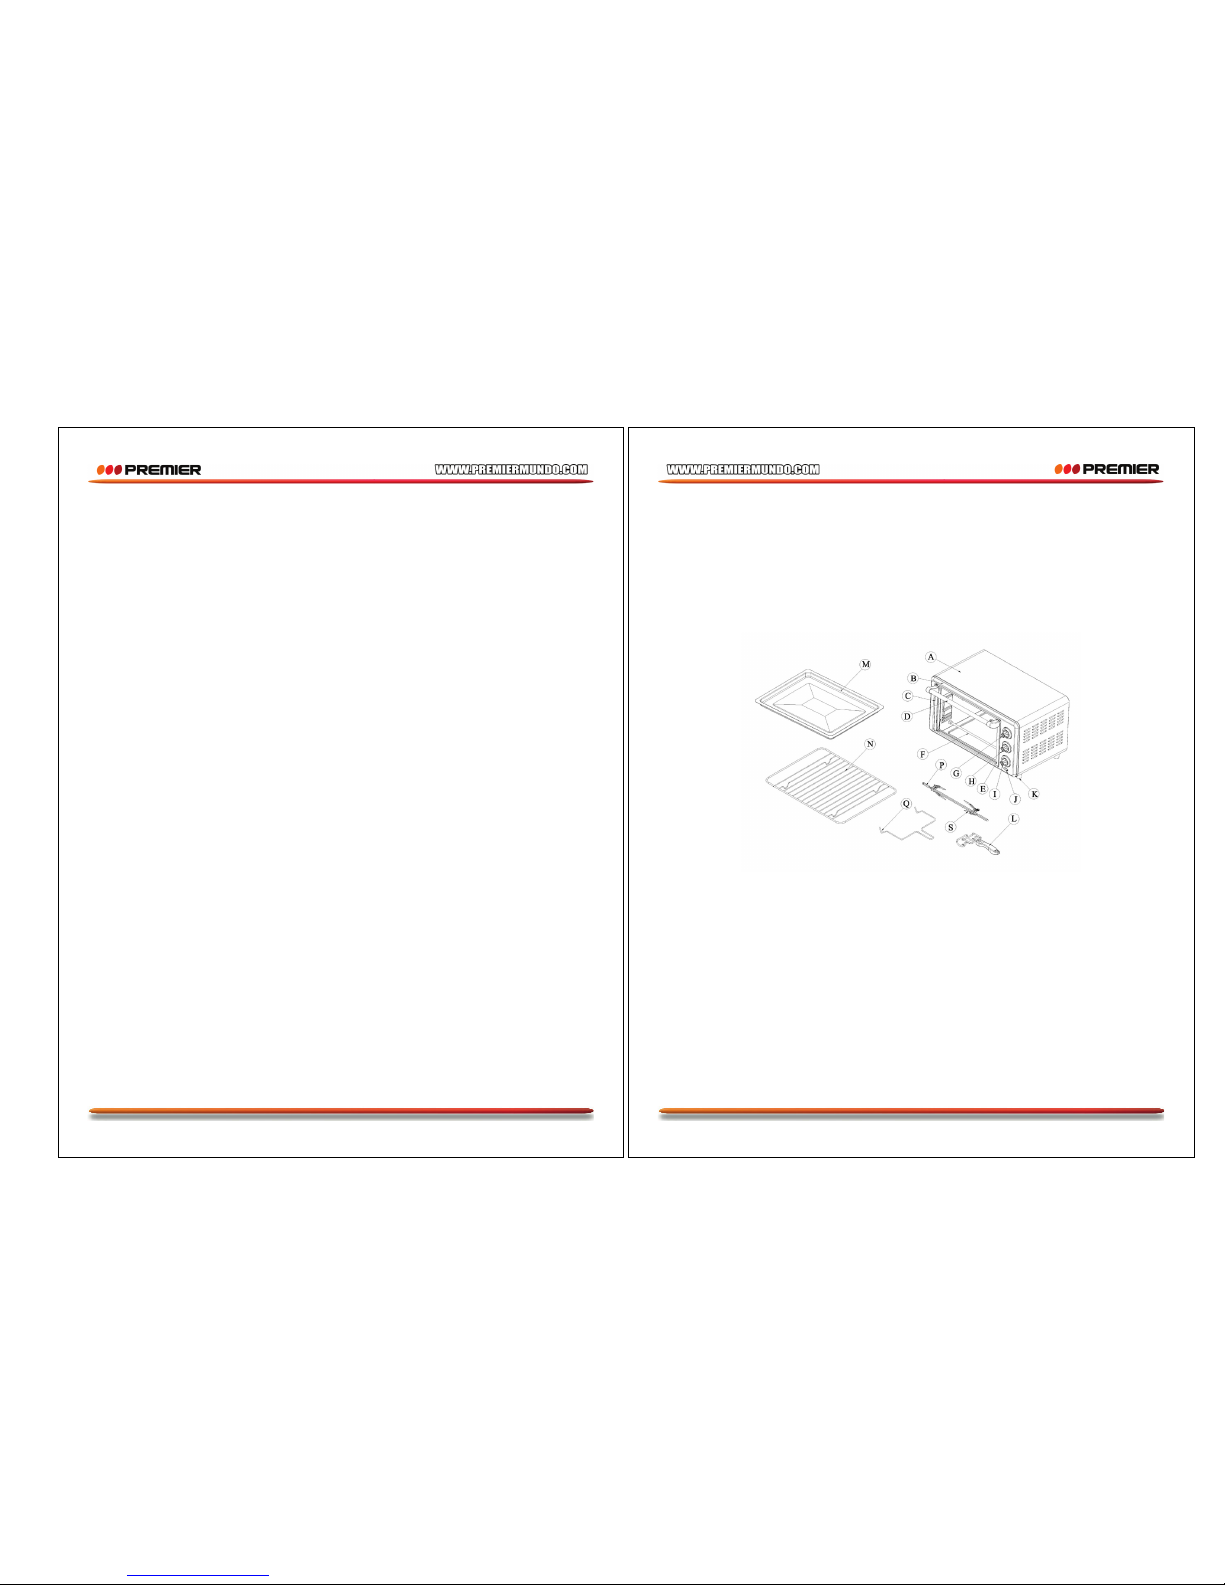
DESCRIPCIÓN DE LA UNIDAD
INDICACIONES ANTES DE USAR LA UNIDAD
•Lea todas las indicaciones dadas en este manual de usuario
•Asegúrese que la unidad esta desconectada y el control de cronometro esta en la posición OFF
(Apagado)
•Lave todos los accesorios con agua caliente y jabón ó en el lavaplatos
•Seque los accesorios completamente y reinstálelos en la unidad.
A. Cubierta
B. Placa frontal
C. Marco de la puerta izquierdo
D. Manija
E. Marco de la puerta derecho
F. Elemento calefactor inferior
G. Perilla de control de temperatura
H. Perilla de control de función
I. Perilla de control de cronometro de cocción