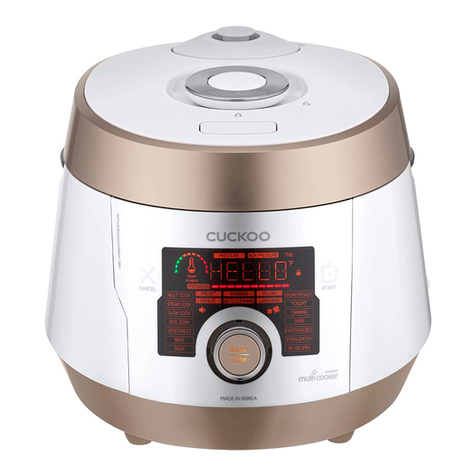
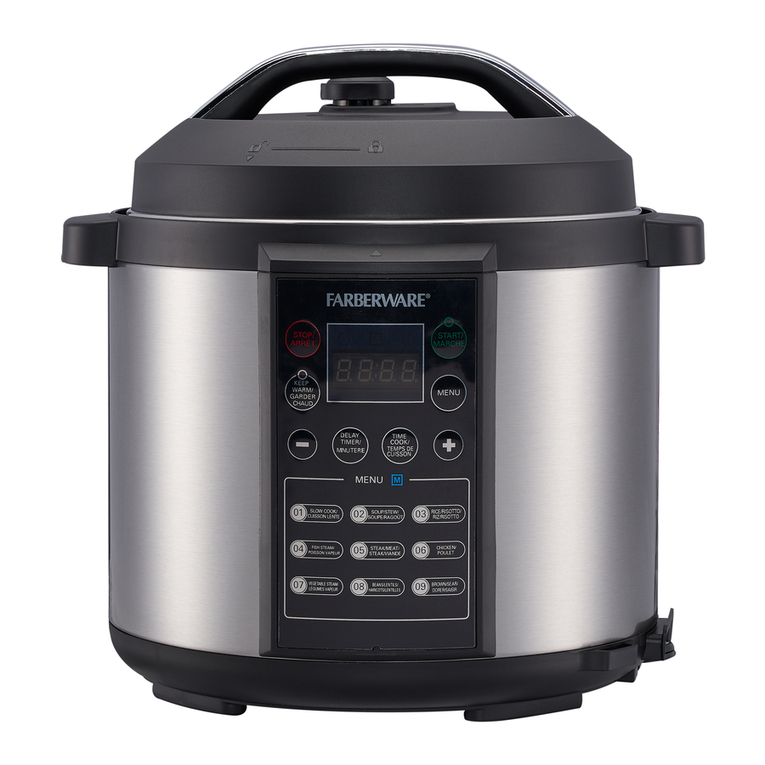
Premium levella PPC10580D User manual

ESPRESSO MAKER
MÁQUINA PARA ESPRESSO

1
IMPORTANT SAFEGUARDS
When using electric appliances, basic safety precautions should always be followed
including the following:
1. Read all instructions.
2. Do not touch hot surfaces. Use handles or knobs.
3. To protect against electrical shock do not immerse cord, plug or appliance in water or
any other liquid. If the unit accidentally falls or gets immersed in water, unplug it from
the wall outlet immediately. Do not reach into the water.
4. Close supervision is necessary when any appliance is used near children.
5.This pressure cooker is not intended for use by children.
6. Unplug from electrical outlet when not in use and before cleaning. Allow to cool
before putting on or taking off parts. If the pressure cooker begins to malfunction during
use, immediately unplug the cord. Do not use or attempt to repair it.
7. Do not operate any appliance with a damaged cord or plug or after the appliance
malfunctions or has been damaged in any manner. Return appliance to the nearest
authorized service facility for examination, repair, or adjustment.
8. The use of accessory attachments not recommended by the appliance manufacturer
may cause injuries.
9. Always operate this appliance on a stable surface.
10. Do not use outdoors. Household use only.
11. Do not let the cord hang over the edge of the table or counter or touch hot surfaces.
12. Do not place on or near a hot gas or electric burner, or in a heated oven.
13. Extreme caution must be used when moving an appliance containing hot oil or any
other hot liquid.
14.Never immerse the housing or base in water.
15. Always attach plug to appliance first, then plug cord into the wall outlet. To
disconnect, turn any control to off, then remove the plug from wall outlet.
16. Do not use the appliance for other than its intended use.
17. Risk of Electric Shock. Cook only in the removable container.
18.This appliance cooks under pressure. Improper use may result in scalding injury.
Make certain the unit is properly closed before operating. See “General Operating

2
Instructions.”
19.Do not fill the unit over the MAX LINE marked in the inner pot. When cooking foods
that expand during cooking such as rice, beans, or dried vegetables, do not fill the unit
over 1/2 (half) full. See “General Operating Instructions”. Overfilling the pressure cooker
may cause clogging, which builds up excess pressure inside and may be dangerous.
20.It is not recommended to cook foods such as applesauce, cranberries, pearl barley,
oatmeal or other cereals, split peas, noodles, macaroni, rhubarb, or spaghetti. These
foods tend to foam, froth and sputter and may block the pressure release device
(exhaust vent). Recipes that use any of these ingredients must be carefully followed to
avoid problems.
21.Always check the pressure release devices for clogging before use. Always make
sure that the exhaust valve is installed correctly before use. Incorrect assembly may
prevent the pressure cooker to build up pressure or allow steam to come out from the
sides of the lid. See “Product Features” and “General Operating Instructions”.
22.Do not use this pressure cooker for pressure frying with oil.
23.DO NOT open the pressure cooker until it has cooled off and all internal pressure
has been released. If the pressure cooker is difficult to open, this indicates that the
pressure cooker is still pressurized.
24.NEVER force the pressure cooker open. Any pressure built up in the cooker can be
hazardous. If you need to open the lid, refer to the instructions in section “Opening the
Lid” and follow them carefully. Always and most importantly if you follow the Quick
Pressure release method, protect your skin from any contact with escaping steam.
Once all the pressure has been released, lift the lid carefully away from you in order to
avoid skin contact with the remaining heat or steam.
25.This electric pressure cooker generates heat and escaping steam during use.
CAUTION HOT SURFACES. All necessary precautions should be followed to avoid fire,
burns or other personal injury during its operation. Never use or place the unit near
flammable materials such as dish towels, paper plates, napkins, curtains, paper towels,
etc. Allow sufficient space around all sides of the unit, including top and bottom to
ensure proper air flow.
26.This appliance is not intended for use by persons with reduced physical, sensory, or

3
mental capabilities, or lack of experience and knowledge, unless they are under the
supervision of a responsible person or have been given proper instruction in using the
appliance. This appliance is not intended for use by children. Any person who has not
fully read and understood all operating and safety instructions contained in this
instruction manual is not qualified to operate or clean this electric pressure cooker.
SAVE THESE INSTRUCTIONS
HOUSEHOLD USE ONLY

4
Special Cord Set Instructions
a) A short detachable power-supply cord is provided to reduce the risk resulting from
becoming entangled in or tripping over a longer cord.
b) Longer detachable power-supply cords are available and may be used if care is
exercised in their use.
c) If a longer detachable power-supply cord is used:
1) The marked electrical rating of the cord set should be at least as high as the
electrical rating of the appliance.
2) The cord should be arranged so that it will not drape over the countertop or
tabletop where it can be pulled on by children or tripped over unintentionally.
3) If the appliance is of the grounded type, the extension cord should be a
grounding-type 3-wire cord.
Precautions
Before use each time, make sure to check the anti-block shield, float valve and
pressure release valve for obstructions; wipe the surface of the inner pot and heating
plate to confirm they are free of any foreign object and make sure the pressure
release valve is in the sealing location.
After cooking, wait until the cooker cools down for a while and release the pressure
using the pressure release valve. Use extreme caution when opening the cover.
Serious burns can result from steam inside the unit.
If a part such as wire or plug is damaged or the intelligent pressure cooker
malfunctions, stop the operation immediately and consult the Troubleshooting and
Warranty Service sections.
Insert the plug into the socket firmly. Incomplete insertion may cause electric shock
or short circuit.
Any dirt or water attached to the insert shall be removed as it may cause fire. When
not in use, unplug the cord from the power outlet.
Care must be taken on the seals to avoid deformation. Fail to do so may prevent the
product from working properly.

5
Product Specifications
Model
Type
Power
Supply
Power
Volume
Size of
inner pot
Working
pressure
Limit
pressure
Warm
temperature
PPC10580D
(10)
120v~60Hz
1000W
6L
22cm
0-50kPa
90kPa
140-176oF
Before First Use
Before the first use, please take out all accessories from the package and read this
Manual carefully. Pay particular attention to operational instructions and cautions to
avoid any injury or property damage.
Prior to each use, inspect to make sure the seal and anti-block shield are mounted in
the lid. After use, remove any foreign object from the seal and anti-block shield.
Keep clean to avoid odors.
Never pull the seal by force, as pull deformation may affect sealing and pressure effect.
A damaged seal should not be used, and unit shall be sent to the service center for
replacement.
Safe Lid Opening
1. Disconnect the power or the power plug.
2. Releasing pressure:
A. Quick opening (for non-fluid food):
Slide the exhaust valve to the Release position.
Put a wet towel on the lid to cool faster until the float valve falls fully.
B. Normal opening: wait until the floating valve drops down, and then open the lid.
3. Open the lid: Hold the lid handle, turn the lid clockwise to the unlock position and
carefully lift the lid up to open.

6
• Do not open the lid until pressure inside the pot is completely released.
• Never pull out the Pressure Release Valve when it is releasing pressure.
• When a large quantity of food is cooked, do not try to release the pressure
immediately after cooking
• For fluid foods (thin, thick, and sticky liquids), do not slide the Pressure Release
Valve for releasing pressure when cooking isjust finished. If you do that, the hot
food fluid may spill from the Pressure Release Valve and cause bodily burn. Be
sure to disconnect the power supply.
.
• It is recommended to let the food cool down for a while before releasing the
pressure.
WARNING:
Do not hold the pressure release valve. Hot steam/liquid may be ejected.
Keep hands and face away from steam vents, use potholders when removing the inner
pot or touching any hot items, and never force the lid open. The lid will only open once
the pressure is released. Remove the lid by lifting it away from you to avoid being
burned by the steam.
How to Use
The Electric Pressure Cooker uses a large and user-friendly control panel with digital
touch buttons. The convenient built-in cooking buttons allow you to cook your favorite
food with a simple touch of the button.
The general procedure for using the cooking functions is as follows:
1. Follow the steps detailed in this manual under the heading “General Operating
Instructions.”
2. Connect the power cord.
To ensure safety, it is recommended to connect the power cord to the cooker first and
then connect the plug to the power outlet.

7
3. Select a cooking method by pressing the corresponding button.
Once the button is pressed, the display will show the default pressure cooking time.
Cooking times may vary depending on the different cooking program selections.
Cooking time may vary slightly depending on the quantity of food and liquid and textures
of food.
The cooking time shown below is for reference only. (e. g. food amount +water reaches
scale between 1/5 to 3/5 inside the inner pot):
Cooking time = heating time + default pressure cooking time.
* Will change according to the amount of food. More food will imply more time needed to
cook.
When you select a function and enter into the program, the display will show the default
pressure cooking time (for rice is 8 minutes), and the pressure cooker starts to heat up.
The default pressure cooking time shown on display will NOT start counting down until
the food or liquid has heated up and the pressure cooker has started pressure cooking.
Heating time normally takes more than 10 minutes depending on food quantity.
4. The menu indicator light will flash for 5 seconds before starting the menu. After 5
seconds, the indicator light will stop flashing to indicate that the cooking process has
started.
During this 5-second interval you can change the default cooking time by pressing the
plus (+) or minus (-) button on the panel.
At any time during the process, the program can be canceled by pressing the
Cancel/Keep Warm button. The pressure cooker will then go into Standby mode.
5. As the pressure increases inside the cooker, the floating valve will pop up.
At this point pressure cooker begins. The lid is now locked and cannot be opened.

8
CAUTION! NEVER ATTEMPT TO OPEN THE LID
WHILE PRESSURE COOKING!
Note: The Pressure Active indicator will light up and indicate that the unit is under high
pressure.
After cooking time has ended, the pressure cooker will automatically go into Keep Warm
mode. The cooker makes an audible beep. The Keep Warm indicator light is on to show
the cooker is in Keep Warm mode. The display will count up the elapsed minutes and let
you know how long the cooker has been in Keep Warm mode. The Pressure Active
indicator goes off automatically when the cooker goes into Keep Warm mode. Be aware
that the cooker is still under high pressure at that moment. Do not attempt to open the
lid. Release the pressure first.
Opening the Lid
When pressure cooking has come to an end, the cooker will go into Keep Warm mode.
At this point you may choose to open the lid, but before, the pressure needs to be
released. This can be done in two ways:
1. Quick pressure release: Move the Exhaust Valve to the VENT position. Steam will
immediately begin to release through the valve. When pressure is fully released, the
floating valve will sink. The lid will now be unlocked to open.
USE EXTREME CAUTION WHEN OPENING THE COVER.
SERIOUS BURNS CAN RESULT FROM STEAM INSIDE THE UNIT.
CAUTION: KEEP HANDS AND FACE AWAY FROM THE VALVE WHILE
VENTING.
Hot steam escaping from the valve may cause serious injuries if precautions are not

9
followed. Use potholders, tongs, or other tools to adjust the valve.
2. Natural pressure release is recommended when cooking foods that will not have the
tendency to overcook, such as potatoes, beans, soups, and stews. When in Keep Warm
mode, the pressure will begin to drop. This will take from 12 to 30 minutes. During this
time cooking continues slightly. When pressure is fully released, the float valve will sink.
The lid will be now unlocked to open.
CAUTION: KEEP HANDS AND FACE FROM THE VALVE WHILE
VENTING.
Hot steam escaping from the valve may cause serious injuries if
precautions are not followed. Use potholders, tongs, or other tools to
adjust the valve.
USE POTHOLDERS WHEN REMOVING THE REMOVABLE COOKING POT. NEVER
FORCE THE LID TO OPEN.
THE LID WILL ONLY OPEN WHEN ALL PRESSURE IS RELEASED.
REMOVE THE LID BY LIFTING IT AWAY FROM YOU TO AVOID INJURIES CAUSED
BY HOT STEAM.

10ProductFeaturesPARTSOFTHEPRESSURECOOKER

11
ACCESSORIES
ACCESSORIES
1.Rice Spoon
2. Measuring Cup
CONTROL AND FEATURES

12
Product functions
The pressure cooker includes the following functions:
Rice
Multigrain
Porridge
Meat/stew
Poultry
Seafood
Veggies
Bean/chili
Soup
Yogurt
Egg Maker
Steam
Slow cook
Sauté
Manual
Display status
1. Power on the device for the first time: The first time the appliance is powered on, the buzzer gives a long
sound and enters the standby state. The display displays "— — — —".
2. Time selection: After selecting the function, the display will show the default pressure cooking time. Before
entering the working state, the time can be adjusted using the keys [-] and [+]. Please refer to the adjustable range
(Table 1)
3. Taste: After selecting the function, the display shows the pressure holding time. The default is Quick (low
pressure), and the Taste can be selected by pressing the "taste selection" button. Quick (low pressure), Medium
(medium pressure) and Strong (high pressure). Taste is different under different pressure and can be adjusted
cyclically. The pressure holding time range can be seen on the COOKING PROGRAMS table.

13
4. Preset Time: Press the Preset Time button to set the preset timer for up to 24 hours. Adjust the time in 30-
minute increments using the “+”and “-”buttons, or by continuing to press the Delay Time button until your
preferred delay time is selected.
5. Keep Warm/Cancel: For most presets, after your cooking cycle is complete, it will automatically switch to Keep
Warm mode. Press the Keep Warm/Cancel button at any time to stop the cooking cycle.
6. Automatic Start: Once you have selected your desired cooking preset or function and adjusted as needed,
simply step away. Your pressure cooker will automatically begin the cooking cycle after about 5 seconds unless the
delay timer has been set.
7. NOTE: Each cooking program and function is set with a default time, temperature, and pressure level that may
be adjustable. Refer to Cooking Programs to see which settings are adjustable and not adjustable.
Functions
1. Sauté
This is a 20-minute program (00:20) for Sauté food. The normal function of this function is no pressure cooking.
You can also use your pressure cooker to sauté foods such as meat. The program time can be adjusted between 1
and 40 minutes, with a default setting of 20 minutes. This is generally adequate for any sauté task. In this example,
we will sauté two pork chops. To do this successfully, follow the steps below: Wash the chops and pat them dry.
Remove the lid on your pressure cooker. Connect your pressure cooker to power, ensuring the inner pot is installed.
The pressure cooker will beep once. Press the Sauté button.
NOTE: DO NOT add oil at this point. The Display will indicate a flashing “20”, the default time. After 5 seconds, it
will show a steady “20”and the Pot will start to heat. When the countdown on the Display decreases to “19”,
add a small amount of oil to the inner pot. Wait a further 2 minutes and, at “17”, place your pork chops into the pot.
Use a wooden or silicone spatula and turn your chops as required to ensure even browning. When you are satisfied
with the result, press the Keep Warm / Cancel button until the display shows: “- - - - “. Switch off the pressure
cooker and unplug it. When cool, clean as per the instructions in the “Cleaning and Maintenance”section.
Note: This function is a high temperature function, and the fault of E3 will not be detected.
2. Rice/Risotto
This is an 8-minute program for cooking rice and grains. Position the removable cooking pot in the cooker. Add

14
at least 1/5 full of water or cooking liquid to the cooking pot. Add the appropriate amount of grain to the liquid,
following the grain to liquid ratio indicated by the recipe. Do not fill the pot more than half-full. Place the lid on the
cooker; align the handle with the condensation collector and turn it counterclockwise until it locks into place. The
locking pin will click into place. Turn the pressure valve to SEAL. Press the RICE button. The light on the RICE
button will flash and the display will show “00:08”. When the cooking time ends, the unit will beep and
automatically turn the “Keep Warm” function on until you press “Keep-Warm/Cancel” button to cancel the program.
3, Slow cook
This function will allow you to cook slow cooker classics such as pot roasts in up to 12 hours. Load your
ingredients in the morning and dinner will be waiting for you.
Choose the SLOW COOK mode on the control panel. The light on the Slow Cook button will flash and the digital
display will show the corresponding cooking time. Default time “02:00”.2 hours. The longest cooking time is 12 hours
at about 212℉.When the cooking time is up, the unit will beep and go automatically into the “Keep Warm” function
until you press the “Keep-Warm/Cancel” button to cancel the program.
4. Yogurt
This is an 8-hour program (08:00) for Yogurt. Disinfect the container with boiling water for 10 minutes, pour in
milk and yogurt starter after cooling, mix well, and cover it; Add a proper amount of water into the tank, select the
"Yogurt" function, and click "Start"; After the work is completed, it will not enter the heat preservation mode and will
enter the standby mode.
5, Meat/stew
This is a 20-minute program (00:20) for stewing food. Follow the steps listed in this manual under the heading
“General Operation Instructions.” Press the Meat/stew button. If your meal needs a longer or shorter cooking time,
the default time can be changed during the first 5-seconds interval by pressing the plus (+) or minus(-) button. Make
sure the pressure cooker is at least 1/5 full. Do not fill the cooking pot more than 3/5 full. When the cooking time ends,
the unit will beep automatically and go into Keep Warm mode, until you press the Keep Warm/ Cancel button.
6,Steam
This is an 8-minute program (00:08) for steaming. Insert a steamer basket (NOT INCLUDED, preferably use a

15
silicone steamer) with your food into the pot, add water to 1/5 mark on the cooking pot. Follow the steps listed in this
manual under the heading “General Operation Instructions.” Press the Steam button. If your food needs a longer or
shorter cooking time, the default time can be changed during the first 5-second interval by pressing the plus (+) or
minus (-) button. When the cooking time ends, the unit will beep automatically go into Keep Warm mode, until you
press the Keep Warm/ Cancel button.
7, Soup
This is a 30-minute program (00:30) for cooking soups. Follow the steps listed in this manual under the heading
“General Operation Instructions.” Press the Soup button.
If your soup needs a longer or shorter cooking time, the default time can be changed during the first 5-second interval
by pressing the plus (+) or minus (-) button.
Make sure the pressure cooker is at least 1/5 full. Do not fill the cooking pot more than 3/5 full. When the cooking
time ends, the unit will beep automatically go into Keep Warm mode, until you press the Keep Warm/ Cancel button.
WARNING
9, Multigrain, porridge, poultry, seafood, veggies/vegetables, Bean/chili beans/peppers, Egg Maker. You put the
food into the container, and then select the corresponding function to start cooking. These functions are cooking
under pressure. If the pressure switch is disconnected, the overpressure protection time will be entered, and then the
8, Manual
This is a Manual program function. This program can be used to provide flexibility if none of the other preset
programs are suitable. Do not forget you only have 5 seconds to select a function you wish to adjust.
pressure switch will be closed to resume heating. If the pressure switch is disconnected, the heating will stop.
:
Do not hold the pressure release valve. Hot steam/liquid may be ejected.
Keep hands and face away from steam vents, use potholders when removing the
inner pot or touching any hot items, and never force the lid open. The lid will only
open once the pressure is released. Remove the lid by lifting it away from you to
avoid being burned by the steam.

16
Time Delay Function
This Pressure Cooker has a delay time function of up to 24 hours.
1. Follow the steps listed in this manual under the heading “General Operation
Instructions”.
2. Press the button of the specific menu that you want to have delayed.
3. Press the Delay Time button during the first 5-seconds interval of the chosen
function.
4. The green indicator light of the Delay Time button will start flashing,
5. The default delay time is 30 minutes (00:30). During the first 5-seconds interval you
can adjust the default delay time by pressing the plus (+) or minus (-) button (30
minutes intervals).
6. After 5 seconds, the delay time is set and the green indicator light is on, together
with the indicator light of the chosen menu. The display will start to countdown.
7. To cancel the Delay Time function, press the Keep Warm/Cancel button.
8. When the delay time ends, the cooking process will start.
9. After the cooking has ended, the unit will beep and automatically go into Keep Warm
mode, until you press the Keep Warm/Cancel button.
Notes:
It is not recommended to use the Delay Time function to cook foods that may
spoil.
Leaving raw food inside the pressure cooker for long periods of time prior to
cooking may result in the food spoiling.
Cook food that can be left out such as beans, grains or other foods that will not
spoil.
Perishable foods such as meat, poultry, fish, cheese, and other dairy products
cannot be left at room temperature for more than 2 hours and never longer than
1 hour if the room temperature is above 90ºF.

17
Cooking Programs (Table 1)
Function
Default time
(Quick)
Taste selection
Adjustable
pressure
Preset
time
Keep Warm
Quick
Medium
Strong
Rice
8min
8min
18min
25min
8-25 (1)
min
24hr
24hr
Multigrain
30min
30min
45min
60min
30-60(1)
min
24hr
24hr
Porridge
15min
15min
25min
35min
15-35(1)
min
24hr
24hr
Meat/stew
20min
20min
30min
40min
20-40(1)
min
24hr
24hr
Poultry
15min
15min
25min
35min
15-35(1)
min
24hr
24hr
Seafood
8min
8min
15min
25min
8-25(1) min
24hr
24hr
Veggies
5min
5min
15min
25min
5-25 (1)
min
24hr
24hr
Bean/chili
30min
30min
40min
60min
30-60min
24hr
24hr
Soup
20min
20min
35min
60min
20-60(1)
min
24hr
24hr
Yogurt
8min
8hr
12hr
20hr
8-20hr
(30min)
//
//
Egg Maker
5min
5min
8min
15min
5-15(1) min
24hr
24hr
steam
8min
8min
15min
25min
8-25 (1)
min
24hr
24hr
Sauté
20min
20min
30min
40min
20-40(1)
min
//
//
Slow cook
2hr
2hr
6hr
12hr
2-12hr
(30min)
24hr
24hr
Manual
10min
10min
30min
60min
10-60(1)
min
24hr
24hr

18
General Operating Instructions
1. Open the lid by turning the lid handle clockwise to the OPEN position, and then
carefully lift the lid. (See picture 1 ).
1
2. Take out the removable cooking pot, put food and water in it.
NEVER fill the cooking pot more than 3/5 or less than 1/5 full. This is indicated on the
upper line on the inside of the cooker identified with the word “MAX”. For rice and
vegetables that expand during cooking, DO NOT fill over 1/2. (See pictures 2, 3, 4)
3. Make sure to dry the removable cooking pot exterior and heating plate before putting
the cooking pot into the stationary pot. Do not put anything into the stationary pot and
heating plate. Please rotate the cooking pot slightly to make good contact with the
heating plate. (See picture 5)

19
4. Close the lid: Make sure the silicone gasket is seated properly inside the lid. Hold the
lid handle and put the lid on the cooker; rotate the lid counterclockwise approximately
30 degrees until the lid is aligned with the “CLOSE mark on the cooker. (See picture 6)
6
5. Install the condensation collector. (See picture 7)
7
6. Adjust the Exhaust Valve to the SEAL position before cooking. The Float Valve must
be fully down to properly seal the pot before cooking. (See picture 8)
8
If using the Slow Cook function mode, put the pressure valve to the VENT
position.
If using the other cooking function modes, put the valve to the SEAL position.
NOTE: Please note that the Exhaust Valve will be loose when you are not using the
appliance for cooking. It will rock slightly and can turn 360°manually. Once the
Exhaust Valve is in operation and the pressure has built up to its capacity, the Exhaust
Valve will tighten securely, only allowing itself to be turned to the right to vent when
you are facing the front of the cooker. Once all the pressure has released, it will
become loose again.
7. Connect to the power. The LED display shows “00:00” and it enters into standby state.
Table of contents
Languages:
