Método de uso
Método de lavado
1. Inserte la manguera de entrada de agua a la entrada en la lavadora y escoja agregar
agua a la tina de lavado.
2. Ponga las ropas en la tina de lavado y agregue detergente a ella. .
Llene agua hasta la mitad de la cantidad deseada de agua, cierre el grifo de agua y
deje que las ropas se remojen en la solución por varios minutos,
luego llene con agua hasta el nivel deseado.
3. Seleccione el programa de lavado “normal” o “fuerte” dependiendo de la cantidad y
textura de las ropas.
4. Gire el botón del tiempo de tiempo a la cantidad de tiempo deseada.
5. Después del lavado, gire el selector de ciclo a la posición de drenaje para drenar.
Método de uso
Método de centrifugado
lavado
1. Sacuda las ropas y póngalas en
la tina de centrifugado.
2. Ponga la cubierta interior de centrifugado
sobre la ropa. Revise que la cubierta este
puesta horizontalmente.
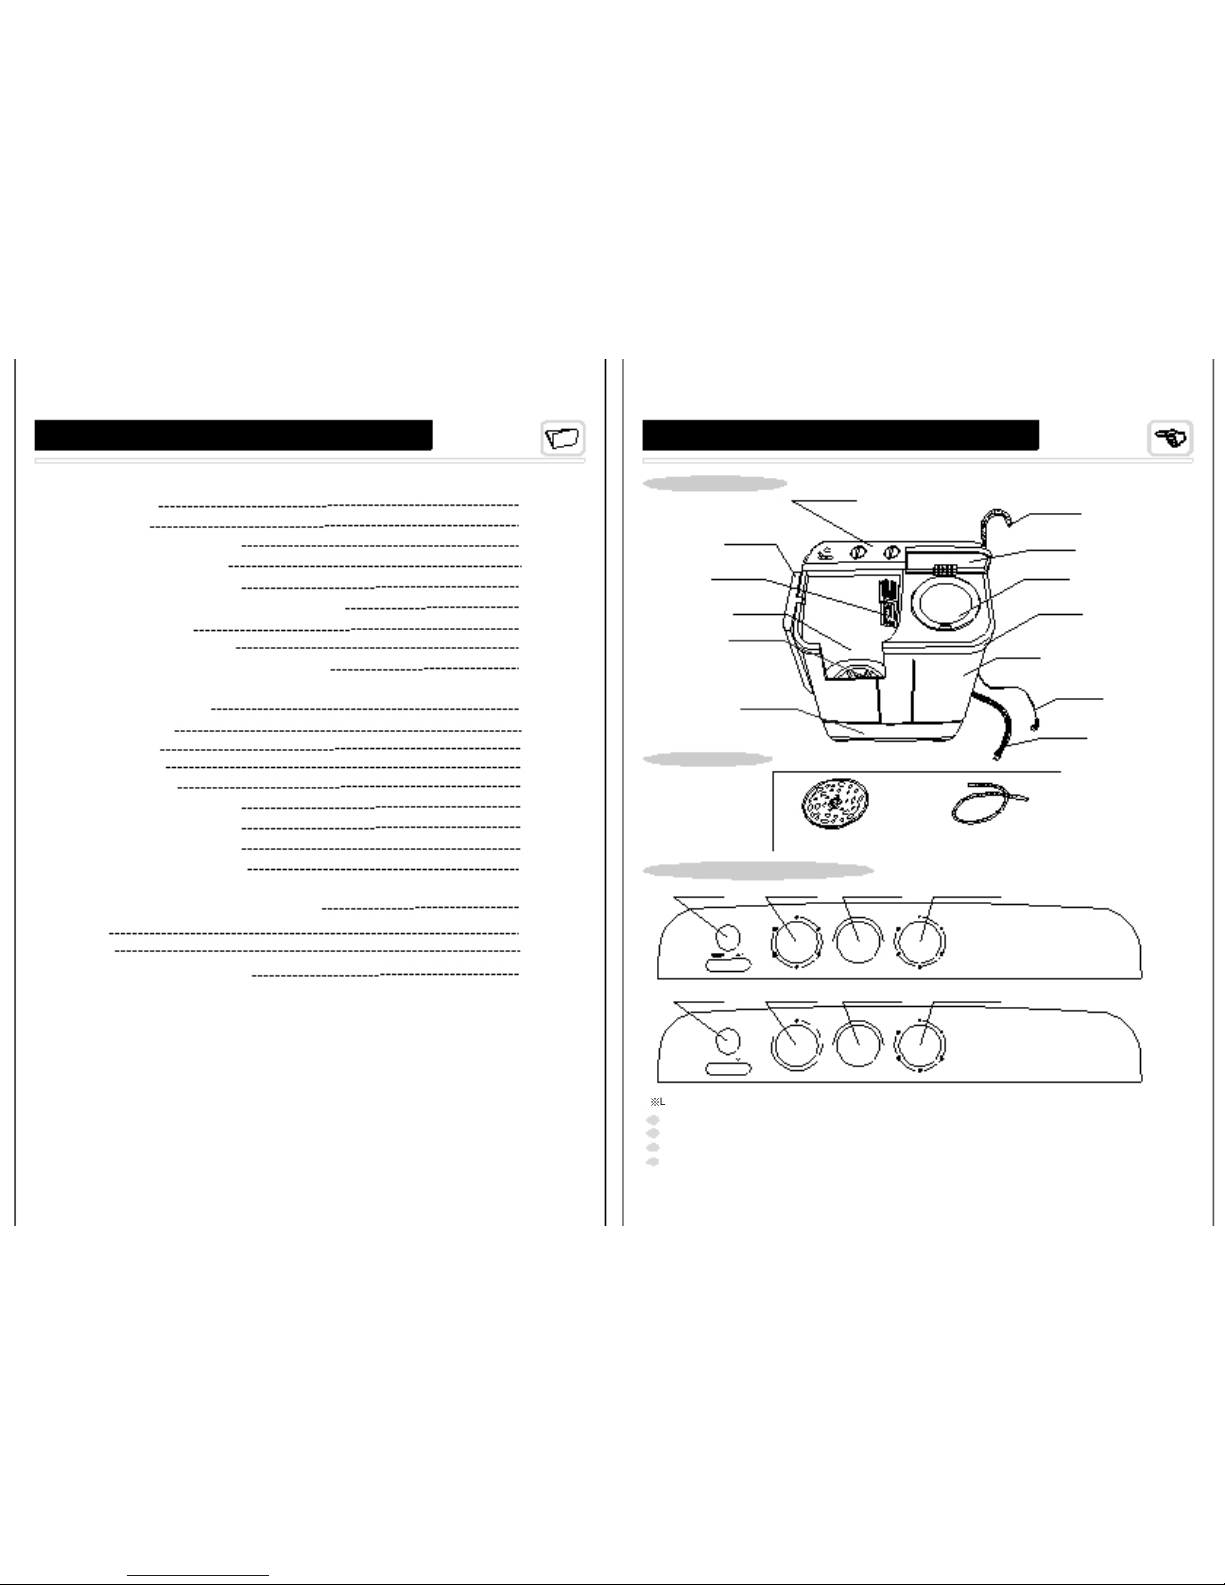
agua
6. Sonará una alarma al completar el ciclo de lavado (para lavadoras con alarma únicamente)
(Para máquinas con función de remojo únicamente)
centrifugado
Tina de
centrifugado
Para ropas muy manchadas, es muy útil remojarlas para alcanzar mejores resultados en el
lavado. Hay un tiempo de 15-35 minutos para el ciclo de remojo únicamente.
aprox 2
Tiempo de trabajo
Tiempo de espera
aprox1.5
aprox 1.5
lavado
3
Remojo
(unidad
)
Correcto
Incorrecto
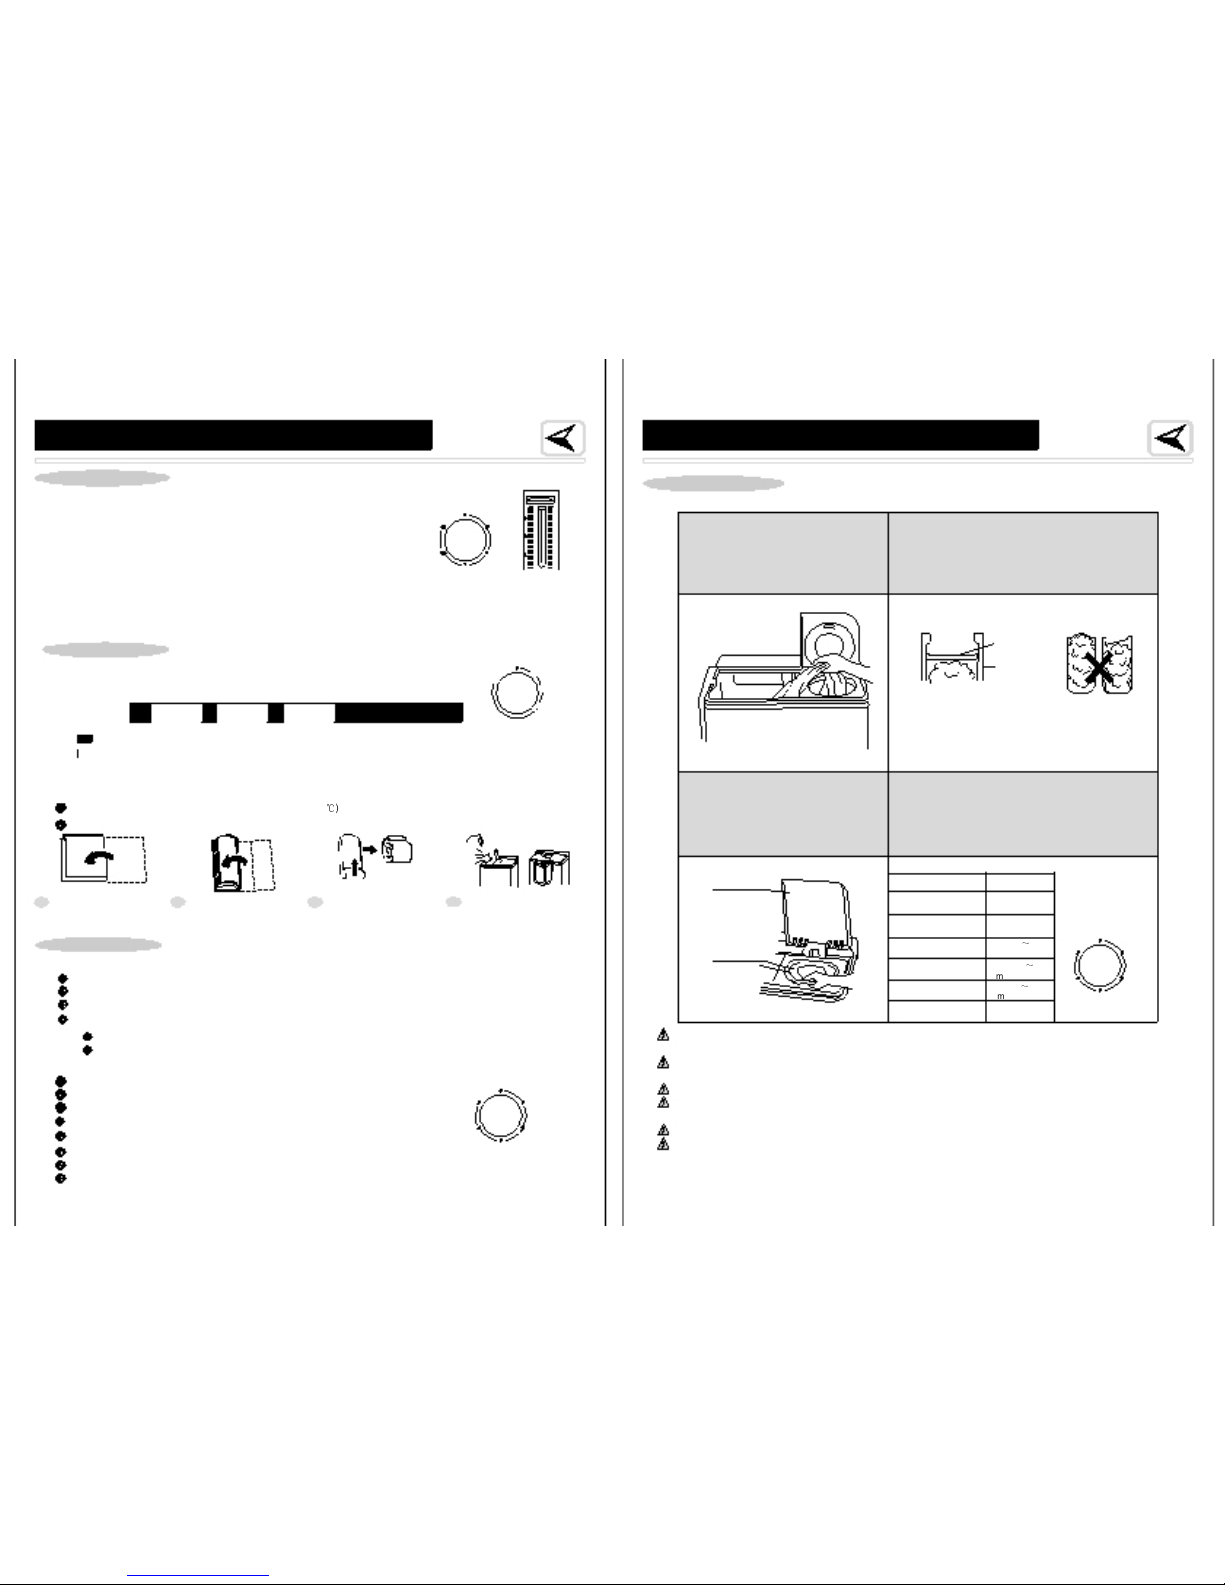
Esta lavadora puede lavar cobijas (menos de 3 kilos) marcadas con etiqueta de “lavado a mano”.
El método de lavado es el siguiente:
Diluya el detergente con suficiente agua (menos de 50
℃
), y agregue la solución a la lavadora.
Doble la cobija como se muestra en la lavadora y agregue a la lavadora.
3. Cierre la tapa de seguridad y la
tapa de la tina de centrifugado.
4. Refiérase a la siguiente tabla para
seleccionar el tiempo de centrifugado
Tapa de
centrifugado
Doble por el lado
más largo
Método de enjuague
Doble 1/3 en la
misma dirección
Enrolle la cobija
Ponga la cobija en la tina
el extremo hacia abajo
Tapa de
seguridad
A. Enjuague con rocío (enjuague en la tina de centrifugado)
Ponga las ropas en la tina de centrifugado después de lavarlas.
Abra el grifo de agua y agregue agua a la tina de centrifugado por 3-4 minutos y luego cierre el grifo.
Programe el tiempo de centrifugado de 2 a 5 minutos para enjuagar.
Puede repetir los pasos mencionados arriba.
Nota: Si hay oxido rojo en el agua, no escoja el enjuague con rocío pues el oxido se puede adherir a las ropas.
Asegúrese de no agregar agua a la tina de centrifugado mientras está dando vueltas.
B. Enjuague normal (enjuague en la tina de lavado)
Para ahorrar tiempo, energía y agua, puede hacer un ciclo de centrifugado previo antes de enjuagar.
centrifugado
Ponga las ropas que se han centrifugado en la tina de lavado.
Después de llenar con agua hasta el nivel deseado, cierre el grifo de agua.
Gire el selector de ciclo "Normal" o "Fuerte".
Seleccione el tiempo deseado girando el tiempo de lavado (3-5 minutos) para enjuague.
Después de enjuagar, ponga las ropas en la tina de centrifugado de 1 a 5 minutos.
Drene el agua de la tina de lavado.
Puede repetir los pasos varias veces.
4
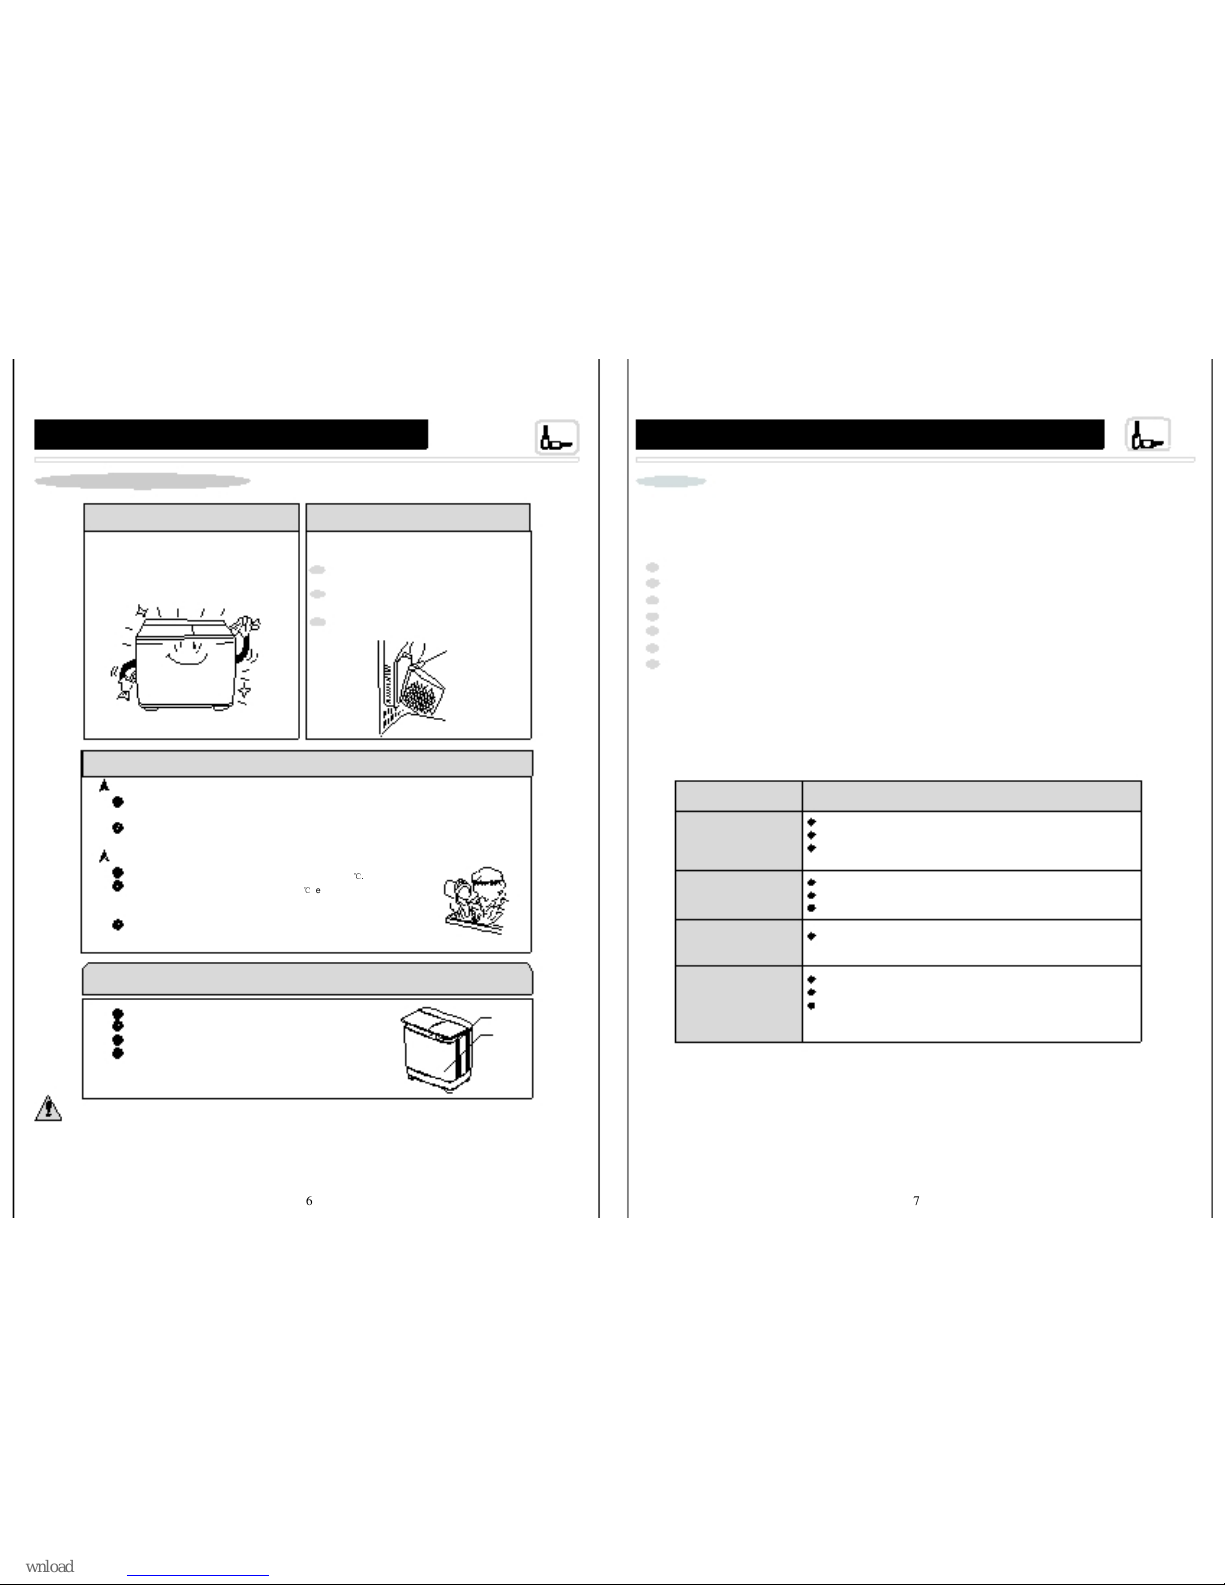
Materiales lavados
Alambre
Ropas ligeras
(fibra/mezclados
Tejidos (fibra)
Ropa interior
(algodón)
Piyama
(algodón/lino)
Toallas
(algodón)
Tiempo
Aprox 50
segundos
Aprox 1
minuto
Aprox 1
~
2
minutos
Aprox 2
~
minutos
Aprox 3
~
4
minutos
Aprox 5
minutos
centrifugado
El aparato no puede ser usado por niños o personas con capacidades físicas, sensoriales o mentales reducidas o con falta de
experiencia y conocimiento a no ser que se les de instrucciones o supervisión.
No use otras mangueras de agua excepto la manguera de entrada que se le suple como accesorio.
Si necesita reemplazar la manguera, contacte al centro de servicios local.
Deje de agregar agua en el momento que va a transferir la manguera de una tina a otra pues la presión del agua es alta.
Si ocurre una vibración fuerte al escurrir, abra la tapa inmediatamente. Asegúrese que la lavadora esta en un piso plano y estable,
luego reajuste las ropas y distribúyalas regularmente.
Para escurrir y drenar al mismo tiempo, por favor escurra un minuto antes de drenar
No lave o escurra ropas a prueba de agua que puedan flotar fácilmente para evitar vibraciones anormales o daños a las ropas.