Pridiom AWS 241HX User manual

www.Pridiom.com

Foreword
Air conditioners are units that should have the professional technicians do the installation for you.
This Instruction Manual is the universal-purpose version for the models of split wall-mounted air conditioners
manufactured by our Co. The appearance of the units that you purchase might be slightly different from the
ones described in the Manual, but it does not affect your proper operations and usage.
Please read carefully the sections corresponding to the specific model you choose, and keep the Manual
properly so as to facilitate your reference at later time.
Addition to the user manual:
The appliance is not intended for use by young children or infirm persons without supervision;
Young children should be supervised to ensure that they do not play with the appliance.
Contents
Instructions to users
The name of each part and its function
Operation and indication sections of remote controller
Use of remote controller
Features of heating operations
Methods of maintenance
Treatment at service call
We hope you will know the following when using the unit
1
3
6
7
8
9
10
11

copper
wire
*
Instructions to users
*
*
Make sure to have the professional after-sale service persons of our company or the authorized dealers to
install the units before you use.
1. The units are not to be installed at places where
there might be leakage of combustible gases.
Earth leakage-
circuit breaker
Make sure that the earth leakage-circuit breaker
is installed.
After the connecting of the wires between the indoor unit and the
outdoor unit, check whether the connecting is loose or not by pulling
the wire with a little force.
The loose connecting might result in fire hazard.
Instructions for Operation
SK
Do not press, stretch, damage, heat or modify the
power line.
It might cause electric shocks, overheating, fire
hazards, etc. If the power line wire is damaged or
needs to be replaced due to some other reasons,
please make sure to have dealer or the authorized
maintenance people to do the replacement.
Never try to stop the operation of the air conditioner
by operate the switch.
Such performance might cause electric shocks or fire hazards.
Do not operate the switch by wet hands.
It might cause electric shocks.
Never use the fuse with incorrect capacity or any
other metal wires.
The use of metal or copper wires for fuse might cause operational
failures or fire hazards.
Please read the "Instruction Manual" carefully prior to the use of your air conditioner so as to ensure proper operations.
Instructions for Installation
In case that the leaked gas accumulates around the units, there
might occur the accident of fire hazards.
Absence of the earth leakage-circuit breaker might lead to electric
shock and some other hazards.
1
OFF
ON
USER'S MANUAL
Split Wall-Mounted Air Conditioner
Make sure that the air conditioner is properly grounded.
The grounding wire on the air conditioner should be tightly connected to
the ground of the power source. Improper grounding might cause electric
shocks or other hazards.

Instructions for Removal and Repair
*
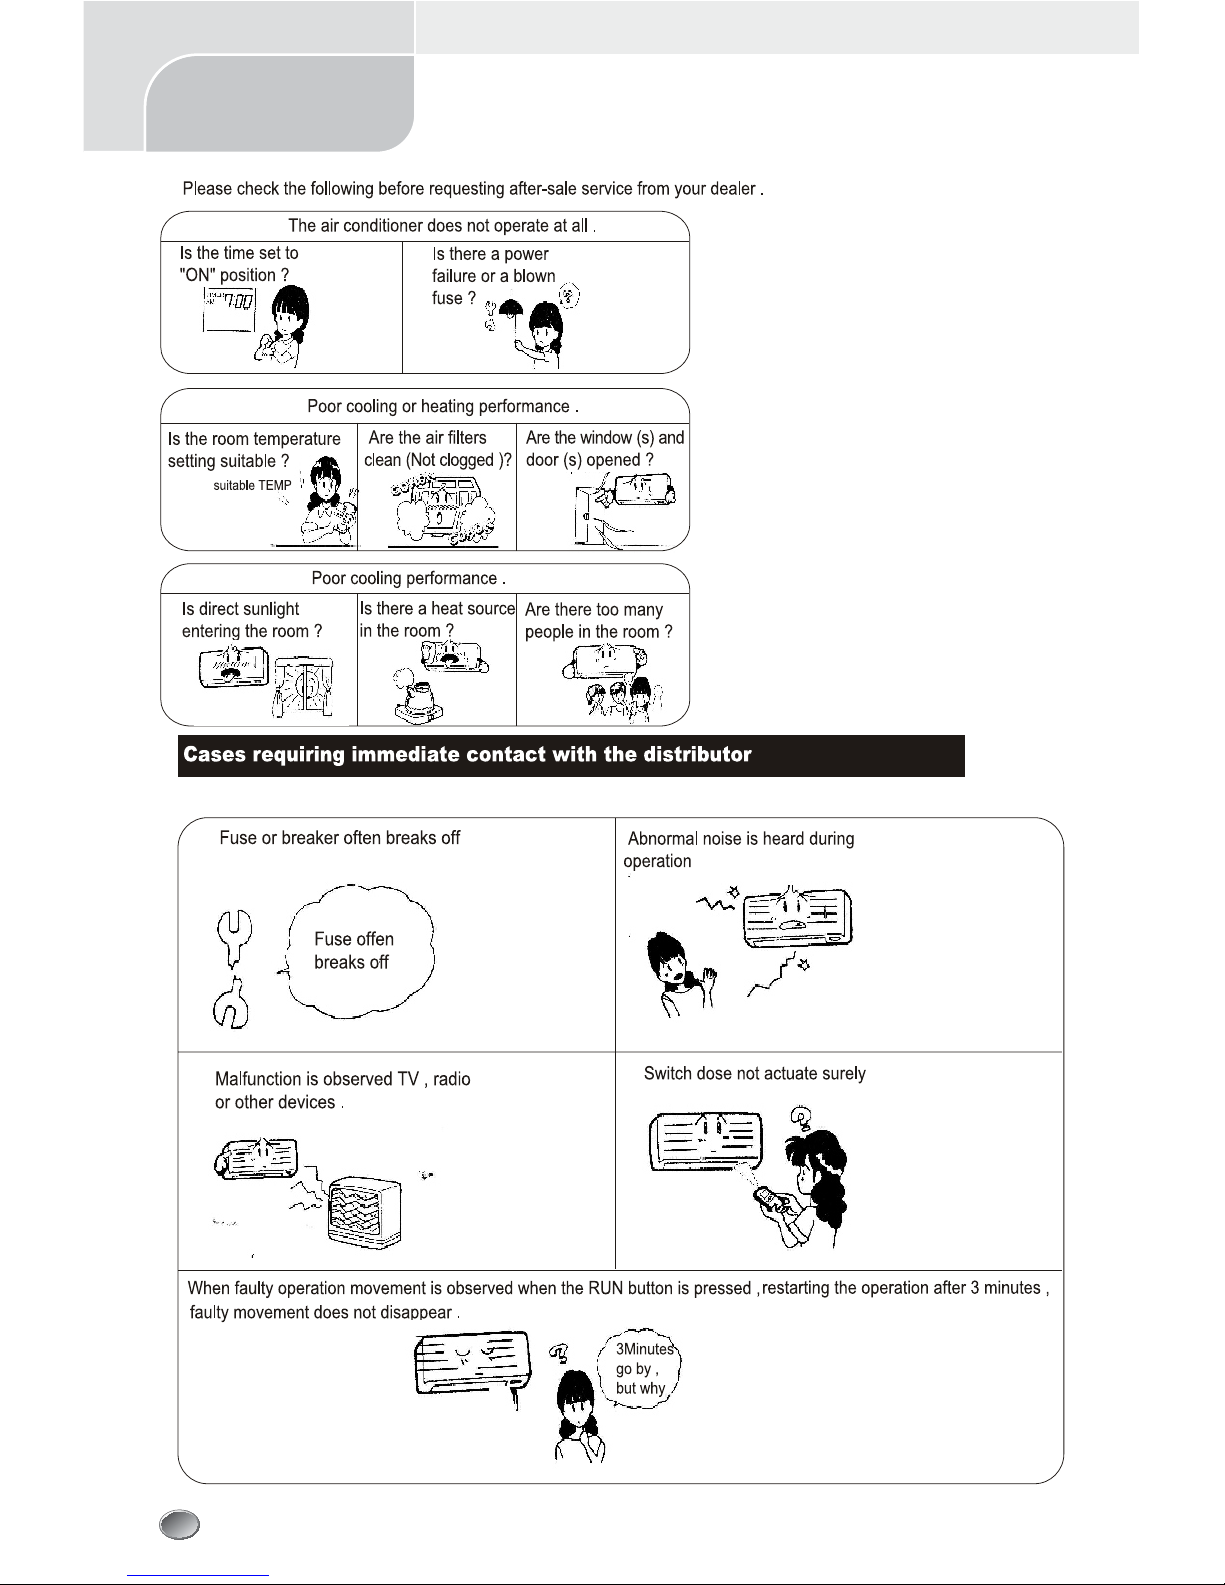
When removal or repair is needed, please contact the dealer or authorized maintenance & installation people.
*
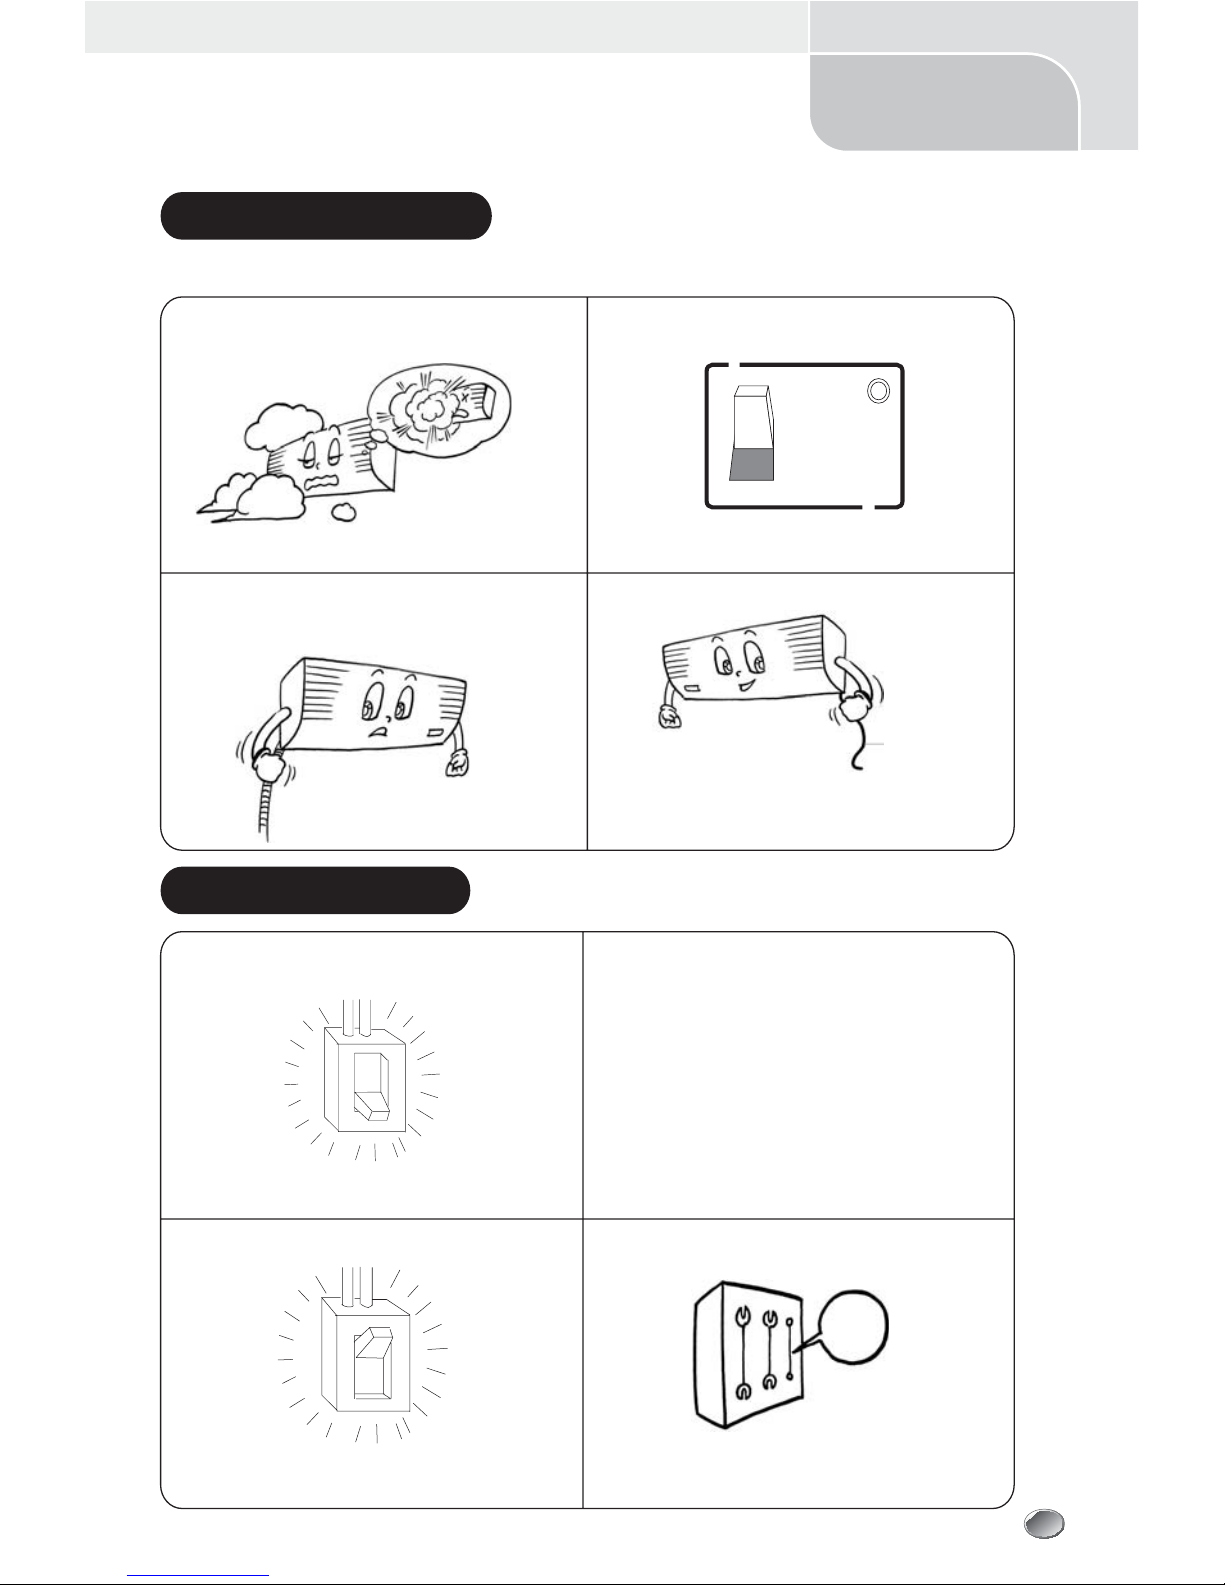
In case of any abnormal occurrences (smell of burning), please stop the operation at once, cut off the power supply
and contact the dealer or authorized maintenance people.
Do not sit on the outdoor unit or place
any other objects on it.
The falling down of
the unit or the objects
might cause human
injuries and other
accidents.
Try to avoid the sunlight and hot air
from entering the room.
During the cooling operation, curtains or window-
blinds should be used to shade off the sunlight.
Try to minimize the generation of heat
during the operation of cooling.
Place the heating sources out of the room.
Check the supporting structures of
the units carefully.
In case of damages, the supporting structures should
be immediately repaired so as to avoid falling down
of the unit, which might cause human injuries or
other accidents.
Put down the power when the unit is
not in use for long time so as to ensure
safety.
Do not keep exposed to the cool air
for long time.
It might cause discomforts of the
body, which is harmful to your
health.
Do not insert sticks or bars into the air
vents.
As the fan is in high-speed operation, the insertion
might lead to accidents.
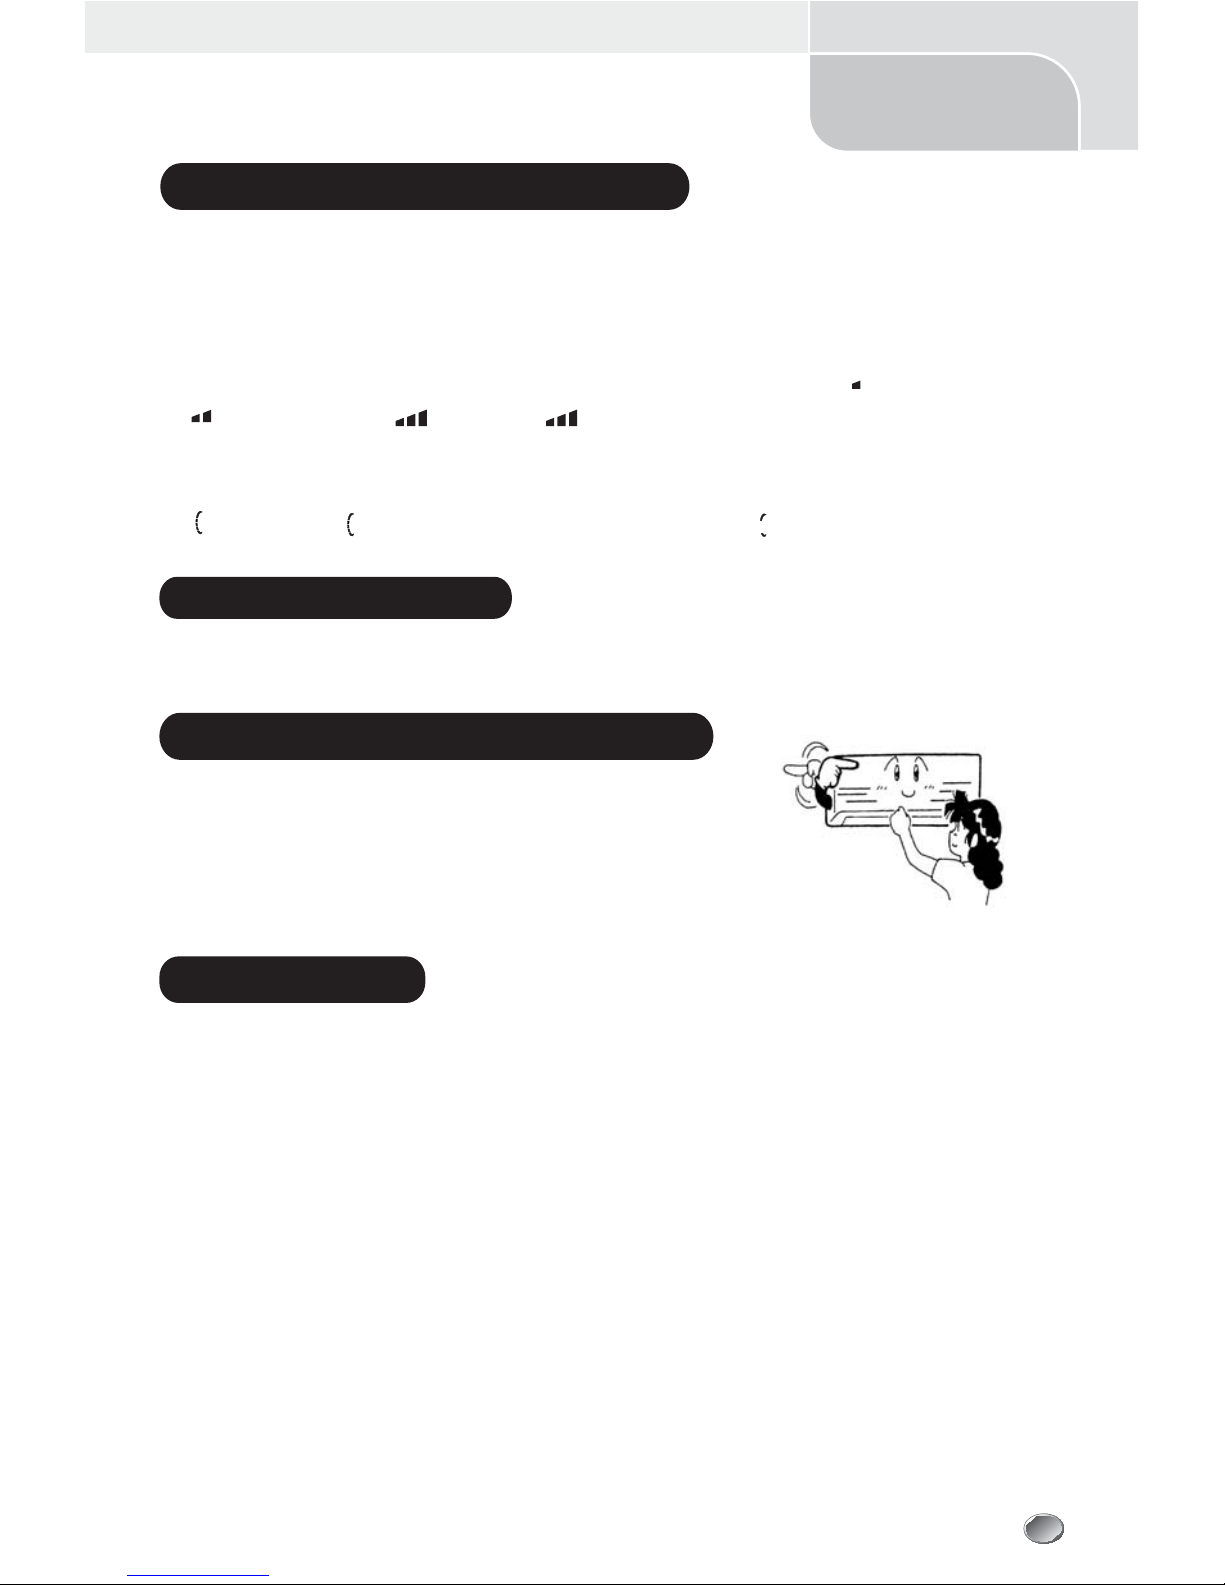
Adjust the air direction correctly.
Properly adjust the up/down and left/right directions
of the air flow so as to get the even room temperature.
Do not use combusting apparatuses
in the air-conditioned room.
It might lead to the incomplete combustion of these
apparatuses.
Do not place insecticides or paints
and other flammable sprays near the
air conditioner, or spray them directly
at the air conditioner.
It might cause fire hazards.
Lack of
oxygen!
When it is necessary to use the air
conditioner and the combusting
apparatuses in the same room, air
ventilation has to be made from time to
time.
Insufficient ventilation might lead to
lack of oxygen or some other dangers.
Prior to the maintenance of the air
conditioner, please cut off the power
supply first. Never do the cleaning of
the units when the fan is in high-
speed operations.
Do not attach, hang or stack articles
on the air conditioner.
It might lead to the falling down of the air conditioner
unit, which will result in accidents or injuries.
Do not clean the air conditioner with
water.
It might cause electric shocks.
Do not use the following substances:
I'm scorched!
Dangerous!
Hot water (over 40
0
C
or 104˚F
)
The use of hot water will deform the air conditioner
or make it fade in color.
Gasoline, paint diluent, benzene and polishing
agents, etc.
These substances will deform the air conditioner
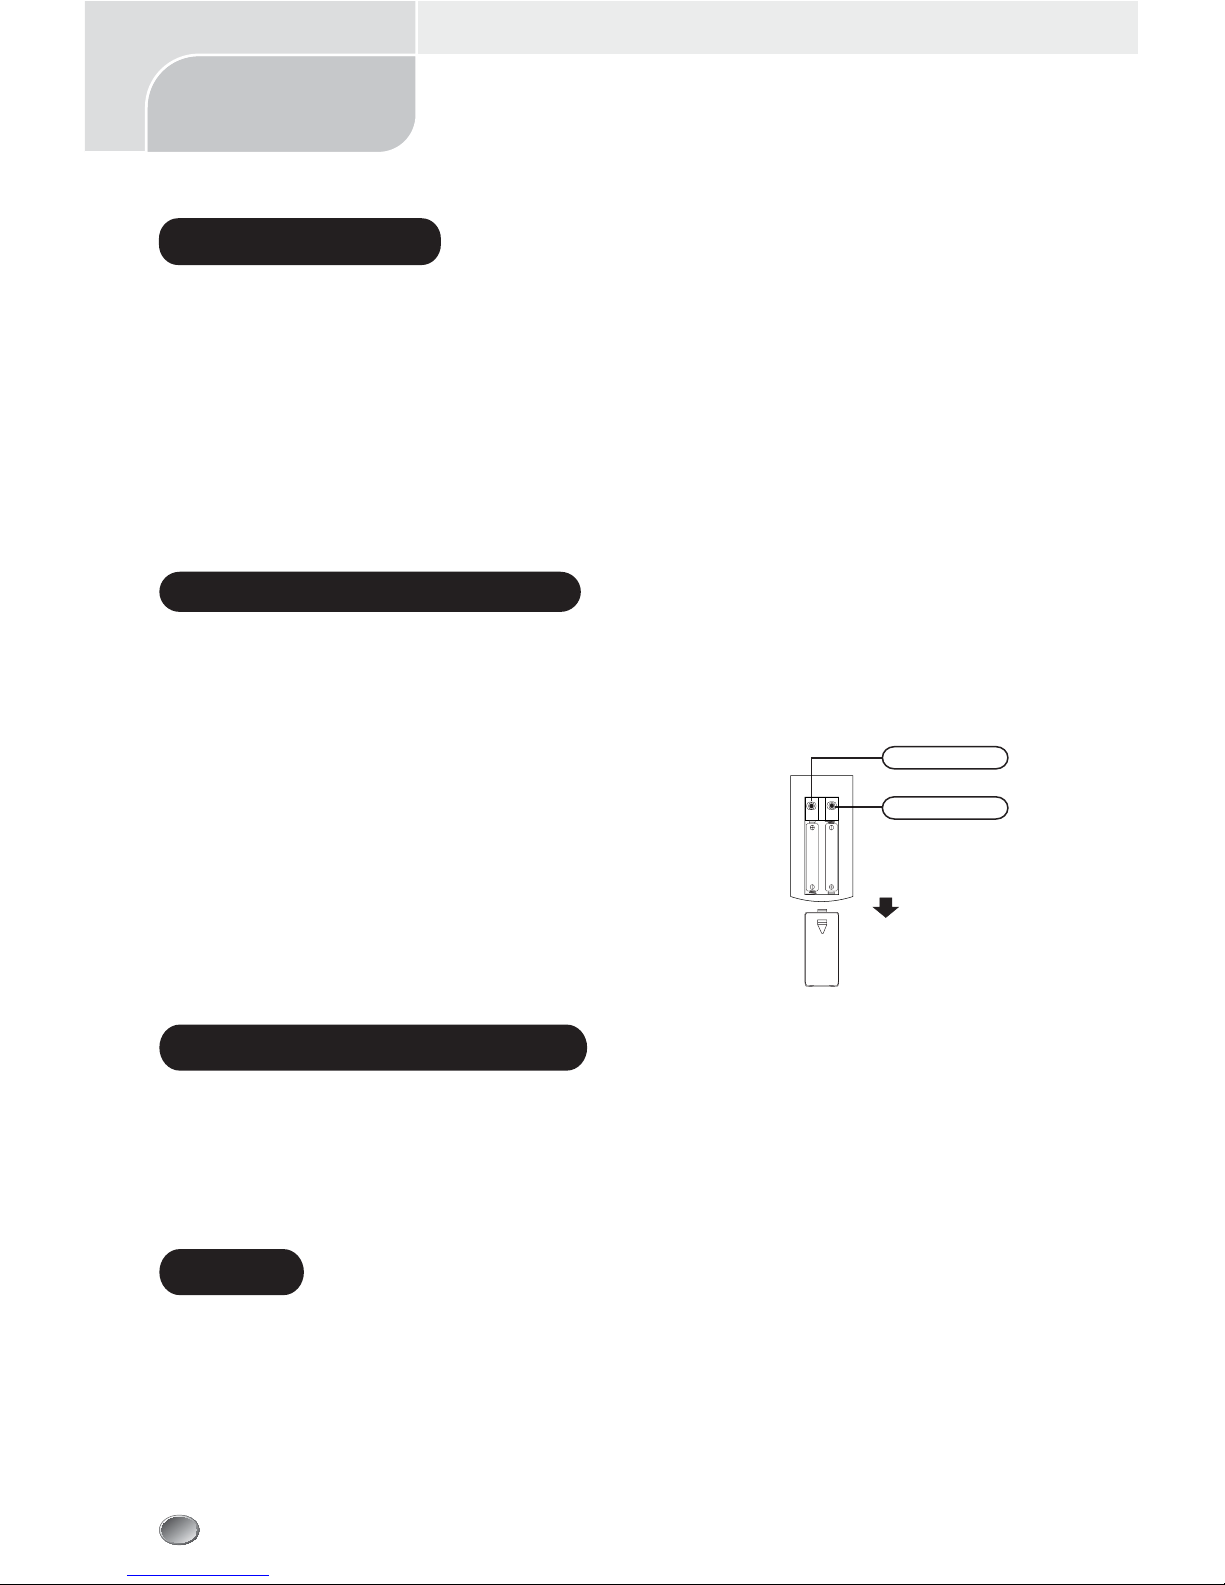
or cause scratches. When the plug is to be pulled out, make sure that
the switch of the air conditioner is turned off.
OFF
OFF
2
USER'S MANUAL
Split Wall-Mounted Air Conditioner

Operational performance/indications
h
h
This button can be used as an emergency measure to turn on/off
unit when remote controller is not available.
Lightly push both sides of the air inlet grid at the
bottom and pull it to this side till a resistance is felt.
3
*
Note: Do not open the grid at an angle over 60 degrees. Do not operate the units with too much force.
*
The name of each part and its function
*
USER'S MANUAL
Split Wall-Mounted Air Conditioner
How to close
Push down the air inlet grid and then push both sides of air inlet
grid at the bottom.
How to open
Unit operation section
Emergency operation key
Air discharge vent
Air inlet
at sides & rear surface Refrigerant piping
connection, Electric
wiring cord
Air blows out from here
Air return grid
Takes in the indoor air
Lelf/right air flow direction
adjusting fin
Air outlet
Air filter
Removes dust or dirt out of the inlet air
Drain the water dehumidified out of the air
Indoor Unit
Up/down air flow direction
adjusting flap
Outdoor Unit
Drain tube

Ch
Dehumidifing
indicator
Cooling
indicator
Heating indicator
(cooling and
heating model)
Auto mode
indicator
Sleeping
indicator
Timer time
indicator
Setting temperature and
malfunction code indicator
Flap swinging
indicator
Indoor fan motor running display
Fan speed indicator
Indications of unit
TIMER ON
COOL DRY HEAT DEF
TIMER OFF
ERROR TIME TEM
AUTO FAN
SET
Operation Panel Display
Defrosting indicator
Room temperature indicator
Operation mode indicator
Timer indicator
Sleeping indicator(when sleep
operation is slected by remote
controller,this indicator will display)
Fan speed indicator
Air flow indicator(when som air flow
direction is slected by remote controller,
this indicator will display)
Setting temperature indicator
H
M
L
AM
PM
RT
In usual,it indicates present time;In timer
operation,it indicates timer time;In failure
operation,it indicates malfunction code.
4
Above figure shows all indications for the purpose of the explanation but practically only the partinent parts are indicated.
The indicator may be changed,but it does not affect your operation.
USER'S MANUAL
Split Wall-Mounted Air Conditioner

PRESENT TIME SETTING PROCEDURE
SET TIMER
DEL
MODE
2
3
4
6
8
7
5
button
567
button
567
8
6
7
6
TIMER ON
COOL DRY HEAT DEF
TIMER OFF
ERROR TIME TEM
AUTO FAN
SET
6
SHUT-OFF TIME OPERATION PROCEDURE
Set the time for the unit to turn off and when it is time,the air conditioner will automatically stop operating.
1.If unit is running,Press TIMER button ,and the display "TIMER OFF"indicator is flickering.
2.Press SET button to enter timer time setting sate ,and press CLOCK +/- button to select the AM
or PM timer time you want,then you can set the time follow as above present time setting precedure
steps 3,4,5,6,7.
57
Operation Panel
5
USER'S MANUAL
Split Wall-Mounted Air Conditioner
TEMP +/- button
Press the +/- button to adjust setting temperature within
a range of 16˚C(61˚F) to 32˚C(90˚F) (It would be
automatically set at 25˚C(76˚F) and unadjustable in
AUTO and DRY mode).
ON/OFF button
To turn the air conditioner ON,press the button.To turn
the air conditioner OFF,press the button again.
FAN SPEED button
Press this button to set air rate you want:HIGH-MED-
LOW-AUTO.(It would be automatically set at LOW speed
and unadjustable in DRY mode)
START TIME OPERATION PROCEDURE
1.If unit is in the standby mode,Press TIMER button ,and the display "TIMER ON"indicator is flickering.
2.Press SET button to enter timer time setting sate,and press CLOCK +/- button to select the AM
or PM timer time you want,then you can set the time follow as above present time setting precedure
steps 3,4,5,6,7.
DEL button
TIMER OPERATION RELEASING PROCEDURE
When the display"TIMER ON" or "TIMER OFF" indicator is flickering(Press TIMER button to enter),at
this time,Press DEL button to cancel shut-off or start time(TIMER ON or TIMER OFF) operation.
1
ON/OFF
H
M
1
MODE button
Press this button,it advances the operation mode as
follows:AUTO-COOL-DRY-FAN(HEAT for cooling and
heating model).It will indicated selected operation mode
on the display.
2
3
4
1.Press SET button and TIMER button together for more than 2 seconds .
2.Press CLOCK +/- button to select the AM or PM present time you want.
3.Press SET button to enter the time setting sate and the HOUR time indicator is flickering.
4.Press CLOCK +/- button to adjust the HOUR time you want.Every time you press,it advances the
time setting as follow:1 Hour*2 Hour *etc.*12 Hours maximum.
5.Press SET button again,and the MIN time indicator is flickering.
6.Press CLOCK +/- button to adjust the MIN time you want.Every time you press,it advances the time
setting as follow:1 Min*2 Min *etc.*60 Mins maximum.
7.Finallly,Press SET button to confirm the present time setting or it will automatically exit the time setting
after 5 seconds.
56
7
5
7
5
7
5
5
8
L
AM
PM
RT

SWING button
This button changes the flap mode:natural
flow ,swing or fixed wind.
ON/OFF button
This button, when pressed starts operation
and stops when repressed.
SET TEMPERATURE button
This button sets the room temperature.
SLEEP button
This button changes to SLEEP operation.
SWING indicator
Indicates selected flap mode.
Temperature indicator
Indicates the set temperature.
FANING indicator
HEATING indicator
DRYING indicator
COOLING indicator
TURBO
HOLD button
Press this button to lock or unlock the
keyboard.
This button used for selection of the left/right
air flow direction,whenever pressed the in
flap will swing or fix(It just works on three-
dimensional air flow model.)
AIR FLOW button(optional)
This button changes the operation mode:
AUTO,COOL,DRY,HEAT,FAN.
FAN SPEED button
This button set air rate.
TIMER button
This button is used to set the switch-on or
switch-off and the timer time.
TURBO button
This button changes to TURBO operation
(It does not work in AUTO,DRY,and FAN
mode.)
TIME indicator
Indicates timer time .
Indicates the seted air rate.
Indicates during sleep operation.
FAN SPEED indicator
AUTO indicator
TURBO indicator
Indicates during TURBO operation.
Key lock indicator
MODE button
SLEEP indicator
SWING
OFF
ON
FAN SPEED
TIMER
HOLD
AIR FLOW
SLEEP
LAMP
MODE
ON/OFF
SWING
FANSPEED
TIMER
HOLD
AIRFLOW
SLEEP
LAMP
MODE
HIPOWER
ON/OFF
OFF
ON
h
USER'S MANUAL
Split Wall-Mounted Air Conditioner
6
NOTE:
*
Above figure shows all indications for the purpose of explanation, but practically only the pertinent parts are indicated.When
air-conditioner is cooling-only model, the HEATis for FAN.
*
When TURBO operation is selected,room temperature is not controlled with operation being continually.If you feel the
room temperature is too cool or too heat,please cancel the TURBO operation.
When each button on the remote controller is pressed with the remote
controller pointing toward the air conditioner unit, signal is sent.
When the signal is received correctly, the receiving sound is emitted
from the unit.
Transmission procedure
*
Operation and indication sections of remote controller
*
This remote controller is the general one used for many types of air-conditioner in our company,we beg your forgiveness
that we would not introduce the button or indicator which is not applicable for units you purchased.The LAMP button is
applicable for special latest developed new models only instead of normal models.

1. During the operation of the air conditioner, press the TIMER button and the air conditioner will enter the timed
switch-off mode.
2. Continuely press the TIMER button to set the needed time for switching off the machine. The timer can make
the setting in the range from 1-24 hours.Every the button is pressed,indication change is the following sequence:
1
*
2
*
........
*
24
*cancel (no indication)*
1.
3. After the setting of the timed switch-off, the digits shown on the display screen will go down by 1 for every elapsed
hour. The displayed digits indicate the remaining time prior to the timed switch-off.
1. When the air conditioner is in the standby mode, press the TIMER button and the air conditioner will enter the
timed switch-on mode.
2.Continuely press the TIMER button to set the needed time for switching on the machine. The timer can make
the setting in the range from 1-24 hours.Every the button is pressed,indication change is the following sequence:
1
*
2
*
........
*
24
*cancel (no indication)*
1.
3. After the setting of the timed switch-on, the digits shown on the display screen will go down by 1 for every elapsed
hour. The displayed digits indicate the remaining time prior to the timed switch-on.
ADJUSTING LEFT/RIGHT AIR FLOW DIRECTION
Methods 1:Manually adjust
OPERATING MACHINE IN SELECTED MODES
1. Point the remote controller at the unit,press the ON/OFF button,then press the MODE button,select the needed
mode: ATUO,COOL,DRY,HEAT,or FAN.
2. Press the SET TEMPERATURE button to increase or decrease the readings until the needed temperaure is
displayed.The room set temperature range is from 16˚C-32˚C(61
˚F-90˚F
).
(It would be automatically set at 25˚C(76
˚F
) and unadjustable in AUTO and DYR mode.)
3. Press the FAN SPEED button to choose the air rate you want:Low(display indicates" "),Med(display indicates
" ",Hi(display indicates" ",Auto(display" "indicator flashing).
(It would be automatically set at low speed and unadjustable in DRY mode.)
4. Press the SWING button to choose the up/down air flow direction you want:natural flow( display indicates
" "),swing(display" " indicator flashing) ,fixed wind(display indicates " ").
(It would be automatically set at fixed wind air flow direction in DRY mode.)
Press TURBO button during COOL or HEAT operation,the air rate can be setted in HIGH .Press the TURBO button
again can release the TURBO operation.
Note: during TURBO operation,the air rate cann’t be changed.
Adjust the direction by moving directly the left/right air flow direction adjusting
fin by hand.
Caution:when adjust the direction,stop air conditioner.
TIMER OPERATION
TURBO OPERATION
7
*
Use of remote controller
*
Set turning off time
Set the time for the unit to turn off and when it is time,the air conditioner will automatically stop operating.
Set turning on time
Set the time for the unit to turn on and when it is time,the air conditioner will automatically start operating.
Methods 2:Horizontal & vertical auto swing(three-dimensional air flow model)
Adjust the direction by remote controller.Press the AIR FLOW button,the air swinging fins will constantly make the left/right
swinging or fixed direction in air delivery.
USER'S MANUAL
Split Wall-Mounted Air Conditioner

Releasing procedure
When the indication on display screen is 24 hour,press the TIMER button again to delete the timed mode.
SLEEP OPERATION
(push the RST button with the tip of a
ball pen,etc)
USER'S MANUAL
Split Wall-Mounted Air Conditioner
8
*
When the signal from the remote controller becomes weak and the
indoor unit can not receive it properly;or the indications on the display
screen becomes blurred,please slide the back cover and replace with
two new batteries.
*
The positive and negative poles must match the installation positions.
*
New batteries of the same type have to be used for replacement.
*
If the remote controller is not to be used for long time,take out the
batteries so as to prevent the leakage of the electrolyte from damaging
the controller.
*
If when the remote controller is at abnormal state,you can take out
the batteries on the back cover or push the RST button to clear off
the display.
REPLACEMENT OF BATTERIES
Use this mode to reduce operation sound when sleeping,etc.
Press the SLEEP button,the air flow sound from the indoor unit is decreased.
Press the SLEEP button again can release the mode.
NOTE:
*
Use the sleep mode when you are going to bed.If this mode is used in the day,the capacity is reduced since the
ambient temperature is too high.(COOL MODE).
*
During the operation of cooling,the room temperature will be raised gradually by 2
0
C(4
˚F
) higher than the setting
after the machine begins to operate in the sleeping mode.
*
During the operation of heating mode,the room temperature will be dropped gradually 5
0
C(9
˚F
) lower than the
setting after the machine begins to operate in the sleeping mode.
*
Features of Heating Operations
*
*
The machines absorb heat from the outdoor air and transfer it indoors so as to heat the room air. The heating
capabilities through this principle of heat pump go up/down with the increase/decrease of the temperatures of the
outdoor air.
*
It only needs a fairly short time for such hot air circulation system to raise the room temperature.
*
When the outdoor air temperature is very low, the system can be used together with other heating devices. But
good ventilation should be maintained to ensure safety and prevent accidents.
Basic principles and performances
Defrosting
When the outdoor air temperature is very low and humidity is very high, frosting will occur to the heat exchanger of
the outdoor unit, which has negative impacts upon the efficiency of the heating performance. In such case, the
automatic defrosting function will come into play. The heating operation will be stopped for 5-10 minutes to do the
defrosting.
*
The fans of both the outdoor and indoor units are stopped.
*
During the defrosting, the outdoor unit might generate some steam. It is caused by fast defrosting, which is
not a performance failure.
*
Upon the completion of the defrosting process, the heating operation is resumed.
RST button
Unload the back Cover
CLK RST
This button let computer reset.
CLK button
It does not work on this model.

Set the temperature at 30
0
C or 86˚F and operate
in the fan status for about half a day.
Stop the operation of the machine and turn off
the power switch.
The air conditioner will consume about 5W of electric
power after the machine is turned off. For the purpose
of energy saving and safety, it is advisable to pull the
plug out during the non-operational seasons.
Clean and install the air filter screen.
Clean the indoor and outdoor units.
Take the batteries out from the remote controller.
Check if there are any blocking materials
in the intake and outlet vents of the indoor
and outdoor units.
Check if the installation stand is corroded
or rusty.
Check if the air filter is clean.
Connect to the power source.
Put batteries in the remote controller.
To make the interior of the units dry
After the season of operation
Check if the machine is
properly grounded.
The cleaning of the air filter screen (Standard intervals should be once every two weeks).
During the season of operation
Note:
If the air filter screen is blocked by dust or dirt, the
performance of cooling and heating will be affected, with
the operation noise and power consumption increased.
Therefore, the air filter screen should be cleaned regularly.
Before the season of operation
Remove the air filter screen from the unit.
*
Gently press the two lower ends of
the grid and open it.
*
Gently pull up the air filter screen and
take it out in the direction of your body.
Clean the air filter screen.
if the screen is very dirty, please use lukewarm water (about
30
0
C or 86˚F) to clean it. Air it dry after the cleaning.
Note:
*
Do not use boiling water to clean the screen.
*
Do not bake the screen dry over a fire.
*
Do not exert too much force in pulling and stretching the screen.
Install the air filter screen.
To operate the air conditioner without the air filter screen on will cause the interior of the
machine dirty which might lead to poor performances or damages to the units.
Clean the air conditioner
*
Use a soft and dry cloth to rub the air conditioner,
or use a vacuum cleaner to clean it.
*
If the air conditioner is very dirty, use a piece of
cloth and soak it with neutral home-use detergent
to do the cleaning.
OFF
9
*
Methods of Maintenance
*
The air conditioner must be turned off power before the maintenance is to be carried
out.
USER'S MANUAL
Split Wall-Mounted Air Conditioner

Shut off the power supply immediately and inform to your distributor in the following situations:
10
*
Treatment at service call
*
USER'S MANUAL
Split Wall-Mounted Air Conditioner

11
*
We hope you will know the
following when using the unit
*
USER'S MANUAL
Split Wall-Mounted Air Conditioner
If the unit is operated for a long period of time with the high
humidity , moisture may form on the air outlet grilles and drip
down .
The unit can not be restarted just after shut down .
( RUN lamp is illuminating )
Not operate
Please wait for
3 minutes .
Three-minute protection timer incorporated in the microcomputer actuates
automatically . Except that power is connected , this function does not
actuate .
Air is not blown out at starting of heating operation.
Air blow is stopped to prevent blowing out of cold air
until the indoor heat exchanger is warmed .( 2 to 5 min )
( HOT KEEP)
Air is not blown out for 6 to 12 min , at heating operation .
When outdoor temperature is low and humidity is high , the unit
sometimes performs defrosting automatically . Please wait . During
defrosting , water or steam are raising from the outdoor unit .
Air is not blown out at DRY operation . Indoor fan is sometimes stopped to prevent vapor of dehumidified
moisture and save energy .
Mist is blown out at COOL operation .
This phenomenon sometimes occurs when the temperature and
humidity of the room are very high , but it will disappear with the
lowering of the temperature and humidity .
Odor is sent out . Air blown out during operation may smell . This is the smell
of tobacco or cosmetics sticked to the unit .
Noise is heard cracking sound . This is caused by the refrigerant that is circulating inside the unit.
Operation can not be restarted even if the power is recovered.
Noise is heard cracking sound .After a power stoppage or after
disconnecting the power supply plug.
The memory circuit of the microcomputer is cleared. Operate
the remote controller again to restart the operation .
Remote control signals are not received .
Remote control signals may not be received when signal receiver
on the air conditioner body is exposed to direct sunlight or strong
lighting . In that case , interrupt the sunlight or darken the lighting.
Moisture may form on the air outlet grilles .
Restart is stopped for 3 minutes after shut down to protect
the unit .
This is caused by heat expansion or contraction of plastics.
The unit will not stop blowing out the air immediately after shut
down at COOL operation(some model).
Because the unit is doing mould proofing operation and indoor
fan motor runs at low speed .The louver will not close down until
after 30 seconds.

Pridiom Group LLC
80 Broadway
Cresskill, NJ 07626
201-266-8232
This manual suits for next models
4
Table of contents
Other Pridiom Air Conditioner manuals

Pridiom
Pridiom POM273HX User manual

Pridiom
Pridiom AWS090HR Use and care manual

Pridiom
Pridiom AWOS090HR User manual

Pridiom
Pridiom AWS090HR User manual

Pridiom
Pridiom AOS090HR User manual

Pridiom
Pridiom PCM123HX User manual

Pridiom
Pridiom POS097EL User manual

Pridiom
Pridiom CS406-U User manual

Pridiom
Pridiom A:1084 User manual

Pridiom
Pridiom PMS121CL User manual