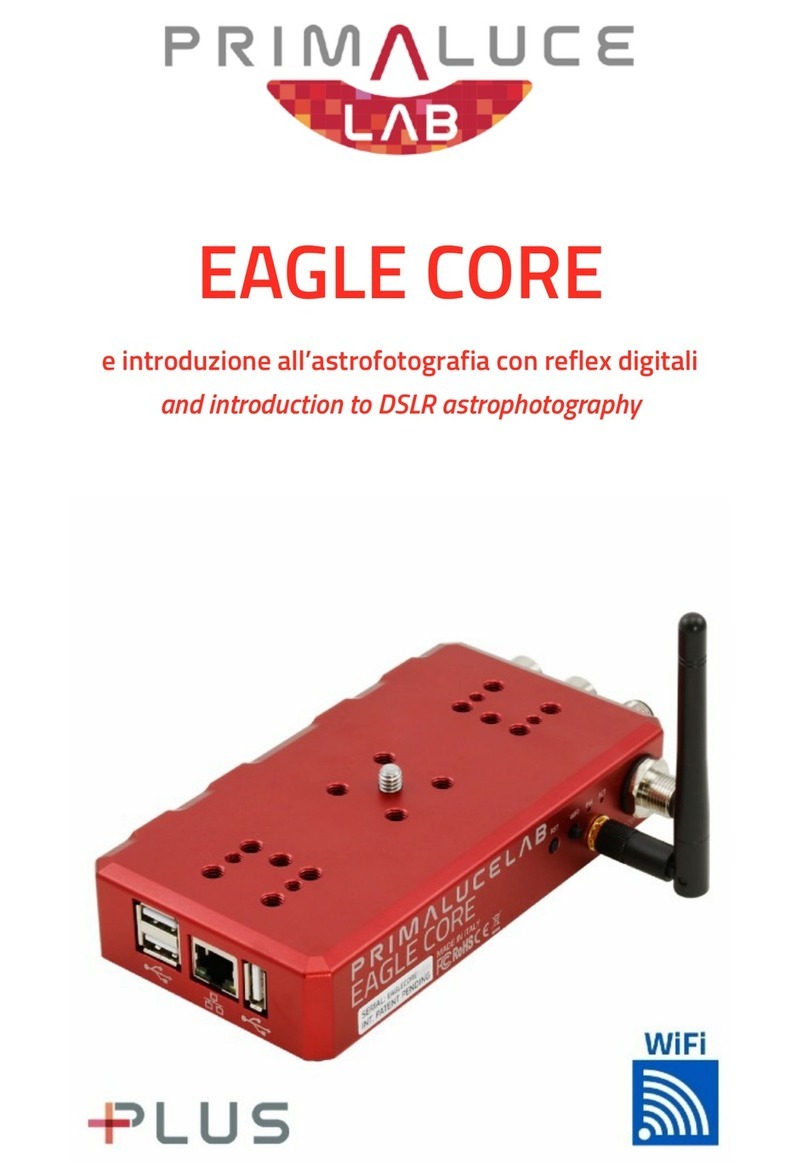
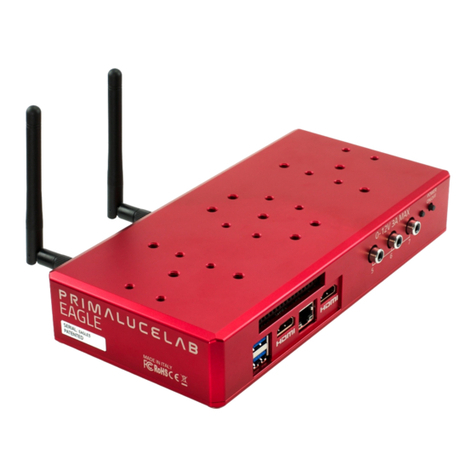
PrimaLuceLab EAGLE LE User manual

VERSION 1.0
Update 08-05-2021
EAGLE is manufactured by PrimaLuceLab S.p.A. (Italy). For any matters relating to the use, service and warranty,
please refer to the addresses given in the relevant documents.!
PrimaLuceLab S.p.A. • Via Roveredo 20/B, 33170, Pordenone • www.primalucelab.com
EAGLE LE
control unit for telescopes and astrophotography

PrimaLuceLab S.p.A. EAGLE LE User Manual
English
CAUTION: To avoid danger of electric shock and malfunction, do not expose EAGLE to rain or moisture. The elec-
tronics are not waterproof so in adverse weather like rain or snow, the EAGLE is not to be used outdoors.
PLEASE NOTE: EAGLE is designed to control telescopes and accessories for astronomy and is not a standard
computer. Please do not modify EAGLE system settings since this could stop some of the EAGLE features. Addi-
tionally, operating system updates are not required if your EAGLE does not connect to the internet.
FIRST CONNECTION: For wireless connectivity, EAGLE creates a WiFi network at the same frequency as those of
usually modems / routers used to connect to the internet. So if you use EAGLE at home (for example the first time,
to install your software) you might notice a low signal or, in some cases, have connection problems. You can move
it to an area with fewer WiFi connections or connect it to a monitor (HDMI), keyboard (USB) and mouse (USB) to
install your software.
WINDOWS: EAGLE includes a computer with Windows OS. For any reference on how to use Windows, please
refer to the operating system user manual.
QUALITY CONTROL: After assembly in our laboratories, every EAGLE unit, is tested by PrimaLuceLab technical
experts to verify the correct operation of all components = the integrated computer, stability and speed of the wire-
less connection and the power bridge.!
"
pagina 1
CAUTION: in order to connect EAGLE to other mechanical PLUS elements please
avoid to use too long screws that may touch the internal electronics of the EAGLE. THE
THREADED PART OF THE SCREW THAT EXIT FROM THE ELEMENT (ring, bar or
clamp) TO BE CONNECTED TO THE EAGLE HAS TO BE NO LONGER THAN 6mm.
If any of the screws touches the internal elements of EAGLE, this could lead to breaka-
ge or malfunction.
CAUTION: EAGLE must be powered with 12V regulated voltage. You can use a power supply with 12V output
voltage or a field battery. If you use a battery, this MUST be provided with a proper voltage stabilization. In case
of any malfunction, immediately unplug the power supply. DO NOT CONNECT TO THE EAGLE A BATTERY
WITHOUT 12V VOLTAGE REGULATOR since it may damage the other instruments powered by EAGLE (like the
cooled camera). Immediately disconnect power supplies or battery if there’s any malfunction of the unit.
CAUTION: Before installing your devices driver and your astronomy software in the Windows operating
system of the EAGLE, PLEASE CREATE A BACKUP COPY OF YOUR SSD DISK by following the instruc-
tions you find at paragraph “First use: backup your SSD drive before installing your software” of this
user manual.

PrimaLuceLab S.p.A. EAGLE LE User Manual
Index
Components Identification 4
First use: how to choose the correct power source 5
First use: switch on and activation of wireless network 6
First use: Setting remote control with iPhone or iPad 10
First use: Setting remote control from a Windows computer 14
First use: Setting remote control from a Mac computer 16
First use: Setting remote control from an Android device 20
First use: backup your SSD drive before installing your software 24
First use: install your software 29
First use: turn off EAGLE 30
First use: installing EAGLE on the telescope 31
First use: powering other instruments connected to the EAGLE 34
First use: remotely control devices with EAGLE Manager 36
- connect or disconnect every power out port of EAGLE 38
- set power out voltage of the 3 power out ports with adjustable voltage 39
- connect or disconnect devices attached to the 4 USB 2.0 ports 40
- check for power in voltage and battery lifetime 40
- set WiFi connectivity 41
-remotely turn on/off the entire telescope 43
- change the password of the WiFi network created by EAGLE 44
- DARK mode 45
Advanced use: EAGLE ASCOM drivers 46
Advanced use: program connection and power to devices 47
Advanced use: remotely turn on EAGLE with wired connection 48
Advanced use: configure EAGLE to automatically start when power is restored 52
Controlling the telescope remotely with Cartes du Ciel 54
Autoguiding with PHD2 Guiding 61
Drift Alignment using PHD Guiding 66
"
page 2

PrimaLuceLab S.p.A. EAGLE LE User Manual
WARNING
If improperly handled, EAGLE may be damaged, so please follow the instructions below:
•Do not disassemble
•Do not open, damage or subject to electric shock or excessive impact any part of EAGLE. Do not drop.
•Do not short the electronic elements
•Do not expose at temperatures above 50°C
•Do not burn or incinerate any component.
•Do not wet any electronic or electric component
•Do not bend, modify or force any part of EAGLE
NOTICE In case you check any malfunction, please contact us immediately (+ 39-0434-1696106 or sup-
[email protected]). Do not try to disassemble, repair or modify yourself EAGLE, without our written
approval, in order not to loose the manufacturer warrantee.!
Q & A 74
Add EAGLE’s ports control in external software 76
Troubleshooting 79
"
page 3

PrimaLuceLab S.p.A. EAGLE LE User Manual
Components Identification
The numbers indicate the name of the specific component. Read the paragraphs below for detailed operation de-
scription.
!
"
page 4
Power IN 12V
HDMI port for external monitor
3
4
n.2 USB 3.0 ports
5
n.2 USB 3.0 ports
7
On / Off switch
8
n.4 12V power OUT
2
Network port
n.4 USB 2.0 ports
WiFi Antenna
1
6
n.3 power out ports with regulated voltage
9
10
Status LEDs
11

PrimaLuceLab S.p.A. EAGLE LE User Manual
First use: how to choose the correct power source
EAGLE allows you to distribute power to many devices used in telescopes astrophotography (such as mount, ca-
mera, filter wheel, electronic focuser, dew heaters, etc.), thus eliminating the need for many different power sup-
plies. Since the EAGLE allows you to have a single power source (battery or AC adapter), it’s important to select
the correct power source to properly power all the devices you want to use.
Which battery or power supply have I to use for my equipment?
The power supply or battery you need to use to power the EAGLE and all peripherals connected to it depends on
the electric current needed to power all the instruments plus the EAGLE. Let’s make an example by considering the
EAGLE basic model, that needs for an average of 0,6 Ah:
- EAGLE: 1,2Ah maximum consumption (average consumption: 0,6Ah)
- Cooled camera: 4Ah maximum consumption (average consumption: 3Ah)
- Computerized mount: 2Ah maximum consumption (average consumption: 1Ah)
- Guide camera: 0 consumption (power from the USB port of EAGLE)
We’ll have a total maximum power consumption: 7,2Ah. So, for this setup, you should use the 14A AC adapter. If
you want to use a battery (WARNING: The battery must have a 12V voltage regulator with protection system) that
can power the entire system for 8 hours (for example for the duration of an astronomical night), you will need a bat-
tery with a capacity of at least:
7,2Ah (consumption per hour) x 8 (hours duration) = 57,6 Ah
!
"
page 5
CAUTION
EAGLE must be powered with 12V regulated voltage. You can use a power supply with 12V output voltage or a
field battery. If you use a battery, this MUST be provided with a proper voltage stabilization. In case of any mal-
function, immediately unplug the power supply. DO NOT CONNECT TO THE EAGLE A BATTERY WITHOUT
12V VOLTAGE REGULATOR since it may damage the other instruments powered by EAGLE (like the cooled
camera). Immediately disconnect power supplies or battery if there’s any malfunction of the unit.
TIP
When many devices are powered through the EAGLE (and Ampere consumption exceeds 5Ah) we re-
commend the use of a power supply or battery with voltage regulator set to 12.8V volts instead of 12V.
This is because, when you distribute power to many devices and you have an high power consumption,
there’s a normal and small voltage drop: by setting your source at 12.8V, you will have a voltage of 12.xV
in the EAGLE’s power out ports and this will be fine with all your 12V powered devices. The important
thing is to have the voltage not lower than 12.0V. In order to create a large capacity field battery and have
a voltage of 12.8V, you can connect to the battery a 220V inverter and then connect to this the standard
12.8V 12A AC adapter for EAGLE.

PrimaLuceLab S.p.A. EAGLE LE User Manual
First use: switch on and activation of wireless network
EAGLE is designed to be controlled from an external device (not included with EAGLE) via WiFi. You can use any
mobile device (tablet or smartphone) with any operating system (iOS or Android) or any computer (Windows or
macOS). For remote control, you will need to download the “Microsoft Remote Desktop” app onto the device
(smartphone, tablet, or computer) that you will use to control your EAGLE. Depending on the App Store for your
system, the application can also be found under the name “RD Client Microsoft”. The Remote Desktop client is
free and compatible with all operating systems - iOS, Android, Windows and macOS. As an alternative, you can
also use the “Parallels RDP Client” that is free and available for different operating systems.
Install the 2 WiFi antennas (9) included in the package by threading them onto the the proper ports on the side of
EAGLE with the status LEDs.
In order to power EAGLE with a 12V battery equipped with a cigarette lighter socket, use the 12V cable with ciga-
rette lighter socket that you find in the EAGLE package. Insert the power cable (image 2) into the appropriate soc-
"
page 6
Image 1: thread the WiFI antennas to the proper ports

PrimaLuceLab S.p.A. EAGLE LE User Manual
ket (1- 12V power input), you will hear a beep sound and the PW LED light will turn on. If you want to power EA-
GLE from the 110/220V wall plug, replace the power cable with the optional 12.8V power supply. Then press the
power button (7). The ON LED will light up and the SSD LED will start blinking, this means Windows is booting.
"
page 7
Image 2: Connect the power plug into the socket (1)
Image 3: press the Start button (7) to switch EAGLE on

PrimaLuceLab S.p.A. EAGLE LE User Manual
Now wait about one minute and you will hear a second beep sound. This indi-
cates that the EAGLE’s WiFI connection is ready. On the side of the EAGLE
case you will see the STS LED light turn green, this means that Windows has
booted correctly. Turn on your WiFi device you choose to control EAGLE. The
network name is EAGLEXXXXXX (where the XXXXXX is the serial number of
your EAGLE as written also is also on the EAGLE’s case).
Look at the list of WiFi networks shown on your device (identification mode of
wireless networks depends on the control device you use, so if you do not
know how to search for WiFi networks, please read the manual of your device)
and select the network created by EAGLE (picture 4).
A window will appear where you will be asked to enter the password of your
network (image 5). The password is primalucelab. Using the keyboard (virtual
or physical) of your device, enter the password paying attention to appropriate
upper or lower case. Then press the CONNECT.
(Note: Each EAGLE has a different Windows login password known only to
you; the password is shown on the EAGLE quick guide that you find in
the box. This way it is safe to use your EAGLE at a star party where other
EAGLE users might be present).
"
page 8
Image 4: select the WiFi net crea-
ted by EAGLE
Image 5: insert network password

PrimaLuceLab S.p.A. EAGLE LE User Manual
Then EAGLE WiFi network connection is confirmed (image 6). The network
setting is complete and the next time you want to access the EAGLE you will
no longer need to enter your password: your device will connect automatically
when you select the network created by EAGLE.
!
"
page 9
Image 6: connection to WiFi network.
NOTE
On Windows operating systems, when you select EAGLE’s WiFi network, you may be requested to insert a “PIN
from the router label”. Please click on the “Connect using a security key instead” and then type the password
“primalucelab”.

PrimaLuceLab S.p.A. EAGLE LE User Manual
First use: Setting remote control with iPhone or iPad
This guide has been written by using an iPhone with iOS 13.6 and
Microsoft Remote Desktop client 10.1.2 (and it has been tested
also with iPad using iPadOS 13.6 and Microsoft Remote Desktop
client 10.0.6). From the App Store of your iPhone/iPad, please
search and install the "Microsoft Remote Desktop" app. If you do
not know how to install the app from the App Store, please read
the manual of your iPhone/iPad.
Start the "Microsoft Remote Desktop" app. You will see a screen like the one
visible in the image 7. Click the + button (top-right), then select “Add PC".
In the window that opens, in "PC name" enter 192.168.137.1
Then select the “User Account" field and
choose "Add user account". A window will
open (picture 8) where you can enter your
username and password to log on to Win-
dows.
The values are:
- Username: PrimaLuceLab;
- Password: (that shown on the quick guide
in the EAGLE box)
Then press the button "Save" to save the
access data.
WARNING: when entering your data
check that your device does not automati-
cally insert a space after the word "user-
name" and "password".
Then (image 9), select the option “Admin Mode” and press the "Save" button
to confirm and save the access data.
"
page 10
Image 9: Press “Save” to confirm
access data.
Image 8: Insert User name and
Windows access password.

PrimaLuceLab S.p.A. EAGLE LE User Manual
Returning to the main page you will find a new connection (picture 10). Tap on it
and wait a few seconds, you’ll see on your device's desktop EAGLE (image 11).
Now can use the screen of your iPhone or iPad like mouse and keyboard of EAGLE. There are two modes of use,
that can be selected by pressing the central-up button (between the magnifying glass and the keyboard) to see the
options. By default, the app works in "mouse" mode to display the classic Windows pointer that you can move with
your finger and click on the icons and buttons visible on the screen. Instead, if you want to use the touch mode (as
you usually do with tablets or smartphones), click the central button at the top (image 12) and select the hand but-
ton (the icon next to the house).
To simulate a single mouse click (like pressing the left button of the mouse) just "tap" on the screen. To simulate the
right mouse button, place a finger on the screen (and do not move it), and then "tap" with another finger to make
options appear.
NOTE: You can also use another Remote Desktop client, the “Parallels Client” (you can download from the
App Store). This client has to be set as the Microsoft one, the only difference is that this will ask also the
Port number, please set it to 3389.!
"
page 11
Image 10: Select the created link
Image 11: EAGLE start screen
Image 12: By clicking the central-top button
(between magnifier and keyboard), you will see
the options.
Image 13: By clicking the hand button (the icon
close to the house), control will turn in touch-
screen mode

PrimaLuceLab S.p.A. EAGLE LE User Manual
"
page 12
NOTE
After being connected to the EAGLE's WiFi, I start a Remote Desktop connection but I
get an error “Unable to connect”. How can I fix this?
This error may happen if your iPhone or iPad doesn't have an internet connection, for example when (or if) it
doesn't have a 4G connection. In this case, please proceed this way:
1) In the iPhone/iPad please go to Settings > Wifi, and select your EAGLEXXXXXX network. Once selected, tap
on the “i” icon to the right.
2) Next tap on “Configure DNS” and change the selection from “Automatic” to “Manual”, and tap on “Add
server”. Here you type the IP address of your EAGLE (192.168.137.1) as the DNS server. Press the “Wi-Fi”
blue text on the top to confirm.

PrimaLuceLab S.p.A. EAGLE LE User Manual
"
page 13
3) With the IPv4 address and DNS settings configured manually, the Remote Desktop should work correctly.
Please launch again the Microsoft Remote Desktop app and start the connection.

PrimaLuceLab S.p.A. EAGLE LE User Manual
First use: Setting remote control from a Windows computer
This guide has been written by using a Windows
10 Home and Microsoft Remote Desktop client
10.1.1215.0 and it has been tested also with a
computer running Windows 10 Pro. From the Mi-
crosoft Store of your computer, please search
and install the "Microsoft Remote Desktop" app.
If you do not know how to install the app from the
Microsoft Store, please read the manual of your computer.
Thanks to the remote control app, you have the EAGLE with
all your software on your device screen. Start the "Microsoft
Remote Desktop" app. You will see a screen like the one visi-
ble in the image 14. Click the + button (top-right), then select
“Desktop".
In the window that opens, in "PC name" enter 192.168.137.1
Then select the “User Account" field and choose "Add user account".
A window will open (picture 15) where you can enter your username
and password to log on to Windows.
The values are:
- Username: PrimaLuceLab;
-Password: (that shown in the flyer in the EAGLE box)
Then press the button
"Save" to save the access data.
WARNING: when entering your data check that your device
does not automatically insert a space after the word "userna-
me" and "password".
Then (image 16), select the option “Connect to admin Mode”
and press the "Save" button to confirm and save the access
data.
Returning to the main page you will find a new connection (pic-
ture 10).
"
page 14
Image 14: Press the + button to add the parameters
to access your EAGLE.
Image 16: Press “Save” to confirm access data.
Image 15: Insert User name and
Windows access password.

PrimaLuceLab S.p.A. EAGLE LE User Manual
Double click on the connection and you will be connected to the EAGLE Manager (image 18). Now you are ready
to use the software you prefer to control your telescope.
NOTE: You can also use another Remote Desktop client, the “Parallels Client” (you can download from
here https://www.parallels.com/products/ras/capabilities/rdp-client/). This client has to be set as the Mi-
crosoft one, the only difference is that this will ask also the Port number, please set it to 3389.!
"
page 15
Image 17: Select the created link
Image 18: EAGLE start screen

PrimaLuceLab S.p.A. EAGLE LE User Manual
First use: Setting remote control from a Mac computer
This guide has been written by using a macOS
Catalina 10.15.6 and Microsoft Remote Desktop
client 10.4.0 (1811). From the Mac App Store of
your computer, please search and install the "Mi-
crosoft Remote Desktop" app. If you do not
know how to install the app from the Mac App
Store, please read the manual of your computer.
Thanks to the remote control app, you can have your EAGLE
with all your software right on your device’s screen. Start the
"Microsoft Remote Desktop" app. You will see a screen like
the one visible in the image 19. Click the + button (top-right),
then select “Add PC".
In the window that opens, in "PC name" enter 192.168.137.1
Then select the “User Account" field and choose "Add user account".
A window will open (picture 20) where you can enter your username
and password to log on to Windows.
The values are:
- Username: PrimaLuceLab;
-Password: (that shown in the flyer in the EAGLE box)
Then press the button "Save" to save the access data.
WARNING: when entering your data check that your device
does not automatically insert a space after the word "userna-
me" and "password".
Then (image 21), select the option “Connect to an admin ses-
sion” and press the "Add" button to confirm and save the ac-
cess data.
Returning to the main page where you will find your new con-
nection (picture 22).
"
page 16
Image 19: Press the + button to add the parameters
to access your EAGLE.
Image 20: Insert User name and
Windows access password.
Image 21: Press “Add” to confirm access data.

PrimaLuceLab S.p.A. EAGLE LE User Manual
Double click on the connection and you will be connected to the EAGLE Manager (image 23). Now you are ready
to use the software you prefer to control your telescope.
NOTE: You can also use another Remote Desktop client, the “Parallels Client” (you can download from
here https://www.parallels.com/products/ras/capabilities/rdp-client/). This client has to be set as the Mi-
crosoft one, the only difference is that this will ask also the Port number, please set it to 3389.!
"
page 17
Image 22: Select the created link
Image 23: EAGLE start screen

PrimaLuceLab S.p.A. EAGLE LE User Manual
"
page 18
NOTE
After being connected to the EAGLE's WiFi, I start Remote Desktop connection but I get
an error “Unable to connect”. How can I fix this?
This error may happen if your Mac is not connected to the internet. In this case, we must configure a manual IP
address on your Mac, when connected to the EAGLE. To be able to switch between network configurations easi-
ly/cleanly on a Mac, you should create a location for your EAGLE, and switch between locations under the Apple
menu. To create a location, do the following:
1) Open System Preferences, and go to “Network” - once there, select the pull-down menu next to “Location”.
Select “Edit Locations”. Click on the “+” symbol; to create a new location, and give it a name in the field pro-
vided.
2) Next, select the name of the WiFi network of your EAGLE. With the network selected, click “Advanced”. Click
on the “TCP/IP” tab, and click on the pulldown menu for “Configure IPv4” to change from “Using DHCP” to
“Manually”. With “Manually” selected, you must enter a valid IP address for the network of your EAGLE. The
IP address of your EAGLE’s AP interface is 192.168.137.1. An address must be selected in the same net-
work range, and it must be unique. This is done by changing the last “octet” of the network address. Your
EAGLE ends in “.1” You can select any other address starting with “.2, and going to “.254”. Remember if you
have multiple devices accessing your EAGLE, you should choose and assign a unique IP to each device. In
this example, I have chosen “.102” - so the IP address I have configured is “192.168.137.102. Configure the
netmask and router as shown. The router is the IP address of your EAGLE.

PrimaLuceLab S.p.A. EAGLE LE User Manual
"
page 19
3) Next, click on the “DNS” tab. Under “DNS Servers” click the “+” symbol to add a server, and again, use the
IP address of your EAGLE, like the example above. When done, click OK. Click Apply. Switch to the new
location you created under the Apple menu > Location > (your location name).
4) Check that now your Mac is connected to the EAGLE’s WiFi and start the Remote Desktop connection.
If you still have the same error, this could be related to the access data saved in your Mac memory. In order to
delete previous saved access data, please enter the “Keychain” and type, in the upper-right field, the name of
your EAGLE’s WiFi network. Then select all the results, make a right mouse click and select Delete All.
This will remove all the access data saved related to your EAGLE’s WiFi network. Please connect again to the
EAGLE’s WiFi (you will be requested to enter again the “primalucelab” password) and start the Remote Desktop
connection to your EAGLE.
Table of contents
Other PrimaLuceLab Control Unit manuals
