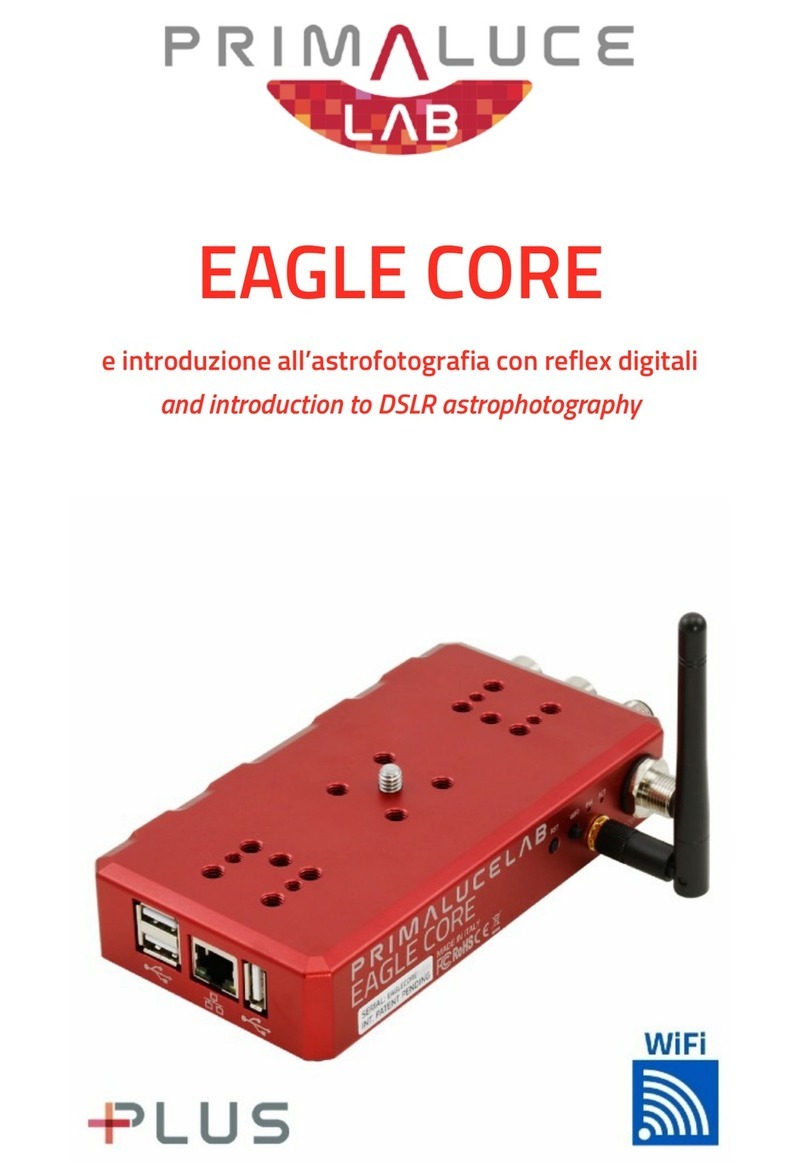
PrimaLuceLab EAGLE CORE PLUS User manual

VERSION 2.10
Update 03-03-2021
EAGLE CORE is manufactured by PrimaLuceLab S.p.A. (Italy). For any matters relating to the use, service and
warranty, please refer to the addresses given in the relevant documents.!
EAGLE CORE
control unit for astrophotography with DSLR and mirrorless camera
PrimaLuceLab S.p.A. • Via Roveredo 20/B, 33170, Pordenone • www.primalucelab.com

PrimaLuceLab S.p.A. EAGLE CORE User Manual
English
Thanks for purchasing EAGLE CORE, the wireless control unit that makes fast and easy astrophotography with
DSLR or mirrorless cameras. In the first part of this manual you will find all the explanations on how to use EAGLE
CORE. In the second part you will find a guide on how to start astrophotography using EAGLE CORE with
telescopes and photo lenses.
CAUTION: To avoid danger of electric shock and malfunction, do not expose EAGLE CORE to rain or moisture.
The electronics are not waterproof so in adverse weather like rain or snow, the EAGLE CORE is not to be used
outdoors.
FIRST CONNECTION: For wireless connectivity, EAGLE CORE creates a WiFi network at the same frequency as
those of usually modems / routers used to connect to the internet. So if you use EAGLE CORE at home (for
example the first time, to install your software) you might notice a low signal or, in some cases, have connection
problems.
QUALITY CONTROL: After assembly in our laboratories, every EAGLE CORE unit, is tested by PrimaLuceLab
technical experts to verify the correct operation of all components = the integrated computer, stability and speed of
the wireless connection and the power bridge.
For any questions regarding use, service, and warranty, please refer to the addresses provided in the relevant
documents. Canon, Nikon, SolidEdge, Simulation Curriculum, SkyWatcher, and Celestron trademarks belong to the
legitimate owners and have been used for the sole purpose of explaining and for the benefit of the user in this
manual without any violation of the applicable Copyright laws.!
page 2
CAUTION: in order to connect EAGLE CORE to other mechanical PLUS elements
please avoid to use too long screws that may touch the internal electronics of the EAGLE
CORE. THE THREADED PART OF THE SCREW THAT EXIT FROM THE ELEMENT
(ring, bar or clamp) TO BE CONNECTED TO THE EAGLE HAS TO BE NO LONGER
THAN 6mm. If any of the screws touches the internal elements of EAGLE CORE, this
could lead to breakage or malfunction.
CAUTION: EAGLE must be powered with 12V regulated voltage. You can use a power supply with 12V output
voltage or a field battery. If you use a battery, this MUST be provided with a proper voltage stabilization. In case
of any malfunction, immediately unplug the power supply. DO NOT CONNECT TO THE EAGLE CORE A
BATTERY WITHOUT 12V VOLTAGE REGULATOR since it may damage the other instruments powered by
EAGLE CORE. Immediately disconnect power supplies or battery if there’s any malfunction of the unit.
CAUTION: EAGLE CORE is 12V powered but it can be powered with a voltage from 9V to 16V. Caution: the
voltage of the output power ports depends strictly on the input voltage. If any of the devices powered by EAGLE
CORE is supplied with a voltage other than the one provided, there may be malfunctions or damage. We
recommend to power EAGLE CORE via an external 12V power supply or a battery. If you use an external battery,
this MUST be equipped with a special voltage stabilizer. Immediately disconnect power supplies or power supply
if you have any malfunction of the unit.

PrimaLuceLab S.p.A. EAGLE CORE User Manual
INDEX
Quick guide 4
Scope of delivery and parts identifications 4
First use: power on and wireless network activation 5
How to connect to EAGLE CORE using an iOS device (iPhone or iPad) 6
How to connect to EAGLE CORE using an Android device 7
How to connect to EAGLE CORE with a PC or Mac 8
Before using EAGLE CORE: set your camera 9
EAGLE CORE App: EAGLE CORE control interface 9
“Guiding” tab 9
“Acquisition” tab 10
EAGLE CORE advanced settings 10
SESTO SENSO settings 11
Delay Time [s] 11
Dithering with EAGLE CORE 12
EAGLE CORE access password modification 12
Updating EAGLE CORE 13
Control the computerized equatorial mount connected to EAGLE CORE 14
Install EAGLE CORE on a telescope or use with a telephoto lens 16
Connection to camera with telephoto lens. 16
Connection to telescopes with PLUS support rings (spaced up to 12cm) 18
Connection to telescopes with PLUS support rings (spaced more than 12cm) 18
Connection to telescopes without PLUS support rings 19
Power other instruments through EAGLE CORE 20
Introduction to astrophotography with DSLR and mirrorless cameras 22
Planetary/lunar and deep-sky astrophotography 22
Astrophotography with telephoto lens or telescope? 23
Mount and sky objects tracking 25
Connecting DSLR or mirrorless camera to telescopes 26
Before starting to photograph: light pollution and power 27
Astrophotography with EAGLE CORE, step-by-step guide 28
Step 1: align the mount to Pole 28
Step 2: align the mount to the stars 30
Step 3: point the object to record 30
Step 4: focus DSLR or mirrorless camera 30
Step 5: start the autoguide 31
Step 6: advanced autoguide settings (optional) 33
Step 7: record pictures with DSLR or mirrorless camera 34
Questions and answers 36
Recommended accessories for EAGLE CORE 37
Troubleshooting 38
page 3

PrimaLuceLab S.p.A. EAGLE CORE User Manual
Quick guide
For EAGLE CORE operation, it is essential to correctly set the DSLR or mirrorless camera, the equatorial mount
and the autoguide camera. This table summarizes what needs to be set, please read the following paragraphs of
this manual before using EAGLE CORE with your telescope.
Scope of delivery and parts identifications
1) EAGLE CORE control unit
2)"12V power cable with cigarette plug for Eagle (length 110cm)
3)"4 M6x12 screws, 4 M6x8 screws
4) Quick guide
The numbers indicate the name of the component listed below. Read the following paragraphs for details on
operation.
!
DEVICE:
HOW TO SET:
DSLR or mirrorless camera:
- M (or B if present) mode.
- Manual focus if you use a telephoto lens instead of a telescope.
- used with a free memory card (we suggest to format the memory
card before use with EAGLE CORE).
- set without auto noise removal (auto dark).
- set without mirror lock up.
- set without automatic rotation of the image
Equatorial mount:
- Corrected aligned to the Pole.
- Aligned to the stars and with automatic tracking active.
- Correct weight balance.
Autoguide system:
- Autoguide camera connected to ST4 port of the mount.
Power system:
- Battery 12V fully charged and with sufficient capacity to power the
entire telescope for many hours or power supply.
page 4
1) Wi-Fi antenna
2) N°2 USB 2.0 ports
3) Ethernet port
4) N°1 USB 2.0 port
5) 12V 3A power out port
6) 12V 3A power out port
7) 12V 5A power out port
8) 12V power in port
9) “PW” LED signal
10) “ACT” LED signal
11) “RST” reset button
12) “WIFI” button
Image 1

PrimaLuceLab S.p.A. EAGLE CORE User Manual
First use: power on and wireless network activation
EAGLE CORE control unit is designed to be controlled by an external device (not included in the package). You
can use any mobile device (tablet or smartphone) with any operating system (iOS or Android) or another computer
(Windows or macOS). Take the WiFi antenna included in the EAGLE CORE box and screw it into the appropriate
port (Image 2).
Please insert in the appropriate power plug (8 - 12V power IN port) the 12V power cable with cigarette plug
included in the package (image 3). This way you can power the EAGLE CORE using 12V field battery with
cigarette plug. If you want to power it with a wall plug, you can use the optional “AC adapter for Eagle”.
Once powered, the “PW” and “ACT” LED lights will turn on. After more or less 40 seconds EAGLE CORE emits a
sound, this means the WiFi connection is active and you can use your WiFi device to control EAGLE CORE. Once
powered, EAGLE CORE starts EAGLE OS and creates a Wi-Fi network that can be accessed with a smartphone,
tablet, or computer. For security reason, each EAGLE CORE device creates a different WiFi network than the other
EAGLE CORE units, and the access password is the same for each device (but you can modify it).!
page 5
Image 2
Image 3

PrimaLuceLab S.p.A. EAGLE CORE User Manual
How to connect to EAGLE CORE using an iOS device (iPhone or
iPad)
!
page 6
If you are using any iOS device like iPhone or iPad, first of all you
need to access the device settings, activate Wi-Fi, and select the
eaglecorexxxx network (the name of the network depends on the
serial number of EAGLE CORE and it’s printed on the white label in
the EAGLE CORE case, in this case eaglecore002). Using the
keyboard (virtual or physical) of your device insert "eaglecore" as the
default password and then press the "Login" button. The next time
you want to access EAGLE CORE, you will no longer have to enter
your password: your device will automatically connect when you
select the network created by EAGLE CORE unless you change the
login password.
Now you can open the browser of the iOS device (for example
Safari), in the url area (in the field where you usually write the url like
www.primalucelab.com) and type the address 192.168.4.1 and press
the button RETURN to access the EAGLE CORE. To create a link
directly to your iOS device desktop, simply press the "share" button
and then "Add to Home". Now we can give a name, "EAGLE CORE"
and have a direct and immediate connection to EAGLE CORE.

PrimaLuceLab S.p.A. EAGLE CORE User Manual
How to connect to EAGLE CORE using an Android device
If you use an Android device, you need to access the settings,
activate Wi-Fi and select the eaglecorexxxx network (the name of
the network depends on the serial number of EAGLE CORE and
is printed on the white label EAGLE CORE case, in this case
Eaglecore005). Using the keyboard (virtual or physical) of your
device insert "eaglecore" as the default password and then press
the "Login" key. The next time you want to access EAGLE CORE,
you will no longer have to enter your password: your device will
automatically connect when you select the network created by
EAGLE CORE, unless you change the login password.
Now open the Android device browser (for example Chrome), type
the address 192.168.4.1 (in the field where you usually enter the
address of an internet website like www.primalucelab.com) and
press ENTER button to access EAGLE CORE. To create a link
directly on your desktop just press the dashed button on the top
right and then "Add to Home". Now we can give a name, "EAGLE
CORE App" and have a direct and immediate link to EAGLE
CORE.
page 7

PrimaLuceLab S.p.A. EAGLE CORE User Manual
How to connect to EAGLE CORE with a PC or Mac
You can connect to EAGLE CORE and then use EAGLE CORE App also from a Windows or Mac computer. You
need to access the settings of your computer, activate Wi-Fi and select the eaglecorexxxx network. When
prompted, enter "eaglecore" as the default password, and then press the "Sign In". Now open your computer
browser, enter address 192.168.4.1 and press keyboard ENTER button to access EAGLE CORE.
You can also access EAGLE CORE also via a network cable. Connect a network cable from your computer (PC or
Mac) to EAGLE CORE and open your computer browser. Now type 192.168.0.250 address, press keyboard
ENTER button and access the EAGLE CORE features.!
page 8

PrimaLuceLab S.p.A. EAGLE CORE User Manual
Before using EAGLE CORE: set your camera
EAGLE CORE App: EAGLE CORE control interface
The EAGLE CORE control interface, EAGLE CORE app, has been created for use in touch mode (as you typically
do with your tablet or smartphone): with a simple "tap" on an EAGLE CORE App icon, EAGLE CORE performs a
function or it has a different menu. The interface has been designed to make it easier to capture images of celestial
objects, avoiding unnecessary and difficult settings and providing in a few steps the information needed to record
astropictures. You do not even have to add software, all you need to do astrophotography with DSLR compatible
cameras is already present in EAGLE CORE.
EAGLE CORE App is divided into two main tabs: Guiding and Acquisition. In the Guiding tab, you can manage all
the functions of the guide camera, while in the Acquisition tab, you can find camera and image capture controls.
The "Menu" button at the top left allows you to access the EAGLE CORE settings and advanced settings.
“Guiding” tab
As seen above, in the "Guiding" tab you have access to all the features needed for
autoguide (autoguide introduction on page 95). At the center of the screen yo see the
real-time image taken from the used guide camera. Here you can set the exposition
time, gain, calibrate and start the autoguide.
For more information on how to autoguide with EAGLE CORE, read "Start the
autoguide" paragraph.
page 9
Before using EAGLE CORE you have to:
- Set your camera to manual mode "M" or, if present, in "B" mode (based on your camera model).
- In the camera, deselect auto noise reduction (auto dark) and mirror lock up.
- Using the USB cable of the camera, connect it to one of the EAGLE CORE USB ports.
- Check the battery of your camera is charged (we recommend using "Eagle-compatible power cable for Canon
EOS and Nikon DSLR camera”).
- Insert a memory card with sufficient free space. At first use, we recommend formatting the memory card using
the camera menu.
- If you want to shoot with a photo lens, set it in manual focus mode

PrimaLuceLab S.p.A. EAGLE CORE User Manual
“Acquisition” tab
In the "Acquisition" tab you can set the capture parameters and manages all the
operations of the camera used (focus and capture images).
For more information on how to capture images with EAGLE CORE, see "Capture
images with DSLR camera" paragraph.
EAGLE CORE advanced settings
With a Tap on the Menu button you will sequentially see a series of functions. First of
all the general system information such as the version of EAGLE OS, and the CPU
temperature. Clicking on "Main" button you will return to the "Guiding" screen and
the control parameters. The "Camera Settings" button allows you to have a first
access to the connected camera. EAGLE CORE automatically recognizes the
connected DSLR camera and reports the status of the battery. To avoid running our
of battery, we recommend using the “Eagle-compatible
power cable for Canon EOS and Nikon DSLR
camera“, available for many reflex models often used
in astro photography. With a "Tap" on "Advanced
settings", you access the guide camera selection; by
default in EAGLE CORE the simulator is set as
default, in this window you can select the guide
camera used (eg QHY5L-II).
Then, in the Guider Camera field you can set the
diameter (Aperture) and focal length (Focal) in
millimeters of the guide scope. The values of the
"60mm CompactGuide Guide Telescope" (optional)
are preset, but you can modify them at will. Below you
can see the parameters (resolution and pixel size) of the guide camera. Parameters
are automatically detected by EAGLE CORE. After selecting the guide camera and
checking the parameters of the guide scope, click "Save" to confirm (if you do not
click Save, EAGLE CORE will keep the Simulator as guide camera).
page 10

PrimaLuceLab S.p.A. EAGLE CORE User Manual
SESTO SENSO settings
ATTENTION: it is necessary that both SESTO SENSO and EAGLE CORE
firmwares are updated to version 2.0 or later. Before continuing with the
SESTO SENSO calibration it is necessary to install it on your telescope
following the instructions in the SESTO SENSO manual.
Starting version 2.0 of EAGLE CORE App, you can manage the setting for
SESTO SENSO (1st or 2nd generation) robotic focusing motor using EAGLE
CORE. Selecting SestoSenso settings, you access the SESTO SENSO
management menu. If SESTO SENSO has not yet been calibrated, the window
will appear as shown in the figure, stating the firmware version, the temperature
detected (if connected to the optional temperature sensor) and the current
position.
Calibration procedure:
Manually bring (by turning the focuser knob) the focuser to about halfway of the
focuser travel, then using the "Slow +" or “Slow -" and "Fast +” or "Fast -
“ buttons bring your focuser to the most position internal and then press the
"Stop" button when you have reached it (you do not have to go to the stop point
of your focuser but you can stop 1 or 2 mm before the end of movement). Do
not worry if the buttons work in the opposite direction, they are only used for
calibration.
Warning: take care to stop the engine (by pressing the Stop button) BEFORE it
reaches the end of the focuser, otherwise the focuser or the SESTO SENSO engine
may break.
Then press the button "Set position to 0", a new window is opened in which confirmation is requested "Set current
position to minimum?”. By confirming with OK we have set the minimum point of focuser travel. Now in the opposite
direction, with the "Slow -“ and "Slow +" or "Fast -“ and "Fast +" buttons, move your focuser to the outermost
position. As before, stop 1 or 2 mm before the end of travel (remembering to avoid letting go of the engine at the
end of the travel as it may brake your focuser or SESTO SENSO motor) by pressing the STOP button. Press the
"Set position to MAX" button, as before appears a new window that asks you to confirm that the current position is
the maximum position "Set current position to maximum?”. Press OK and SESTO SENSO calibration will be done.
WARNING: never disconnect the USB or power cable between the EAGLE CORE
and SESTO SENSO while the "ACT" LED is on, ALWAYS turn off EAGLE CORE by
using the off button and wait until the "ACT" LED is off before removing the power
to EAGLE CORE. If one of the above conditions occurs, the calibration procedure
must be repeated to avoid breaking the SESTO SENSO focuser or motor.
NOTA: if, after calibration, you move the focuser by hand (this way loosing the
calibration), manually move the focuser in innermost position and press the “Set position to 0” button.
Delay Time [s]
Here you can set a "Delay" time that is a “waiting” time between consecutive
pictures. This setting is useful to let ambient temperature cool down the sensor
between consecutive pictures.
page 11

PrimaLuceLab S.p.A. EAGLE CORE User Manual
Dithering with EAGLE CORE
Dithering is an advanced technique designed to reduce background noise when
stacking many images. In practice, the integration of the guide system with the
image capture system makes it possible to move by a few pixels a picture with
respect to the other and in a different direction for consecutive images. Since a
particular form of background noise of DSLR and mirrorless cameras is static (ie it is
constant in consecutive images), when you stack (and therefore re-align) the images
recorded with Dithering and the images will be realigned by the software, the
background noise will be misaligned between photos: this way when the images will
be stacked, the noise of the sky background will be reduced. EAGLE CORE allows
you to record pictures with the Automatic Dithering function. To activate it, press the
"Dithering" button in the "Acquisition" tab.
It is also possible to adjust the advanced Dithering settings in the Advanced Settings
menu. Here you can set:
- Pixel shift: displacement in number of pixels between one image and the next.
- Guiding tolerance: distance in pixels above which the following image does not
start.
-Guiding delay: time in seconds of delay between one image and the next one (a
higher value helps stabilize the guide).
EAGLE CORE access password modification
In order to change the access password to EAGLE CORE from the settings menu
you have to click on "Wifi settings", a new menu now appears in which the name of
the SSID network is displayed (in this example EagleCore005) with the network
password, which for the first use will be the default password "eaglecore". You can
not change the name of the WiFi network created by EAGLE CORE, as each EAGLE
CORE has its own unique network to avoid overlapping when there are more EAGLE
CORE powered on on at the same time, for example during a star party. In order to
change the password, simply click on the Password field and enter the new
password. It is possible to change the EAGLE CORE transmission channel at the
same time by moving the drag lever next to the "Channel" parameter. Press the
"Save" button to confirm and a warning message will appear. By pressing the "ok"
button, EAGLE CORE will emit an audible signal, and the "ACT" LED will be off.
Before reconnecting, wait until EAGLE CORE emits another sound and the "ACT"
LED is on again.
Now from the control device you will be asked to enter the new login password.
page 12
We suggest to use Dithering when you want to record deep-sky images
(galaxies, nebulas, star clusters) and at least 10 pictures.

PrimaLuceLab S.p.A. EAGLE CORE User Manual
WARNING: If we changed to the wrong password or we forgot it, we need to
connect to EAGLE CORE using a network cable connection and a computer, then
we would be able to change the password. We suggest not to change the password
on the field while we use the telescope to avoid any problem.
Updating EAGLE CORE
EAGLE CORE software updates can be downloaded from our website:
https://www.primalucelab.com/astronomy/downloads
Update files have .enc format. Download and save the file into the device you use
to connect to EAGLE CORE, then go to the menu, click "Update" and open a page
like the one you see in the picture, here you can select the installation file you
saved on your control device and press The OK button. A confirmation prompt will
appear: "Apply update? NOTE: System will be rebooted!” Confirm with OK, the
ACT LED will be turned off and the system will be updated and restarted. During
the upgrade process you do not have to power off EAGLE CORE, or EAGLE
OS could be damaged irreparably. When the update is complete, EAGLE CORE
will amit a sound and the ACT LED will turn on to confirm update and WiFi network
creation.
WARNING:
- if you have an iOS device, please note EAGLE CORE update can be performed on devices with iOS operative
system at least iOS11 version.!
page 13

PrimaLuceLab S.p.A. EAGLE CORE User Manual
Control the computerized equatorial mount connected to EAGLE
CORE
EAGLE CORE allows you to control computerized mounts (with WiFi and without the need to use the mount hand-
pad) by directly connecting to one of the EAGLE CORE USB ports, by using SkySafari PLUS or PRO (http://
www.skysafariastronomy.com) that you can download from the Store of your device. This feature is compatible with
SkyWatcher/Orion with SynScan hand pad (tested with firmware version 4.39 or later) or Celestron mounts with
NexStar hand pad.
In order to control your computerized mount with EAGLE CORE, follow this
guide:
-When EAGLE CORE is powered off, connect all USB and power cables
to EAGLE CORE. The mount must have the power button set to ON. If
your mount has a serial connection cable (RS-232), you must convert it
to a USB cable. To do this we recommend adding a special converter
such as the ATEN UC232A.
- Connect the power to EAGLE CORE
- If you have a SkyWatcher mount (of if your mounts asks for Mode) select the
Equatorial mode (“EQ Mode”) by pressing the ENTER button.
- Follow the menu on your keypad to make a 1, 2 or 3-star alignment.
ATTENTION: to correctly control your mount with SkySafari you must
enter the exact time and your geographical position (latitude and
longitude) in the mount’s hand pad.
- Connect the device you use to control EAGLE CORE (for example your
smartphone) to the EAGLE CORE WiFi network.
- Start SkySafari PLUS or PRO, then select SETTINGS and SETUP.
- In the window that opens, insert these settings:
- Scope Type: your mount
- Mount Type: Equatorial GoTo
- Autodetect SkyFi: OFF
- IP Address: 192.168.4.1
- Port Number: 4040
- Set Time & Location: ON
Then click “Done” in top-right to save.
- Click the “Scope” button and then “Connect” (if an error message appears, press
the Connect button again).
-SkySafari will show the position of your telescope corresponding to the last star
you used to align your mount. Now you can control your mount from your device
via WiFi and EAGLE CORE.
- The arrow buttons (on the left and right of the main screen) allow you to move
the mount like the buttons on the physical hand pad of your mount, setting the
movement speed displayed below: 1 (minimum), 2, 3 or 4 (maximum).
page 14
image courtesy of SkySafariAstronomy.com
image courtesy of SkySafariAstronomy.com

PrimaLuceLab S.p.A. EAGLE CORE User Manual
- You can use SkySafari to find, view and point objects tin the sky. You can also get a
preview of the area framed in the sky based on the focal length of your telescope
and the type of sensor you use. in order to do this press the "Observe" button and
then click on Equipment. In the window that opens you can insert your telescope
(TELESCOPES) with diameter and focal length. Then you can enter your camera
(CAMERAS) with resolution and pixel size. Click "Done" at the top right when you
are done.
- Now click "Observe" and then "Scope Display". In the window that opens click the
"Add FOV Indicator" button. In the window that opens, select your telescope, your
camera and, if you have previously added a focal reducer or multiplier, add this
option as well. Click the "Done" button at the top right to confirm. In this way
SkySafari will calculate the real field framed by your telescope and camera,
showing it on the sky chart.
- You will be able to verify if the field is sufficient to photograph the whole object. In
the image below: not enough on the left, excellent on the right.
- In order to point an object, you can select it among the many objects shown in
SkySafari (you can click on the stars, planets, galaxies, nebulae or star clusters) and
then click the GoTo button. The mount will move to the requested object.
- Now you can mode to the EAGLE App to control camera, focus, autoguide and
record your pictures.
page 15
image courtesy of SkySafariAstronomy.com
image courtesy of SkySafariAstronomy.com
image courtesy of SkySafariAstronomy.com
image courtesy of SkySafariAstronomy.com

PrimaLuceLab S.p.A. EAGLE CORE User Manual
Install EAGLE CORE on a telescope or use with a telephoto lens
EAGLE CORE has been entirely designed with SolidEdge three-dimensional design software to offer the widest
possible modularity along with PLUS elements (dovetail plates, rings or clamps) and/or with telescopes from many
brands. EAGLE CORE can be positioned under a camera lens, between support rings and guide rings, connected
to a Vixen or Losmandy type plate using the optional clamp or, in the case of telescopes with long bars, it can be
screwed on the PLUS Vixen or Losmandy plate to be placed on top of the PLUS support rings. So let's see the
various configurations possible, depending on the telescope on which EAGLE CORE is installed, either using other
PLUS elements or with different instruments, or using the telephoto lens of your camera.
WARNING: in order to connect EAGLE CORE to other PLUS mechanical elements, do not use longer screws than
M6x12 and M5x12. Otherwise, the screws could touch the EAGLE CORE internal elements and could lead to
breaks or malfunctions. Screws are supplied with EAGLE CORE.
Connection to camera with telephoto lens.
If you do not have a telescope you can do
astrophotography even using the telephoto lens of your
camera. In this case, EAGLE CORE can be installed as
the support of your camera with telephoto lens just as if it
was a bar. In this case, connect a 140mm Vixen PLUS
bar under EAGLE CORE using two M6x12 screws
(supplied); then install the optional 80mm PLUS guide
rings next to EAGLE CORE using the optional spacers
and the M5X40 screws (optional). Warning: in order to
avoid any flexure, the guide telescope must not exceed 3
Kg weight. In order to install the camera above EAGLE
CORE you have two options:
page 16
TIP 2:
If you notice that, after having performed the polar alignment of the mount and the alignment on the stars, the
pointing of the object is not precise (for example if you don't frame it in the field of your camera) you probably
have a wrong polar alignment or you have inserted some wrong data in your mount or in SkySafari: check them
again before proceeding.
TIP 1:
If, after pointing an object, in the EAGLE App you notice that it is not pointed at the center of your camera
sensor, you can move the telescope with the arrows in SkySafari until you bring it to the center of the field of
view, then press the "Align" button in SkySafari. In this way the actual position of your telescope will be
synchronized with the sky map.

PrimaLuceLab S.p.A. EAGLE CORE User Manual
A. Screw a photographic ball head (not
included in the package) to the photographic
screw on the EAGLE CORE case and then
connect the camera with a lens above the
photo head.
1) Camera with lens
2) Ball head
B. If you want more stability (recommended when using heavy telephoto lenses, for example with focal lengths
greater than 100mm), screw the Vixen+Losmandy PLUS dovetail clamp on EAGLE CORE. Then connect the
90mm PLUS Vixen bar underneath the camera (or underneath the support found on some heavy photographic
telephoto lenses). You can then place the camera on EAGLE CORE, having a rigid and quick-locking
mechanism.
1) M6x12 screw
2) Vixen or Losmandy
bar
3) Vixen/Losmandy
PLUS dovetail
clamp
4) 80mm PLUS guide
rings with spacers
5) 60mm guide
telescope
6) 80mm Vixen PLUS
bar
page 17

PrimaLuceLab S.p.A. EAGLE CORE User Manual
Connection to telescopes with PLUS support rings (spaced up to 12cm)
Using compact apochromatic telescopes, the distance between the support rings is given by the Vixen or
Losmandy PLUS plate installed under the telescope. In this case, EAGLE CORE can be installed directly above the
support rings, just as if it were a bar. With the special M5 threaded holes on top of EAGLE CORE, then you can
install PLUS guide rings and then a guide telescope (warning: the guide telescope should not exceed 3 Kg in
weight to avoid flexures).
In order to use EAGLE CORE in this
configuration, insert 2 M6x12 screws
into each PLUS ring (2 screws for
every ring) and fasten EAGLE CORE.
So if you want to use a guide
telescope in parallel, you can fasten
the PLUS guide rings to the top of
EAGLE CORE by screwing, for each
ring, 2 M5x12 screws.
Connection to telescopes with PLUS support rings (spaced more than 12cm)
If you want to use EAGLE CORE with telescopes with PLUS rings spaced more than 12 cm, you can place EAGLE
CORE above the support rings to support a compact telescope in parallel. In order to do this, however, you must
first add a Vixen or Losmandy PLUS plate on top of the support rings and then install EAGLE CORE.
In order to use EAGLE CORE in this
configuration, place a Vixen or
Losmandy PLUS plate (same length
as the one placed under the support
rings) and secure it with 2 M6x12
screws for each ring. The plate above
the telescope must be inverted to the
position beneath the optical tube.
Then use 4 M6x12 screws to secure
EAGLE CORE to the plate. Finally, if
you want to use a parallel telescope,
you can connect the PLUS guide
rings. In order to do this, screw 2
M5x12 screws for each guide ring at
the top of EAGLE CORE.
page 18

PrimaLuceLab S.p.A. EAGLE CORE User Manual
Connection to telescopes without PLUS support rings
If your telescope does not have PLUS support rings, just add the “PLUS Vixen+Losmandy dovetail clamp" and
screw it directly to EAGLE CORE to allow you to connect it any Vixen or Losmandy dovetail bar.
Take the "PLUS Vixen+Losmandy dovetail clamp" and
use 4 M6x12 screws to secure it to EAGLE CORE, as
shown in the image.
This way you can connect it to any telescope equipped with a Vixen or Losmandy dovetail bar as shown in the next
page image.
page 19

PrimaLuceLab S.p.A. EAGLE CORE User Manual
Power other instruments through EAGLE CORE
EAGLE CORE incorporates a power bridge that can be used to connect up to 3 instruments such as mount,
camera and electronic focuser avoiding the need for other power supply sources and reducing the number and
length of cables. Through a special internal board, EAGLE CORE distributes 12V power to the 3 ports to which
the various devices are connected via the optional cables. All power ports are equipped with a safety screw socket
to prevent the cable from being inadvertently disconnected or polarity reversals. 2 power outlets have a resettable
3 Amp fuse each while one port has a resettable 5 Amp protection fuse and is specially designed for connecting to
cooled DSLR cameras that often have high power consumption.
WARNING: EAGLE CORE distributes 12V power only. If the instrument you want to use requires a different
voltage, DO NOT connect it to the EAGLE CORE power ports.
WARNING: the power OUT ports of the EAGLE CORE depends on the power supply or the battery connected to
the power IN port of EAGLE CORE. Since various astronomy instruments require strictly 12V fixed power
supply, you need to check that your power source supplies a stable 12V voltage. If you want to power
EAGLE CORE with a battery, make sure it is equipped with a special 12V voltage stabilizer. DO NOT CONNECT
TO EAGLE CORE A BATTERY WITHOUT VOLTAGE STABILIZER as it may damage other instruments powered
through EAGLE CORE.
WHAT HAPPENS IF I CONNECT AN INSTRUMENT THAT NEEDS MORE CURRENT THAN THE ONE
ACCEPTED BY EAGLE CORE OUTPUTS? The internal power board has special protection fuses. If your device
requires more power than the one distributed by EAGLE CORE, the fuse blocks the port (this is a security feature
to avoid current rushes that could damage the connected instrument). When you remove the power cable, the
port is automatically reset.
EAGLE CORE has 3 12V power out ports:
- Plugs 5 and 6 have a resettable 3 Amp
protection fuse and are used for connection to
mounts and other instruments (with power
consumption up to 3A), port 7 has a resettable 5
Ampere protection fuse and is used to connect
instruments that need more power (such ad
cooled DSLRs). To avoid confusing the power
out ports, the 3A ports have a different connector
than the 5A one.
page 20
Table of contents
Other PrimaLuceLab Control Unit manuals
