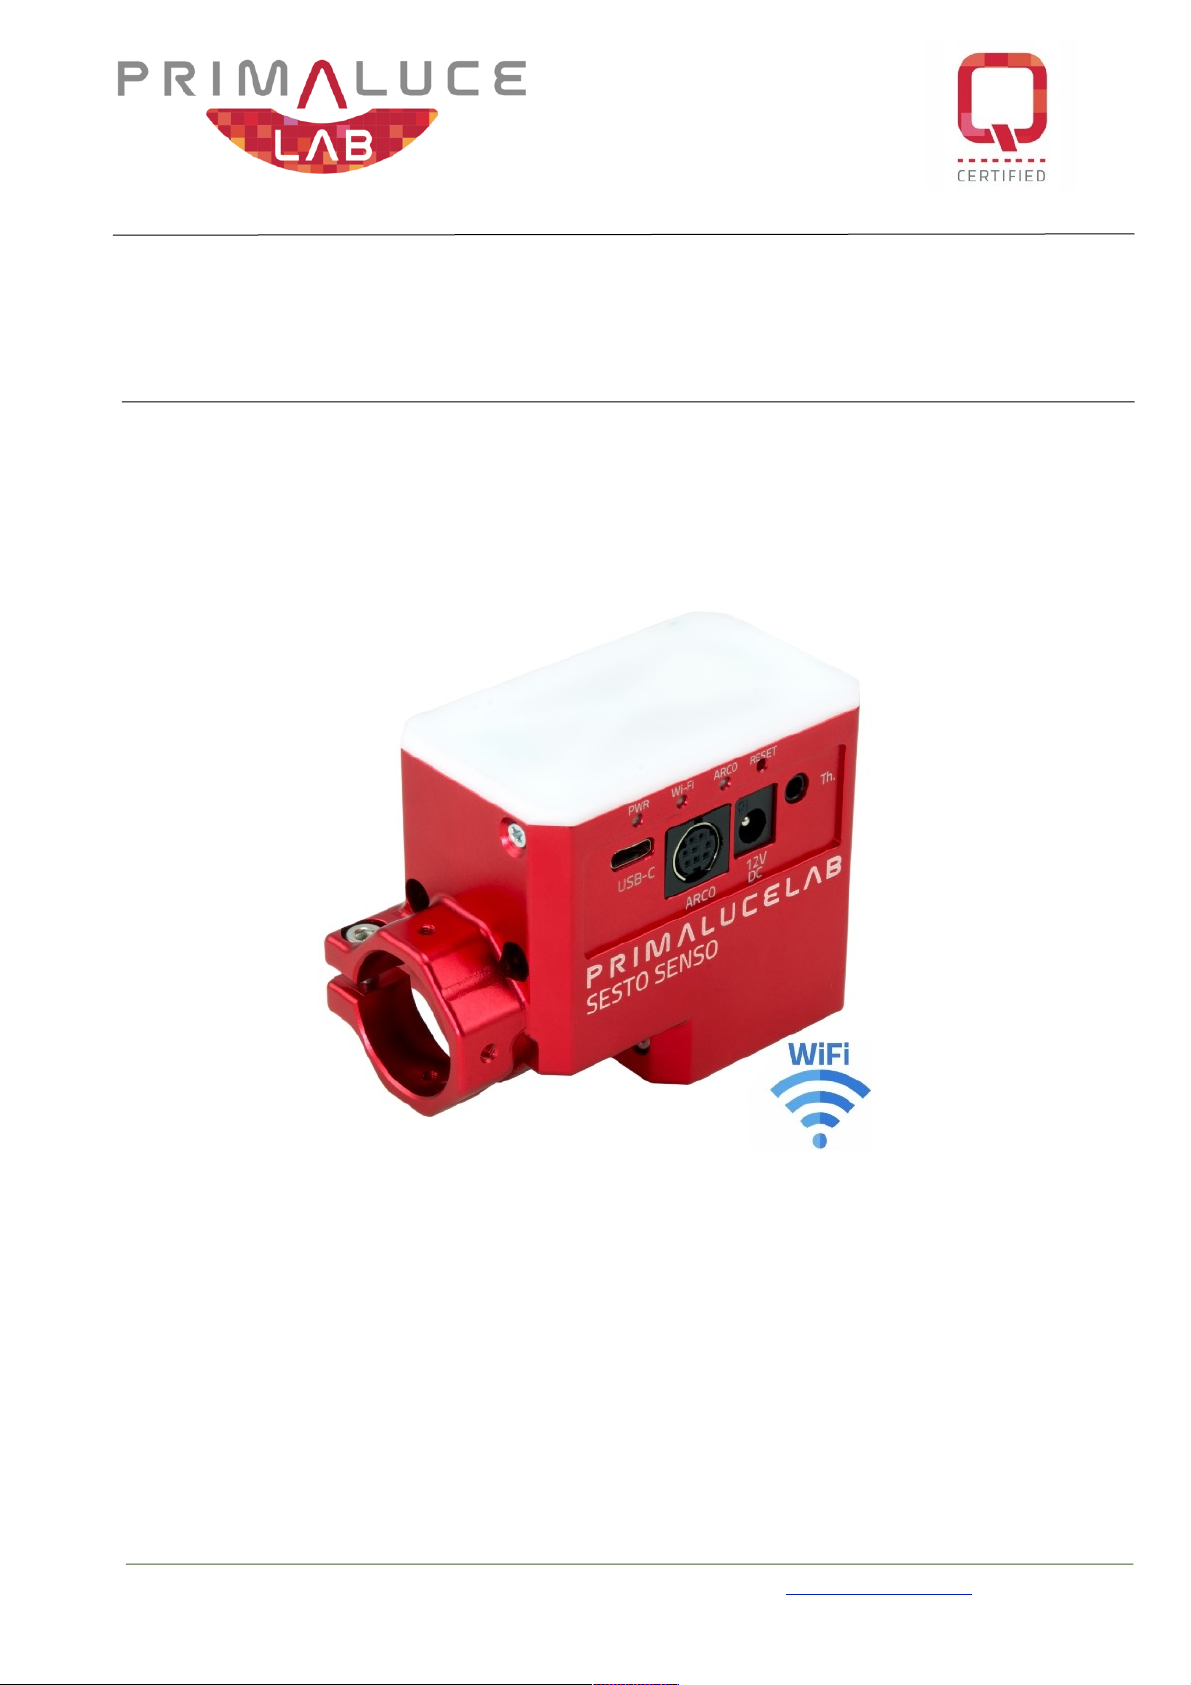
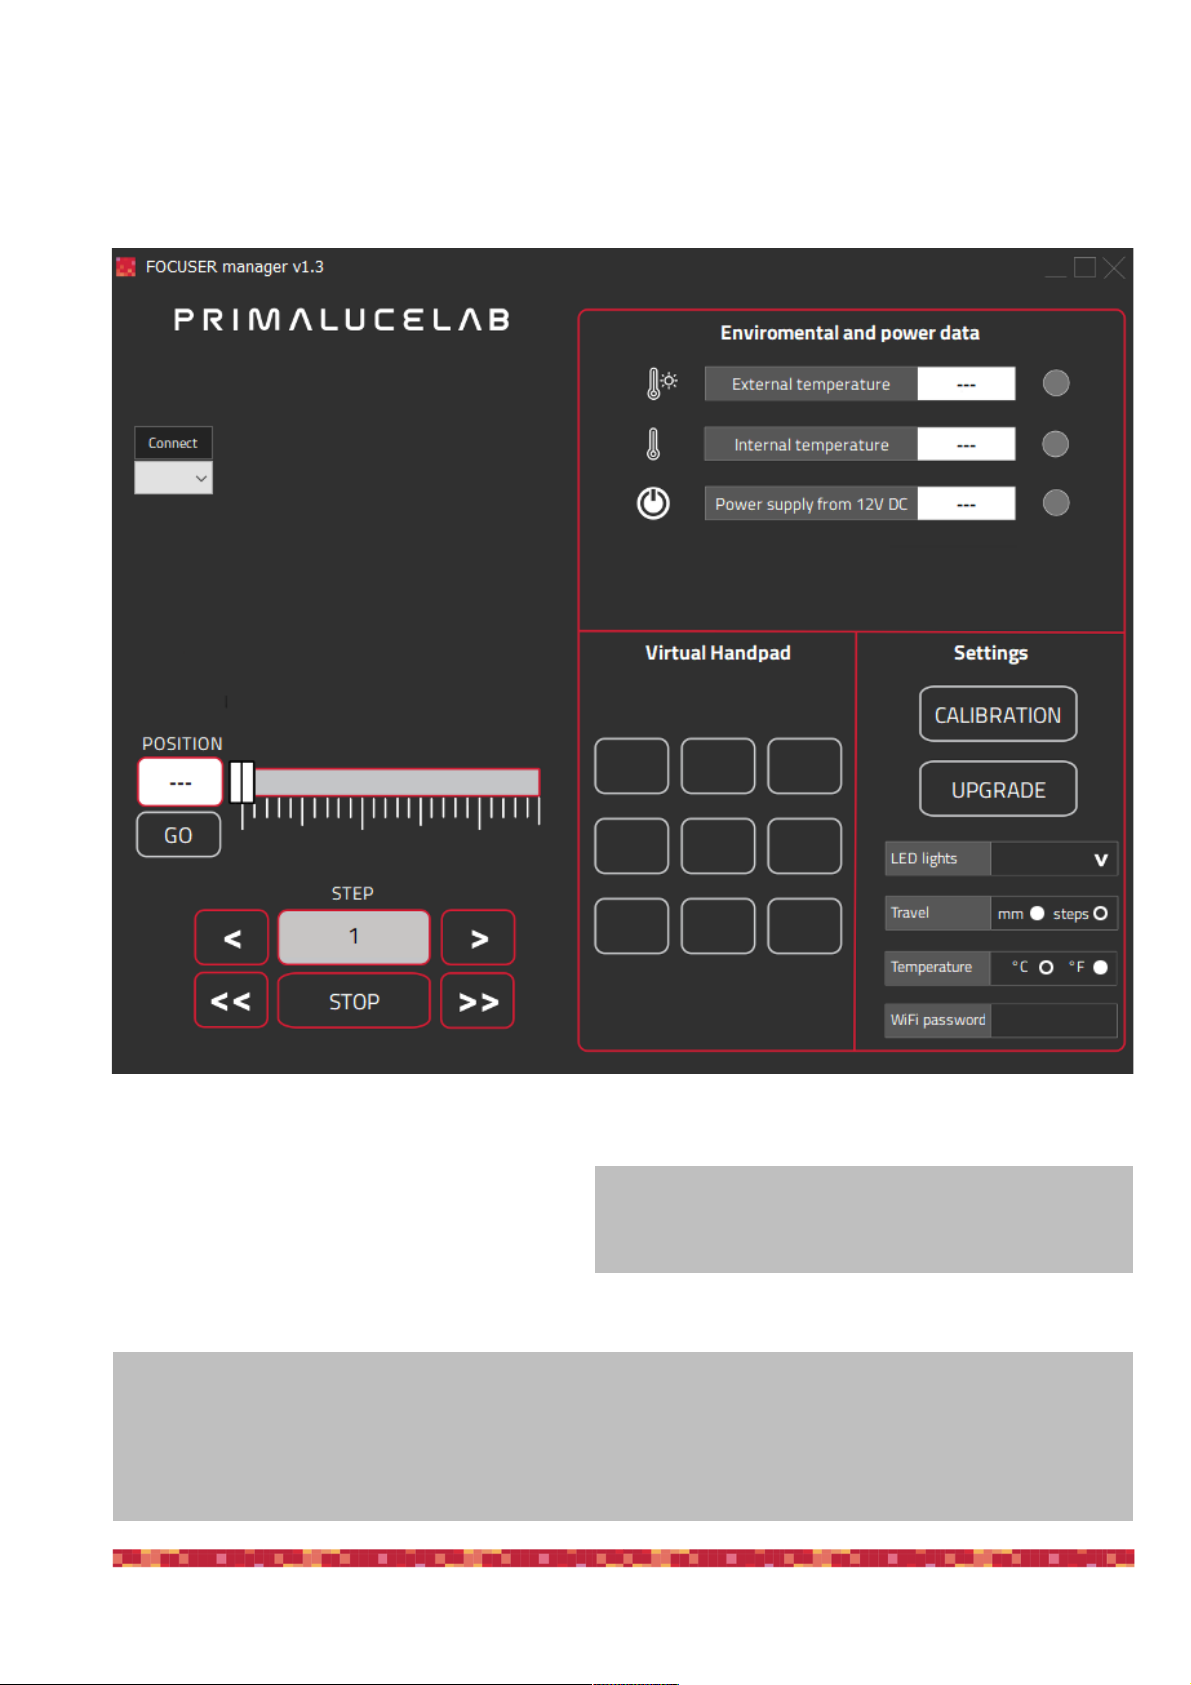
Controlling SESTO SENSO 2 with EAGLE or computer with Windows OS
SESTO SENSO 2 can be controlled with the EAGLE or any external computer that comes with Windows operative
system (at least version 7 64 bits). In the SESTO SENSO 2 package you can find a 12V power cable with cigarette
plug and a PC connection cable for USB port. Connect the USB-C cable to the USB port of your EAGLE or perso-
nal computer. You will see the PWR LED on (this means SESTO SENSO 2 is powered) and, after a few seconds
the Wi-Fi LED will be on too and this means that also the SESTO SENSO 2 WiFi connection is ready to be used.
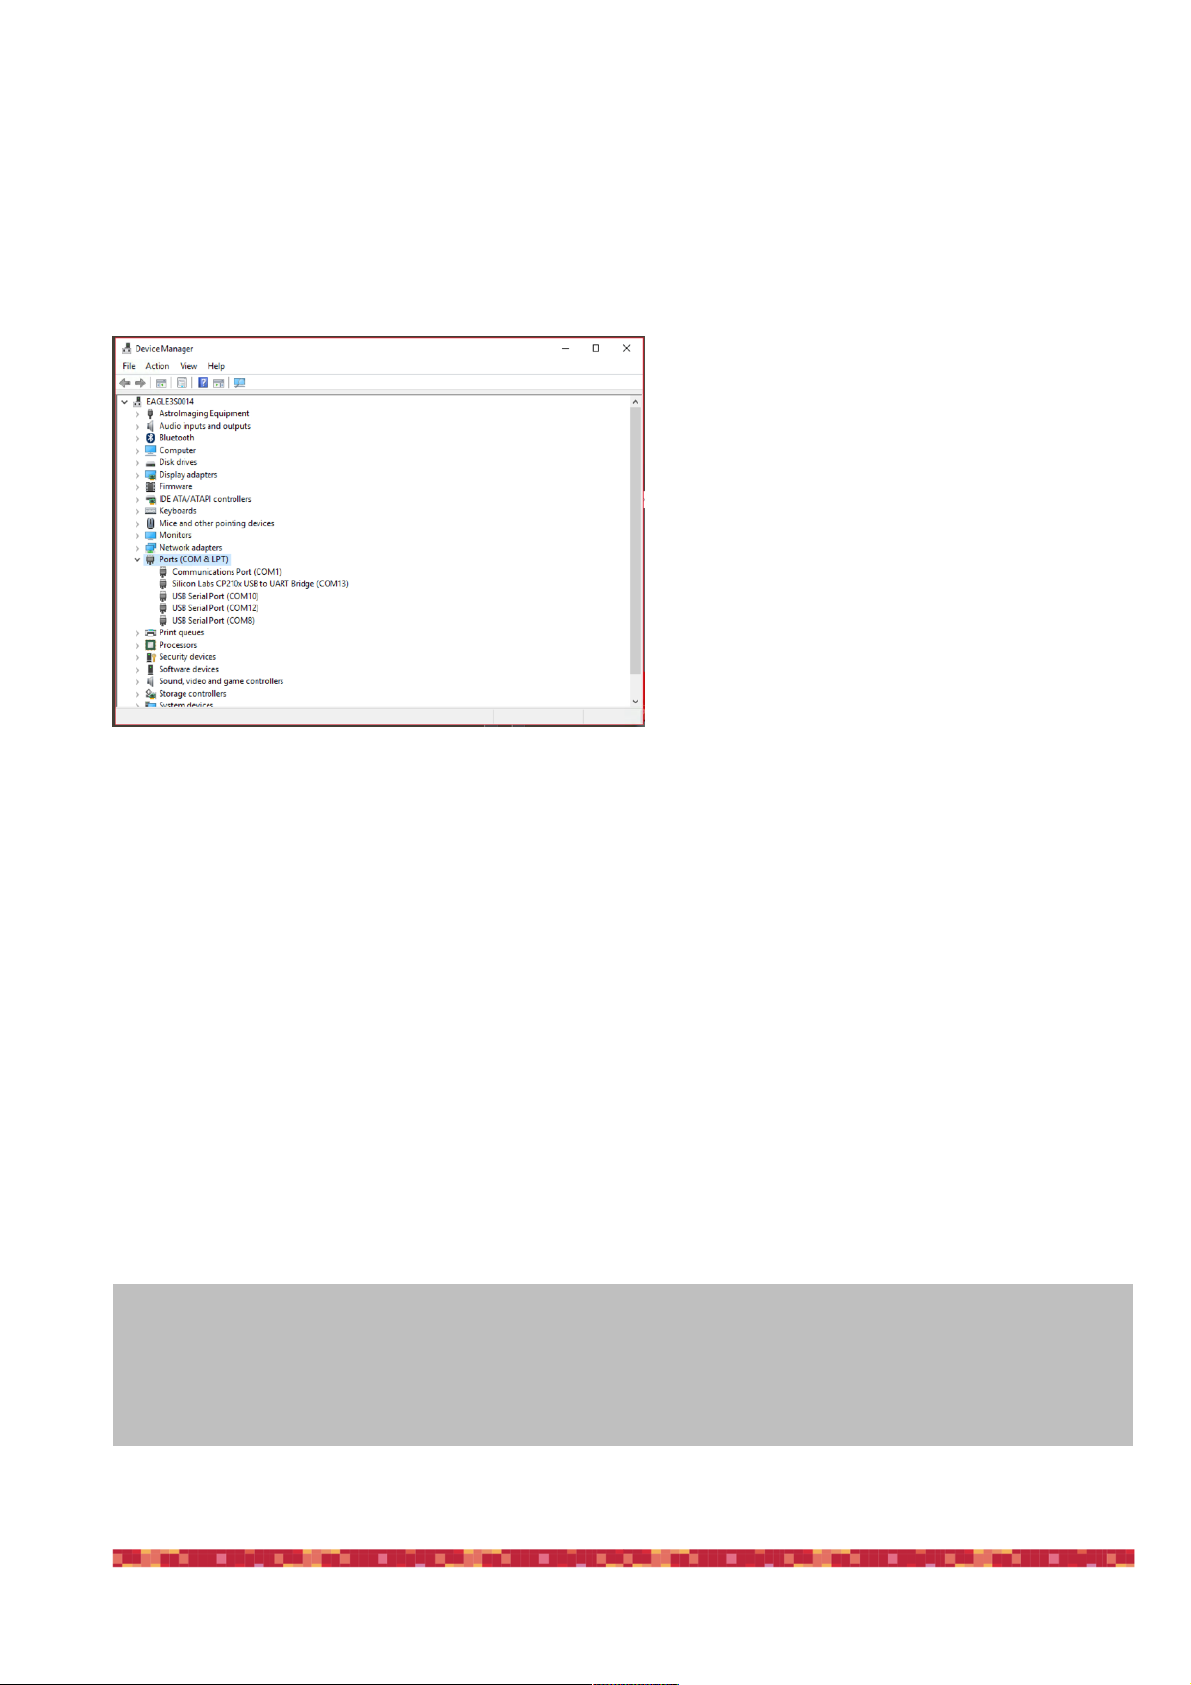
When you connect it to USB port of the EAGLE or of
an external computer, SESTO SENSO 2 should be
automatically detected and Windows should auto-
matically install the new driver. In order to check
this, please go to Control Panel and then choose
Device Manager. You should see the SESTO SEN-
SO 2 listed under “Ports (COM & LPT)” and descri-
bed as “Silicon Labs CP210x” (in order to check,
you can disconnect and then reconnect the SESTO
SENSO 2 USB cable and see how Windows lists it).
If you can’t find it, Windows is not able to automati-
cally install the SESTO SENSO 2 driver. In order to
do this, please follow this procedure:
1) go to "Device Manager”
2) locate "CP2102N USB to UART Bridge Controller" under "Other devices”
3) make a mouse right-click and select "Update Driver Software”
4) select the second option “Browse my computer for driver software” in order to install the driver from a specific
folder
5) select the folder where you saved the content of the SESTO SENSO 2 software package you downloaded
from our website
www.primalucelab.com/astronomy/downloads
Please remember to unzip the file you downloaded before starting the installation of the SESTO SENSO 2.
6) at the end of the procedure, a message will appear indicating the correct installation.
Now, under “COM and LPT devices”, you will see a new COM port (in this example COM16) which is the one used
by your computer to communicate with SESTO SENSO 2.