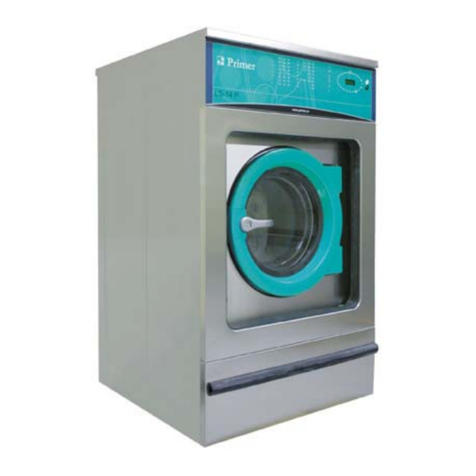
Primer LS-11 User manual

Página 1 de 1
LS-11 / LS-14 / LS-19 / LS-26 / LS-36 / LS-45 / LS-62 / LS-125
TS-11 / TS-14 / TS-19 / TS-26
RS-11 / RS-14 / RS-19 / RS-26 /RS-36 / RS-62
INSTRUCTION MANUAL
MACHINES
12132021


EN
Página 1 de 43
0SAFETY INSTRUCTIONS.......................................................................................................2
1INTRODUCTION.......................................................................................................................3
2USE .............................................................................................................................................3
2.1 Recomendations for use...............................................................................................3
2.2Using the dispenser .......................................................................................................3
2.3 Machine features.............................................................................................................3
3INTERFACE...............................................................................................................................4
3.1 Screen OFF OPL..............................................................................................................4
3.2 Main Screen OPL.............................................................................................................4
3.3 Run screen OPL...............................................................................................................5
4PROGRAMMES........................................................................................................................8
4.1 Cycle parameters............................................................................................................8
4.1.1 Parameters for soak, prewash, wash or rinse cycles:.........................................8
4.1.2 Parameters for spin cycles: .....................................................................................9
4.2 Cycle library....................................................................................................................10
4.3 Programme library........................................................................................................12
4.4 Model parameters .........................................................................................................17
4.5 Template for customized programs.........................................................................18
5CONFIGURATION..................................................................................................................19
5.1 Programme management............................................................................................19
5.1.1 My programmes.......................................................................................................20
5.1.2 Programme library...................................................................................................20
5.1.3 Cycle library..............................................................................................................22
5.2 Configure System .........................................................................................................22
5.2.1 HUD configuration...................................................................................................24
6MAINTENANCE......................................................................................................................26
6.1 Electrical and mechanical irregularities .................................................................26
6.2 Warnings .........................................................................................................................26
7NAVIGATION CAM................................................................................................................30

EN
Página 2 de 43
0SAFETY INSTRUCTIONS
In order to reduce the risk of electrical shocks or injury when using the appliance, the basic
precautions should be observed, including the following:
READ all the instructions prior to using the appliance and KEEP THEM in an easily accessible
place for reference in the event of doubt.
Do NOT wash clothes which have been previously treated, washed, soaked or stained with
petrol, dry cleaning solvents, or other inflammable or explosive substances, as these give off
vapours which may catch fire or explode.
Do NOT add petrol, dry cleaning solvents or other inflammable substances to the washing water.
These substances give off vapours which could catch fire or explode.
In some conditions, hydrogen gas may be produced in a hot water system which has not been
used for more than two weeks. Hydrogen gas is explosive. If the hot water system has not been
used for a while, before using the washing machine turn on all the hot water taps and let the
water run for a few minutes. This will release any accumulated hydrogen gas. As the gas is
inflammable, do not smoke or use naked flames during this operation.
Do NOT allow children to play in or on the appliance. Children should be strictly supervised when
in the vicinity of a machine which is operating.
Remove the door from the appliance before disposal or before leaving it out of service.
DO NOT TRY TO OPEN THE DOOR if the drum is moving.
Do NOT install or store the appliance in the open.
Do NOT try to force the controls.
Do not repair or replace parts of the appliance or carry out any servicing unless recommended to
do so in the User Instruction Manual. Make sure that you fully understand the instructions and
have the necessary skills to carry out the operations described.
Do NOT remove any safety device or modify any components in the washing machine. DO NOT
INSTALL components not belonging to the machine in the appliance.
Failure to comply with any of the instructions given in the Instruction Manual may result in
personal injury to the user. It is no possible to provide for all possible situations and contingencies
with warnings about risk and hazards. Therefore, any person involved in the transportation,
installation, use or maintenance of the machine should always employ common sense, caution
and care.
Do NOT use the machine unless all the covers and guards are correctly fitted and secured.
The distributor (vendor) MUST correctly instruct the user during commissioning.
Pour the correct doses of detergent, fabric softener and lay into the dispenser drawer, as
indicated by the manufacturer. Heed tips concerning the treatment of different materials given by
the manufacturers.
Daily remove any traces of detergent or liquids from the dispenser drawer. Never use powdered
or abrasive detergents for cleaning; use only water and soap.
Clean the water inlet filters and the external dispenser conducts once a month.
Never clean the exterior by water injection; functional parts of the machine could damage.
If the washing machine is to be idle for long periods, apply a coat of Vaseline oil to all its stainless
steel surfaces.
An annual general revision is recommended.

EN
Página 3 de 43
1INTRODUCTION
Dear customer,
Thank you for the confidence you have placed in our product. We hope it meets your needs.
The guarantee does not cover damage to glass components, or consumables (seals, bulbs, etc.) nor
damage to insulation material or damage due to the incorrect installation of the appliance, or to
inappropriate use, inadequate maintenance or poor repair processes.
This appliance is subject to changes and modifications for its technical progress.
2USE
2.1 Recomendations for use
This machine has been designed to wash or treat most materials. Its use for other purposes than
those given is considered as undue and dangerous.
The machine should be loaded with the nominal load, smaller or bigger loads should be avoided.
Clothes should not be washed in sacks or cloth bags. If this is absolutely necessary, make sure the
machine is loaded to the nominal load to avoid possible unbalanced loads.
Canvas, waterproof items, mops, carpets or rugs should not be spun.
When a programme ends, before allowing the door to be opened, the clothes are untangled during 30
seconds. An acoustic signal when the door can be opened after this process.
2.2 Using the dispenser
Add washing products to each compartment and close dispenser cover.
2.3 Machine features
The machine is controlled using a microprocessor able to adapt to the needs of each user.
The machine has an intelligent control to control the water temperature; if hot water is available, it
should be connected. The machine adjusts the different water inputs to maintain the programmed
temperature.
It has intelligent control for spin cycle management. The washing machine controls any unbalanced
loads and manages the spin to ensure a good spin, reducing noise and extending the useful life of
wearable components, thus significantly reducing fatigue in the
Powdered detergent for prewash
Powdered detergent for wash
Liquid softener
Liquid whitener (bleach)

EN
Página 4 de 43
3INTERFACE
All the washing machines have a touch screen displaying all the information and from where it is
possible to select all the controls shown on the screen.
When the machine is switched on, Screen Off is displayed. The ON/OFF button takes the user to the
Main screen, from where it is possible to run a programme or go to the main menu. Press START to
go to the Run screen, which displays all the relevant information about the screen.
Press ON/OFF to return to Screen Off from the current screen.
The information displayed on each of the screens can be omitted or enabled from the HUD menu (See
section 5.2.1)
3.1 Screen OFF OPL
This screen is displayed when the washing machine is switched off, showing the parameters
configured by the user.
5
4
1
2
3
1. Date: Date in the selected format (if enabled in HUD).
2. Time: Time and minutes in the selected format.
3. Laundrette message: Message configured by the user (if enabled).
4. Logo: The logo is displayed (if enabled).
5. Machine identifier: Label identifying the machine (if enabled).
If the option “energy saving” is active, 10 minutes after switching off the washing machine, the screen
backlight will go off. If any part of the screen is touched, the backlight will light up again. Likewise, if
the ON/OFF button is pressed, the backlight comes on and the main screen is opened.
3.2 Main Screen OPL
The Main screen of the washing machine is as follows, and displays each of the available options.
Some of the options may be omitted from the HUD menu.
1
8
2563
79
4
8

EN
Página 5 de 43
1. Machine identifier: Label identifying the machine.
2. Time: Time and minutes in the selected format.
3. Weight of clothes: The weight of the clothes in the machine is displayed (if the weighing kit is
active) or the nominal load for the selected model (if the kit is not active), and the weight of the
load entered can be edited. Option to enable/omit in HUD. Once the programme has ended or
been aborted, the nominal load of the machine is selected again.
4. Main menu: Access to washing machine main menu, where the different machine
parameters can be configured.
5. Programme name: Name configured for the selected programme.
6. Programme temperature: Maximum temperature of the different cycles of the programme.
7. Programme number and length: Position of the programme in the list of programmes (My
Programmes), and the estimated length in minutes for the programme selected.
8. Increase/decrease programme number: Permits user to scroll up or down the list of selected
programmes. As well as using the buttons, the programme can be increased/decreased by
pressing directly on the programme information (just above the button).
9. Start: Button to start running the selected programme from the cycle indicated.
10. Programme cycles: Press on the selected programme, the programme cycles are displayed
and the cycle you wish to start with can be selected.
In addition, it is possible to configure a programme instantly, that is, change the parameters of a
cycle (time, temperature, level and dosage) for the current programme. These values are not
saved for future programme runs.
3.3 Run screen OPL
When START is pressed, the programme begins and all the relevant programme information is
displayed on this screen. Some of the options may be omitted from the HUD menu.
1
4
11
23 5
10 67
12
8
9
1. Machine identifier: Label identifying the machine.
2. Time: Time and minutes in the selected format.
3. Programme running: Programme name, Programme number, Programme length.

EN
Página 6 de 43
4. Remaining time: Minutes estimated for the completion of the programme. Status of programme
progress, relation between total time and time remaining for programme.
5. Status (drawing): Animated drawing showing the current cycle of the washing machine (filling,
draining, washing, rinsing, spinning or untangling).
6. Status (text): General text for any message to be displayed. If everything is correct, the text for
the status in question is displayed.
In the event of an error, the cycle and status information is maintained in order to determine
exactly where the error has occurred.
7. Currently running cycle: Identifier and name of currently running cycle.
8. Next cycle: Identifier, name and drawing of next cycle (if the current cycle is the last cycle,
nothing is displayed).
9. Advance cycle: Button to go to next cycle (if the current cycle is the last cycle, nothing is
displayed). As well as using the button, the cycle can be advanced by pressing directly on the
information for the next cycle (just above the button).
10. Pause: Button to pause the current programme. If the programme is paused, the pause icon will
change to the play icon. The programme can be restarted from where it was interrupted.
11. Stop: Button to stop and cancel the programme. A confirmation message will be requested.
12. Run menu: Access to the current parameters.
Inputs: The status of each of the inputs is displayed. The inputs which are available in
all the machines are always displayed. The inputs which are exclusive to a particular feature
(for example, Self-service, Sanitary, Extra dispensers, Tanks (T1, T2, T3), Tilting…) will only
be available if this feature is activated.
Outputs: The status of each of the outputs is displayed. The outputs which are
available in all the machines are always displayed. The outputs which are exclusive to a
particular feature (for example, Self-service, Sanitary, Extra dispensers, Tanks (T1, T2, T3),
Tilting…) will only be available if this feature is activated.

EN
Página 7 de 43
Settings/values: Display of settings and true values for the current cycle
(Temperature, Level, Time remaining).
Allows setting values to be edited, but is only effective for currently running
programme.
Manual dosing: This section can be accessed, the state of each dispenser (ON /OFF)
is displayed, and the required dose can be activated/deactivated. The available options will
be based on the configuration of existing kits. On exiting the dosing window, all the
dispensers are deactivated.
Manual water inlet: This section can be accessed, the state of each water inlet (ON
/OFF) is displayed, and the required inlet can be activated/deactivated. The water inlet that
has been activated by the fill logarithm cannot be deactivated. On exiting the water inlet
window, all the manually activated water inlets will be deactivated.

EN
Página 8 de 43
4PROGRAMMES
There is a programme library consisting of all the programmes installed by default, together with the
programmes created by the user.
Before explaining the programme management (see section 5.1), details are given of their parameters
and of the standard programmes found in the library.
4.1 Cycle parameters
Each programme is made up of a series of cycles, consisting of a set of parameters which can be
configured, depending on the cycle type in question.
4.1.1 Parameters for soak, prewash, wash or rinse cycles:
Cycle name: Name identifying the cycle. This is not the text displayed on the Run screen,
but the text which identifies a created cycle.
Time: Value, in minutes, of the cycle length. Range can be configured from 1 to 99.
Temperature: Temperature, ºC or ºF, of current cycle.
Range can be configured from 20ºC to 90ºC.
Level: Water level at which cycle should be run.
There are 5 types of level: Minimum (1), Low (2), Medium (3), High (4), Maximum (5)
Please refer to table of levels by model (see section 4.4.). Range can be configured.
Speed: Speed of current cycle. There are 4 different speeds to select from: Minimum
(1), Low (2), Normal (3), High (4).
Please refer to table of speeds by model (see section 4.4.). Range can be configured.
Wash rate: Sequence of movement that washing machine must follow (run time
(seconds) / stop time (seconds)). Range can be configured from 1 to 99.
The drum alternately turns to the left and to the right.
Water inlet: This indicates the selection of the required water inlet.
Hot water: Load water from the hot water inlet (Yes/No).
Cold water: Load water from the cold water inlet (Yes/No).
Auxiliary: Load water from the auxiliary water inlet (Yes/No).
Water adjustment: Load water from one or other inlet depending on the temperature
(Yes/No).
T1, T2, T3: Load water from any of the tanks if recovery KIT is fitted.
Drainage: This displays whether the water should be drained at the end of the cycle,
indicating which outlet should be used if the recovery kit is active.
Cooling: Option that permits the temperature in a cycle to be lowered before
drainage or going to the next cycle. Configurable parameter only if the cycle temperature is
equal to or higher than 40ºC. Range can be configured from 30ºC to cycle setting.
In addition to selecting the cooling value, there is a button to enable or disable this option.

EN
Página 9 de 43
Dispenser 1.8: Each dispenser can be activated independently, and the following
parameters must be configured if it is activated:
Start: If dispenser X is active, indicate when this dispenser should start dosing.
Safety level (ML): Start dosing when the safety level is reached.
Level (L): Start dosing when the defined level is reached.
Temperature (T): Start dosing when the defined temperature is reached.
Time: Time, in seconds, of dispenser X. Range can be configured from 0 to 99.
Delay: Delay, in seconds, of dispenser X. From the moment the programme reaches the
start point indicated, the dosing will be delayed for the time indicated. Range can be
configured from 0 to (cycle time-dosing time).
Move while filling: Rotate drum while machine is filling (Yes/No).
Movement while draining: Rotate drum while machine is draining (Yes/No).
Thermal stop: Indicate the moment from which the time stipulated for the cycle is
counted (Yes/No).
Pause programme: This allows you to pause the programme before the cycle in
question starts running. The pause will be indicated on the screen and an acoustic signal is
emitted. (Yes/No)
If this parameter is active, before starting the cycle, the machine will go to pause status, and
the message “Pause programmed” is displayed on the screen. To continue running the
programme, press the PLAY button.
4.1.2 Parameters for spin cycles:
Time: Value, in minutes, of the spin length. Range can be configured from 1 to 99.
Speed: Spin speed. There are 4 different speeds to select from: Minimum (1), Normal
(2), Medium (3), Maximum (4).
The Medium (3) and Maximum (4) values are only available in high- and medium-speed
machines respectively.
Please refer to table of speeds by model (see section 4.4.). Range can be configured.
Untangling: Untangle at the end of the spin cycle (Yes/No).
Optimum distribution: If this option is active, the machine does not drain in the
previous cycle.
Pause programme: This allows you to pause the programme before the cycle in
question starts running. The pause will be indicated on the screen and an acoustic signal is
emitted. (Yes/No).

EN
Página 10 de 43
4.2 Cycle library
These are the cycles found by default in the cycle library. These cycles can be used to form new
programmes.
Soak cycles
F1: Soak
Prewash cycles
F2: Normal Prewash Cold
F3: Normal Prewash 40ºC
F4: Delicate Prewash Cold
F5: Delicate Prewash 40ºC
F6: Very Delicate Prewash Cold
F7: Very Delicate Prewash 40ºC
F8: Wet Prewash
Wash cycles
F9: Normal Wash Cold
F10: Normal Wash 60ºC
F11: Normal Wash 90ºC
F12: Delicate Wash Cold
F13: Delicate Wash 40ºC
F14: Very Delicate Wash Cold
F15: Very Delicate Wash 40ºC
F16: Wet Wash Cold
F17: Wet Wash 40ºC
Rinse cycles
F18: Normal Rinse
F19: Normal Final Rinse
F20: Delicate Rinse
F21: Delicate Final Rinse
F22: Very Delicate Rinse
F23: Very Delicate Final Rinse
F24: Wet Rinse
F25: Wet Final Rinse
Spin cycles
F26: Short Spin
F27: Long Spin
Cycle symbols:
Soak cycles
Prewash cycles
: Prewash cold, 40: Pre-wash 40 ºC,...
Wash cycles
Rinse cycles
: Rinse, : Final rinse with softener
Spin cycles

EN
Página 11 de 43
Symbols and values of the parameters:
Time
Value in minutes
Temperature
Value in ºC
Level
1:Minimum, 2:Low, 3: Medium, 4:High, 5:Maximum
Wash speed
1:Minimum, 2:Low, 3:Normal, 4:High,
Spin speed
2:Normal, 3:Rapid, 4:Maximum
Water inlet
0:Cold, 1:Cold/Hot according to adjustment
Wash rate
Run time (seconds) Stop time (seconds)
Move while filling
: Yes
Thermal stop
: Yes
Movement in drainage
: Yes
Drainage
: Yes
Cooling
: Yes
Optimum distribution
: Yes
Stop programme
: Yes
Untangling
: Yes
D
Dispenser
with the START/TIME/DELAY programmed at ML/0/30
Tables of cycles with their parameters:
F1
F2
F3
F4
F5
F6
F7
F8
40
40
40
3
5
5
6
6
6
6
5
3
40
40
40
3
1
1
3
3
3
3
3
0
3
3
2
2
2
2
1
15;05
0
1
0
1
0
1
0
15;05
15;05
10;08
08;06
5;15
5;15
02;02
D
D1
D1
D1
D1
D1
D1
D1

EN
Página 12 de 43
F9
F10
F11
F12
F13
F14
F15
F16
F17
60
90
40
40
40
10
10
10
12
12
12
12
10
10
60
90
40
40
40
1
1
1
1
1
1
1
2
2
3
3
3
2
2
2
2
1
1
0
1
1
0
1
0
1
0
1
15;05
15;05
15;05
10;08
10;08
05;15
05;15
02;02
02;02
D
D2, D3
D2, D3
D2, D3
D2
D2
D2
D2
D2
D2
F18
F19
F20
F21
F22
F23
F24
F25
F26
F27
2
2
3
3
3
3
2
2
2
6
4
4
4
4
4
4
4
4
2
4
3
3
2
2
2
2
1
1
15;05
15;05
10;08
10;08
05;15
05;15
02;02
02;02
D
D4
D4
D4
D4
4.3 Programme library
These are the programmes that are found by default in the programme library:
P1: Energetic 90ºC
P2: Energetic 60ºC
P3: Energetic 30ºC
P4: Energetic cold
P5: Normal 60ºC
P6: Normal 30ºC
P7: Normal cold
P8: Delicates 40ºC
P9: Delicates cold
P10: Extra delicates Cold
P11: Economy 90ºC
P12: Economy 60ºC
P13: Economy 30ºC
P14: Economy cold
P15: Sluice
P16: Long spin
P17: Short spin

EN
Página 13 de 43
P1
40
90
1
2
3
P2
30
60
1
2
3
6
15
3
3
2
3
6
6
15
3
3
2
3
6
40
90
30
60
1
1
3
3
3
1
1
3
3
3
3
3
3
3
3
3
4
3
3
3
3
3
3
4
1
1
0
0
0
1
1
0
0
0
15;05
15;05
15;05
15;05
15;05
15;05
15;05
15;05
15;05
15;05
D
D1
D2, D3
D4, D5
D
D1
D2, D3
D4, D5
P3
30
1
2
3
P4
1
2
3
6
15
3
3
2
3
6
6
15
3
3
2
3
6
30
1
1
3
3
3
1
1
3
3
3
3
3
3
3
3
3
4
3
3
3
3
3
3
4
0
1
0
0
0
0
0
0
0
0
15;05
15;05
15;05
15;05
15;05
15;05
15;05
15;05
15;05
15;05
D
D1
D2, D3
D4, D5
D
D1
D2, D3
D4, D5

EN
Página 14 de 43
P5
30
60
1
2
3
P6
30
1
2
3
6
15
3
3
2
3
6
6
15
3
3
2
3
6
30
60
30
2
2
4
4
4
2
2
4
4
4
3
3
3
3
3
3
4
3
3
3
3
3
3
4
1
1
0
0
0
0
1
0
0
0
15;05
15;05
15;05
15;05
15;05
15;05
15;05
15;05
15;05
15;05
D
D1
D2, D3
D4, D5
D
D1
D2, D3
D4, D5
P7
1
2
3
P8
40
1
2
3
6
15
3
3
2
3
6
6
12
3
3
3
6
40
2
2
4
4
4
2
2
4
4
4
3
3
3
3
3
3
4
2
2
2
2
2
3
0
0
0
0
0
0
1
0
0
0
15;05
15;05
15;05
15;05
15;05
10;08
10;08
10;08
10;08
10;08
D
D1
D2, D3
D4, D5
D
D1
D2
D4, D5

EN
Página 15 de 43
P9
1
2
3
P10
1
2
3
6
10
3
3
3
4
12
3
3
3
3
3
3
4
4
4
1
4
4
4
2
2
2
2
2
3
2
2
2
2
2
0
0
0
0
0
0
0
0
0
10;08
10;08
10;08
10;08
10;08
05;15
05;15
05;15
05;15
D
D1
D2
D4, D5
D
D2
D4, D5
P11
90
1
2
P12
60
1
2
15
3
2
3
6
15
3
2
3
6
90
60
1
3
3
1
3
3
3
3
3
3
4
3
3
3
3
4
1
0
0
1
0
0
15;05
15;05
15;05
15;05
15;05
15;05
D
D2, D3
D4, D5
D
D2, D3
D4, D5

EN
Página 16 de 43
P13
30
1
2
P14
1
2
15
3
2
3
6
15
3
2
3
6
30
1
3
3
1
3
3
3
3
3
3
4
3
3
3
3
4
1
0
0
0
0
0
15;05
15;05
15;05
15;05
15;05
15;05
D
D2, D3
D4, D5
D
D2, D3
D4, D5
P15
65
71
1
2
3
P16
3
6
15
3
2
3
2
3
6
6
65
71
4
3
1
1
3
3
3
3
3
3
3
3
3
3
3
4
0
1
1
0
0
0
15;05
15;05
15;05
15;05
15;05
15;05
P17
2
2
D
D1
D2, D3
D4, D5

EN
Página 17 de 43
4.4 Model parameters
MINIMUM
LOW
MEDIUM
HIGH
INTERMEDIATE
MINIMUM
NORMAL
MEDIUM
HIGH
RPM
Max
RPM
450G
0,2V (rpm)
0,4V (rpm)
0,5V (rpm)
0,6V (rpm)
0,8V (rpm)
1V (rpm)
5V (rpm)
3,5V (rpm)
5V (rpm)
7,5V (rpm)
10V
(rpm)
LS -11
1000
1245
20
40
50
60
80
100
500
350
500
750
1000
LS -14
1000
1150
20
40
50
60
80
100
500
350
500
750
1000
LS -19
950
1080
19
38
47
57
76
95
475
332
475
712
950
LS -26
900
1035
18
36
45
54
72
90
450
315
450
675
900
LS -36
860
975
17
34
43
51
68
86
430
301
430
645
860
LS -45
840
16
33
42
50
67
84
420
294
420
630
840
LS -62
760
15
30
38
45
60
76
380
266
380
570
760
LS -120
680
13
27
34
40
54
68
340
238
340
510
680
TS -11
760
20
40
50
60
81
102
507
354
507
760
TS -14
760
20
40
50
60
81
102
507
354
507
760
TS -19
720
19
38
48
57
76
96
480
336
480
720
TS -26
690
18
36
46
55
73
92
460
322
460
690
RS-11
540
21
43
54
64
86
108
540
378
540
RS -14
540
21
43
54
64
86
108
540
378
540
RS -19
510
20
40
51
61
81
102
510
357
510
RS -26
490
19
39
49
58
78
98
490
343
490
RS -36
460
18
36
46
55
73
92
460
322
460
RS -62
420
16
33
42
50
67
84
420
294
420

EN
Página 18 de 43
LS
TS
RS
11
14
19
26
36
45
62
125
11
14
19
26
11
14
19
26
36
62
0
mm
13
16
14
6
7
-70
-70
-80
13
16
14
6
13
16
14
6
7
-70
1
mm
70
75
85
95
125
150
160
200
70
75
85
95
70
75
85
95
125
125
2
mm
90
105
115
125
155
190
210
250
90
105
115
125
90
105
115
125
155
155
3
mm
110
135
145
155
175
230
260
300
110
135
145
155
110
135
145
155
175
175
4
mm
130
165
175
185
205
270
310
350
130
165
175
185
130
165
175
185
205
205
5
mm
180
225
240
260
290
450
500
650
180
225
240
260
180
225
240
260
290
290
6
mm
40
20
40
10
40
20
40
20
40
40
7
mm
250
300
320
350
400
650
700
800
250
300
320
350
250
300
320
350
400
400
8
mm
35
40
45
50
65
75
80
100
35
40
45
50
35
40
45
50
65
65
(Level 0: Offset level, Level 6: Minimum safety level, Level 7: Maximum safety level, Level 8: Weighing level)
4.5 Template for customized programs
P
D
This manual suits for next models
17
Table of contents
Other Primer Washer manuals
