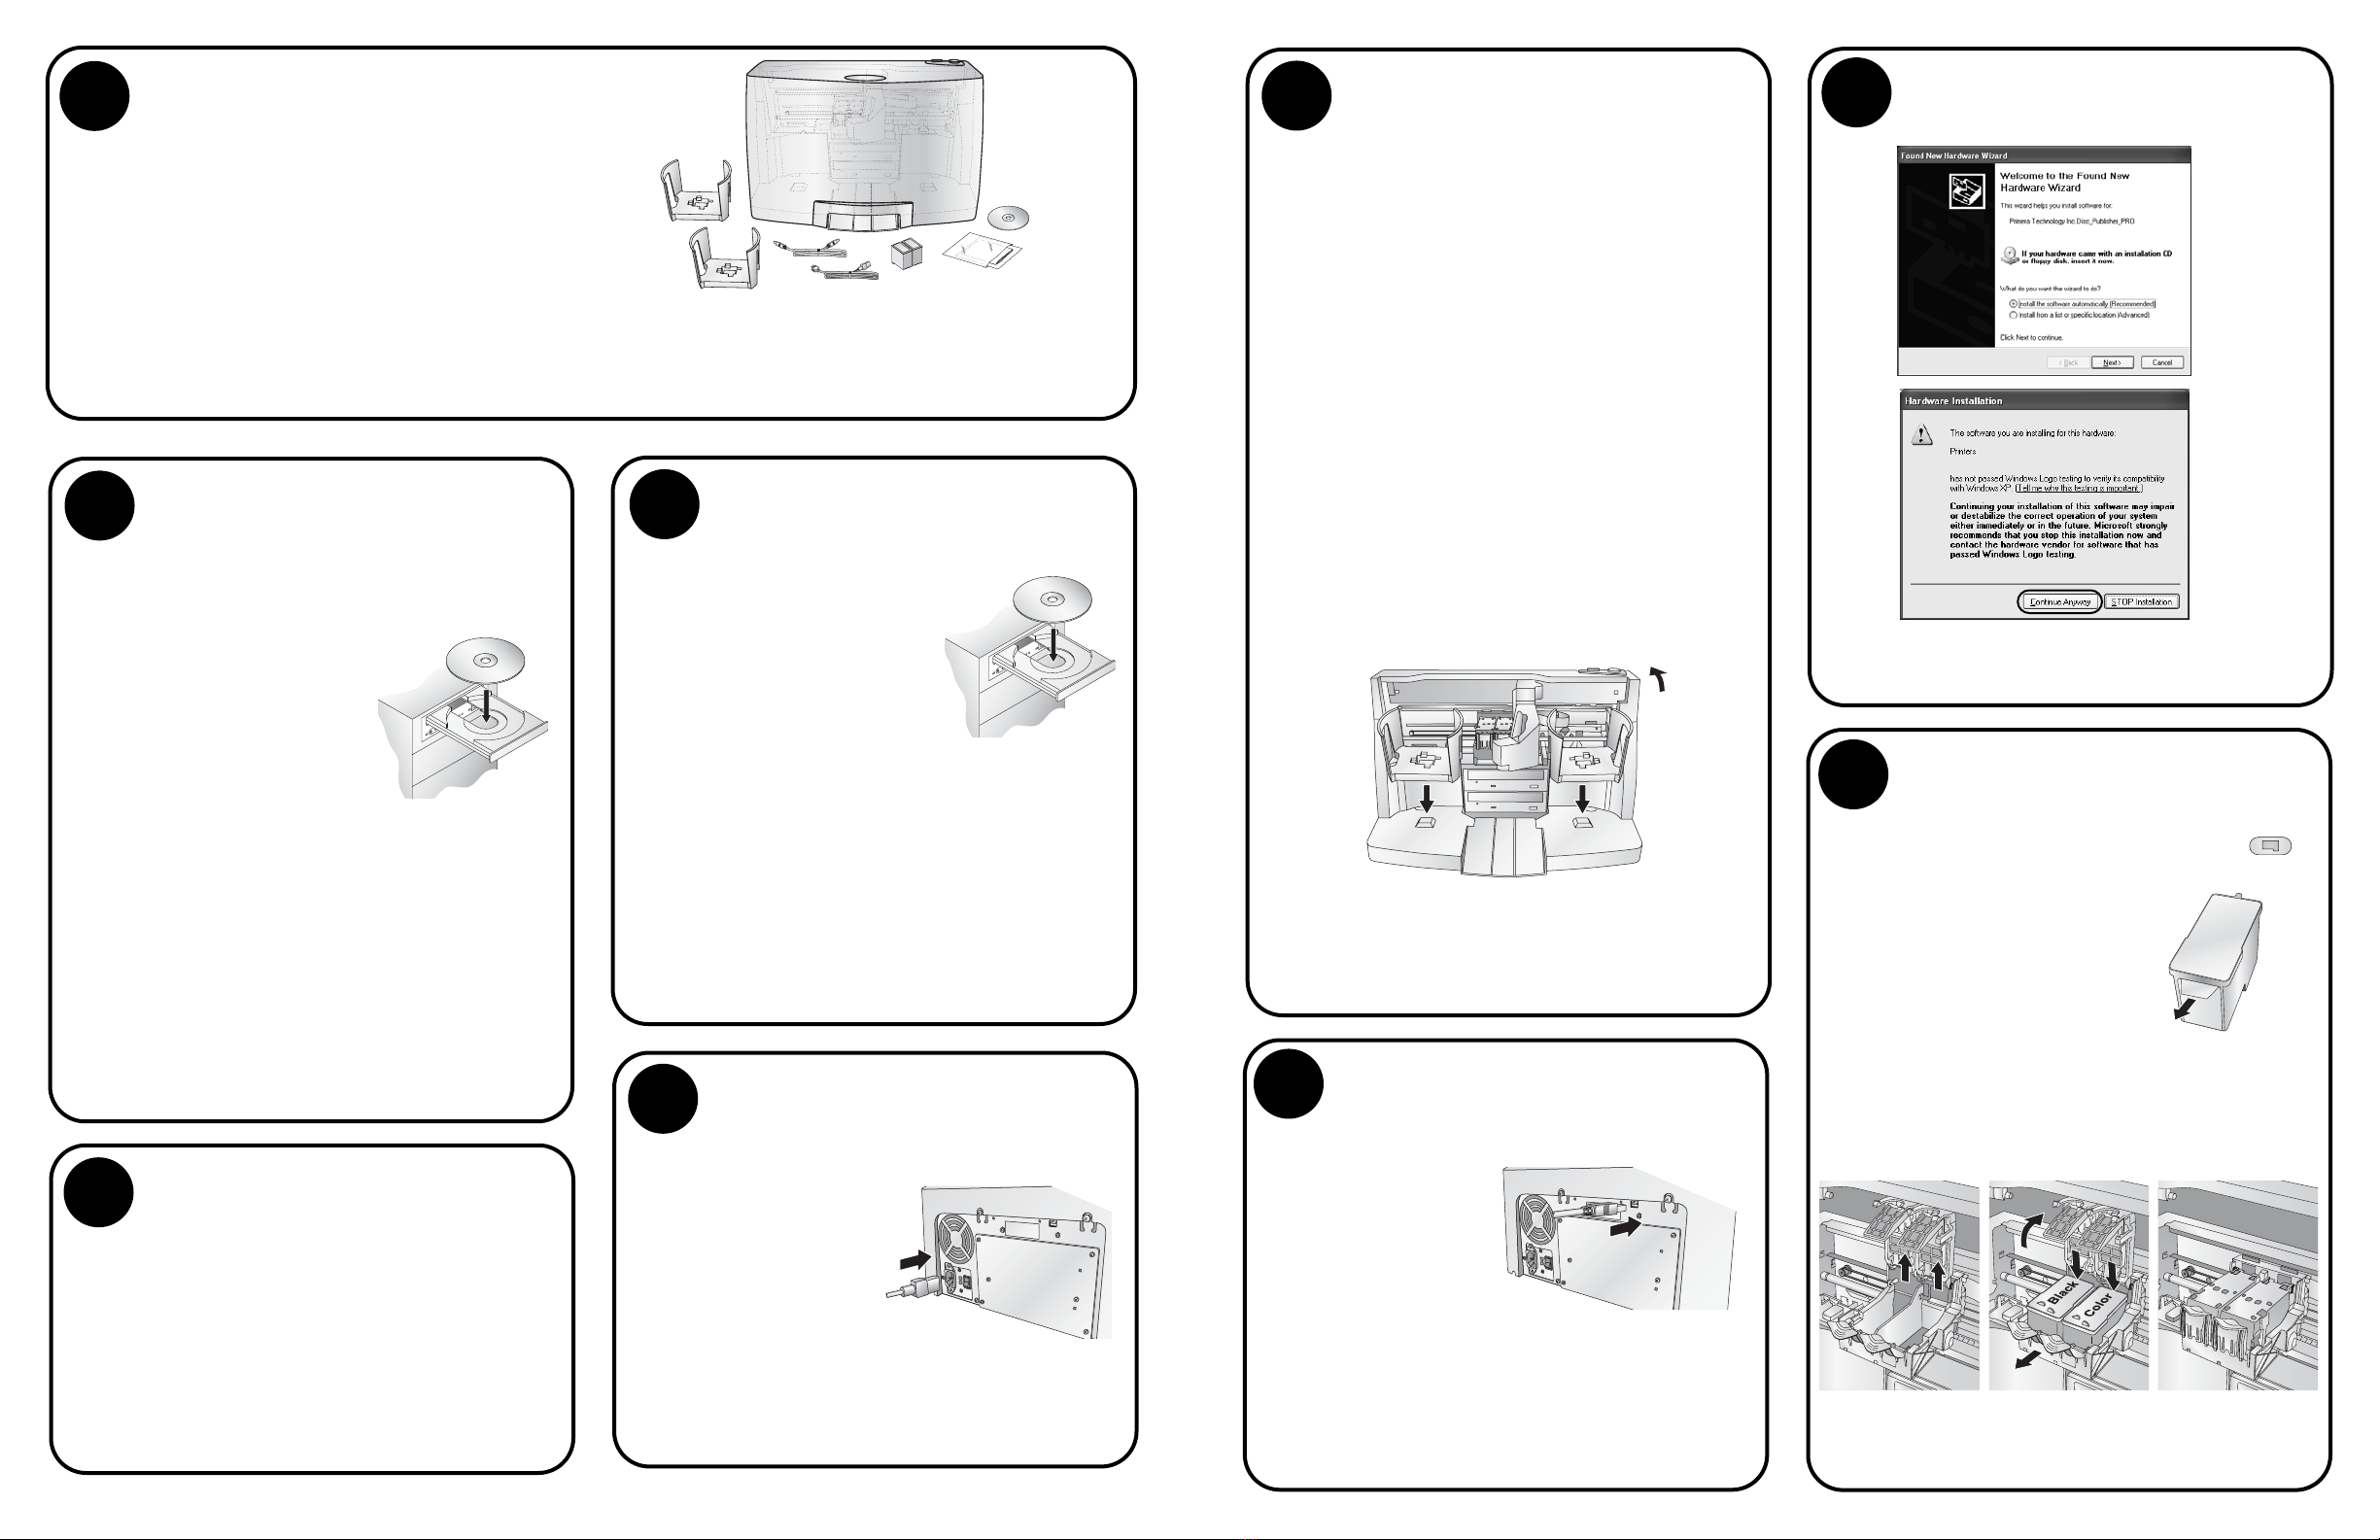
1Unpack Your Publisher
•Optical Disc Publisher
•Gray Plastic Input and Output Bins
•Power Cord
•One Three-Color (CMY) Ink Cartridge
•One Monochrome Black Ink Cartridge
•QuickStart Installer Disc (for use with both
CD-R and DVD-R models)
•USB 2.0 Interface Cable (Beige)
•Warranty Card
•This Operator's Manual, Quick Start Guide
and Other Printed Information
Save the carton and packing materials. They
will come in handy later if you ever need to
transport the Publisher and/or any of its parts
and accessories.
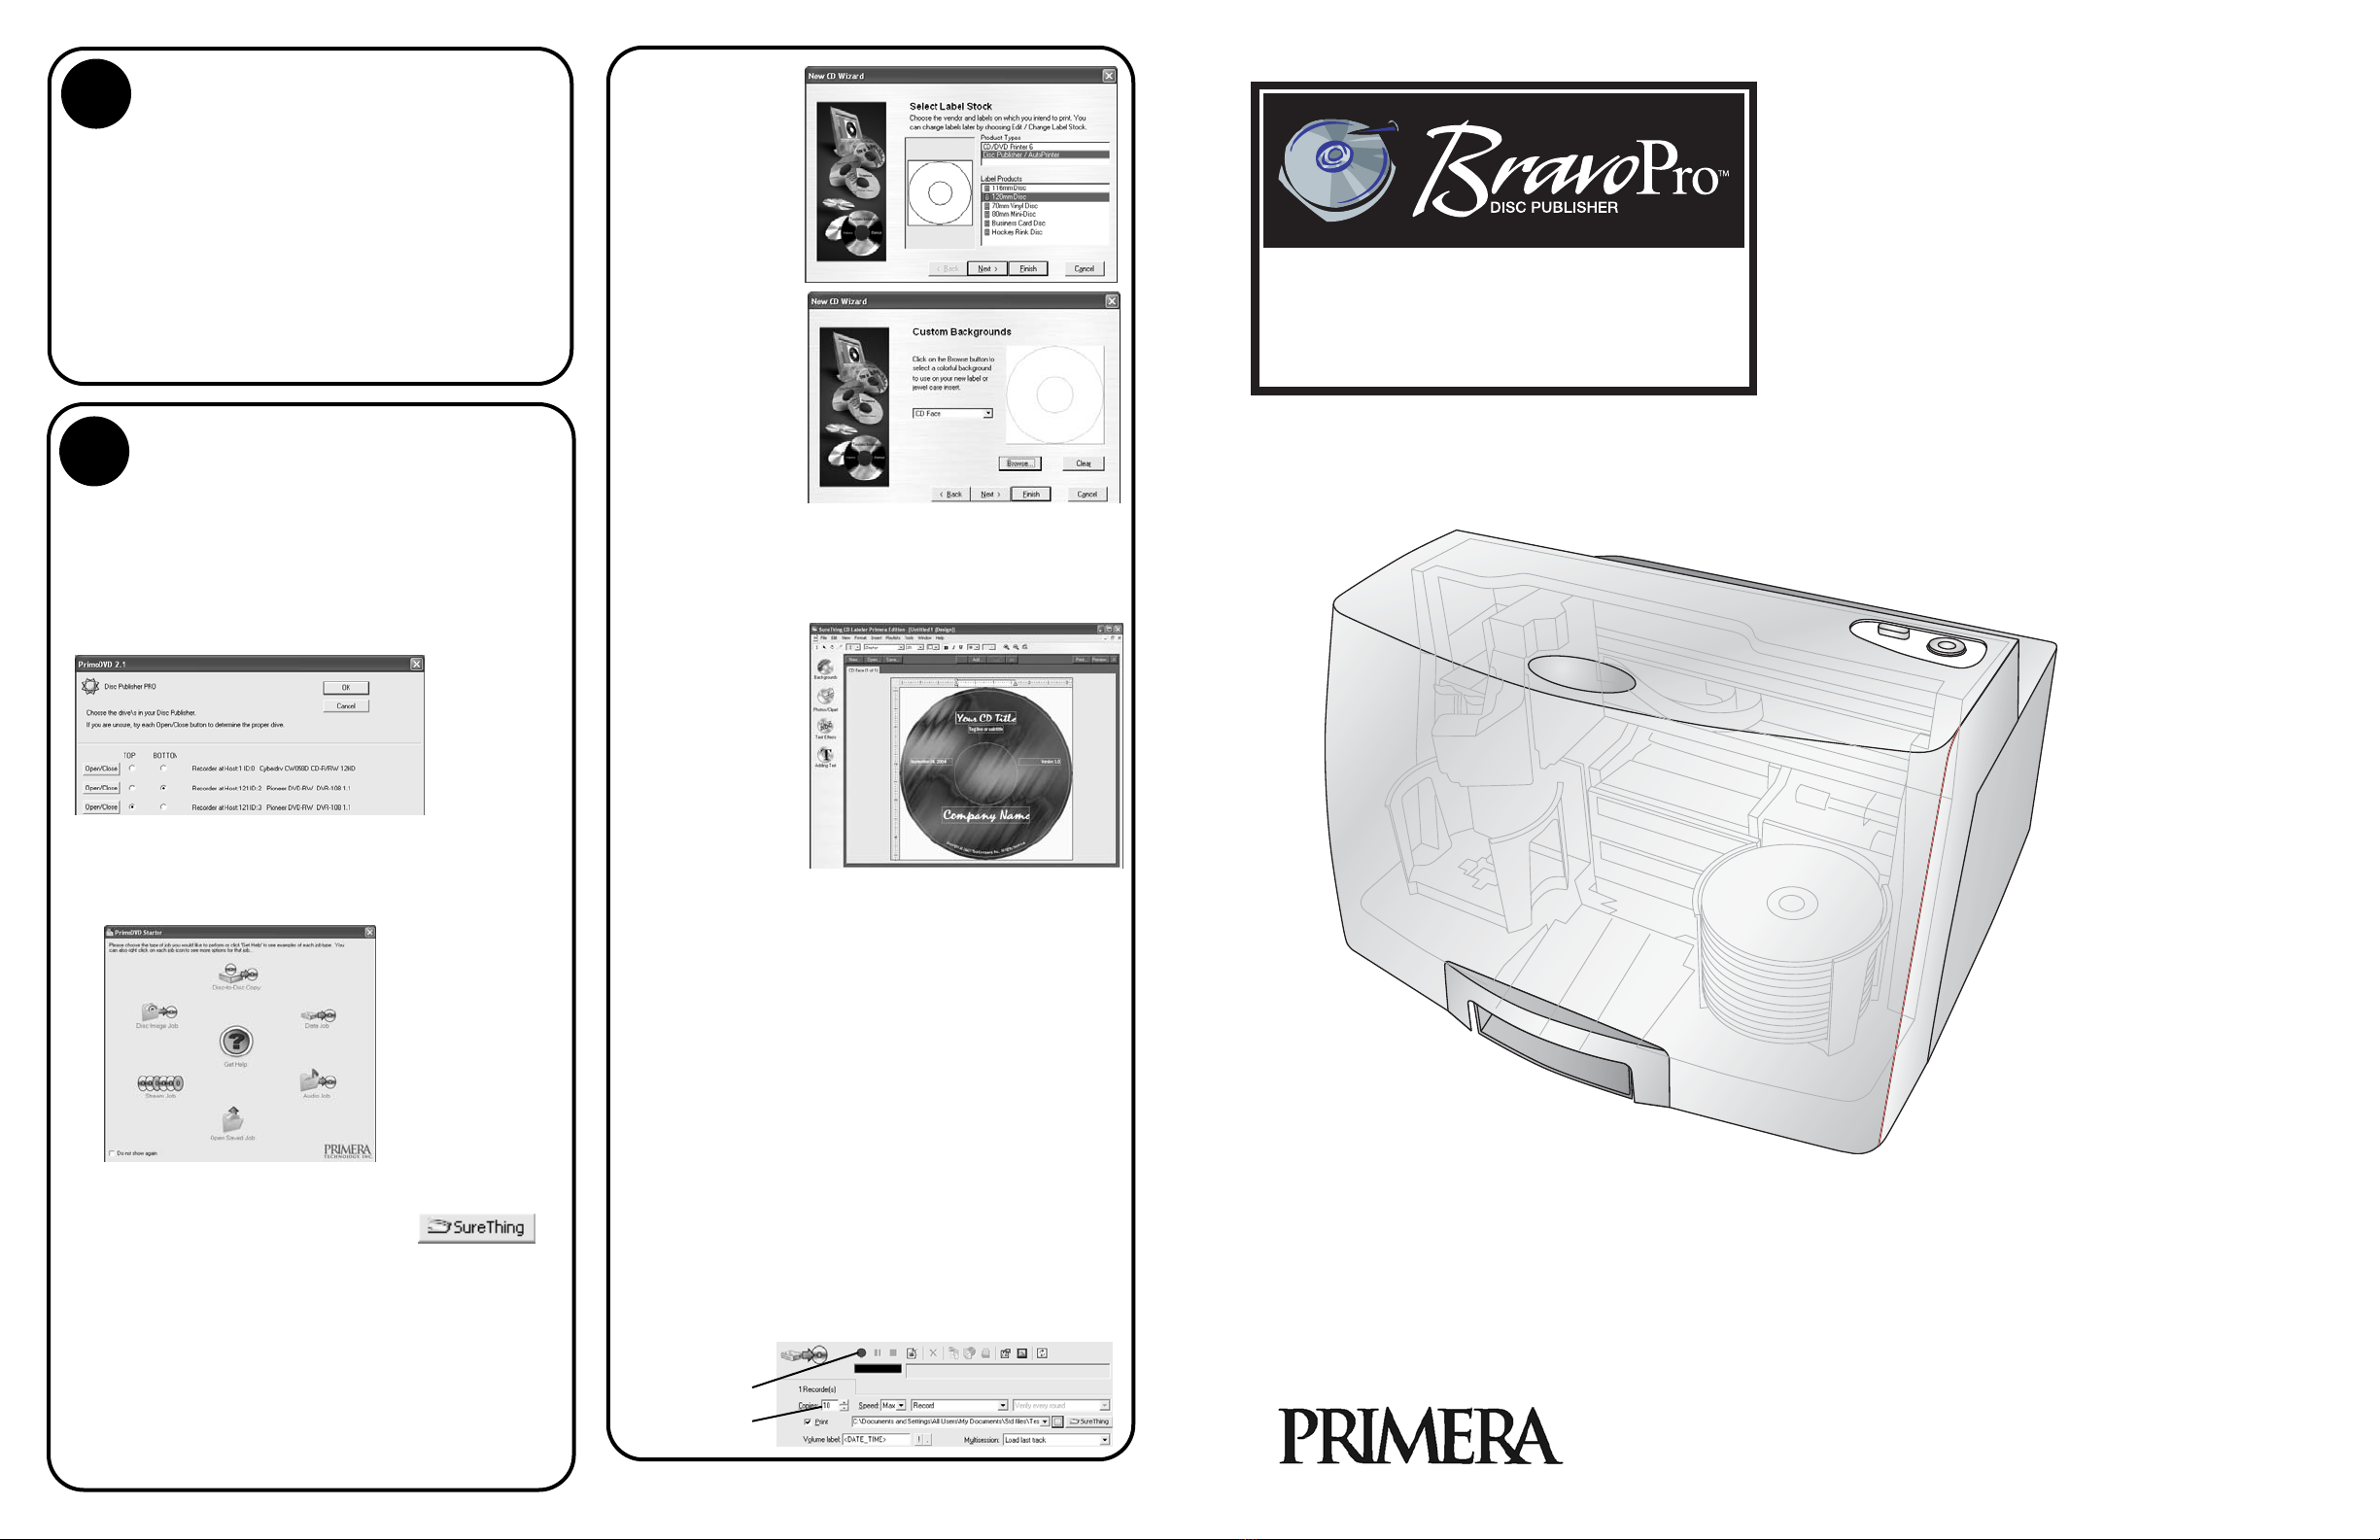
7Installing Ink Cartridges
The Installer Disc has a QuickStart menu that will
guide you through the process of setting up your
duplicator. Please refer to the following for more
information on each step:
1. Place the Optical Disc
Publisher Installer CD in
your CDRom Drive. The
Installer application should
automatically launch in a
few moments. If it does,
proceed to Step 2. If it does
not automatically launch, follow these steps:
•Double-click the My Computer Icon, then
double-click the icon of the appropriate CD
drive containing the Software Installer disc.
•Double-click INSTALL.exe
2. In the Installer Application, click the QuickStart
Install button. The QuickStart Install will guide
you step-by-step through the installation
process. As you complete each step, click Next.
Steps 4-8 are shown below as well as on the
monitor. You may follow either to complete the
setup.
2Installing the PC Software
•Locate the power cord supplied with your
Publisher.
•Plug the adapter into
a surge protected
outlet, and plug the
power plug into the
power port on the
rear panel of the
Publisher.
•Turn on the power switch. Wait for the LED
lights to stop flashing.
4Applying Power
NOTE: Your Publisher can print directly onto virtually
any brand of inkjet printable-surface CD/DVD
media. However, different brands of discs have
different printable coatings. Because of this, you
may need to adjust the printer driver settings to
accommodate your specific brand of CD/DVD
media. Refer to Section 3 in the User’s Manual for
further printer driver information.
Due to the wide variety of printable-surface
CD/DVD media, you may find that certain
brands of discs provide higher print quality
than others. For maximum print quality, use
CD/DVD media authorized by Primera.
Refer to the following steps when loading
discs in to the Publisher:
•Open the front cover of the Publisher
•The Publisher will automatically position
the cartridge carrier and Robotic Disc
Transporter to the center position
allowing for easy access to the bins.
•Load the Input Bin (the bin located on the
right-hand side of the Publisher) with up
to 50 blank discs and place the bins on the
mounting pegs.
5Loading Media (Discs)
You may see
a notice like
the one
shown here
stating that
the Printer
has not
passed
Windows
Logo
Testing.
Click Install
Anyway to
continue
installing the
printer driv-
er for your
Publisher.
Note: If you are using a MAC you may be required
to add the printer via Printer Setup Utility.
6Connecting the USB 2.0 Cable
(continued)
Open Cover
•With the cover open, press the Cartridge Button
on the top of the Publisher to move the
Ink Cartridge Carrier to the load position.
•Remove each ink cartridge
from its packaging.
•Slowly remove the tape
covering the cartridge's
print head.
DO NOT TOUCH THE
COPPER AREA!
•Insert the ink cartridges into the carrier, copper
end first and snap the cartridge cover in place.
Insert the color in the right holder, monochrome
black in the left cartridge holder. The cartridge
labels are color coded to the cartridge covers.
•Close the Publisher's front cover.
3Installing the Mac Software
Before installing Discribe please note that all software
must be installed on a hard disk. Once you have
installed the software, store the original program CD-
ROM in a safe place.
Please note that your user account must have admin-
istrative rights to properly install a new printer. You
can check with your system administrator or check
with Apple support to confirm whether or not your
account has administrative rights.
Install the software as follows:
a. Insert the Bravo Installation
CD-ROM in your system's
CD-ROM drive.
b. Double-click the
CD-ROM icon.
c. Double-click on the Disc
Publisher Installer.mpkg
file icon. Follow the on-screen instructions.
d. The volume containing the operating
system should be selected for installation. Click
the Continue button. All components will be
installed to their proper locations.
e. Once the installation has completed,
click Quit.
You have successfully installed all the necessary
software! The following steps will describe how to
connect the Bravo to your Mac.
3Installing the Mac Software
(continued)
6Connecting the USB 2.0 Cable
Connect the Publisher to your PC with your beige
USB 2.0 Cable. After a
few moments,
Windows will tell you
it has found new hard-
ware and is looking for
software to install it.
Select "Install the soft-
ware automatically" and click Next.