Prism Sound MDIO-Dante User manual

MDIO-Dante Module
Operation Manual


Table of Contents
General Information ............................................................................................................................................... 4
Introduction ............................................................................................................................................................ 7
Scope .............................................................................................................................................................. 7
Terminology ................................................................................................................................................... 7
MDIO Modules ............................................................................................................................................... 8
Quick Start Guide ....................................................................................................................................................
Reference.............................................................................................................................................................. 13
Setting up a Dante Network ................................................................................................................................. 13
Dante Basics ................................................................................................................................................. 13
Network Connections .................................................................................................................................. 13
Dante Controller .......................................................................................................................................... 14
Synchronisation ........................................................................................................................................... 16
Sample Rates ................................................................................................................................................ 17
Dante PCIe card............................................................................................................................................ 18
Renaming Channels and Devices ................................................................................................................. 18
Some Dante Routing Examples .................................................................................................................... 22
Redundant Mode ......................................................................................................................................... 23
Switched Mode ............................................................................................................................................ 24
Multi-cast ..................................................................................................................................................... 25
AES67 ........................................................................................................................................................... 25
Switching to MDIO-Dante Mode .......................................................................................................................... 25
The Prism Sound Control Panel ............................................................................................................................ 25
Appendix 1 - Front Panel LEDs .............................................................................................................................. 2
Appendix 2 - Installing the MDIO-PTHDX module ................................................................................................ 31

©201 - 2020 Audio Squadron Limited
4
General Information
MDIO-Dante Module Reference Revision History
Rev Date Author Comments
1.00 30
th
July 201 S.G. Penn Initial release
1.01 2
nd
January 2020 S.G. Penn Corrections & clarifications
Support Contacts
Audio Squadron Limited
Unit 1A Grovemere House
Lancaster Way Business Park
Ely
Cambridgeshire
CB6 3NW
Telephone: +44 1353 648888
Email: tech.support@prismsound.com
Web: www.prismsound.com
W RNING!
TO PREVENT FIRE OR SHOCK HAZARD DO NOT EXPOSE THIS EQUIPMENT TO RAIN OR
MOISTURE. REFER SERVICING TO QUALIFIED SERVICE PERSONNEL.
Fitting the MDIO-Dante module to a suitable Prism Sound Interface requires the lid to be
removed. There are dangerous voltages inside and installation must be referred to qualified
personnel. Anyone fitting the MDIO-Dante module must ensure that the mains is
disconnected from the unit before removing the cover, and is not re-connected until the
cover is refitted.
Statements of conformity
This equipment has been tested and found to comply with the limits for a Class B digital device, pursuant to
Part 15 of the FCC Rules. These limits are designed to provide reasonable protection against interference in a
residential area. This device generates and uses radio frequency energy and, if not installed and used in
accordance with the instructions, may cause interference to radio or TV reception. If this unit does cause
interference to radio or TV reception, please try to correct the interference by one or more of the following
measures:
a) Reorient or relocate the receiving antenna.
b) Increase the separation between the equipment and the receiving antenna.
c) Plug the equipment into an outlet on a different circuit from the receiver.
d) If necessary, consult your dealer or an experienced radio or TV technician.
CAUTION: Changes or modifications to this equipment not expressly approved by the manufacturer could void
the user's authority to operate this equipment.

©201 - 2020 Audio Squadron Limited
5
THIS DIGITAL APPARATUS MEETS ALL CLASS B LIMITS FOR RADIO NOISE EMISSIONS AS LAID DOWN IN THE
RADIO INTERFERENCE REGULATIONS OF THE CANADIAN DEPARTMENT OF COMMUNICATIONS.
CET APPAREIL NUMÉRIQUE RESPECTE TOUTES LES EXIGIENCES APPLICABLES AUX APPAREILS NUMÉRIQUES DE
CLASSE B SUR LE BROUILLAGE RADIOELECTRIQUE EDICTE PAR LE MINISTERE DES COMMUNICATIONS DU
CANADA.
Audio Squadron Ltd. hereby declares that this equipment conforms to the following standards:
EN55103-1, environment category E4
EN55103-2, environment category E4
NOTE: The use of this equipment and its host interface unit with non-shielded interface cabling is not
recommended by the manufacturer and may result in non-compliance with one or more of the above
directives. All coaxial connections should be made using a properly screened 75R cable with the screen
connected to the outer of the connector at both ends. All analogue XLR and jack connections should use
screened cable with the screen connected to pin 1 of the XLR connector, or the jack outer, at both ends.
Trademark cknowledgements
Microsoft and Windows are trademarks of Microsoft Corporation.
Apple, Macintosh, Core Audio and OS X are trademarks of Apple Computer, Inc.
Dante is a trademark of Audinate Pty Ltd.
All trademarks acknowledged
© 201 - 2020 Audio Squadron Limited. All rights Reserved.
This manual may not be reproduced in whole or part, in any medium, without the written permission of Audio
Squadron Limited.
In accordance with our policy of continual development, features and specifications are subject to change
without notice.

©201 - 2020 Audio Squadron Limited
6

Prism Sound MDIO-Dante Module Operation Manual Revision 1.01
©201 - 2020 Audio Squadron Limited
7
Introduction
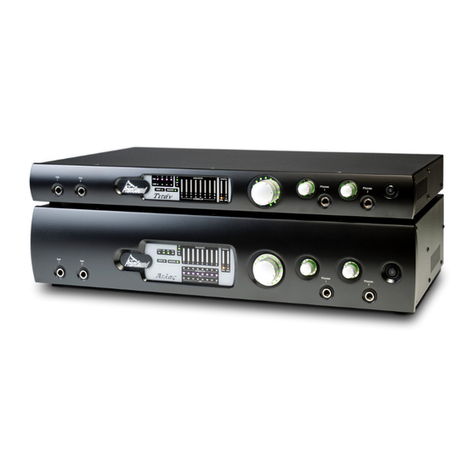
The Prism Sound MDIO-Dante module is an option for Prism Sound interfaces that have the ‘MDIO’ option slot.
This module allows for connection of Atlas or Titan units to an ‘Audio-over-IP’ Dante network, allowing users of
computers on the Dante network to enjoy the excellent sound quality of the Prism Sound Atlas and Titan A/D
and D/A converters, and their equally well regarded on-board microphone pre-amplifiers.
This module makes all analogue inputs and outputs, headphone outputs and AES/SPDIF inputs and outputs
available to the Dante network. Note that ADAT I/Os are not enabled in Dante mode.
A Control Panel app for Windows and Mac is provided to allow control of the unit(s) from a computer
connected to the Dante network or via the existing USB connection as appropriate.
Multiple Titan and/or Atlas units may be connected to the Dante network to provide large channel counts of
perfectly synchronised audio.
Scope
This document aims to help a user to start working with a Dante-equipped Prism Sound interface but does not
aim to explain the full details of the Dante technology. Dante setup can be very simple, however, depending
on how you aim to use the Atlas in your Dante network, you may require further information and training
about the features of Dante and how to operate its software. The designers of Dante – Audinate – have a
website www.audinate.com which has lots of training videos and technical resources.
Terminology
At the time of writing, the MDIO-Dante module can be used with either a Prism Sound tlas or Prism Sound
Titan interface unit. For the sake of simplicity, this document will refer to ‘Prism Sound tlas’ or just ‘ tlas’ as

Prism Sound MDIO-Dante Module Operation Manual Revision 1.01
©201 - 2020 Audio Squadron Limited
8
meaning any unit that can be fitted with an MDIO-PTHDX module, unless there are particular differences (in
which case any differences between models will be noted).
MDIO Modules
Other MDIO module options exist for connection to different interfaces – i.e. currently as of January 2020, the
MDIO-PTHDX module can be fitted for direct connection to an Avid | Pro Tools system utilising either a Pro
Tools | HDX PCIe card, a Pro Tools | HD Native PCIe card or a Pro Tools | HD Native Thunderbolt interface
using a DigiLink cable.
There is a single MDIO module slot. If your Atlas already has the MDIO-PTHDX fitted, it will have to be removed
before fitting the MDIO-Dante. There are details of how to fit the MDIO cards in Appendix 2.

Prism Sound MDIO-Dante Module Operation Manual Revision 1.01
©201 - 2020 Audio Squadron Limited
Quick Start Guide
1. Your Atlas may have come from the factory with the Dante module already fitted, in which case, you
should remove the power for the unit and move straight to step 2.
Alternatively you may be fitting the MDIO-Dante to an existing unit.
If this is an existing unit, it’s VERY important that BEFORE you fit the MDIO-Dante module you should
update the unit in preparation.
Both software and firmware updates are required (a firmware update is a special process, and
involves more than just running an installer) and it must be done in the correct order – software first,
firmware second. If the software is not updated first, it will not be possible to update the firmware.
a) Update the computer software (Driver and Control Panel) to the latest version – this is available
from our website Download pages.
http://www.prismsound.com/music_recording/products_subs/titan/titan_downloads.php
or http://www.prismsound.com/music_recording/products_subs/atlas/atlas_downloads.php
b) Connect your Atlas to the computer via USB (if you have several units, you must connect them and
update them one unit at a time).
c) Update the firmware in your Atlas or Titan. Instructions here..
http://resources.prismsound.com/rp/USBAudio_FirmwareLoading_A4.pdf
(note that a firmware update resets all settings, so you may wish to save them and reload them
afterwards. If you use the Volume control, the firmware update will switch it off, so take care that it’s
set up again before playing any audio).
d) Power down the unit. Only now should you follow the instructions for fitting the MDIO module in
ppendix 2 below.
2. The Prism Sound Atlas unit(s) must be connected to a network, using a Gigabit Ethernet switch and
CAT5e or CAT6 cables.
Any computers that you plan to use with the Atlas(es) must be connected to the same physical
network, and it will be useful to have the Prism Sound control panel software installed to at least one
computer. It’s possible to install and run the software from a number of computers which may be
convenient.

Prism Sound MDIO-Dante Module Operation Manual Revision 1.01
©201 - 2020 Audio Squadron Limited
10
Note that Dante will not work over a wireless network – all devices, including computers, must be
connected physically via CAT5e or CAT6 cables.
The MDIO-Dante module has 2 x RJ45 network connections. For the purposes of this ‘quick start’ you
should connect to only one of them – the ‘Primary’ connector is labelled PRI and is the closest to the
mains inlet. Redundant mode uses the Secondary connector (SEC) and is described later in this
document and can be enabled at a later stage.
Note also that there is another RJ45 connector on the back of the Atlas and Titan underneath the
‘Word Clock Out’ BNC connector. Do NOT attach a network cable to this – this port is disabled.
3. Download and install the Dante Controller software. https://audinate.com/products/software/dante-
controller. This software will be necessary to make connections on the Dante network.
The computer that Dante Controller is running on must be connected to the Dante network.
4. In order to use the Atlas(es) with a DAW software application, you will need a ‘Soundcard Interface’
for the DAW software to use.
This may be the ‘Dante Virtual Soundcard’ software https://audinate.com/products/software/dante-
virtual-soundcard
which adds drivers for WDM and ASIO or Core Audio to the computer and allows you to use a
standard network port to connect the computer to the Dante network.
Or else it may be a PCIe Dante Interface card https://www.audinate.com/products/manufacturer-
products/dante-pcie-card (or a PCIe Dante card in a Thunderbolt enclosure) which is manufactured by
several companies.
In general, the PCIe card will give you larger channel counts and better latency and reliability than the
software-only Dante Virtual Soundcard.
5. You may wish to make the connections to your audio inputs and outputs now.
6. Connect power to the Atlas unit(s).
7. Set each of them to MDIO-Dante mode by pressing and holding their Volume knob for four seconds.
The Host LED on the front panel changes to red.
8. Now open Dante Controller on one of the computers on the Dante network.
You should see the Atlas unit(s) and any other Dante devices (including DVS and/or the Dante PCIe
card) that are attached to the network. Dante Controller will take a few seconds to recognise the
Atlas – don’t be too impatient.
. You can now configure the routings on the network. There are some video tutorials describing how to
use Dante Controller on their website….
https://www.audinate.com/products/software/dante-controller
and user manuals here…
https://www.audinate.com/resources/technical-documentation
.. and some Hints, Tips and example setups follow in this manual.

Prism Sound MDIO-Dante Module Operation Manual Revision 1.01
©201 - 2020 Audio Squadron Limited
11
10. In Dante Controller’s Routing grid, make connections between the Atlas and your Dante Sound card.
11. When starting your DAW software, select the driver for the Dante soundcard. (i.e. DVS or the Dante
PCIe card). Now, whatever you play through the driver’s ‘TX’ outputs will be played to whichever Atlas
Output/RX channel you have routed it to using the Dante Controller grid. Similarly, audio appearing
on the Atlas’ Inputs/TX channels will appear at the driver’s RX channel when you’ve routed it.

Prism Sound MDIO-Dante Module Operation Manual Revision 1.01
©201 - 2020 Audio Squadron Limited
12

Prism Sound MDIO-Dante Module Operation Manual Revision 1.01
©201 - 2020 Audio Squadron Limited
13
Reference
Setting up a Dante Network
Dante Basics
It’s not so likely that you’d have got this far without a basic understanding of what Dante is. In very simple
terms, it’s a means of replacing audio cables with standard network cables, with the ability to connect devices
together using off-the-shelf network switches. This potentially makes cabling simpler, connections can be
configured using software and allows for cables of much longer distances. Because Dante is a network, it’s
possible to make any audio signal that’s attached to this network available at any other location on the
network.
There is a simple Dante overview on the Audinate website ….
https://www.audinate.com/solutions/dante-overview
and a great many other resources and i.e. tutorials ….
https://www.audinate.com/resources/training-and-tutorials
on other parts of their website which can help you decide the best way to set up a Dante network. This
document offers some simple information to help you to get started with Dante on the Prism Sound Atlas and
Titan units but it will help to have some other knowledge of how to work with Dante.
There are many options for customising and securing the network, but by default, IP addresses are set to be
obtained automatically. Therefore we suggest the first thing to do to start to setup the network is to make the
connections – physical, and then ‘virtual’.
Network Connections
Every Device on the Dante Network – Audio Devices, Computers, PCIe cards etc. - must be connected by CAT5e
or CAT6 cables. Two units could be connected directly, but if you’re connecting more than two devices, it gives
most flexibility to connect everything via a standard Gigabit network switch.
For a very simple setup with 1 computer and a few Atlas units, it’s possible to make connections without using
an Ethernet switch by ‘daisy-chaining’ units – see ’Switched Mode’ below.

Prism Sound MDIO-Dante Module Operation Manual Revision 1.01
©201 - 2020 Audio Squadron Limited
14
In order to control devices and to set up routings on the Dante network, you will need a computer attached to
the network via its network port, and for it to be running the Dante Controller software….
Dante Controller
Dante Controller is a free software application for PC and Mac which allows you to configure the Dante
network, to view and control the various settings of the devices on the Dante network and to make routings
between individual units.
The first thing you will be presented with when starting Dante Controller is its ‘Routing’ tab which displays the
inputs and outputs of every device on your Dante network. By clicking in the appropriate box in this grid, you
can connect a path from one device to another.
Having connected any Atlases and Titans you have to the network, they should automatically appear in both
the Transmitter and Receiver axes of the grid.
You will also require one or more Dante utilities that can connect audio playback/recording software running
on your computer (i.e. your DAW, or iTunes, Windows Media Player etc.etc.) into the Dante network. In this
example I have installed the Dante Virtual Soundcard software (DVS), which acts as an ASIO or Core Audio
driver for the DAW software.
By using the TX and/or RX channels of the DVS driver as the Outputs/Inputs of your DAW you can play and
record to or from audio outputs and inputs that are connected via the Dante Controller routing grid to DVS
ports.
Use the + and – buttons to open/close areas of the grid to see the devices you are concentrating on.

Prism Sound MDIO-Dante Module Operation Manual Revision 1.01
©201 - 2020 Audio Squadron Limited
15
Transmitters and Receivers
‘Transmitters’ (TX) are listed along the top; ‘Receivers’ (RX) down the left-hand side, and these names describe
the devices’ relationship to the Dante Network.
So, for instance one of Atlas’s Audio Inputs is a ransmitter – the audio received from a Line input or mic pre is
being transmitted to the Dante network.
An Audio Output is a Receiver - it receives audio from the network.
An output from your DAW software is connected into the network via, say, the Dante Virtual Soundcard which
is a Transmitter (transmitting to the Dante network). That DVS Transmitter must be routed to a Receiver to

Prism Sound MDIO-Dante Module Operation Manual Revision 1.01
©201 - 2020 Audio Squadron Limited
16
allow you to hear the audio. Likewise to record into your DAW, you will need to route an Atlas Transmitter to
the DVS Receiver, and then assign that particular channel for recording in your DAW software.
Clicking in the cross-point between a Transmitter (a.k.a. TX) and a Receiver (RX) creates the routing – the
software thinks about it for a moment and then if the routing is successful, the cell shows a green ‘tick’ icon.
Dante calls a routing a ‘subscription’.
(If the routing is not successful – see below – ‘Synchronisation’).
The picture in the example above shows a very simple setup with just two Dante devices :-
•Atlas (named ATLAS-0132e8)
•A computer running Dante Virtual Soundcard (named DVS).
The cursor (where the darker blue lines meet) is over the routing between
DVS TX 01 - i.e. channel 1 output of the DVS driver/ your DAW software and
Atlas’ RX Analogue Out 1 – i.e. Atlas’ Analogue Output number 1.
You can see that I’ve also routed DVS’s TX 02 to 08 to Atlas RX Analogue Out 2 to 8, and so in your DAW,
outputs 1-8 are connected through to Atlas’s Analogue outputs 1-8.
And in the lower left quadrant of the grid, I’ve also set up routings for Atlas’ Analogue Inputs to map them to
the DVS’ RX1-8 and hence to the audio inputs of your DAW.
It’s worth noting that Dante receivers and transmitters have an ‘address’, like an email address, to help you
work out where they belong. In the yellow pop-up box in the picture above, the analogue output of the Atlas is
referred to as nalogue Out 1@ TL S-0132e8, and the DVS output is 01@DVS.
These names can be customised – see the ‘Renaming Channels and Devices’ section below.
However… before you can start designing some routings, you must check that the devices you wish to route
between are synchronised.
Synchronisation
Multiple sample rates can exist in a Dante network, however there is no sample rate conversion, and so you
can only make connections between devices that are at the same sample rate.
In addition, the devices on the Dante network must be synchronised. This can be automatic – it’s possible to
synchronise the audio to the Dante network’s clock, but in the case of Atlas, we have retained the ability to
synchronise the audio to external sync sources, such as Word Clock or digital input.
In addition to options for Local Sync and Sync to Word Clock/DI, the Dante version of the Atlas Control Panel
has a Sync Source option for ‘PTP’, which stands for ‘Precision Time Protocol’ and when selected means that
Atlas will take its sync from the Dante network clock.
From the Dante network’s perspective, an Atlas on Local clock, is actually externally sync’d (external to the
network sync).
The Dante network has methods for automatically ensuring devices are in sync. You can elect a ‘preferred’
Master, which the Dante network will make it the ‘Grand Master’ for sync if it’s present (and if there are no
other competing ‘preferred’ sync masters on the network).
The simplest way to sync the Atlas units on a Dante network is to set them all to ‘PTP’ using the Sync Source
Control on the Atlas Control Panel. You can elect a Preferred Master there if you wish. The Dante network will
take care of which device is the master clock.
Alternative Sync regimes…
1. Set one Atlas to Local (in the Atlas Control Panel) and set it to be ‘Preferred’. Set all other devices to
‘PTP’. The devices on the network will sync to #1 Atlas’s clock via the network.
2. Set one Atlas to Local and set it to be ‘Preferred’. Set all other devices to Sync Source = Word Clock.
Then you must connect from the #1 Atlas’s Word clock out, to the next device’s word clock in, and
chain it on to other devices in the network. (Of course this may not be so easy due to location of the
devices).

Prism Sound MDIO-Dante Module Operation Manual Revision 1.01
©201 - 2020 Audio Squadron Limited
17
The Clock Status tab of the Dante Controller software is useful for giving you a picture of the synchronisation
setup.
Below is an example of a fairly simple setup, with an Atlas, a Titan and DVS – a Dante Virtual Soundcard.
In this example the Atlas is on Local, the Titan is locked to Word clock from the Atlas. DVS, being software,
always syncs to Dante and can never be a Clock Master. Atlas is the Preferred Master and is ‘Grand Master
Clock’. Titan and Atlas both show a clock source =External, because it’s external to the Dante network.
Tip:- when you’re changing settings, make sure to use the Dante Controller’s ‘refresh’ button – the Dante
Controller display doesn’t automatically update very quickly.
Sample Rates
You will need to check that the Sample rate of all units and the DVS or Dante PCIe driver is the same for
devices involved in any Dante connections that you want to make.
On Atlas and Titan units you can change the sample rate from the Atlas/Titan Control Panel, or from the Dante
Controller’s ‘Device View’/Device Config tab. You can open a Device View by double clicking in Dante
Controller wherever the device’s name appears. It’s possible to change the Sample Rate of an Atlas
(highlighted in red in the picture below) using Dante Controller’s Device View window. Note also that Device
View has a drop-down selector at the top (highlighted in yellow) which allows you to view different devices’
Config settings in turn.

Prism Sound MDIO-Dante Module Operation Manual Revision 1.01
©201 - 2020 Audio Squadron Limited
18
Dante PCIe card
The Dante PCIe cards offer much better performance than the Dante Virtual Soundcard in terms of number of
tracks, latency and reliability of audio data.
Several manufacturers make a Dante PCIe card – there is a list of currently available models on the Audinate
site..
https://www.audinate.com/products/manufacturer-products/dante-pcie-card
Some are available as a ‘PCIE-R’ model – i.e. with dual RJ45 connectors and offering Redundant Mode, as
discussed below.
Note – if a PCIe-R card is set to operate in Redundant Mode don’t connect a Primary network to the Secondary
RJ45 connector use the ‘PRI’ primary connector as per the picture above.
For computers that cannot be fitted with PCIe cards, but have a Thunderbolt port, Audinate approve of a
number of Thunderbolt Expansion boxes as mentioned in this article
https://audinate.com/about/news-activity/press/dante-pcie-includes-thunderbolt-expansion-support
The Dante PCIe card is seen in Dante Controller as a normal device and will show 128 transmitters and
receivers. You will need to install the drivers for Mac or PC, and it will appear as an Core Audio or ASIO device
‘Audinate Dante PCie’.
Note that, unlike the Dante Virtual Soundcard, the Dante PCIe card can be set as a Clock Master if required.
Renaming Channels and Devices
In Dante Controller if you double-click on a Device’s name – for instance in the Transmitter or Receive sides of
the Routing tab, or where it appears in Device Info, clock Status tabs etc. – will show the Device View.

Prism Sound MDIO-Dante Module Operation Manual Revision 1.01
©201 - 2020 Audio Squadron Limited
1
In the Device Config tab it’s possible to change the Device’s name – click in the box under ‘Rename Device’ and
type.
You will see some warnings that renaming a Device can break routings, so it would be a good idea to settle on
some names now, before you spend too much time on complex routings.
In the Receive tab, you can click in the Channel column and rename Atlas’s outputs.

Prism Sound MDIO-Dante Module Operation Manual Revision 1.01
©201 - 2020 Audio Squadron Limited
20
And similarly in the Transmit tab, you can rename Atlas’s Inputs by clicking and typing into the Channel Label
column.
And in the Receive tab, you can rename a label in the Channel column.
The channel labels for a Device must have unique names (in the same way that an email address must be
unique – the channel label is part of the address in the Dante system).
Other manuals for MDIO-Dante
1
This manual suits for next models
1
Table of contents
Other Prism Sound Recording Equipment manuals
