PrismCut P28 User manual

PrismCut
Cutter/Plotter with WiFi
Quick Start Guide
POWER SWITCH
CONTROL PANEL
touch screen
CARRIAGE HEAD (white)
moves the blade across cutting area
PINCH ROLLERS (black)
position pinch rollers under arrows
KEY STEPS FOR GETTING OPTIMAL RESULTS
• Use a short blade depth. In most cases, the blade does not need to be extended more than 1/2 the thickness of a credit card. New
users tend to expose too much blade. The idea is to cut through just the top layer of the vinyl and to leave the backing layer with only
minimal scratches. This allows you to weed the top layer o the backing easily. If corners or small detail do not cut all the way through,
consider increasing the force before extending the blade depth. You only need to extend the blade depth or use the 60 degree (blue tip)
blade for thicker materials.
• Set a safe and reliable speed. A good starting value for speed is 400. When you have accumulated experience with the material you
are cutting and production time becomes a factor, you can look to increase the speed. Also, intricate jobs typically require lower speeds.
• Set the correct force. A good starting value for force is 70, then adjust force up or down depending on how thick/dense the material
is to be cut. With cutting mat and test material in place, use the the Test Cut icon on the cutter’s main screen to cut a small square in
your test material to see that it cuts all the way through and can be weeded easily.
• Align the pinch rollers so that they are under the guide arrows. The pinch rollers must align with the gritted sections on the bottom
roller. Note that the small levers on top of each pinch roller should be set to the down position unless extra strong pressure is needed.
• The cutting mat is used when cutting materials that do not have their own backing. Place your material on the cutting mat so that
the pinch rollers roll on the mat, not the material. Move unused pinch rollers out of the way so they don’t touch the parts of the material
being cut. Use a brayer roller to flatten your material on the sticky part of the cutting mat or tape the edges of thicker materials to the
cutting mat. For wider jobs it sometimes cannot be avoided and the pinch rollers will need to roll over areas of the material being cut,
however typically this is not a problem.
• When cutting long pieces of material it is important to carefully position the material so that it is completely straight and doesn’t drift
to one side when cutting. CONSULT THE USER MANUAL OR WATCH VIDEOS FOR ADDITIONAL TIPS
POWER PLUG
USB CABLE PORT
connect to computer
only if not using WiFi
U-DISK SLOT
cut files without computer
PINCH ROLLER LEVER
Up/Down pinch rollers
ver 1.7 - Oct 3, 2019
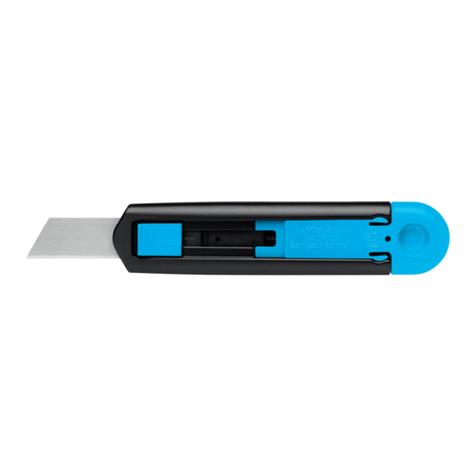
Use 45 degree blade for
most common uses
Use 60 degree blade for
thicker materials
Set blade depth to cut only
the material not the backer
BLADE SETUP
Quickstart Video: www.prismcut.com/videos
BLADE HOLDER (silver)
(caution: blade inside!)
Turn on Cutter for WiFi SETUP (follow prompts on cutter main display)
Connect to your home
WiFi using the same
WiFi password you
use for your tablet or
other home devices
START HERE
NOTE: You do NOT need the USB cable if using WiFi. WiFi is recommended
YOU CAN ALSO ACCESS THE WiFi MENU BY PRESSING THE SETTINGS ICON

For Windows PC download VinylMaster at: https://fcws1.com/info/vmlinks.php
SURE CUTS A LOT (MAC screen)
For MAC computers download Sure Cuts A Lot software at: www.craftedge.com/register/scal4pro
Sure Cuts A Lot - Step 1
To configure WiFi if your software is Sure Cuts a Lot,
click on Cutter icon to open Cut Settings menu.
Select Model = PrismCut, Connection = TCP/IP and
enter the IP address displayed on the cutter’s home
screen.
The IP address on both the cutter and the computer
must match in order for WiFi communications to work.
If you do not see PrismCut as a model selection, on
the very top line where you see File, Edit, Object, Path
etc. click on Cutter->My Cutter->Manage Cutters and
add PrismCut
Your cutter and computer should now be connected.
In the Sure Cuts A Lot program, try dragging the heart
shape from the library onto the design mat and send it
to the cutter (click the cutter icon to send to cutter).
With no blade yet, you will not damage your cutter.
VinylMaster - Step 1
To configure WiFi if your software is VinylMaster,
first click on Shuttle icon to open the
Vinyl Spooler menu.
VinylMaster - Step 2
* Click on the Connection Tab within the Vinyl Spooler menu
to display cutter Connection Settings (red oval, top right)
* In Current Vinyl Cutter section click on the pull down menu
for Current Cutter and select PrismCut (see black arrows)
* If you need to add a new cutter click the +ADD button
under Current Cutter
* In Connection Method section click on the pull down menu
for Port Type and select Windows Port
* In Settings section click on the pull down menu for Port
and select TCP
VinylMaster - Step 3
* Within the same Connection Tab, click on the Configure
button in the Settings section to open a window to
configure the TCP/IP port values.
* Connect cutter to WiFi IP before adding IP in VinylMaster
* Enter the IP address that is displayed at the top of the
PrismCut cutter’s home screen.
* The IP address MUST be the same for both cutter and PC
* Ignore port number (leave it at 8080)
* Press the Test button to verify that communications work
Your cutter and PC should now be connected. You can try
creating a simple design in VinylMaster and send to your
cutter as outlined below
AFTER SETTING UP WiFi ON THE CUTTER, DOWNLOAD AND INSTALL EITHER SURE CUTS A LOT
OR VINYLMASTER SOFTWARE AND CONFIGURE YOUR SOFTWARE WiFi TO MATCH CUTTER WiFi
THIS IS THE IP ADDRESS.
IT MUST MATCH ON BOTH THE
CUTTER AND COMPUTER.
IP STARTS WITH 192.168.... (or
sometimes IP starts with 172....
or 10.....) BUT YOUR NUMBERS
WILL BE DIFFERENT.
Note: if the top line starts with
HI-LINK_xxxx you are not yet
connected to your home router.
Go to WIFI in SETTINGS to set up
WiFi connection.
1
2
3
Click on the A icon
on the left side of the
screen and then click
inside the design area.
Type Hi! and then click
on the cutter icon on
the top line to send
the job to the cutter
Click on “Cut Now” to
confirm your choice.
Since the blade is not
yet inserted you will not
damage your material
but you should see the
control head move,
confirming you have
communications
You will need the software serial number you received with your purchase to download software
This manual suits for next models
1
