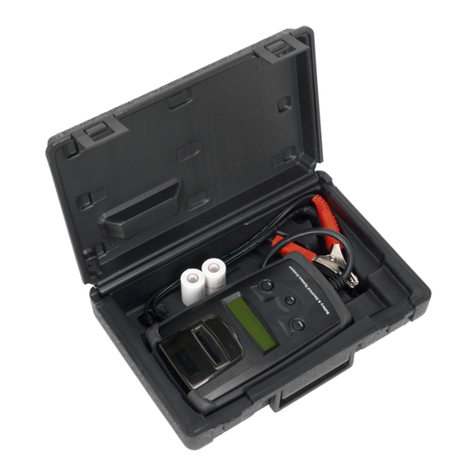
pro user BT400 User manual

12 V DIGITAL BATTERY TESTER
12 V DIGITAL BATTERIETESTER
12 V TESTEUR DE BATTERIE DIGITAL
12 V COMPROBADOR DE BATERÍA DIGITAL
12 V TESTER DI BATTERI
12 V BATTERIJTESTER
12 V TESTOVACÍ PŘÍSTROJ NA BATERIE
12 V TESTOVACÍ PRÍSTROJ NA BATÉRIE
12 V PRZYRZĄD DO TESTOWANIA
AKUMULATORÓW
12 В ПРИБОР КОНТРОЛЯ НАПРЯЖЕНИЯ
АККУМУЛЯТОРА
BT400

INTRODUCTION
Thank you for purchasing the BT400 12Volt Digital Battery Tester.
Please carefully read and follow the following safety and operating instructions.
l Plug the battery tester into the 12 Volt DC accessory outlet inside the car before or after the start of the
engine in order to test the battery exactly
l The LEDs and the digital display will show battery voltage and battery condition(see chart below)
l Plug the battery tester into the 12 Volt DC accessory outlet inside the car
l Switch ON all the auxiliary electronic equipment (e.g. vipers, lights, …)
l Start the engine
l Repeat the same procedure with having switched OFF all the auxiliary electronic equipment (e.g. vipers,
lights, …)
l In both cases the symbol should not pop up in the display. If you see this symbol it indicates that the
Alternator is supplying no voltage or too low/too high voltage. Please let the alternator be checked by your
car workshop.
l Additional to this information the LEDs and the digital display will show battery voltage and battery
condition (see chart above)
l Connect the BT400 (5V input) with the USB cable of your mobile electronic equipment
l Your mobile electronic equipment will be charged upon the following status from your USB port
- USB icon display: indicates USB is workable
- USB icon OFF: indicates input voltage > / = 15.2V OR < 10.5V, it’s in OFF status
- USB icon flash: indicates overload or short circuit, it’s in OFF status
INSTRUCTIONS TESTING BATTERY
LED LAMP
DIGITAL
READOUT
INDICATION
CONDITION
Flash
ON
YELLOW
X
Below 7.0V
POOR
Examine battery and electrical system
YELLOW
X
Display Real
Voltage
LOW VOLTAGE
7-11.8V,To check if need to charge
battery
GREEN
X
Display Real
Voltage
NORMAL
11.8-14.5V, Normal
RED
X
Display Real
Voltage
HIGH VOLTAGE
14.5-15.5V, Battery Fully Charged
RED
X
Above 15.5V
HIGH INPUT
VOLTAGE
Examine alternator and battery
INSTRUCTIONS TESTING ALTERNATOR
INSTRUCTIONS CHARGING MOBILE ELECTRONIC EQUIPMENT

TECHNICAL SPECIFICATIONS
- Working Temperature: -10~+40°C
- Working Voltage: 8-16V
- USB power output : 5V 1.0Amp
ENVIRONMENTAL PROTECTION
- Waste electrical products should not be disposed of with household waste.
- Please recycle where facilities exist. Check with your local authority or retailer for recycling advice.
WARRANTY
Pro-User warrants this product for a period of 2 years from the date of purchase to the original purchaser.
Warranty is not transferable. Warranty covers defect against workmanship and materials only. To obtain
warranty service, please return the unit to the place of purchase or authorized Pro-User dealer together with
your proof of purchase. The warranty is void if the product has been damaged or not used as described in this
manual. Warranty is void if a non-authorized repair has been performed. Pro-User makes no other warranty
expressed or implied. Pro-User is only responsible for repair or replacement (at Pro-Users’ Discretion) of the
defective product and is not responsible for any consequential damage or inconvenience caused by the defect.

EINFÜHRUNG
Vielen Dank für den Kauf unseres BT400 12Volt Digital Batterietesters.
Bitte lesen Sie die folgende Bedienungsanleitung vor Benutzung aufmerksam durch.
l Stecken Sie das BT400 in die 12 Volt DC Steckdose in Ihrem Auto vor oder nach Starten des Fahrzeuges.
l Die LEDs und das Display zeigen die Batteriespannung und den Zustand der Batterie wie folgt an:
l Stecken Sie das BT400 in die 12 Volt DC Steckdose in Ihrem Auto
l Schalten Sie diverse Verbraucher an (z.B. Scheibenwischer, Abblendlicht, Heckscheibenheizung, …)
l Starten Sie den Motor
l Wiederholen Sie den Vorgang mit ausgeschalteten Verbrauchern.
l In beiden Fällen sollte das Symbol nicht im Display erscheinen. Falls Sie das Symbol sehen, stellt
die Lichtmaschine keine Spannung, zu viel Spannung oder zu wenig Spannung zur Verfügung. In diesem
Falle sollten Sie die Lichtmaschine in Ihrer Werkstatt kontrollieren lassen.
l Zusätzlich zeigt das BT400 mit den LEDs und dem Display die Batteriespannung und den Zustand der
Batterie analog der oben dargestellten Tabelle an.
l Verbinden Sie das BT400 (5V Eingang) mit dem USB Kabel Ihres elektronischen Gerätes.
l Ihr elektronisches Gerät wird in Abhängigkeit von der Zustandsanzeige Ihres USB Symbols im Display
aufgeladen:
- USB Symbol im Display: USB funktioniert und Gerät kann geladen werden.
- Kein USB Symbol im Display: Spannung die am BT400 anliegt ist >/= 15.2V oder < 10.5V, daher kann
der USB Anschluss nicht benutzt werden.
- USB Symbol blinkt: Es liegt eine zu hohe Spannung an oder ein anderes Fehler hat stattgefunden,
daher ist die Benutzung nicht möglich.
ANLEITUNG TESTEN DER BATTERIE
LED
DISPLAY
INDICATION
CONDITION
Blinkt
AN
GELB
X
< 7.0V
DEFEKT
Überprüfen Sie die Batterie und das
elektrische System
GELB
X
Anzeige
Batteriespannun
g
NIEDRIGE
SPANNUNG
7-11.8V,Batterie sollte geladen werden
GRÜN
X
Anzeige
Batteriespannun
g
NORMALER
ZUSTAND
11.8-14.5V, Normaler Zustand
ROT
X
Anzeige
Batteriespannun
g
HOHE
SPANNUNG
14.5-15.5V, Batterie vollständig geladen
ROT
X
> 15.5V
ZU HOHE
SPANNUNG
Überprüfen Sie die Lichtmaschine und
die Batterie auf Fehler
ANLEITUNG TESTEN DER LICHTMASCHINE
ANLEITUNG LADEN VON ELEKTRISCHEM ZUBEHÖR

Technische Spezifikationen
Umgebungstemperatur: -10~+40°C
Spannungsbereich: 8-16V
USB Ausgang: 5V 1.0Amp
Umweltschutz
Gebrauchte Elektroprodukte sollten nicht gemeinsam mit dem Hausmüll entsorgt werden.
Bitte entsorgen Sie Elektroprodukte dort, wo die entsprechenden Einrichtungen geschaffen
wurden. Bei den örtlichen Behörden erhalten Sie Informationen zum Thema Recycling.
Garantie
Pro-User gewährt auf dieses Produkt für die Dauer von 2 Jahren eine Garantie ab dem Kaufdatum. Die
Garantie ist nicht übertragbar. Die Garantie deckt nur Defekte gegen fehlerhafter Fertigung und Material. Im
Garantiefall senden Sie das defekte Gerät an Ihren Verkäufer mit Kassenbeleg zurück. Die Garantie ist nichtig,
wenn das Gerät beschädigt oder nicht nach Bedienungsanleitung betrieben wurde. Garantie verfällt ebenfalls,
wenn das Gerät geöffnet und eine nicht autorisierte Reparatur durchgeführt wurde. Pro-User gibt keine
anderweitigen Garantien. Pro-User ist nur verantwortlich für Reparatur oder Umtausch des defekten Gerätes
und nicht haftbar zu machen für Beschädigungen, die durch den Defekt entstanden.

INTRODUCTION
Merci d’avoir choisi notre BT400 12Volt Digital Testeur de batteries.
Avant l’utilisation veuillez lire attentivement le mode d’emploi suivant.
l Branchez le BT400 sur la prise 12 Volt DC dans votre voiture, avant ou après le démarrage du véhicule.
l Les LED et le Display affichent la tension de la batterie et l’état de la batterie comme suit:
l Branchez le BT400 sur la prise 12 Volt DC dans votre voiture
l Allumez différents consommateurs (p.e. les essuie-glaces, les codes, le chauffage de la vitre arrière, …)
l Démarrez le moteur
l Répétez le processus avec les consommateurs éteints
l Dans les deux cas le symbole ne devrait pas apparaître dans le display. Au cas, où vous voyez le
symbole, l’alternateur propose trop de tension ou trop peu de tension. Dans ce cas, vous devriez faire
contrôler l’alternateur chez votre concessionnaire.
l En outre le BT400 affiche avec les LED et le Display la tension de la batterie et l’état de la batterie suivant
le tableau ci-dessus.
l Reliez le BT400 (5V entrée) avec le câble USB de votre appareil électrique.
l Votre appareil électronique sera chargé selon l’affichage de votre symbole dans votre display :
- Symbole USB dans le Display: USB fonctionne et l‘appareil peut être chargé
- Pas de symbole USB dans le Display: Tension sur le BT400 >/= 15.2V ou < 10.5V, pour cette
raison le branchement USB ne peut pas être utilisé.
- Le symbole USB clignote: La tension est trop élevée ou un autre défaut a eu lieu, pour cette raison,
l’utilisation n’est pas possible.
MODE D’EMPLOI TEST DE LA BATTERIE
LED
DISPLAY
INDICATION
ETAT
clignote
ON
JAUNE
X
< 7.0V
DEFECTUEUX
Examinez le stockage de la batterie et
l’éclairage
JAUNE
X
Affichage
tension de la
batterie
BASSE TENSION
7-11.8V, la batterie devrait être chargée
VERT
X
Affichage
tension de la
batterie
ETAT NORMAL
11.8-14.5V, Etat normal
ROUGE
X
Affichage
tension de la
batterie
HAUTE TENSION
14.5-15.5V, Batterie complètement
chargée
ROUGE
X
> 15.5V
TENSION TROP
ELEVEE
Recherchez des défauts sur l’éclairage
et la batterie
MODE D’EMPLOI TEST DE L’ALTERNATEUR
MODE D’EMPLOI CHARGE DES ACCESSOIRES ELECTRIQUES

SPECIFICATIONS TECHNIQUES
- Température: -10~+40°C
- Voltage: 8-16V
- USB output : 5V 1.0Amp
PROTECTION DE L‘ENVIRONNEMENT
Des produits électriques usés ne devraient pas être éliminés ensemble avec les
déchets ménagers. Veuillez déposer vos produits électriques aux endroits prévus à
cet effet. Auprès des administrations locales, vous pouvez obtenir des
informations au sujet du recyclage.
GARANTIE
Pro-User accorde sur ce produit une garantie de 2 ans à partir de la date d’achat. La garantie
n’est pas transférable. La garantie ne couvre que les défauts d’une fabrication défectueuse et du
matériel. Pour faire valoir la garantie, veuillez renvoyer l’appareil défectueux à votre vendeur
avec le ticket de caisse. La garantie n’est pas applicable, si l’appareil a été endommagé ou n’a
pas été utilisé selon le mode d’emploi. La garantie n’est également pas applicable, lorsque
l’appareil a été ouvert et une réparation non autorisée a été réalisée. Pro-User n’accorde pas
d’autres garanties. Pro-User est seulement responsable pour la réparation ou l’échange de
l’appareil défectueux, et ne peut pas être rendu responsable pour les dommages, qui résultent
du défaut.

Introduzione
Ci ringraziamo per la compra del nostro BT400 12Volt test digitale di batteria.
Si prega di leggere questo manuale di operazione attentamente.
l Connettere il BT400 con la presa 12V DC nel veicolo prima o dopo lanciare il veicolo.
l I LED e il display mostra il voltaggio della batteria e la condizione della batterie come seguente:
l Connettere il BT400 con la presa 12V DC nel veicolo prima o dopo lanciare il veicolo.
l Lanciare con sommatori diverrei (p.e. luce, riscaldamento, tergicristallo.)
l Lanciare il motore
l Ripetere il processo con sommatori spegnati
l In ambedue casi non deve mostrare il simbolo nel display. Se vedete il simbolo, il dinamo forne
nessuno, troppo o troppo meno di voltaggio. In questo caso si consiglia di fare controllare la dinamo
da un meccanico.
l Addizionale il BT400 con i LED e il display mostra il voltaggio della batteria analo alla tabella
mostrato in alto.
l Connettere il BT400 (5V entrata) con la spina USB dell´accessorio.
l L´accessorio e caricato in dipendenza del display di condizione del vostro simbolo USB nel display.
- Simbolo USB nel Display: USB funziona, pronto per carica.
- Nessun simbolo USB nel Display: Voltaggio al BT400 e >/= 15.2V o < 10.5V, per questo la
concezione USB non può essere usato.
- USB Simbolo aluccia: Presente voltaggio troppo alto o un errore diverso, quindi uso e impossibile.
Manuale testare la batteria
LED
DISPLAY
INDICAZIONE
CONDIZIONE
Aluccia
ON
GIALLO
X
< 7.0V
DIFETTO
Verificare storo della batteria e sistema
elettrica
GIALLO
X
Display
Voltaggio
VOLTAGGIO
BASSO
7-11.8V, consigliato caricare la batteria
VERDE
X
Display
Voltaggio
CONDIZIONE
NORMALE
11.8-14.5V, Condizione normale
ROSSO
X
Display
Voltaggio
VOLTAGGIO ALTO
14.5-15.5V, Batteria caricata
completamente
ROSSO
X
> 15.5V
VOLTAGGIO
TROPPO ALTO
Verificare batteria e dinamo per difetti
Manuale testare la dinamo
Manuale carica di accessori elettrici

Specificazioni tecniche
Temperatura all´intorno: -10~+40°C
Voltaggio: 8-16V
Uscita USB: 5V 1.0Amp
Ecologia
Non smaltire prodotti elettronici insieme con i rifiuti domestici. Si prega di smaltire
i prodotti elettronici dove ci sono le installazioni appropriati. Le autorità
provvedono informazione sul tema re cycling.
Garanzia
Pro-User accorda una garanzia per la durata di due anni dalla data di compra. La garanzia non e
convertibile. La garanzia solo copra difetti per fabbricazione o materiale. In caso di garanzia si
prega di inviare l´utensile difetto al suo venditore con la ricevuta. La garanzia e futile se
l´utensile e danneggiato o utilisato diverso delle avvertenze di uso. La garanzia anche e futile se
l´utensile e aperto ed e fatto una re paratura non autorizzata. Pro-User non accora altre
garanzie. Pro-User solo e responsabile per re paratura o cambio dell´utensile difetto. Non e
responsabile per danne causate per il difetto.

INTRODUCTIE
Dank u voor het kopen van de BT400 12Volt Digitale accutester.
Lees zorgvuldig de volgende veiligheid- en gebruiksinstructies door.
l Stop de accutester in de 12V accessoire uitgang binnenin het voertuig voor of na de start van de motor
om de accu precies te testen
l De LED's en het digitale display geeft de voltage en de conditie van de accu weer (zie tabel).
l Stop de accutester in de 12 volt accessiore aansluiting binnenin het voertuig.
l Zet alle aanwezige stroomverbruikers aan(bijv. ruitenwissers, lichten, ect…)
l Start de motor.
l Herhaal de zelfde procedure alleen met alle stroomverbruikers uit (bijv. ruitenwissers, lichten, ect …)
l In beide gevallen moet het symbool niet beginnen te branden in het display. ALs u dit
symbool ziet branden geeft het aan dat de dynamo te lage, te hoge of geen spanning levert. Laat
uw garagist naar uw dynamo kijken.
l Aanvullend op deze informatie geven de LED's en het digitale display de accuspanning en de
conditie van de accu weer. (zie tabel hierboven).
l Verbind de BT400 (5V input) met de USB kabel van uw mobiele electronische apparaat.
l Uw mobiele electronische apparaat kan op de volgende manier via de USB poort geladen worden:
- USB teken zichtbaar in het display: USB aansluiting werkt en uw apparaat kan geladen worden.
- USB teken onzichtbaar in het display: te lage spanning > / = 15.2V OF < 10.5V, de USB poort kan niet
gebruikt worden.
- USB teken knippert: geeft een te hoge spanning of een kortsluiting aan. De USB poort kan niet
gebruikt worden.
INSTRUCTIES ACCU TESTEN
LED
DIGITALE
UITLEZING
INDICATIE
CONDITIE
Knippert
ON
GEEL
X
Onder 7.0V
DEFECT
Onderzoek de accu en het electrische
systeem.
GEEL
X
Geeft huidige
spanning
weer
LAGE SPANNING
7-11.8V,accu moet geladen worden.
GROEN
X
Geeft huidige
spanning
weer
NORMAAL
11.8-14.5V, Normale toestand
ROOD
X
Geeft huidige
spanning
weer
HOGE SPANNING
14.5-15.5V, Accu volledig geladen.
ROOD
X
Boven de
15.5Volt
TE HOGE
SPANNING
Onderzoek de dynamo en accu op
defecten.
INSTRUCTIE VOOR HET TESTEN VAN DE DYNAMO
INSTRUCTIES VOOR HET LADEN VAN ELECTRONISCHE APPARATEN

TECHNISCHE SPECIFICATIES
- Omgevingstemperatuur: -10~+40°C
- Spanningsbereik: 8-16V
- USB uitgang: 5V 1.0Amp
BESCHERMING VAN HET MILIEU
Afgedankte elektrische producten mogen niet worden weggegooid bij het huishoudelijk afval.
Recycle waar mogelijk. Neem contact op met uw gemeente of verkoper voor recycling advies.
GARANTIE
Pro-User geeft garantie op dit product voor een periode van 2 jaar vanaf de datum van aankoop aan de
oorspronkelijke koper. Garantie is niet overdraagbaar. Garantie dekt tegen defecten van materiaal en
vakmanschap. Om de garantieservice te verkrijgen, retourneert u het apparaat naar de plaats van aankoop of
geautoriseerde Pro-User dealer samen met uw bewijs van aankoop. De garantie vervalt wanneer het product
is beschadigd of niet gebruikt, zoals beschreven in deze handleiding. De garantie is ongeldig als een niet-
geautoriseerde reparatie is uitgevoerd. Pro-User geeft geen andere expliciete of impliciete garantie. Pro-User
is alleen verantwoordelijk voor reparatie of vervanging (bij Pro-User inzicht) van het defecte product en is niet
aansprakelijk voor enige indirecte schade of ongemak veroorzaakt door het defect.

12
EG – Konformitätserklärung
EU – Declaration of Conformity
Hiermit bestätigen wir, dass das nachfolgend bezeichnete Gerät den angegebenen Richtlinien entspricht.
We herewith confirm that the appliance as detailed below complies with the mentioned directives.
Artikelbezeichnung (Model description) Digitaler Batterietester (Batterietester)
Artikelnummer (Model number) 18108
Artikelname (Model name) BT400
Firmenanschrift (Company address) Pro-User Europe GmbH, Seestrasse 19, 83253 Rimsting, Germany
Einschlägige EG-Richtlinien / governing EU-directives / directives CE concernées:
1. Elektromagnetische Verträglichkeit (EMV) Electromagnetic compatibility (EMC)
2004/108/EC
2. Niederspannungs-Richtlinie Low voltage directive (LVD)
2006/95/EC
Harmonisierte EN-Normen / harmonised EN- Standarts
Dieser Artikel entspricht folgenden, zur Erlangung des CE-Zeichens erforderlichen Normen:
The article complies with the standards as mentioned below wich are necessary to obtain the CE-symbol:
Zu 1. EN61000-6-1:2007
EN61000-6-3:2007
Zu 2. EN60950-1:2006 A1+A11+A12
Unterschrift / Signature:
Stellung im Betrieb / Position: Geschäftsführer
Ausstellungdatum / Date of issue: 10.08.2012
Pro-User Europe GmbH, Seestrasse 19, 83253 Rimsting, Germany

Manufactured for
Pro-User Europe GmbH
Seestrasse 19
83253 Rimsting
Germany
www.pro-user.com
Table of contents
Languages:
Other pro user Test Equipment manuals


