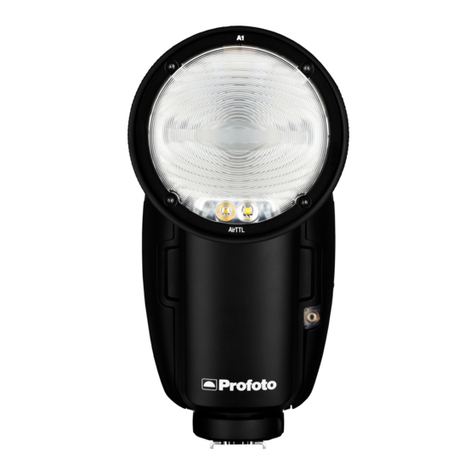
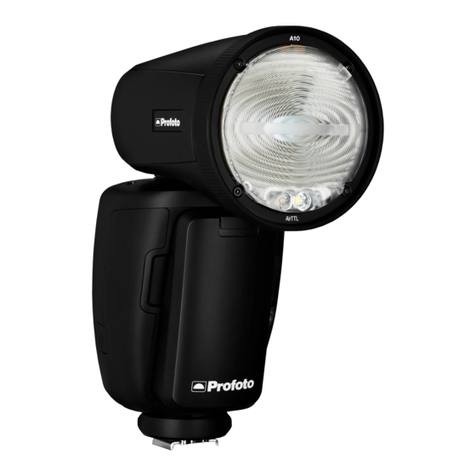
Profoto B10 User manual

Forotherlanguagesvisit:
www.profoto.com/support
User guide
ProfotoB10

Profoto B10
2
www.profoto.com

Profoto B10
3
www.profoto.com
Congratulations on your new
Profoto product!
Regardless ifyou chose a newflash or a new light shaping tool,know
thatalmosthalfacentury’sworthofexperiencewasputintoitsmaking.
If the years have taught us one thing, it is to never neglect a single
detail.We only put ourname on a product in whichwe have the fullest
confidence. Before shipping, every one of our products passes an
extensive and strict testing program. Unless it complies with the
specified performance,qualityand safety,it is a no-go.
As a result, we are confident that your new Profoto product will stay
withyouforyearsand helpyougrowasaphotographer. Butgettingthe
productisonlythe beginningofthatjourney. Usingitforlightshapingis
therealadventure.Thatiswhywetakeprideinprovidingyouwithsuch
awideassortmentoflightshapingtools,allowingyoutoshape thelight
in anywayyou can imagine.
The almost infinite possibilities might seem bewildering at first, but
we’re certain you will soon get the hang ofit.
I encourage you to sign up for our newsletter or visit Profoto stories,
www.profoto.com/profoto-stories, to learn more about shaping light
from photographers who are sharing their stories about how Profoto
Light Shaping Tools help them create outstanding images.
Enjoyyour Profoto product!
ConnyDufgran,founder

Profoto B10
4
www.profoto.com
General safety instructions
Safety Precautions!
Do not operate the equipment before studying the instruction manual carefully. Make sure that Profoto
Safety Instructions is always accompanied the equipment! Profoto products are intended for indoor
conditions use! Do not place or use the equipment where it can be exposed to moisture, extreme
electromagneticfields,orin areaswith flammable gasesor dust! Do notexpose the equipment to dripping
or splashing. Do not place any objects filled with liquids, such as vases, on or near the equipment. Do
not expose the equipment to hasty temperature changes in humid conditions as this could lead to
condensation water in the unit.Do not connect this equipment to flash equipment from other brands.The
front lens shall be changed if it has becomevisibly damaged to such an extent that their effectiveness is
impaired,for examplebycracksor deep scratches.Equipmentmust onlybe serviced,modifiedor repaired
byauthorizedandcompetentservice personnel!Warning-Theterminals markedwiththeflash symbolare
hazardouslive.Thechargermains cableand plug serveas the disconnectdevicefrommains power.Always
disconnectthe chargerfromthemains outletbypulling the plug,notthe cable.Thesocketoutletshould be
in close proximityto the equipment and should be easily accessible.
WARNING – Electrical Shock Hazard – High Voltage!
Do not open or disassemble flashes,generators or lamp heads! Equipment operates with high voltage.
Generator capacitors are electrically charged for a considerable length of time after being turned off.
Batteries (battery pack or batteries installed) shall not be exposed to excessive heat such as direct
sunlight,fire, orthe like.
Caution – Burn Hazard – Hot Parts!
If front lens cracks,it must be replaced before re-use of the equipment.Do not touchfront lens during
operation,it mayreach a high temperature.
Note about RF!
This equipment makes use of the radio spectrum and emits radio frequency energy. Make sure the
device is operated according to local regulations. The frequency spectrum this device is using is
shared with other users. Interference cannot be ruled out. Due to varying regulations and limits on
radio transmissions,Profoto B10 has a power output setting.Some countries do not allow the use of
thefull powermode,pleaserefertoyourcountryspecificsection inthe userguide tosee the maximum
allowedpowersetting allowedbynational regulations.Pleasenote that reducingthe poweroutput will
affect the range ofthe device.
Final Disposal
When the product reaches end of service, do not dispose of it with your other household waste.
Equipment contains battery, electrical and electronic components that could be harmful to the
environment.Equipment may be returned to Profoto distributors free of charge for recycling. Follow
local legislation fordisposal of batteries, electrical and electronic components, respectively.

Profoto B10
5
www.profoto.com
Table of Contents
General safety instructions.............................................................................................4
Nomenclature ..................................................................................................................... 7
Getting started.................................................................................................................. 10
Charge the battery.........................................................................................10
Check the battery status .............................................................................10
Mount the battery............................................................................................11
Attach the stand adapter..............................................................................12
Setup on light stands.................................................................................... 13
Setup on camera tripods..............................................................................14
Mount Profoto Light Shaping Tools......................................................... 15
Change front glass, flash tube and LED................................................. 16
Basic operation..................................................................................................................17
Switch on/o....................................................................................................17
Adjust the flash power...................................................................................17
Adjust the continuous light ........................................................................ 18
Navigate the settings menu ...................................................................... 19
Menu settings ..................................................................................................................20
Air group........................................................................................................... 20
Air channel.......................................................................................................20
Air ......................................................................................................................20
Bluetooth .........................................................................................................20
IR slave ...............................................................................................................21
Flash mode .......................................................................................................21
Continuous light.............................................................................................22
Advanced settings.........................................................................................22
Air operation ..................................................................................................................... 25
Trigger (Channel setup)............................................................................... 25
Remote control (Group setup).................................................................. 25
TTL..................................................................................................................... 26
High-Speed Sync ......................................................................................... 26
Air compatibility overview.......................................................................... 26
General notes on Air operation .................................................................27
Profoto app connectivity ..............................................................................................27

Profoto B10
6
www.profoto.com
Other ................................................................................................................................... 28
Battery storage .............................................................................................. 28
Overheat protection..................................................................................... 28
Quick burst...................................................................................................... 28
Firmware update ........................................................................................... 29
Serial number................................................................................................. 29
Technical data..................................................................................................................30
Warranty............................................................................................................................. 33
Regulatory information ................................................................................................. 34

Profoto B10
7
www.profoto.com
Nomenclature
1
2
3
4
5
6
7
1. Front glass
2. Zoom scale
3. Batterycompartment
4. Alignment pin hole
5. Stand adapter attachment
point
6. Strap attachment point
7. USB-C port

Profoto B10
8
www.profoto.com
8
10
9
11 12
8. IR-Slave eye
9. Display
10. Continuous light dial
11. Main dial
12. Test button
16
17
18
19
15
14
13
13. Stand stud mount
14. Clamp screw
15. Umbrella holder
16. Tilt-lockknob
17. Attachment screwwheel
18. Alignment pin
19. Attachment screw

Profoto B10
9
www.profoto.com
20
21
22
23
20. Battery status button
21. Batterystatus LEDs
22. Batterycharge connector
23. Battery release button
24
25
26 27
24. AC inlet
25. Strap
26. Charge status indicator
27. Batteryconnectorplug

Profoto B10
10
www.profoto.com
Getting started
Chargethebattery
Thebatterycanbechargedfromanychargelevel.OnlyusetheProfoto
chargersuppliedwiththeProfotoB10 orotherchargersrecommended
byProfoto.
Charge the battery:
1. Connectthebatteryconnectorplug [27]onthe batterychargerto
the batterycharge connector [22] on the battery.
2. Connect the batterycharger to mains power.
3. Check that the charger indicator [26] is continuously amber,
indicating that charging is in progress.
4. When the charging is completed,the charger indicator [26] turns
green.When not charging it is recommended to disconnect the
batterychargerfrom mains powerand from the battery.
NOTE
• If the battery is deeply discharged,the charging time can be longer than specified
in section Technical data.
• Battery charger indicator blinking amber indicates battery error. Contact a Profoto
dealerfor support.
Checkthe batterystatus
Thebatterychargecanbecheckedonthebatteryitselfbypressingthe
Batterystatus button [20].
Whilethebatterystatus buttonis pressed,the batterychargestatus is
indicated by the Batterystatus LEDs [21]:
5 LED: 75-100 %
4 LED: 50-75 %
3 LED: 25-50 %
2 LED: 10-25 %
1 LED: <10 %:

Profoto B10
11
www.profoto.com
Once the Profoto B10 is turned on, the battery charge status is
indicatedbythebatteryicon inthebottomrightofthe display[9]:
4 sections: 75-100 %
3 sections: 50-75 %
2 section: 25-50 %
1 section: 10-25 %
Emptyframe: <10 %
If the Profoto B10 is turned on and the battery is charged during use,
it will be indicated by a battery charge icon in the bottom right of
the display[9].
Mountthebattery
1. To mount the battery, fit the battery into the Profoto B10 unit as
illustrated below and press firmly until you hear a “click” sound,
indicating that the battery is locked in place.
2. To dismountthebattery,first,switchoffthe ProfotoB10unit.Press
the batteryrelease button [23] and pull out the battery.

Profoto B10
12
www.profoto.com
Attachthestandadapter
Attachthestandadaptertothestand adapterattachment point [5] on
the Profoto B10.
1. Before attaching,observe that the alignment pin [18] on the stand
adapter,fits into alignment pint hole [4] on the Profoto B10.
2. Tighten the attachment screw [19] with the attachment screw
wheel [17] until the stand adapter sitsfirm.

Profoto B10
13
www.profoto.com
Setuponlightstands
BeforemountingtheProfotoB10 ontoa lightstand,youneedtoattach
the stand adapter. Once the stand adapter is attached, follow the
instruction below.
1. Mount the Stand stud mount [13] onto the stand stud and secure
with the Clamp screw[14].
2. Loosen theTilt lock knob [16] to adjust the tilt position.
3. Tighten the Tilt lock knob [16] to lockthe tilt position.

Profoto B10
14
www.profoto.com
Setuponcameratripods
ItiseasytomounttheProfotoB10 ontoanycameratripodorballhead.
1. If the stand adapter is attached to the Profoto B10,first remove it.
2. Attach the tripod or ball head onto the stand adapter attachment
point [5] on the Profoto B10.

Profoto B10
15
www.profoto.com
MountProfotoLightShapingTools
TheProfotoB10iscompatiblewithmorethanProfoto120lightshaping
tools,whichcanbeused toshapeits alreadybeautifullightintoalmost
anylightyoucanimagine.Notethatinstructionsadditionalfromthose
below may comewith each light shaping tool.
Mount tools with standard reflector mount (rubber collar
withclasp)
Mostreflectorsareequippedwith Profoto’suniqueclampmechanism.
This makes them easy to mount and allows you to shape the light by
simply sliding the reflectorback and forth along the zoom scale [2] on
the Profoto B10.
1. Unlock the clasp on the reflector.
2. Slide the reflector onto the front of the Profoto B10.Use the zoom
scale [2] as a memo forwhere to position the reflector.
3. Secure the reflectorby locking the clasp on the reflector.

Profoto B10
16
www.profoto.com
Mountumbrellas
Theumbrellaholderisintegratedintothestand adapter.Umbrellasare
easily mounted by sliding the umbrella shaft into the umbrella holder
[15].The umbrella shaft diameter must be between 7 mm and 8 mm to
fit into the umbrella holder.
1. Mount the stand adapteron the Profoto B10.
2. Slide the umbrella shaft into the umbrella holder [15] passing the
point where you feel somefriction.
3. Continue to slide the umbrella shaft into the umbrella holder [15]
until the umbrella is positionedwhere you want it.
Changefrontglass,flashtubeandLED
Replacement of the front glass, flash tube, or continuous light LED
can only be performed by a service technician. Contact your nearest
Profoto dealeror distributorforprofessional service.

Profoto B10
17
www.profoto.com
Basic operation
Switchon/off
1. To switch on the unit,press and hold the Test button [12].
2. To switch off the unit,press and hold theTest button [12].
When the Profoto B10 is switched off, the current settings are stored
and will applywhen the unit is switched on again.
NOTE
To save battery,the Profoto B10 automatically enters standby mode and/or switches
off completely aftera period of inactivity.The periods of inactivityfor the standby and
auto poweroff functions are selectable via the settings menu.
Adjustthe flashpower
The flash power setting (light output) is shown in big bold numbers on
thedisplay[9].Thepowerscaleisarelativef-stopscalefrom1.0-10.The
maximum light output is shown as 10.
Use the Main dial [11] to change theflash light output:
• Turn the Main dial [11] to change the light output in 1/10 f-stop
increments.
• Pressandturn theMaindial[11]tochangethelightoutputin1f-stop
increments.
• Press theTest button [12] to release a testflash.

Profoto B10
18
www.profoto.com
Adjustthe continuouslight
The continuous light can be set to FREE (factory setting) or
PROPORTIONALin the settings menu.
1. WhensettoFREEthecontinuouslightbrightnesscanbeadjusted
separatelyfrom the flash power.
2. When set to PROPORTIONAL the continuous light brightness is
always proportional to theflash power.
Adjusting continuous light when it is set to FREE
1. Press the Continuous light dial [10] to turn the continuous light
on or off.
2. When the continuous light is on, the brightness and color
temperature is indicated in the display [9] by two separate bars
as shown below.
3. Turn the Continuous light dial [10] to change the brightness.
4. Press and turn the Continuous light dial [10] to change the color
temperature.

Profoto B10
19
www.profoto.com
Adjusting continuous light when it is set to PROPORTIONAL
1. Press the Continuous light dial [10] to turn the continuous light
on or off.
2. When the continuous light is on, the brightness and color
temperature is indicated in the display [9] as shown below.
3. TurntheMaindial [11]tochangetheintensity(thiswillchangeboth
flash and continuous light proportionally).
4. Turnthecontinuouslightdial [10]tochangethecolortemperature.
Navigatethesettingsmenu
All Profoto B10 settings are accessed and selected through the
settings menu.
1. Press the Main dial [11] to enterthe settings menu.
2. Scroll through the settings menu byturning the Main dial [11].
3. To change a setting, press the main dial [11]. For some settings,a
sub menu will appear.
4. Toreturntothe previousmenu,presstheContinuouslightdial[10]
or select the left arrow symbol at the top of the menu.
5. To return to the main screen,press theTest button [12].

Profoto B10
20
www.profoto.com
Menu settings
All settings listed beloware accessed through the settings menu.
Airgroup
The AIR GROUP setting is used to select the group (A-F) for wireless
control via Profoto Air. See also section Air operation. Factory default
setting is groupA.
NOTE
The AIR GROUPsetting is only selectable whenAIR is set ON.
Airchannel
The AIR CHANNEL setting is used to select the channel (1-8) for
wireless triggeringvia ProfotoAir.Factory default setting is channel 1.
See also section Airoperation.
NOTE
The AIR CHANNELsetting is only selectable whenAIR is set ON.
Air
The AIR setting can be set to ON or OFF to activate or deactivate
ProfotoAirwirelessfunctionality.WhenAirisdeactivated,“AIR OFF” is
shownatthebottomleftofthedisplay[9].WhenAirisactivated,theset
channeland group,ex“1A”isshownatthebottomleftofthe display[9].
NOTE
IfAIR is ON channel and group must also be selected.For additional guidance howto
set up Air, see the section“Air operation”.
Bluetooth
The BLUETOOTH setting is used to manage connectivity with the
Profoto app.See also section Profoto app connectivity.
• DISCOVERABLE:SelectONtomaketheProfotoB10discoverable
and OFF to deactivate Bluetooth.When Bluetooth is activated, a
Bluetooth icon is shown at the bottom of the main screen of the
display[9].
Table of contents
Other Profoto Camera Flash manuals

