PROKORD SMART HOME W411-E J300 User manual

1
PROKORD SMART HOME W411-E

2 3
Thank you for choosing PROKORD SMART HOME W411-3!
Our high-end cleaning robot combines high accuracy radar with various sensors that can collaborate
through navigation algorithms, draw a room map in real time, plan the cleaning route and charges
without manual intervention.
It has a strong suction power, high-capacity drawer dust box, washable HEPA filter and split typ
mopping module which allows it to adopt an efficient cleaning mode of first vaccum and then mopp.
You can download the app to your smart phone to oversee the cleaning map and running status of
the robot in real time as well as adjust the cleaning area and schedule.
Introduction
Key Function
Clean/ON & OFF
Press to start Sweep or to pause
Press and hold for 3 s to turn ON/OFF
Press and hold for 15 s to force shutdown
Clean/local cleaning
Press to recharge or to pause
Press and hold for 3 s to start local cleaning
Reset WiFi
Press the two buttons simultaneously for 3 s
Indicator light
Blue: Normal use or charging
Red: Low battery or abnormal condition
Purple: Not connected to the network

4 5
Included products/parts
Charging base Adapter
HEPA filter + sponge
Duster cloth
Left side brush x 2
Right side brush x 2
Parts List
Included products/parts
2 in 1 electric-controll water tank
Cleaning brush with knife Cleaning brush
Remote control
Parts List

6 7
Product Introduction
Filter screen
cover Wall sensor
System reset button
System upgrade port
(this is only for
professional use)
Dustbin
button
Robot
Product Introduction
Anti-drop sensor
Charging contact
Universal wheel
Side brush
Battery cover
Driving wheel
Rolling brush
Rolling brush
cover buckle
Sensor and Structure
LDS laser raning
sensor
Anti-collision
sensor for radar
Anti-collision
sensor
Infrared
recharging sensor
8 9
Product Introduction
Power indicator light
Signal emission area
Charging base pins
Catching groove
Cover plate
Wire slot
Power adapter
port
Wrapping post
Charging Base
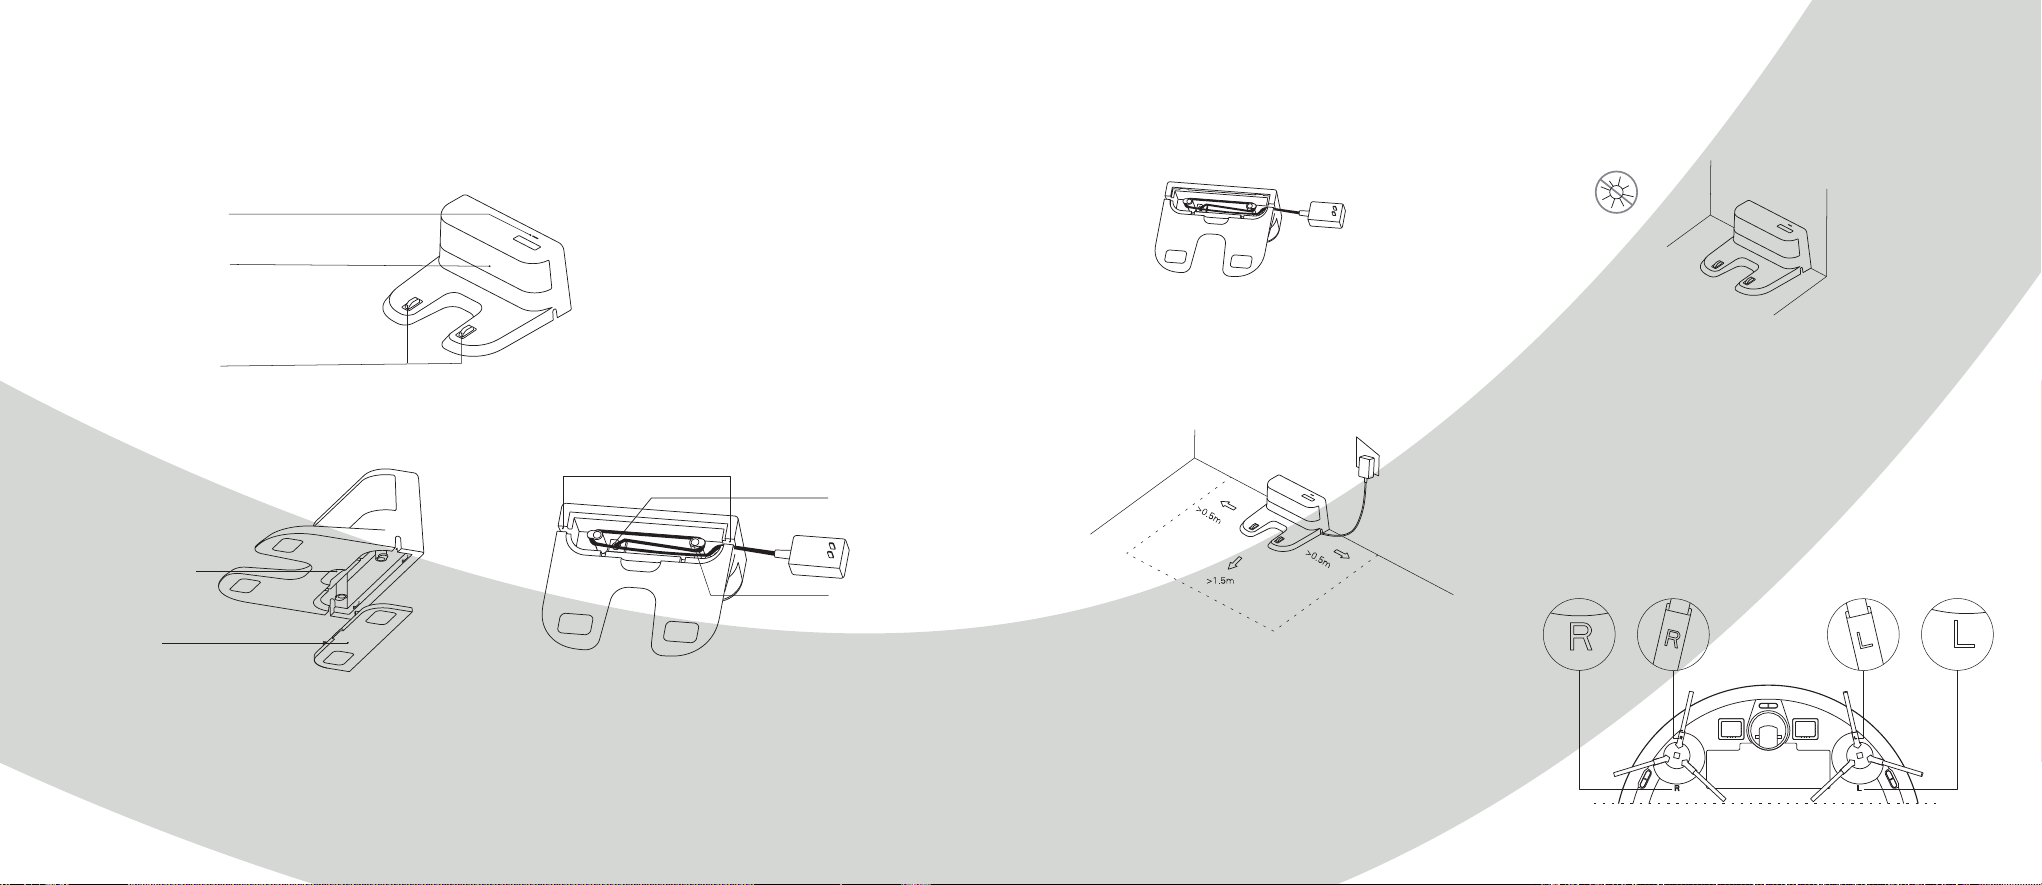
Installation
Connect the power adapter to the charging base and wrap
the excess cable around the wrapping posts into the slot.
1.
2.
3. Installation of side brushes
To install the side brushes, make sure that the left side brush (L)
and the right side brush (R) correspond respectively, to the L
and R markings on the bottom of the robot. Press down the left
and right brush on either side until you hear a “clicking” sound.
Make the left side brush (L) and the right side brush (R)
correspond to L and R on the bottom case by pressing L and R
until you hear a "clicking" sound.
Place the charging base against the wall, according to the
illustration below. Make sure that there is 0,5m of free
space on both sides of the base and 1,5m of free space in
front of it.
Connect the power adapter to a wall socket. The charging
indicator will light up.
Note: Do not move the charging base. If the charging base
I moved, the robot may lose its map and fail to return to the
charging base. When restarted, the host will rebuild and
motorize the map, but the rebuilt map may lose cleaning
information about forbidden areas, scheduled cleanings etc.
Do not place the charging base in direct sunlight as it will
interfere with recharging signals that will make the robot
unable to return to the charging base.
Table of contents


