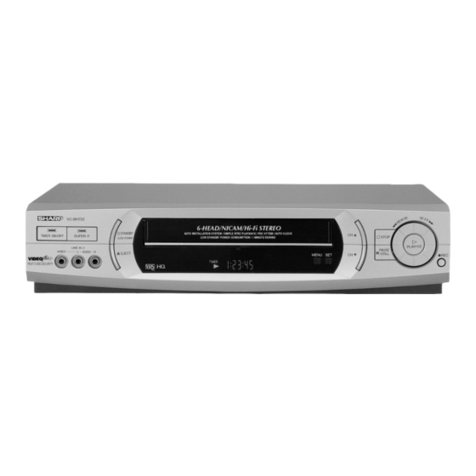
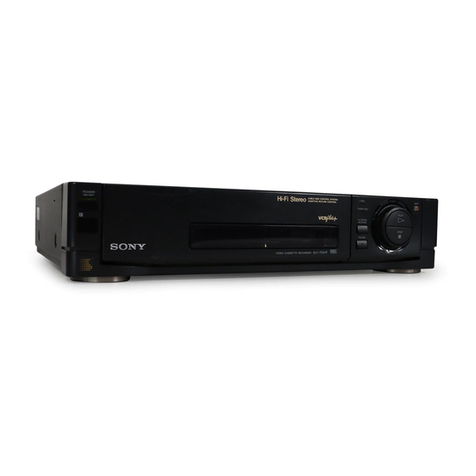
Proline VR101 User manual

English Français Nederlands Deutsch Italiano
OPERATING INSTRUCTIONS
MANUEL D’UTILISATION
HANDLEIDING
BETRIEBSANLEITUNG
ISTRUZIONI OPERATIVE
PAL SECAM
VR101
NICAM STEREO VIDEO CASSETTE RECORDER
MAGNETOSCOPE NICAM STEREO
NICAM STEREO VIDEOCASSETTERECORDER
VHS STEREO VIDEORECORDER
VIDEOREGISTRATORE STEREO
STOP/EJECTREC/OTR
CHANNEL F.FWDREW PLAY
VIDEO L RAUDIO
FUNCTION
AUTO REWIND
SECAMPAL
HM464FD(EN).fm Page 1 Thursday, April 5, 2007 4:40 PM
Downloaded from www.vandenborre.be

2EN
Features
•Hi-FiSystem
• Automatic Operations
• On Screen Display
• Auto Repeat Playback
• Picture Select
• One Touch Recording
• Parental Lock
• Auto Return
• Timer Recording
• Auto Head Cleaner
•NTSCPlayback
• Quick-Find
•Index/TimeSearch
• Slow Motion
• AUDIO/VIDEO in jacks
• AUDIO OUTPUT L/R jacks
Supplied Accessories
• Remote control
• Two R6 batteries • RF cable
Model/Serial Number
This appliance has a serial number located on the rear panel.
Please note down the model number and serial number and
retain the information for your records.
Model number: VR101
Serial number:
Table of Contents
Safety Information .............................................................................................................................................3
Before Using This Product ................................................................................................................................4
Installation .........................................................................................................................................................6
Setting the Clock ...............................................................................................................................................7
Basic Operation ..............................................................................................................................................11
Advanced Operations .....................................................................................................................................12
Maintenance ...................................................................................................................................................16
Troubleshooting Guide ...................................................................................................................................17
Specifications ..................................................................................................................................................17
HM464FD(EN).fm Page 2 Thursday, April 5, 2007 4:40 PM
Downloaded from www.vandenborre.be

3EN
English
Safety Information
Symbols
Safe use and care of your equipment
We have designed and made this product to meet European
safety standards, but as with any electrical equipment you
must take care to get the longest working life from it and stay
safe. Here are a few tips to help you do this.
Read these instructions carefully before you try to use the
equipment.
Protect the mains lead. You must ensure the mains lead
cannot be walked on, crushed, chafed or cut.
Avoid harsh conditions such as wet or damp places, high
humidity, strong vibration, extremely high or low
temperatures, strong sunlight and places which are very dusty.
Never let anyone, especially children, push objects into holes
and ventilation slots.
To save power switch off mains power or pull out the mains
power plug when you are not using the equipment, unless the
function of the equipment requires a continuous power
supply.
Don't continue to use this equipment if you have spilt liquids
in it, if it is damaged in any way or if it does not work
normally. Immediately unplug the equipment and get expert
advice.
Pull the mains plug out of the wall socket during
thunderstorms.
This product is designed for domestic use only. Any other
use may invalidate the guarantee and might be dangerous.
Ventilation
Place the equipment on a hard flat surface away from direct
sunlight and heat sources. If it is in a cabinet, allow at least a
10cm gap all around. Don't obstruct the ventilation slots,
including those underneath, with soft furnishings.
Overheating will shorten the life of the equipment and
increase the risk of fire.
Cleaning
Disconnect the mains supply and use only a lightly dampened
soft cloth. Do not use chemical solvents or strong detergents as
these may damage the cosmetic finish.
Batteries
Remove batteries when the equipment is not to be used for a
long time. Batteries left in equipment may cause damage
through deterioration and corrosive leakage, invalidating the
guarantee. To protect the environment please use local
recycling facilities for battery disposal.
Disposal
Waste electrical and electronic products must
not be disposed of with household waste.
Please refer to the retailer from whom you
purchased this item for disposal instructions.
Batteries and packaging materials can be
recycled using your local collection facilities.
Important Safety warnings
• To prevent electric shock, do not remove any cover.
• If anything goes wrong, don’t try and fix it yourself, get a
qualified service agent to look at it.
• Do not expose this equipment to dripping or splashing or
place any objects filled with liquids, such as vases, on the
equipment.
• Never put a naked flame source on or near the equipment.
• Small parts. Do not let young children play with the
equipment.
• Never operate the equipment and try to view video while
driving a vehicle.
• The mains plug shall remain readily operable.
Copyright warnings
Most records, compact discs and radio broadcasts contain
material, which is subject to copyright. It is unlawful to record
such material without the permission of the copyright owner.
Any person who makes a recording of such material without
the consent of the copyright owner may be liable to pay
damages to the copyright owner, and in some cases to criminal
prosecution.
Dew Warning
Moisture condensation may occur inside the unit when it is
moved from a cold place to a warm place, after heating up a
cold room, or under conditions of high humidity. Do not use
the VCR for at least 2 hours until it is dry inside.
Positioning
Do not place the VCR directly on top of, or underneath, your
TV set. Ensure that there is at least 20 cm between the VCR
and the TV set, and that air can circulate freely through the
ventilation openings of the VCR.
This equipment is double insulated and an earth
connection is not required.
This mark is applied to show the equipment
conforms to European safety and electromagnetic
compatibility standards.
Dangerous voltage constituting a risk of electric
shock is present inside this equipment.
There are important operating and maintenance
instructions in the literature accompanying this
equipment.
HM464FD(EN).fm Page 3 Thursday, April 5, 2007 4:40 PM
Downloaded from www.vandenborre.be

4EN
Before Using This Product
Description of Controls
Front Panel
1. Cassette compartment
2. F.FWD (Fast Forward) button
3. PLAY button
4. REW (Rewind) button
5. STOP/EJECT button
6. REC/OTR button
7. AUTO REWIND button
8. Display (See below.)
9. CHANNEL (K/L) buttons
10. FUNCTION button
11. AUDIO in jacks
12. VIDEO in jack
Display
13. PWR (Power) indicator
14. REC (Record) indicator
15. (Timer) indicator
16. Clock indicator
17. Cassette indicator
Rear Panel
18. Power cord
19. AV2 (DECODER) socket
20. AV1 (TV) socket
21. AUDIO OUTPUT L/R jacks
22. RF OUT socket
23. AERIAL socket
STOP/EJECTREC/OTR
CHANNEL F.FWDREW PLAY
VIDEO L RAUDIO
FUNCTION
AUTO REWIND
SECAMPAL
12 11 10 987654 3 2
1
13
1517
16
14
REC
PWR
AV2 (DECODER) AV1 (TV)
AUDIO
OUTPUT
AERIAL
RF OUT
R
L
2019
2223 21
18
HM464FD(EN).fm Page 4 Thursday, April 5, 2007 4:40 PM
Downloaded from www.vandenborre.be

5EN
English
Remote Control
* These buttons do not function for this VCR.
1. FUNCTION button
2. AUDIO SELECT button
3. number buttons
4. MENU button
5. DISPLAY button
6. REW/sbutton
7. STOP/Lbutton
8. REC/OTR button
9. QUICK-FIND button
10. SEARCH MODE button
11. PAUSE/STILL pbutton
12. SPEED/SYSTEM button
13. F.FWD/Bbutton
14. PLAY/Kbutton
15. TAPE COUNTER RESET button
16. TAPE COUNTER MEMORY button
17. SLOW button
18. CHANNEL (K/L) buttons
19. EJECT Obutton
Video Cassette Tape
This VCR will operate with any cassette that bears the VHS
mark. For best results, we recommend the use of high-quality
tapes. Do not use poor quality or damaged tapes.
You can prevent accidental erasing of a recording by breaking
off the erase-prevention tab on the back edge of the cassette. If
you decide to record on the tape again, cover the hole with
plastic tape.
Two Different Tape Speeds
Before recording, select the tape speed : SP mode (Standard
Play) or LP mode (Long Play).
The table below shows the maximum recording/playback time
using E-60, E-120, E-180 or E-240 tapes in each mode.
TV Colour System
Different countries use different television colour systems.
Tapes recorded in the PAL, SECAM or NTSC system can be
played back on this unit. Usually, the picture on the TV screen
will be in black and white when you play back a tape that is
recorded in a different colour system.
Tapes recorded in the NTSC system can be played back on
this unit and a PAL system TV set. This feature is only
available in the SP mode. When playing back such tapes, the
picture may roll up or down, shrink vertically and black bars
may appear both at the top and bottom of the screen. Adjust
the vertical hold control on your TV, if the TV features this
control.
To insert the batteries:
Install two R6 batteries matching the polarity indicated inside
the battery compartment.
Caution
Do not mix old and new batteries. (Also never mix alkaline
batteries with manganese batteries.)
PLAY
STOP
REW F.FWD
0
789
6
5
4
3
2
1
FUNCTION EJECT
AUDIO
SELECT
CHANNEL
SLOW
TAPE COUNTER
MEMORY
RESET
MENU DISPLAY
REC/OTR
QUICK-FIND
SEARCH MODE
SPEED/
SYSTEM
PAUSE/STILL
1
3
2
18
19
4
6
8
7
9
16
17
13
12
14
11
10
15
5
*
*
Tape Type Recording/Playback Time
Tape Speed SP Mode LP Mode
E-60 1 hour 2 hours
E-120 2 hours 4 hours
E-180 3 hours 6 hours
E-240 4 hours 8 hours
Ta b
HM464FD(EN).fm Page 5 Thursday, April 5, 2007 4:40 PM
Downloaded from www.vandenborre.be

6EN
Installation
Connecting the VCR
Basic Connection
1) Disconnect the TV’s power cord from the AC outlet.
2) Disconnect the VHF/UHF TV aerial coaxial cable from
the TV.
3) Connect the VHF/UHF TV aerial coaxial cable to the
VCR aerial input.
4) Connect the VCR to the TV using the RF cable.
5) Connect the VCR's AV1 (TV) Scart socket to the Scart
socket on the back of your television. Consult your
television’s operating instructions.
Note: The television must be connected to the VCR via the
AV1 (TV) socket. Connection via the AV2
(DECODER) socket will result in faulty operation.
6) Plug the power cords of the VCR and TV into the AC
outlets.
Euro Scart cables are available from your retailer.
Note: You may connect the VCR to your audio amplifier.
1) Prepare an audio cable (not supplied).
2) Switch off your audio amplifier.
3) Insert one end of the audio cable into the corresponding
red and white AUDIO OUTPUT L/R jacks at the back of
the video recorder and the other end into the
corresponding audio input jacks at the audio amplifier.
Other Connections
AV2 (DECODER) Connection for Other External Devices
The second Scart socket AV2 (DECODER) is designated for
other external devices, e.g. decoder, another VCR, video
camera and so on..
Euro Scart cables are available from your retailer.
AV Front Terminals
When you copy a video tape, or watch a programme recorded
on another source, use the AUDIO/VIDEO input jacks on the
front panel of the VCR.
Note: When you connect Mono sound from another source to
this VCR, connect the audio output jack of the Mono
sound to the AUDIO L jack of this VCR. The audio
signal will be recorded on both L and R channel equally.
External Input Mode
To receive the signal from an external source (decoder, video
camera, another VCR, etc.), connect the source to the AV2
(DECODER) socket, and press CHANNEL (K/L) or enter
“002” with the number buttons. “AV2” appears on the TV
screen. If you use the AV1 (TV) socket, press
CHANNEL (K/L) or enter “001” with the number buttons.
“AV1” appears on the TV screen.
If you use the front AUDIO/VIDEO input jacks, press
CHANNEL (K/L) or enter “003” with the number buttons.
“AV3” appears on the TV screen.
(TV)
AV2 (DECODER) AV1 (TV)
AUDIO
OUTPUT
AERIAL
RF OUT
R
L
to 21-Pin Scart Jack
to AERIAL
RF cable
(supplied)
VHF/UHF
MIXER
UHF VHF
[Back of the VCR]
L
R
AUDIO
OUTPUT
AV2 (DECODER) AV1 (TV)
AUDIO
OUTPUT
AERIAL
RF OUT
R
L
to 21-Pin Scart Jack
Decoder (Not supplied)
VIDEO L-AUDIO-R
[Front of the VCR]
etc.
To the audio
output jack
[Another source]
To the video
output jack
Audio/Video
cables
(not supplied)
HM464FD(EN).fm Page 6 Thursday, April 5, 2007 4:40 PM
Downloaded from www.vandenborre.be

7EN
English
Initial Settings
Selecting the Language
The following steps should only be performed if there is a
power failure or if the VCR is unplugged for more than 30
seconds.
• Use the remote control for this procedure.
1) Turn on the TV and select the video channel on the TV.
2) Press FUNCTION.
3) Press PLAY/Kor STOP/Lrepeatedly to select your desired
language.
4) Press MENU.
Changing the Language
If you want to change the language used on the TV screen
menus, follow the steps below.
• Use the remote control for this procedure.
1) Press MENU.
2) Press PLAY/Kor STOP/Lto select “INITIALSATION”,
then press F. F W D /B.
3) Press PLAY/Kor STOP/Lto select “LANGUAGE”, then
press F.FW D /B.
4) Press PLAY/Kor STOP/Lrepeatedly to select your desired
language.
5) Press MENU.
Setting the Clock
This VCR incorporates a 24-hour clock. The clock must be set
for the Timer Recording function to operate correctly.
• Use the remote control for this procedure.
1) Press MENU.
2) Press PLAY/Kor STOP/Lto select “INITIALSATION”,
then press F.F WD /B.
3) Press PLAY/Kor STOP/Lto select “HORLOGE”, then
press F. F W D /B.
4) Press PLAY/Kor STOP/Luntil the relevant year appears,
then press F.F WD /B.
5) Press PLAY/Kor STOP/Luntil the relevant month
appears, then press F. F W D /B.
6) Press PLAY/Kor STOP/Luntil the relevant day appears,
then press F.F WD /B.
7) Press PLAY/Kor STOP/Luntil the relevant hour appears,
then press F.F WD /B.
8) Press PLAY/Kor STOP/Luntil the relevant minute
appears.
9) Press MENU to start the clock.
Note:
•PressREW/sto go one step back from the current step
during steps 4) to 8).
• Although seconds are not displayed, they begin counting
from 00 when you exit by pressing MENU. Use this feature
to synchronize the clock with the correct time.
• If the VCR is unplugged or if there is a power failure for
more than 30 seconds, you may have to reset the clock.
LANGUAGE
[FRANÇAIS]
ITALIANO
DEUTSCH
LANGUAGE
[FRANÇAIS]
ITALIANO
DEUTSCH
MENU
PROGRAMMATION
CONFIGURATION
INITIALISATION
INITIALISATION
SYNTONISATION
HORLOGE
LANGUAGE
MENU
PROGRAMMATION
CONFIGURATION
INITIALISATION
INITIALISATION
SYNTONISATION
HORLOGE
LANGUAGE
HORLOGE
ANNÉE 2 0 0 7
MOIS 0 7
JOUR 04MER
HEURE – –
MINUTE – –
HM464FD(EN).fm Page 7 Thursday, April 5, 2007 4:40 PM
Downloaded from www.vandenborre.be

8EN
Channel Presetting
Tuning of broadcast channels not already preset in the VCR
can be performed in two ways.
Automatic Channel Preset
• By “AUTOMATICALLY” tuning channels and placing
them in sequential order in the VCR’s memory i.e. the first
channel found will be memorized into the VCR’s channel
position 1, the second channel found will be memorized
into the VCR’s channel position 2 and so on.
• Execution of the “Automatic” channel presetting cancels all
the preset channels. DO NOT use this feature if you intend
to use some of the pre-tuned channels. Use the “Manual”
channel presetting function to tune in the additional
channels you require.
Manual Channel Preset
• Each channel is tuned manually and individually. Follow
the steps laid out in the “Manual Channel Preset” section.
Automatic Channel Preset
You can programme the tuner to scan only the channels that
you can receive in your area.
• Use the remote control for this procedure.
1) Turn on the TV and select the video channel on the TV.
2) Press MENU.
3) Press PLAY/Kor STOP/Lto select “INITIALSATION”,
then press F.F WD /B.
4) Press PLAY/Kor STOP/Lto select
“SYNTONISATION”, then press F.F W D/B.
5) Press PLAY/Kor STOP/Lto select “AUTO”, then press
F.F W D/B.
• The VCR automatically distinguishes between SECAM
and PAL.
• The tuner scans and memorizes all the active channels in
your area. After scanning, the tuner stops on the lowest
memorized channel.
To Select a Channel
You can select a channel by using CHANNEL (K/L), or directly
pressing the number buttons on the remote control.
• Enter a channel number as a two-digit number for the
quickest results. For example, to select channel 6, press 0
and 6. If you only press 6, channel 6 will be selected after a
brief delay.
• You can only select channels 1–99.
Manual Channel Preset
• Use the remote control for this procedure.
1) Press MENU.
2) Press PLAY/Kor STOP/Lto select “INITIALSATION”,
then press F. F W D /B.
3) Press PLAY/Kor STOP/Lto select
“SYNTONISATION”, then press F. F WD/B.
4) Press PLAY/Kor STOP/Lto select “MANUEL”, then
press F.FW D /B.
5) Press on PLAY/Kor STOP/Lto select “SYSTÈME”, then
press F.FW D /Buntil the desired system appears.
6) Press PLAY/Kor STOP/Lto select “POSITION”, then
press F.FW D /B.
•When a weak signal is received in Manual Tuning mode,
you can change the background to solid blue or the
static screen by pressing TAPE COUNTER RESET.
7) Press the number buttons, PLAY/K, or STOP/Lto select
your desired position number, then press F. F W D /B.
•You can select position number 01-99.
•If [M] appears on the right side of “PASSER”, press
PLAY/Kor STOP/Lto point to “PASSER”. Then, press
F.F W D/Bto select [A].
•If you want to remove scrambled signals, press
PLAY/Kor STOP/Lrepeatedly to point to
“DÉCODEUR”. Then, press F.F W D /Bto select [M].
8) Press PLAY/Kor STOP/Lto select “CANAUX”, then
press F.FW D /B.
•Press PLAY/Kor STOP/L. The VCR tuner will begin to
search up or down automatically. When a channel is
found, the VCR will stop searching and the picture will
appear on the TV Screen.
•You can select desired channel number by using
the number buttons. You must refer to the following
Channel Plan table and press three digits to select the
channel number.
(To select channel 24, press “0” button first and then
press “2” and “4”.)
•If this is the channel you want, press F.F W D/B
[SECAM-L]
[PAL B/G]
This VCR can receive Hyper and Oscar frequency bands.
9) Press MENU to exit.
INITIALISATION
SYNTONISATION
HORLOGE
LANGUAGE
SYNTONISATION
AUTO
MANUEL
DEPLACEMENT
scanning
MENU
PROGRAMMATION
CONFIGURATION
INITIALISATION
Channel Plan
CH Indication TV Channel
01 - 10 F1 - F10
21 - 69 E21 - E69
71 - 86 B - Q
90 - 106 S4 - S20
121 - 141 S21 - S41
Channel Plan
CH Indication TV Channel
02 – 12 E2 – E12
13 – 20 A – H (only ITALY)
21 – 69 E21 – E69
74 – 78 X, Y, Z, Z+1, Z+2
80 – 99,100 S1 – S20,GAP
121 – 141 S21 – S41
HM464FD(EN).fm Page 8 Thursday, April 5, 2007 4:40 PM
Downloaded from www.vandenborre.be

9EN
English
Note: To confirm that a channel has been added, press
CHANNEL (K/L).
To Skip a Preset Channel
The channels you can no longer receive or seldom watch can
be set to be skipped when you access channels by pressing
CHANNEL (K/L).
• Use the remote control for this procedure.
1) Press MENU.
2) Press PLAY/Kor STOP/Lto select “INITIALSATION”,
then press F.F WD /B.
3) Press PLAY/Kor STOP/Lto select
“SYNTONISATION”, then press F.F W D/B.
4) Press PLAY/Kor STOP/Lto select “MANUEL”, then
press F. F W D /B.
5) Press PLAY/Kor STOP/Lto select “POSITION”, then
press F. F W D /B.
6) Press the number buttons, PLAY/K, or STOP/Lto select
relevant position number, then press F. F W D /B.
7) Press PLAY/Kor STOP/Lto select “PASSER”, then press
F.F W D/Bto select [M].
•To memorize the channel again, press F. F W D /B. “M”
will change to “A”.
8) Press MENU to exit.
Note: To confirm that a channel has been skipped, press
CHANNEL (K/L).
Channel Reprogramming
You can replace two channels.
• Use the remote control for this procedure.
1) Press MENU.
2) Press PLAY/Kor STOP/Lto select “INITIALSATION”,
then press F. F W D /B.
3) Press PLAY/Kor STOP/Lto select
“SYNTONISATION”, then press F. F WD/B.
4) Press PLAY/Kor STOP/Lrepeatedly to select
“DESPLACEMENT”, then press F. F W D /B.
5) Press PLAY/Kor STOP/Lrepeatedly to select the position
number you want to change the channel, then press
F.F W D /B.
•You cannot select a position number where “- - -”
appears next to the number. This is because PASSER is
set to [M] for this position number.
•When a weak signal is received in Channel
Reprogramming mode, you can change the background
to solid blue by pressing TAPE COUNTER RESET.
If you press the button again, the background will return
to the static screen.
6) Press PLAY/Kor STOP/Lrepeatedly to move to another
position number, then press F. F W D /B.
7) Press MENU to exit.
The change of system includes <SECAM/PAL>
CHANGE OF PLAYBACK SYSTEM
When AUTO is selected by pressing SPEED/SYSTEM, the
VCR automatically recognises the system (SECAM or PAL) in
accordance with the format recorded.
MENU
PROGRAMMATION
CONFIGURATION
INITIALISATION
MANUEL
SYSTÈME [SECAM]
POSITION P55
CANAUX 55
DÉCODEUR [A]
PASSER [A]
INITIALISATION
SYNTONISATION
HORLOGE
LANGUAGE
SYNTONISATION
AUTO
MANUEL
DEPLACEMENT
MENU
PROGRAMMATION
CONFIGURATION
INITIALISATION
MANUEL
SYSTÈME [SECAM]
POSITION P55
CANAUX 55
DÉCODEUR [A]
PASSER [M]
INITIALISATION
SYNTONISATION
HORLOGE
LANGUAGE
SYNTONISATION
AUTO
MANUEL
DEPLACEMENT
MENU
PROGRAMMATION
CONFIGURATION
INITIALISATION
INITIALISATION
SYNTONISATION
HORLOGE
LANGUAGE
SYNTONISATION
AUTO
MANUEL
DEPLACEMENT
DEPLACEMENT
P01:
P02:
P03:
P04:
P05:
01
02
03
04
05
P06:
P07:
P08:
P09:
P10:
06
07
08
09
10
[ ]
Position
Number Channel
Number
DEPLACEMENT
P01:
P02:
P03:
P04:
P05:
01
02
10
04
05
P06:
P07:
P08:
P09:
P10:
06
07
08
09
03
[ ]
DEPLACEMENT
P01:
P02:
P03:
P04:
P05:
01
02
10
04
05
P06:
P07:
P08:
P09:
P10:
06
07
08
09
03
HM464FD(EN).fm Page 9 Thursday, April 5, 2007 4:40 PM
Downloaded from www.vandenborre.be

10EN
If the picture on the television screen is in black and white,
manually select the SECAM or PAL system using
SPEED/SYSTEM. Each time SPEED/SYSTEM is pressed the
television screen changes as follows.
CHANGE OF RECORDING SYSTEM
The VCR can automatically change the recording system
when the input signal is received from an external source
(another VCR, etc.). This enables you to manually select the
recording of a program in the desired system.
1) Press MENU.
2) Press PLAY/Kor STOP/Lto select
“CONFIGURATION”, then press F.F W D /B.
3) Press PLAY/Kor STOP/Lto select “SYSTÈME”.
4) Press F. F W D /Bto select the desired system
(AUTO/SECAM/PAL).
5) Press MENU to exit.
AUTO SECAM PAL
MENU
PROGRAMMATION
CONFIGURATION
INITIALISATION
CONFIGURATION
RETOUR AUTO [M]
REP. AUTO [M]
NETTETÉ [NORMAL]
SYSTÈME [SECAM]
HM464FD(EN).fm Page 10 Thursday, April 5, 2007 4:40 PM
Downloaded from www.vandenborre.be

11 EN
English
Basic Operation
Playback
Tracking Adjustment
• Tracking adjustment will be activated automatically
(Digital Tracking function) when you start playback.
• When playing pre-recorded tapes or tapes recorded on units
other than your own, noise lines (black and white streaks)
may appear on the playback picture. If this occurs, you can
adjust the tracking control manually by pressing
CHANNEL (K/L) until the streaks disappear. To return to
the DTR function, stop the tape once and start playback
again.
Note: • You can reduce the noise lines by pressing CHANNEL
(K/L) in Slow mode, too. Slow tracking adjustment is
not set automatically.
•In the Still mode, press SLOW, and press CHANNEL
(K/L) until the streaks disappear. To return to the
Still mode, press PAUSE/STILL pagain.
•WhenAUTOisselected by pressing on SPEED/SYSTEM,
the VCR automatically recognizes the system (SECAM or
PAL) in accordance with the tape format recorded during
playback. If the picture on the television screen is in black
and white, select SECAM or PAL using SPEED/SYSTEM.
• Playback of tapes recorded with the NTSC system is
possible with this VCR using a PAL system television.
Note: Depending on the television, during playback of an
NTSC tape on a PAL television, the picture can move
to the top or bottom, shrink vertically, and black bars
can appear at the top and bottom of the screen.
1) Turn on the TV and select the video channel on the TV.
2) Insert a prerecorded tape.
The VCR will turn on automatically. If the erase-
protection tab has been removed, the VCR will start
playback automatically.
3) Press PLAY/Kto begin playback.
•Tracking adjustment will be activated automatically
(Digital Tracking function) when you start playback. To
adjust the tracking manually, press CHANNEL (K/L).
<If a tape is already in the VCR...>
•Using the buttons on the VCR
Just press PLAY on the VCR. Power will automatically
turn on and playback will start. (Direct Button
Operation)
•Using the buttons on the remote control
Press FUNCTION to turn on, and then press PLAY/K.
4) Press STOP/Lto stop playback.
Speed Search
1) Press F. F W D /Bor REW/sduring playback to view a
videotape at a high speed in either a forward or reverse
direction. In this mode, the sound will be muted.
2) Press the button again, the VCR will now search in super
high speed. (This function will not operate for a NTSC
tape.)
3) Press PLAY/Kto return to normal playback.
Still Picture
Press PAUSE/STILL pduring playback to view a still picture on
the TV screen.
• When the picture begins to vibrate vertically, stabilise the
picture by pressing CHANNEL (K/L) in slow mode, then
press PAUSE/STILL p.
• After the VCR has been in Still mode for 5 minutes, it will
stop automatically to protect the tape and the video head.
<Note for “Speed Search” and “Still Picture”>
• Usually there will be video “noise” lines (black and white
streaks or dots) on the screen. This is normal.
The still picture may, in addition to containing the “noise”
lines, be black and white.
This is not a fault of the machine but merely a by-product
of the technology involved in producing a VCR with
LP mode.
Slow Motion
•PressSLOW to reduce the playback speed. The VCR mutes
the sound during slow motion. You can control the speed
by pressing F. FWD/B(faster) or REW/s(slower). Press
PLAY/Kto return to normal playback.
• If it is left in the Slow mode for more than five minutes, the
VCR will automatically switch to the Stop mode.
Recording
Viewing and Recording the Same Programme
1) Insert a cassette tape with its erase-prevention tab in place.
(If necessary, rewind or fast forward the tape to the point
at which you want to begin recording.)
2) Press the number buttons or CHANNEL (K/L) to select
the channel to be recorded.
3) Press SPEED/SYSTEM to select the tape speed (SP/LP).
4) Press REC/OTR to begin recording.
•The REC indicator on the display comes on.
5) Press STOP/Lwhen recording is completed.
Skipping Unwanted Programme Material During
Recording
1) Press PAUSE/STILL pwhen you want to temporarily halt
recording.
•You can check the remaining pause time with
C
marks on
the TV screen. Each
C
mark represents 1 minute. After 5
minutes, the VCR will automatically switch to the Stop
mode to prevent tape damage.
2) Press PAUSE/STILL por REC/OTR to resume recording.
Recording One Programme While Viewing Another
You can record one programme while viewing another. To
start recording, follow steps 1) to 4) under “Viewing and
Recording the Same Programme”. Then, set the TV to the
channel you want to watch.
To Monitor the Progress of Your Recording
Select the video channel on the TV.
Assemble Function
You can record in continuation from previous programme on
a pre-recorded tape.
1) Insert a pre-recorded tape. Press PLAY/Kto start playback.
2) Press PAUSE/STILL pat the desired point on the tape.
3) Press REC/OTR. The VCR will be in the Recording Pause
mode.
HM464FD(EN).fm Page 11 Thursday, April 5, 2007 4:40 PM
Downloaded from www.vandenborre.be

12EN
4) Press CHANNEL (K/L) to select the channel to be
recorded.
5) Press REC/OTR or PAUSE/STILL p. The recording will
begin.
6) Press STOP/Lwhen recording is completed.
Hi-Fi Stereo Sound System
This VCR will record and playback Hi-Fi stereo sound. It has
a A2 or NICAM stereo sound decoder.
This equipment will receive stereo and bilingual broadcasts
and supports several ways of recording and playing back the
sound.
Selecting the Sound Mode
You can select each mode by pressing AUDIO SELECT on the
remote control. Each mode is displayed on the TV screen as
following.
• During playback of the recorded tape in Hi-Fi mode:
• Reception of stereo broadcasts:
• During reception of bilingual broadcasts:
Note: • If you play non-Hi-Fi tapes, the VCR will play
automatically in Mono even if you select another
mode.
•If the stereo signal becomes weak, the broadcast is
automatically recorded in Mono.
Advanced Operations
Counter Memory
This feature can be used to memorise a beginning point that
you want to watch again. Rewinding or fast forwarding makes
it easy to locate this point.
Note: • If a tape includes both programmes recorded in the
PAL system and ones recorded with NTSC system,
this function may not be operated correctly.
•TAPE COUNTER MEMORY does not function if
the Auto Repeat mode is set to ON. In this case, set
the Auto Repeat mode to OFF.
1) Stop the tape at the desired point.
2) Press TAPE COUNTER RESET to display 0:00:00.
3) Press TAPE COUNTER MEMORY so that “M” appears on
the TV screen.
4) Press REC/OTR or PLAY/K.
•Press STOP/Lwhen recording or playback is completed.
5) Press REW/sor F.F WD/B. The VCR will automatically
stop when the counter returns to 0:00:00 (approx.).
To Exit the Counter Memory
Press TAPE COUNTER MEMORY so that the “M” disappears
from the TV screen.
Note: When you set the Auto Repeat mode to ON while the
Counter Memory mode is ON, the VCR exits the
Counter Memory mode automatically.
OTR (One Touch Recording)
This function enables you to set the duration of a recording
simply by pressing REC/OTR.
1) Follow steps 1) to 3) in “Viewing and Recording the Same
Programme” section.
2) Press REC/OTR repeatedly until the desired recording
length appears in the upper left corner of the TV screen.
Recording stops when 0:00 is reached.
• To check time remaining during an OTR
Press DISPLAY.
• To change the recording length during an OTR
Press REC/OTR repeatedly until the desired length appears.
• To stop an OTR before recording is finished
Press STOP/L.
• To cancel the OTR but continue recording
Press REC/OTR repeatedly until “I” appears without the
recording length.
Auto Repeat Playback
The VCR has an auto repeat function that allows you to repeat
a tape indefinitely without touching PLAY/K.
• Use the remote control for this procedure.
• Insert a pre-recorded tape.
1) Press MENU.
2) Press PLAY/Kor STOP/Lto select
“CONFIGURATION”, then press F.FW D/B.
Mode AUDIO OUTPUT Display on
the TV screen
Stereo L Hi Fi L Audio STÉRÉO
R Hi Fi R Audio
LL Hi Fi L Audio GAUCHE
R Hi Fi L Audio
RL Hi Fi R Audio DROIT
R Hi Fi R Audio
Normal L Normal Audio -None-
R Normal Audio
Mode AUDIO OUTPUT Display on
the TV screen
Stereo L L Audio STÉRÉO
RRAudio
LL L Audio GAUCHE
R L Audio
RLRAudio DROIT
RRAudio
Monaural L L+R Audio -None-
R L+R Audio
Mode AUDIO OUTPUT Display on
the TV screen
MAIN L Main Audio PRAL.
R Main Audio
SUB L Sub Audio SOUS
R Sub Audio
MAIN L Main Audio PRAL.
SUB R Sub Audio SOUS
II[0:30] I[1:00]... I[7:30] I[8:00]
(Normal (OTR:
recording) 30 minutes)
HM464FD(EN).fm Page 12 Thursday, April 5, 2007 4:40 PM
Downloaded from www.vandenborre.be

13 EN
English
3) Press PLAY/Kor STOP/Lto select “REP. AUTO”.
4) Press F. F W D /Bso that “M” appears next to “REP.
AUTO” on the TV screen.
If the on-screen menu still remains, press MENU to exit,
then press PLAY/K.
Note: • Once you select the Auto Repeat mode, it stays in
effect even after you turn off the VCR.
•TAPE COUNTER MEMORY does not function if
the Auto Repeat mode is set to ON.
•When you set the Auto Repeat mode to ON while the
Counter Memory mode is ON, the VCR exit the
Counter Memory mode automatically.
To Stop Playback
Press STOP/L.
To Exit the Auto Repeat Mode
Repeat steps 1) to 3). Then, press F. F W D /B.
“A” will appear next to “REP. AUTO” on the TV screen. Press
MENU to exit.
Picture Select
This function enables you to select the picture quality of a
tape.
• Use the remote control for this procedure.
1) Press MENU.
2) Press PLAY/Kor STOP/Lto select
“CONFIGURATION”, then press F.F W D /B.
3) Press PLAY/Kor STOP/Lto select “NETTETÉ”.
4) Press F. F W D /Buntil the desired mode (NORMAL,
DOUX, or HAUT) is indicated on the TV screen.
5) Press MENU to exit.
Note: Once you select the Picture Select mode, it stays in
effect even after you turn off the VCR.
Automatic Operations
Automatic Rewind, Eject, Off
When the end of a tape is reached during recording, playback,
or fast-forward, the tape will automatically rewind to the
beginning. After that, the VCR will eject the tape and turn
itself to off.
• The tape will not auto-rewind during Timer Recording or
One Touch Recording.
• When the Counter Memory is activated, the tape will
rewind to the M0:00:00 position and the VCR will enter
the Stop mode.
Tape Eject
A tape can be ejected with the VCR power on or off (but the
VCR must be plugged in).
• If a Timer Recording is set, a tape can only be ejected with
the power on.
Real Time Tape Counter
• This shows the elapsed recording or playback time in
hours, minutes, and seconds. (Nothing is shown in the case
of blank portion.)
• The “ – ” indication will appear when the tape is rewound
further than the tape counter position “0:00:00”.
Timer Recording
You may program the VCR to start and end a recording while
you are away. You can set 8 programmes to record on specific
days, daily or weekly within a 1-year period.
• Use the remote control for this procedure.
• Insert a cassette tape with its erase-prevention tab in place.
(If necessary, rewind or fast forward the tape to the point at
which you want to begin recording.)
1) Press MENU.
2) Press PLAY/Kor STOP/Lto select
“PROGRAMMATION”, then press F.F W D/B.
Note: If you have not set the clock yet, “HORLOGE” setting
menu appears. If so, follow the steps outlined in the
“Setting the Clock” section. Then, set the timer.
•WhenyoupressF. F WD/Bafter pressing PLAY/Kor
STOP/Lduring steps 3) to 8), the input mode will move to
the next step.
• If you do not press F. F W D /Bwithin 5 seconds of setting an
item, the input mode will move to the next step.
MENU
PROGRAMMATION
CONFIGURATION
INITIALISATION
MENU
PROGRAMMATION
CONFIGURATION
INITIALISATION
CONFIGURATION
RETOUR AUTO [M]
REP. AUTO [M]
NETTETÉ [NORMAL]
SYSTÈME [SECAM]
MENU
PROGRAMMATION
CONFIGURATION
INITIALISATION
MENU
PROGRAMMATION
CONFIGURATION
INITIALISATION
CONFIGURATION
RETOUR AUTO [M]
REP. AUTO [M]
NETTETÉ [NORMAL]
SYSTÈME [SECAM]
HM464FD(EN).fm Page 13 Thursday, April 5, 2007 4:40 PM
Downloaded from www.vandenborre.be

14EN
•PressREW/sto go back one step from the current setting
during steps 4) to 9). If REW/sis pressed when the No
PROGRAMME is flashing, the entire programme contents
will be erased.
3) Programme number flashes. Press PLAY/Kor STOP/L
repeatedly until the desired programme number appears.
Then, press F.F W D /B.
4) For once-only recording : Press PLAY/Kor STOP/L
repeatedly until the relevant month appears.
For daily recording : To record a TV programme at the
same time on the same channel from Monday through
Friday. While the month digit is flashing, press PLAY/Kor
STOP/Lrepeatedly to select “LUN-VEN”.
For everyday recording : To record a TV programme at
the same time on the same channel everyday. While the
month digit is flashing, press PLAY/Kor STOP/L
repeatedly to select “LUN-DIM”.
For weekly recording : To record a TV programme at the
same time on the same channel every week. While the
month digit is flashing, press PLAY/Kor STOP/L
repeatedly to select “S-LUN” (Example: every monday).
5) For once-only recording only : Press PLAY/Kor STOP/L
repeatedly until your desired day appears.
6) Press PLAY/Kor STOP/Lrepeatedly until the relevant
start hour appears. Next, enter the minute digit.
7) Press PLAY/Kor STOP/Lrepeatedly until the relevant
end hour appears. Next, enter the minute digit.
8) Press PLAY/Kor STOP/Lrepeatedly until the relevant
channel number appears.
9) Press PLAY/Kor STOP/Lrepeatedly until the desired tape
speed appears.
10)Press F. F WD /B. Programme is now completed.
•To set another timer programme, repeat steps 3) to 10).
11)Press MENU to exit.
12)Press FUNCTION to activate the timer.
The indicator on the display comes on.
To Stop a Timer Programme which has Already
Started
Press STOP/EJECT on the VCR.
Note: STOP/Lon the remote control will not function in the
Timer Recording mode.
To Correct Timer Programmes
If you want to correct an automatic timer after you finished
setting programme,
1) Repeat steps 1) to 3) in the “Timer Recording” section.
2) Select the setting you want to change using F.F WD/Bor
REW/s.
3) Enter the correct numbers using PLAY/Kor STOP/L,
then press F.F WD /B.
4) Press MENU to exit.
5) Press FUNCTION to return to timer standby mode.
To Cancel or Check the Start/End Time
1) Repeat steps 1) to 2) in the “Timer Recording”.
2) Select a programme number you want to check using
PLAY/Kor STOP/L. The details of selected programme
appears on the TV screen. You may cancel the entire
programme by pressing REW/s.
3) Press MENU to exit.
Avoid Overlap of TIMER Programmes...
A timer programme does not work while another programme
is under execution.
Hint for Timer Recording
• If there is a power failure or if the VCR is unplugged for
more than 30 seconds, the clock setting and all timer
settings will be lost.
• If the tape runs out before the end time, the VCR will
switch to the Stop mode immediately, eject the tape and the
VCR power will be turned off. The indicator will flash.
• If a tape is not in the VCR, Timer Recording cannot be
performed and the indicator flashes. If an erase-
prevention tab of the tape is missing, the tape will be
ejected and the indicator will flash. Please insert a
recordable tape.
• When all the Timer Recordings are completed, the also
flashes. To play or eject the recorded tape, press FUNCTION
first, and then press PLAY/Kor EJECT O. To rewind the
tape to the beginning of the recorded programmes, press
AUTO REWIND on the VCR.
• The TV that is connected to your VCR may be turned on
or off when the VCR is in the Timer Recording mode.
• The VCR will only perform a Timer Recording after it has
been placed into timer standby mode.
Auto Return
Using the AUTO REWIND Button
When all the Timer Recordings are completed (the
indicator flashes), press AUTO REWIND on the VCR first. The
VCR will rewind to the beginning of the recorded
programme(s).
Note: If there are any remaining programmes, press
FUNCTION to turn on the VCR and then press
AUTO REWIND. In this case, if you press any other
button once and then press AUTO REWIND, RETOUR
AUTO will not be carried out.
MENU
PROGRAMMATION
CONFIGURATION
INITIALISATION
No PROGRAMME 1
DATE – – / – –
DEMARRAGE – – : – –
FIN – – : – –
CANAUX – –
VITESSE – –
9:00 10:00 11:00
Programme 1
Programme 2
Programme 3
HM464FD(EN).fm Page 14 Thursday, April 5, 2007 4:40 PM
Downloaded from www.vandenborre.be

15 EN
English
Using the VCR Menu
If there are any remaining programmes including Daily,
Everyday, & Weekly, RETOUR AUTO will not operate.
1) Press MENU.
2) Press PLAY/Kor STOP/Lrepeatedly to point to
“CONFIGURATION”, then press F.F W D /B.
3) Press PLAY/Kor STOP/Lto point to “RETOUR
AUTO”, then press F.F W D/B.
[M] will appear next to “RETOUR AUTO”.
4) Press MENU.
Watch the Recorded Timer Programme
Press FUNCTION to turn on the VCR, then press PLAY/K.
Parental Lock
Parental Lock prevents use of the VCR by making the buttons
on the VCR and the remote control inoperative.
•ThePWRindicatoronthe display comes on.
1) Press and hold down FUNCTION on the remote control for
5 seconds until “PL” appears on the display. The Parental
Lock is activated.
When you want to cancel it, press and hold FUNCTION on
the remote control again for 5 seconds.
When Parental Lock is activated:
• The time will appear on the display. “PL” will appear on
the display for two seconds every minute.
•Youmayinserta tape. However, the VCR power will
remain off.
• You may press EJECT Oto remove the tape (unless a Timer
Recording is programmed or has finished).
• Timer Recording will take place as scheduled, even if
Parental Lock is activated. “P.L.” will appear steadily on the
TV screen during the Timer Recording.
QUICK-FIND
This function enables you to search and confirm the contents
of the recorded programme(s) using the index mark.
• Use the remote control for this procedure.
• The tape must be fully rewound.
1) Press QUICK-FIND.
To Skip to the Beginning of Next Programme
1) Press QUICK-FIND.
To View at Normal Speed
1) Press PLAY/K. The Quick-Find is cancelled.
Note:
• This function will not operate in the Recording mode.
• When you want to cancel the Quick-Find while in
progress, press STOP/L.
• When the end of a tape is reached during the Quick-Find,
the tape will automatically rewind to the beginning. After
rewinding finishes, the VCR will eject the tape and turn
itself off.
INDEX SEARCH
• The index mark will be made automatically when
REC/OTR is pressed. It will also be marked at the starting
point of Timer Recording and OTR.
• The index mark is not recorded if PAUSE/STILL pis
pressed and released during recording.
• The time gap between index marks on the tape should be
greater than 1 minute for SP recording and 2 minutes for
LP recording.
• Use the remote control for this procedure.
1) Press SEARCH MODE.
2) Press PLAY/Kor STOP/Lrepeatedly until the number of
programmes that you want to skip appears.
3) Press REW/sor F. FW D /B.
The VCR begins rewinding or fast forwarding to the
beginning of desired programme.
When the preset programme is reached, the VCR will start
playback automatically.
Note:
• Index Search can be set up to 20.
• This function will not operate in the Recording mode.
• Operations must be followed up within 30 seconds from
steps 2) to 3), otherwise the Index Search mode will be
cancelled.
• To exit the Index Search mode, press MENU in step 2) or
press STOP/Lafter step 3).
TIME SEARCH
If a tape includes both programmes recorded in the PAL
system and ones recorded in the NTSC system, this function
may not be operated correctly.
• Use the remote control for this procedure.
1) Press SEARCH MODE twice.
2) Press PLAY/Kor STOP/Lrepeatedly until the desired
time appears.
3) Press REW/sor F. FW D /B.
The VCR begins rewinding or fast forwarding to the
specified point.
When 0:00 is reached, the VCR will start playback
automatically.
Note:
• Time Search can be set up to 9 hours 59 minutes (9:59).
• This function will not operate in the Recording mode.
• Operations must be followed up within 30 seconds from
steps 2) to 3), otherwise the Time Search mode will be
cancelled.
• To exit the Time Search mode, press MENU in step 2) or
press STOP/Lafter step 3).
HM464FD(EN).fm Page 15 Thursday, April 5, 2007 4:40 PM
Downloaded from www.vandenborre.be

16EN
Copying a Video Tape
You can make copies of videotapes made by friends or relatives
for your own enjoyment.
WARNING:
• Unauthorised recordings of copyrighted video
tapes may be an infringement of copyright
laws.
Connect the recording VCR (this unit), playing VCR (another
VCR) and your TV as outline in the following diagram.
1) Insert a pre-recorded videocassette into the playing VCR.
2) Insert a blank videocassette, or one you want to record
over, into the cassette compartment of the recording
VCR.
3) Press SPEED/SYSTEM on the remote control to select the
desired recording speed (SP/LP).
4) Select “AV2” position on the recording VCR. See “Other
Connections”.
5) Press REC/OTR on the recording VCR.
6) Begin playback of the tape in the playing VCR.
7) To stop reco rding , press STOP/EJECT on the recording
VCR, then stop playback of the tape in the playing VCR.
Note:
• For best results during dubbing, use the VCR’s front panel
controls whenever possible. The remote control might
affect the playback VCR's operation.
• If video or colour fades in and out, you may be copying a
copy guarded video tape.
To Monitor the Recording
Turn on the TV and select the video channel on the TV.
A Status Display
To check the Counter, or Clock & Channel number, press
DISPLAY. Each time you press DISPLAY, TV screen will
change as illustrated:
When you select the channel using the number buttons, select
the desired channel (position number).
Note: If the on screen display or indicators on the front panel
show an abnormal reading or no reading, unplug the
VCR for 2 minutes, then plug it in again.
Please note that language, clock, and timer settings will
be cleared after disconnection.
Maintenance
Cabinet Cleaning
• Wipe the front panel and other exterior surfaces of the
VCR with a soft cloth that has been immersed in lukewarm
water and wrung dry.
• Never use a solvent or alcohol. Do not spray insecticide
liquid near the VCR. Such chemicals may cause damage
and discolouration to the exposed surfaces.
Auto Head Cleaning
• This feature automatically cleans the heads as you insert or
remove a cassette to ensure a clear picture.
• The playback picture may become blurred or interrupted
even if the TV programme received is clear. This does not
mean that the recorded programme has been erased. This
problem is caused by dirt accumulated on the head after
long periods of use, or usage of rental or old tapes. In this
case, head cleaning requires highly technical expertise and
the nearest dealer should therefore be consulted. Clean
heads only when problems occur.
Service
Should your VCR become inoperative, do not try to correct
the problem by yourself. There are no user-serviceable parts
inside. Turn the unit off, unplug the power cord, and take the
unit to a Service Centre for servicing.
AV2 (DECODER) AV1 (TV)
AUDIO
OUTPUT
AERIAL
RF OUT
R
L
[Source (Playing) VCR <Monaural>]
(another VCR)
to 21-Pin
Scart Jack
to 21-Pin
Scart Jack
[TV set]
(Use for monitoring)
[Editing (Recording) VCR]
(this unit)
■
SP
0:12:34
■
SP 17:40
P02
<CLOCK and CHANNEL
NUMBER mode>
<COUNTER mode>
Press once. Press once.
Press once.
<OFF mode>
HM464FD(EN).fm Page 16 Thursday, April 5, 2007 4:40 PM
Downloaded from www.vandenborre.be

17 EN
English
Troubleshooting Guide
If you have followed the instructions contained in this manual and have difficulty in operating your VCR, locate the SYMPTOM
in the left column below. Check the corresponding cell CORRECTIVE ACTION columns to remedy the problem.
Specifications
General Specifications
Note: This VCR complies with HYPER and OSCAR
frequency bands of the CATV.
Electrical Specifications
Other Specifications
Note: Designs and specifications are subject to changewithout
notice.
We apologise for any inconvenience caused by minor inconsistencies in these instructions, which may occur as a result of product
improvement and development.
Kesa U.K HU1 3AU
SYMPTOM CORRECTIVE ACTION
No power. • Make sure the power cord is connected to an AC outlet.
• Make sure the power is turned on.
Timer Recording is not possible. • Make sure the Timer Recording is set correctly.
• Make sure the power is off.
• Make sure the VCR clock is set correctly.
Recording mode cannot be engaged. • Make sure the erase-prevention tab on the tape is intact. If removed,
cover the hole after the tab with adhesive tape.
No picture or poor picture on playback. • Set your TV to the video channel.
• Fine tune your TV.
No picture but the audio is OK in playback. • Head cleaning is necessary, consult the nearest Authorized Service
Centre.
Playback picture is partially noisy. • Adjust tracking control for a better picture by using CHANNEL (K/L).
On-the-air TV programmes cannot be seen. • Re-check the AERIAL and RF OUT connections.
• Set your TV to the TV channel correctly.
No operation by infrared Remote Control. • Check the batteries in the remote control.
Video or colour fades in and out when
making a copy of a video tape. • You cannot copy a copyrighted video tape. You are experiencing copy
guard protection.
Television system SECAM L, L’, PAL B/G
TV standard
Video heads Four-video and Two-audio heads
helical scan system
Tape width 12.65mm
Tape speed SP :23.39mm/sec.
LP :11.70mm/sec.
Tuner
channel [SECAM-L]
[PAL B/G]
F1~F10
FB~FQ
E21~E69
CATV
E2~E12
E21~E69
A~H (Only Italy)
CATV
Timer indication 24-hour system
Operating temperature 5°C ~ 40°C
Terminals AERIAL
RF OUT
AUDIO/VIDEO
VIDEO input
AUDIO input/output
Coaxial type, female
Coaxial type, male
21 pin scart socket x 2
RCA connector x 1
RCA connector x 4
Video output level 1Vp-p
Video output impedance 75Ωunbalanced
Audio output level -6dBv
Video input level 0.5 ~2.0Vp-p
Audio input level -10dBv
Video S/N ratio
(STANDARD) 45dB
Audio S/N ratio
(STANDARD) 41dB
Power requirement 220-240V 50Hz
Power consumption 25 Watts
Dimensions W 360mm
H 92mm
D 226mm
Weight 2.4 Kg (approx.)
HM464FD(EN).fm Page 17 Thursday, April 5, 2007 4:40 PM
Downloaded from www.vandenborre.be

2FR
Table des Matières
INFORMATIONS RELATIVES A LA SECURITE ..............................................................................................3
AVANT D’UTILISER CE PRODUIT ..................................................................................................................4
INSTALLATION .................................................................................................................................................6
RÉGLAGE DE L’HORLOGE..............................................................................................................................7
FONCTIONNEMENT DE BASE ......................................................................................................................11
FONCTIONNALITES AVANCEES ..................................................................................................................12
ENTRETIEN ....................................................................................................................................................16
GUIDE DE DEPANNAGE ...............................................................................................................................17
SPECIFICATIONS TECHNIQUES .................................................................................................................17
CARACTERISTIQUES
• Système stéréo Hi-Fi
• Opérations automatiques
• Affichage OSD
• Lecture répétée automatique
• Sélection d’image
• Enregistrement immédiat (EUT)
• Verrouillage parental
• Rembobinage automatique
• Enregistrement automatique déclenché par minuterie
• Nettoyage automatique des têtes vidéo
• Lecture du système NTSC
• Recherche rapide
• Recherche d’index/heure
•Ralenti
• Jacks AUDIO/VIDEO
• Jacks de sortie AUDIO D/G
ACCESSOIRES FOURNIS
•Télécommande
• Deux piles R6
•CâbleRF
MODELE / NUMERO DE SERIE
Le numéro de série de cet appareil est situé sur le panneau
arrière. Veuillez prendre note du numéro du modèle et du
numéro de série et les conserver dans vos archives.
Numéro du modèle: VR101
Numéro de série:
HM464FD(FR).fm Page 2 Thursday, April 5, 2007 3:50 PM
Downloaded from www.vandenborre.be

3FR
Français
INFORMATIONS RELATIVES A LA SECURITE
Symboles
Utilisation sans danger et entretien de votre
équipement
Nous avons conçu et créé ce produit dans le respect des normes
de sécurité européennes, mais, comme avec tout équipement
électrique, vous devez faire en sorte que sa durée de vie de
fonctionnement soit la plus longue possible et que l’appareil
reste sans danger. Pour y parvenir, voici quelques conseils.
Lisez attentivement ces instructions avant de tenter d’utiliser
l’équipement.
Protégez le conducteur. Veillez à ne pas marcher sur le
conducteur, à ne pas l’écraser, à ne pas l’user ou à ne pas le
couper.qui accompagne cet équipement.
Evitez des conditions sévères comme des endroits mouillés
ou humides, une forte humidité, de fortes vibrations, des
températures très élevées ou très basses, une forte lumière
solaire et des endroits très poussiéreux.
Ne laissez jamais personne, surtout des enfants, introduire des
objets dans les trous et les fentes pour la ventilation.
Pour économiser de l’énergie, éteignez le secteur électrique
ou retirez la prise du secteur électrique quand vous n’utilisez
pas l’équipement, à moins que le fonctionnement de
l’équipement requiert une alimentation électrique continue.
Ne continuez pas à utiliser l’équipement si vous avez renversé
des liquides à l’intérieur, ou s’il est endommagé de n’importe
quelle manière ou s’il ne fonctionne pas normalement.
Débranchez immédiatement l’équipement et consultez l’avis
d’un expert.
Retirez la prise principale de la prise de courant murale
pendant un orage.
Ce produit est uniquement destiné à un usage domestique.
Toute autre utilisation risque d’annuler la garantie et d’être
dangereuse.
Ventilation
Placez l’équipement sur une surface plane dure et en dehors
d’une exposition solaire directe et de sources de chaleur. S’il se
trouve dans un meuble de rangement, laissez une distance de
10 cm autour de lui. N’obstruez pas les fentes pour la
ventilation, y compris celles du dessous, avec des tissus doux.
Une surchauffe réduira la durée de vie de l’équipement et
augmentera le risque d’incendie.
Nettoyage
Déconnectez l’alimentation électrique et n’utilisez qu’un
chiffon doux légèrement humide. N’utilisez pas de solvants
chimiques ou de détergents puissants, car ils risquent
d’endommager le fini cosmétique.
Piles
Otez les piles si l’équipement ne va pas être utilisé pendant
longtemps. Les piles laissées dans l’équipement risque de
l’endommager à cause de leur détérioration et des fuites
corrosives, qui annuleront la garantie. Pour protéger
l’environnement, veuillez utiliser les points de recyclage locaux
pour jeter les piles.
Elimination
Les déchets électriques et électroniques ne
doivent pasêtre jetés avec les déchets
ménagers.
Veuillez consulter le point de vente dans
lequel vousavez acheté cet appareil pour savoir
comment vous en débarrasser.
Les piles et l’emballage peuvent être recyclés
dans les points de collecte locaux.
Avertissements importants concernant la
sécurité
• Pour éviter tout choc électrique, n’ôtez pas le couvercle.
• Si quelque chose se passe mal, n’essayez pas de le réparer
vous-même. Consultez un agent de service qualifié pour
qu’il examine l’appareil.
• N’exposez pas cet équipement à des gouttes ou à des
éclaboussures et ne placez aucun objet contenant des
liquides, comme des vases, sur l’équipement.
• Ne placez jamais une source de flamme nue sur ou près de
l’équipement.
• Petites pièces. Ne laissez pas d’enfant en bas âge jouer avec
l’équipement.
• Ne faites pas fonctionner l’équipement tout en essayant de
regarder une vidéo pendant la conduite d’un véhicule.
• La prise principale doit rester facilement opérationnelle.
Avertissements concernant le Copyright
La plupart des enregistrements, des disques compacts et des
émissions radio sont sujettes au copyright. Il est illégal
d’enregistrer de tels matériels sans la permission du
propriétaire du copyright. Toute personne qui effectue un
enregistrement de tels matériels sans le consentement du
propriétaire du copyright s’expose à lui payer des dommages,
et dans certains cas, à des poursuites pénales.
Avertissement concernant la condensation
De la condensation peut se former à l’intérieur de l’appareil
lorsqu’il est déplacé d’un endroit froid à un endroit chaud,
après avoir réchauffé une pièce froide ou dans des conditions
d’humidité élevée. Attendez au moins 2 heures pour laisser
sécher l’intérieur avant d’utiliser le magnétoscope.
Emplacement
Ne placez pas le magnétoscope directement au-dessus ou au-
dessous de votre téléviseur. Assurez-vous qu’au moins 20 cm
séparent le magnétoscope et le téléviseur et que l’air peut
circuler librement par les ouvertures de ventilation du
magnétoscope.
Cet équipement est doublement isolé et une liaison
à la terre n’est pas nécessaire.
Ce signe est appliqué pour montrer que
l’équipement est conforme aux standards de
sécurité et de compatibilité électromagnétique
européennes.
Une tension dangereuse constituant un risque
d’électrocution est présente à l’intérieur de cet
appareil.
Des instructions importantes concernant le
fonctionnement et l’entretien se trouvent dans la
brochure qui accompagne cet équipement.
HM464FD(FR).fm Page 3 Thursday, April 5, 2007 3:50 PM
Downloaded from www.vandenborre.be

4FR
AVANT D’UTILISER CE PRODUIT
Nomenclature des commandes
Panneau avant
1. Logement à cassette
2. Touch e F.FWD
3. Touch e PL AY
4. Touch e REW
5. Touch e STOP/E JE CT
6. Touch e RE C/OTR
7. Touc he AUTO R EWIN D
8. Affichage (Se reporter ci-dessous.)
9. Touches CHANNEL (K/L)
10. Touche FUNCTION
11. Entrées AUDIO (Gauche/Droite)
12. Entrée VIDEO
Affichage
13. Affichage PWR (power = puissance)
14. Affichage REC (enregistrement)
15. Affichage (minuterie)
16. Affichage horloge
17. Affichage de cassette
Panneau arrière
18. Cordon d’alimentation
19. Prise AV2 (DECODER)
20. Prise AV1 (TV)
21. Prises AUDIO OUTPUT L/R (sortie AUDIO G/D)
22. Prise RF OUT (sortie H.F.)
23. Prise AERIAL (antenne)
STOP/EJECTREC/OTR
CHANNEL F.FWDREW PLAY
VIDEO L RAUDIO
FUNCTION
AUTO REWIND
SECAMPAL
12 11 10 987654 3 2
1
13
1517
16
14
REC
PWR
AV2 (DECODER) AV1 (TV)
AUDIO
OUTPUT
AERIAL
RF OUT
R
L
2019
2223 21
18
HM464FD(FR).fm Page 4 Thursday, April 5, 2007 3:50 PM
Downloaded from www.vandenborre.be
Table of contents
Languages:
Other Proline VCR System manuals
