ProLite LD1 User guide

Installation, Servicing and User Instructions for
LD1 & LD2 BOILING TOPS
CAUTION: Read the instructions before using the appliance.
Important Installation Information
The installer must ensure that installation of the unit(s) is in conformity with regulations in force at the
time. For the UK, particular attention requires to be paid to:-
BS7671 IEE Wiring Regulations
Electricity at Work Regulations
Health and Safety at Work Act
Fire Precautions Act
The unit has been CE-marked on the basis of compliance with the Low Voltage and EMC Directives for the
voltage stated on the data plate.
WARNING: THIS APPLIANCE MUST BE EARTHED!
Preventive Maintenance Contract
In order to obtain maximum performance from the equipment, we would recommend that a
maintenance contract be arranged with Serviceline. Visits may then be made at agreed intervals to carry
out adjustments and repairs. A quotation for this service will be provided upon request. Contact
Serviceline as detailed below:-
Tel: 01438 363 000 Fax: 01438 369 900
WEEE Directive Registration No. WEE/DC0059TT/PRO
At end of unit life, dispose of appliance and any replacement parts in a safe manner, via a
licenced waste handler.
Units are designed to be dismantled easily and recycling of all material is encouraged
whenever practicable.
Falcon Foodservice Equipment
Wallace View, Hillfoots Road, Stirling. FK9 5PY, Scotland
e-mail: info@falconfoodservice.com T100317 Ref 8

IMPORTANTINFORMATION
Warranty Policy Shortlist
Warranty does not cover :-
•Correcting faults caused by incorrect installation of a product.
•Where an engineer cannot gain access to a site or a product.
•Repeat commission visits.
•Replacement of any parts where damage has been caused by misuse.
•Engineer waiting time will be chargeable.
•Routine maintenance and cleaning.
•Gas conversions i.e. Natural to Propane gas.
•Descaling of water products and cleaning of water sensors where softeners/ conditioners are not
fitted,
or are fitted and not maintained.
•Blocked drains
•Independent steam generation systems.
•Gas, water and electrical supply external to unit.
•Light bulbs
•Re-installing vacuum in kettle jackets.
•Replacement of grill burner ceramics when damage has been clearly caused by misuse.
•Where an engineer finds no fault with a product that has been reported faulty.
•Re-setting or adjustment of thermostats when unit is operating to specification.
•Cleaning and unblocking of fryer filter systems due to customer misuse.
•Lubrication and adjustment of door catches.
•Cleaning and Maintenance
•Cleaning of burner jets
•Poor combustion caused by lack of cleaning
•Lubrication of moving parts
•Lubrication of gas cocks
•Cleaning/adjustment of pilots
•Correction of gas pressure to appliance.
•Renewing of electric cable ends.
•Replacement of fuses
•Corrosion caused by use of chemical cleaners.
Electrical Safety and Advice Regarding Supplementary Electrical Protection
Commercial kitchens and foodservice areas are environments where electrical appliances may be located
close to liquids, or operate in and around damp conditions, or where restricted movement for installation
and service is evident.
The installation and periodic inspection of the appliance should only be undertaken by a qualified, skilled
and competent electrician; and connected to the correct power supply suitable for load as stipulated by the
appliance data label.
The electrical installation and connections should meet the necessary requirements to local electrical
wiring regulations and electrical safety guidelines.
We recommend:-
Supplementary electrical protection with use of a residual current device (RCD).
Fixed wiring appliances incorporate a locally situated switch disconnector to connect to, which is
easily accessible for switching off and safe isolation purposes. The switch disconnector must meet
the specification requirements of IEC 60947.

SECTION 1 - SITING
Dimensions
LD1 - 300mm (W) x 645mm (D) x 240mm (H) Power Rating –2.76kW
Weight - 10kg Fuse Rating - 13A
LD2 - 600mm (W) x 645mm (D) x 240mm (H) Power Rating –6.44kW
Both Models - Side/Rear Clearance - 20mm Vertical Clearance - 900mm
The LD1 and LD2 have been designed in modular form to allow countertop use or base unit
mounting.
Free-standing and base models should be installed upon a firm, level surface and adjustable feet are
provided for levelling purposes.
Counter units must be positioned upon a table, counter or similar surface.
Vertical and horizontal clearances required from the top and sides of a particular unit to any
overlying combustible surface (ie wall, partition, etc) are listed above. Relevant fire regulations must
be complied with.
Mounting Counter Units on the Oven
When mounting a counter unit upon a light duty oven, it is recommended that units which carry
liquids, i.e. fryers and bains marie, are secured as follows:
Remove oven outer back panel and crown plate.
Position unit(s) which require to be secured upon the oven.
Secure hob unit(s) to oven through side flange centre holes into the threaded inserts in the base(s)
of the hob unit(s). Use fixings provided (packed separately) and replace oven back panel.
The unit is now ready for electrical connection.
Figure 1 Front View
Mounting Counter Units on a Cupboard
Light duty hot cupboards are designed to be used in conjunction with counter models. Assembly is
achieved by means of two shouldered fixings being applied to the underside of a top unit from inside
a base appliance as detailed in Figure 1.

SECTION 2 - ELECTRICAL SUPPLY AND CONNECTION
Electrical ratings are as stated on the unit data plate. This is based on standard UK specification at
230V - 240V~ as appropriate. Wiring must be executed in accordance with the regulations listed in
this booklet.
WARNING! - Each individual appliance must be earthed!
The appliance is also provided with a terminal for the connection of an external
equipotential conductor. This terminal is in effective electrical contact with all fixed
exposed metal parts of the appliance, and shall allow the connection of a conductor
having a nominal cross-sectional area of up to 10 mm². It is located on the rear panel and
is identified by the following label and must only be used for bonding purposes.
After completion of installation, the method of operation should be demonstrated to the kitchen
staff. The isolating switch location, for use in an emergency or during cleaning should also be
pointed out.
LD1 Boiling Top
This model is designed to be connected to a single phase AC supply using the 2 metre mains lead
fitted as standard.
Check that no damage has occurred to the appliance, power cable and plug top during transit. If
damage has occurred do not use the appliance.
Ensure that the mains power cable is routed free from the appliance to avoid damage.
We recommend supplementary electrical protection with the use of a residual current device (RCD).
Periodic testing, repair and fixed wiring connection should only be undertaken by a skilled and
competent electrician.
Wires are coloured in accordance with the following code and should be connected to the plug as
follows:
EARTH to terminal marked Eor coloured GREEN or GREEN/YELLOW.
NEUTRAL to terminal marked Nor coloured BLACK.
LIVE to terminal marked Lor coloured RED.
Units which receive power from a plug, adaptor or distribution board must be individually protected
by a fuse with an appropriate rating.
For models with two mains leads, each lead requires to be protected by a fuse with an appropriate
rating.
Any replacement supply cable must be 1.5mmŽ2•, cord code designation 245 IEC 57 (CENELEC H05
RN-F).
For internal connection, outer sheathing must be stripped 140mm from the cable end. The live and
neutral conductors must be trimmed so that the Earth conductor is longer by 50mm. Pass inlet cable
through the rear panel cord grip and ensure that the cable is routed without leaving excessive free
length inside the appliance.

LD2 Boiling Top
This model is designed to be connected to a single phase AC supply. Electrical supply must be
installed using a suitable isolating switch with a minimum contact separation of 3mm in all poles.
SECTION 3 - USE and CLEANING
IMPORTANT: GENERAL NOTES ON CLEANING
Disconnect unit from electricity supply prior to cleaning.
Never use a coarse abrasive to clean exterior panels. A soft cloth with a warm
water and detergent solution is sufficient.
Never attempt to steam clean or hose down with a jet of water.
Plate Control Switch
Each hotplate is controlled by a switch which offers six individual heat settings. The LD2 front plates
have a built-in cut-out device to automatically reduce heat if the plates are left uncovered at a high
setting. Always switch plate settings to OFF position when not in use.
Rear to left Front to right
Rear Front
Figure 2 - LD1 Model
LH Front LH Rear RH Rear RH Front
Figure 3 - LD2 Model
For efficient operation, it is important that good contact be established between the plate and
utensil. Ground based pots should be used and the plate surface must be clean. For maximum

efficiency, the pot diameter should be the same as that of the plate. This is not always possible but,
in the interest of fuel economy, using very small or large pots should be avoided.
Spillage should never be allowed to accumulate around the edge of a plate as this will burn on and
become difficult to remove.
Cleaning a Boiling Top
Allow the unit to cool before cleaning.
Use a detergent/water solution, take care to rinse and dry all surfaces thoroughly. Stubborn stains
may be removed with a soap-filled pad. Be careful, NEVER use a harsh abrasive on stainless steel.
SECTION 4 - SERVICING
SERVICE ACCESS
Base Plate
Upturn unit and rest it at the edge of a worksurface with rear upstand overhanging the edge.
Undo base plate fixings to remove base plate.
FUNCTIONAL COMPONENTS
Control Switch
Remove base.
Remove control knob.
Remove electrical connections, noting their positions.
Undo fixings which secure control to panel and remove.
Replace in reverse order.
Elements
Remove base plate.
Undo electrical connections, noting their positions.
Undo element fixings and remove.
Replace in reverse order.
Terminal Block
Remove base plate.
Remove electrical connections at terminal block, noting their positions.
Undo fixings which secure the block to the unit and remove.
Replace in reverse order.
Neons
Remove base plate.
Remove electrical connections at terminal block, noting their positions.
Remove and replace neon.
Replace in reverse order.
Cable
Remove base plate.
Undo mains cable cord grip at unit rear.
Undo electrical connections at terminal block and remove cable.
Replace in reverse order. Ensure cable is fed through the securing clamp and pulled taut before
tightening the clamp.

Short Spares List
735110010 Round Hotplate (1.5kW)
730960050 Round Hotplate (2kW)
735110050 Control Knob
735110030 Control Switch
730962040 Neon (Amber)
730962010 Neon (Red)

LD1 WIRING DIAGRAM

LD2 WIRING DIAGRAM
Other manuals for LD1
1
This manual suits for next models
1
Table of contents
Popular Cooktop manuals by other brands
Whirlpool
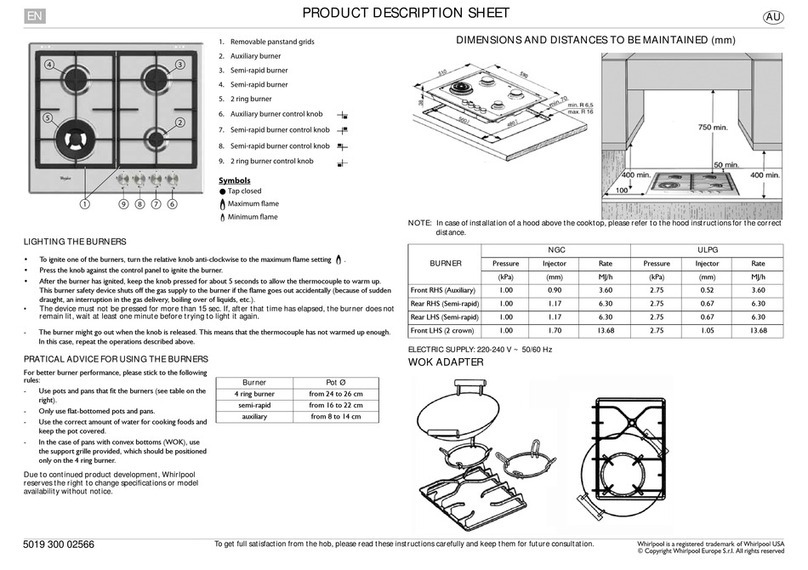
Whirlpool GMF6422 Product description sheet

Wolf
Wolf CT36I/S Planning information

Thermador
Thermador Professional P24WK Care and use manual

Jenn-Air
Jenn-Air JDS9865 Use and care guide

American Range
American Range ARSCT-354GD installation manual
Electrolux
Electrolux E36GC70FSS - Icon 36 Inch Drop-In Gas... Specifications

