Propox JTAGcable II User manual

JTAGcable II
In Circuit Emulator for
Atmel AVR microcontrollers
User’s Guide
REV 1.0
rterKitsEmbeddedWebServ
e
PICmicrocontrollersSt
a
-
sfor‘51,AVR,S
T
,
ationBoar
d
Evalu
rsPrototypingBoardsMinimod
-
Microprocesorsystems,PCB
AVR,PIC,STmicrocontrollers
edInSystemprogrammersfor
netcontrollers,RFIDHighSpe
-
ulesformicrocontrollers,ether-
designingEvaluationBoardsfo
r
ethernetcontrollers,RFIDHigh
nimodulesformicrocontrollers,
ServersPrototypingBoardsmi
-
lersStarterKitsEmbeddedWe
b
‘51,AVR,ST,PICmicrocontrol-
SpeedInSystemsprogramme-
rocontrollersStarterKitsEmbe
-
ardsfor`
51,AVR,ST,PICmic-
PCBdesigningEvaluationBo-
ollersMicroprocesorsystems,
rsforAVR,PIC,STmicrocontrl
-
ddedWebSerwersPrototyping
mersforAVR,PIC,STmicroco
-
HighSpeedInSystemprogra
m
-
controllers,ethernetcontrollers
,
BoardsMinimodulesformicro-
c
ontrollersMicroprocesor
B
oards
n
ingEvaluatio
n
S
ystems,PCBDesig
-
R
Many ideas one solution

2
Introduction
Thank you for buying our JTAGcable II emulator. We hope that the great power it
offers will allow you to appreciate fully the virtues of debugging and programming in
the system provided by Atmel microcontrollers.
JTAGcable II constitutes a tool for programming, real-time emulation in the target
circuit and debugging of processors of the AVR family of Atmel microprocessors
equipped with a JTAG interface. It is fully compatible with the original AVR JTAG ICE
from Atmel. It forms, together with AVRStudio software, an up-to-date and
professional environment for the start-up of programs written both in low-level
(Assembler) and high-level (C) languages.
JTAG is a four-wire interface permitting takeover of control of the processor’s core
and its internal peripherals. The possibilities offered by this interface are, among
others, stepped operation, operation at full speed, circuit and software traps,
monitoring and modification of register contents and data memories. Moreover,
functions offered by ISP programmers are available, such as: programming and read-
out of Flash memories, EEPROM, fuse-and-lock bits.
JTAGcable II can co-operate with microcontrollers supplied with voltages from 1.8 to
6 V. Such a broad range of supply voltages was achieved through buffering of signals
on the JTAG line, additionally enhancing the immunity of the circuit to interference.
The set is provided with AVRStudio software from Atmel, working in the Windows
system.
A detailed operating instruction of the emulator and of the AVRStudio program can be
found at the website of Atmel: http://www.atmel.com
Let us wish you nothing but success and a lot of satisfaction in
designing and putting new microprocessor devices to work.
Features
Compatible with AVR JTAG ICE
Co-operates with Atmel AVRStudio software
Allows emulation and programming in AVR microprocessor systems equipped with a
JTAG interface
Allows debugging of a code written both in Assembler- and C-language
Connected to the USB port
Supports software up-dating from the AVRStudio level
Operates with target voltages in the range of 1.8 – 6 V
Buffering of the JTAG bus, allowing proper operation with systems powered from a broad
range of supply voltages and enhancing immunity to external interference
Standard 10-pin connector to the target circuit in the Atmel standard
Operation of the emulator signalled by three built-in LED indicators
No need for external power supply, power is taken from USB port
The programmer can supply power to target circuit
Small dimensions

3
Supported devices
Below is a list of devices supported by the emulator. As new devices appear, the list is going to be
modified. The current list is always available in the AVRStudio program.
ATmega128, ATmega128L, AT90CAN128
ATmega64, ATmega64L
ATmega32, ATmega32L
ATmega323, ATmega323L
ATmega16, ATmega16L
ATmega162, ATmega162L, ATmega162V
ATmega165, ATmega165V
ATmega169, ATmega169L, ATmega169V
Description of the emulator
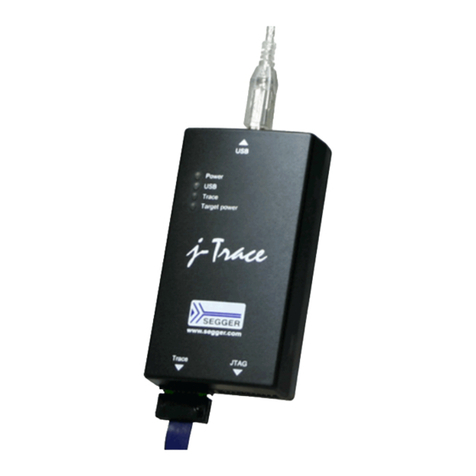
USB
Power LED
Jumper
JTAG
Target power LED
Data Com LED
USB -
USB mini B connector for connection with the PC
Power LED - Signalling the application of supply voltage to emulator
Target Power LED - Signalling the application of supply voltage to the target device
Data Com LED - Signalling communication with the target device
Jumper - Jumper closed when supplying target from emulator
JTAG - 10-pin JTAG connector to the target device
Emulator JTAG connector
DESCRIPTION OF TERMINALS
TCK
Test Clock – clock signal for the target circuit
TDO Test Data Output –
data signal for the target circuit
TMS Test Mode Select – switching signal for the target
circuit
VCC Power supply from target circuit
TDI Test Data Input – data signal from the target circuit
Vref
Line signalling the presence of supply voltage in the
target circuit
NSRST
Reset input/output of target circuit
NTRST
Not used
GND
Programmer ground

4
(AD0) PA0 51
(AD1) PA1 50
(AD2) PA2 49
(AD3) PA3 48
(AD4) PA4 47
(AD5) PA5 46
(AD6) PA6 45
(AD7) PA7 44
(ALE) PG2 43
(A8) PC0 35
(A9) PC1 36
(A10) PC2 37
(A11) PC3 38
(A12) PC4 39
(A13) PC5 40
(A14) PC6 41
(A15) PC7 42
(RD) PG1 34
(WR) PG0 33
PF0 (ADC0)
61
PF1 (ADC1)
60
PF2 (ADC2)
59
PF3 (ADC3)
58
PF4 (ADC4 / TCK)
57
PF5 (ADC5 / TMS)
56
PF6 (ADC6 / TDO)
55
PF7 (ADC7 / TDI)
54
AREF
62
AGND
63
AVCC
64
PE0 (PDI / RXD0)
2
PE1 (PDO / TXD0)
3
PE2 (AC+ / XCK0)
4
PE3 (AC- / OC3A)
5
PE4 (INT4 /OC3B)
6
PE5 (INT5 /OC3C)
7
PE6 (INT6 /T3)
8
PE7 (INT7 /IC3)
9
PB0 ( SS )
10
PB1 (SCK)
11
PB2 (MOSI)
12
PB3 (MISO)
13
PB4 (OC0)
14
PB5 (OC1A)
15
PB6 (OC1B)
16
PB7 (OC2 / OC1C)
17
(INT0 / SCL) PDO 25
(INT1 / SDA) PD1 26
(INT2 / RXD1) PD2 27
(INT3 / TXD1) PD3 28
(IC1) PD4 29
(XCK1) PD5 30
(T1) PD6 31
(T2) PD7 32
XTAL2 23
XTAL1 24
GND
53 GND
22
VCC 21
VCC 52
PEN
1
RESET
20
PG4 (TOSC1)
19
PG3 (TOSC2)
18
ATMEGA128
U1
GND
VTG
GND
VTG
12
34
56
78
910
JTAG
J1
TCK
TDO
TMS
VCC
TDI
GND
Vref
NSRST
NTRST
GND
GND
GND
VTG
VTG
10k
R1
VTG
The JTAG connector is compatible with the 10-pin standard from Atmel.
Connection with the target circuit
The connection to the target circuit should be realized through the attached 10-lead ribbon cable,
terminated with standard IDC plugs with 2.54 mm raster. In case of using another cable it should be
kept in mind that it should not be longer than 30 cm (~12 inches). The target device should be
equipped with a JTAG connector with lead-out identical to that of the emulator JTAG connector. We
connect the JTAG bus lines with their corresponding JTAG bus lines of the microcontroller as shown
in the figure below.
Connection with the ATmega128 microcontroller
It is necessary to make a suitable adapter, when connecting the JTAGcable II emulator to a target
device having a JTAG connector in another standard.
Level converter of JTAG signals
In order to assure proper operation of the emulator when the supply voltages of the target circuit
differ from the emulator’s supply voltage, level converters of JTAG signals come into use. The
conversion circuits have been designed for operation with a target circuit supplied from a voltage
between 1.8 and 6 V.
The JTAGcable II can be supplied from an external source or directly from the target circuit. In the
last case, the supply voltage should have a value between 4.5 and 5.5 V.
Signals between the programmer and the target circuit can be divided into three groups: input
signals (TDO), output (TCK, TMS, TDI) and input/output (NSRST). Besides regenerating JTAG bus

5
signals, the signal level converter buffers limit the input and output currents. Buffering has been
applied on all signal lines of the emulator. The implementation of a signal level converter for output
lines has been shown in the figure below.
1 2
33R
ZENER
From uC
VCC VTG
To Target
ISP HEADER
VTG
Voltage level converter (outputs)
The implementation of a signal level converter in the input line of the MISO programmer is shown
below.
Voltage level converter (input)
The implementation of a bi-directional level converter is a combination of solutions shown above.
Supplying the emulator
Emulator is powered form USB bus and do not need external power supply.
Additionally, after closing jumper, power to the target circuit can be supplied. In this case you should
remember that accordingly to the USB bus standard, supplied voltage can be between 4.3 and
5.25V. Current drawn by the target circuit shouldn’t exceed 100mA.
Technical data
Dimensions : 55 x 53 x 16 mm
Weight : about 0.1 kg
Connection to the PC : Serial port 9-pin SUB, female
Transmission speed : max. 115200 bps
Programming cable : length 30 cm
JTAG clock frequency : max. 250 kHz
Target circuit supply voltage : VTG 1.8 – 6.0 V
Power for the target circuit : VTG 4.5 – 5.5 V
s
max. 50 mA
Supply current form USB :
max. 50 mA
1 2
ZENER
o uC
VCCVTG
From Target
ISP HEADER
VTG
10k
33R
VTG

6
Contents of delivery package
•
JTAGcable II emulator
•
Cable terminated with IDC 10 plugs for connection of the emulator with the target circuit
•
USB cable for connection of the emulator with a PC
•
CD with documentation and software
Technical assistance
In order to obtain technical assistance, please contact support@propox.com
Please provide the following data:
•Clock frequency and type of processor in the PC
•Version of the operating system
•Processor type (complete number of the device) and oscillator’s frequency
•Detailed description of the problem
Table of contents