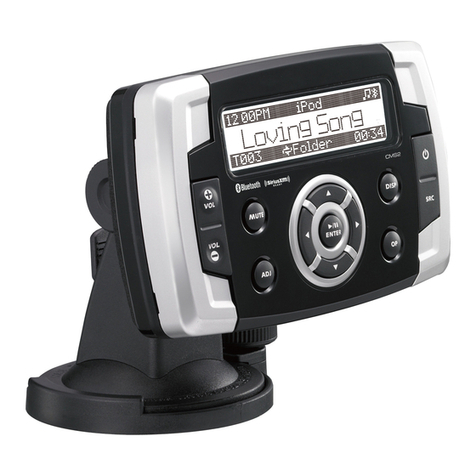
Prospec Electronics INFMBB-400 User manual


Table
of
Contents
Table
of
Contents ----------------------------------------------------------------- 1
Product Description -------------------------------------------------------------- 2
Mounting the Black Box -------------------------------------------------------- 3
Wiring Configuration ------------------------------------------------------------ 4
General Function
of
Buttons ---------------------------------------------------- 5
Sign up Display & Home Menu ------------------------------------------------ 6
General Operations --------------------------------------------------------------- 7
General Settings ------------------------------------------------------------------ 8
Radio Section Operation -------------------------------------------------------
11
SiriusXM® Section Operation -----------------------------------------------
14
Bluetooth Section Operation --------------------------------------------------
16
USB Section Operation -------------------------------------------------------- 20
iPod/iPhone Operation --------------------------------------------------------- 22
AUX Section Operation --------------------------------------------------------
23
Troubleshooting ----------------------------------------------------------------- 24
1

ProductDescription
The INFMBB400 incorporates the following features:
I
i'
"
;;
0
~ii
AM/FM/WB/RDS
SiriusXM-Ready™
(SiriusXM connect tuner and subscriptionrequired)
Bluetooth
Audio
Streaming
with
ID
tagging
USB
input
and
control
-
for USB drives and iPod/iPhone (iAP2)
Auxiliary
input
SOW
x 4
amplifier
Wired
remote
I RF remote
option
U.S.
and
European
tuning
Charging
through
USB
4
pair
of
RCA
output
including
subwoofer
output
Can
Bus
Control
via
NMEA2000
Multizone
Control
(Zone 1,
Zone
2)
The Infinity brand is part
of
Harman International Industries.
In
1958, Harman
Kardon developed the world's first stereo receiver.
Sirius, XM and all related marks and logos are trademarks
of
Sirius XM Radio
Inc. All rights reserved.
2

Mounting the Black
Box
1.
Precautions
Choose the mounting location carefully so that the unit will not interfere with the normal
driving functions
of
the boat.
Avoid installing the unit where it would be subject to high temperature, such as from direct
sunlight or hot air, or where it would be subject to dust, dirt
or
excessive vibration. Use only
the supplied mounting hardware for a safe and secure installation.
2.
Mounting illustrations
Correct
Mounting
Positions
(Wires
downwards)
Better
(45 facing upward)
Best
(90 facing
upward)
Incorrect
Mounting
Positions
(Wires
upwards)
3.
Installation Note
Do
NOT
mount
black
box
in
either
of
the
following
positions.
This
will
allow
water
to
intrude
and
will
result
in
damage
to
the
unit.
Please find enclosed nylon wire tie-downs (wire clamps) for added support. (Use the wire
clamps to hold down the harness, preventing water from running along the wires and into
the unit.)
3

Wiring Configuration
ANTJAC
REAR
LINE
OUT
NOTE:
AUX1
AUX2
(AUTOAN
(ACC
(GROUN
(FRONTLE
(REARLE
1-
i-
BLUE
RED
6PREMOTE
6PREMOTE
CONTROL
BLACK
WHITE
WHITE/BLACK
GREEN
GREEN/BLACK
GRAY
GRAY/BLACK
(FRONT
RIGHT)
VIOLET
VIOLET/BLACK
(
REAR
RIGHT
)
1.
When wiring, the red lead is recommended to be wired to ACC/ignition power lead.
2. Make sure that the black wire on the wiring harness is connected to a good ground point
on the boat.
If
the chassis
of
the boat is used as a ground point, make sure that the surface
is scraped clean
of
paint before attaching the wire to it.
It
is recommended to connect the
black ground wire directly to negative terminal (-)
of
the boat battery.
3.
Before wiring your system, disconnect your boat battery's positive(+) cable. This helps
prevent damage in case
of
a short.
4

General Function
of
Buttons
c:::::::>
~
®-------------------
------
---·
·---------
----------------------®
VOL TUNE
1. POWER, MUTE, PAUSE button
-With unit off, press it to power the unit on.
-With the unit on, press and hold it for over 2s to power the unit off.
-In Radio, SiriusXM, AUX mode, press it to MUTE sound output,
press again to resume sound output.
-In USB, BT Music mode, press it to PAUSE playback, press again
to resume playback.
2.
MENU,
ENTER
button
-In any status, press and hold it for 2s to revert back to current source home display.
-In source playing status, press it to activate navigation function.
(Note: Navigation function would be disabled after 5s without operation.)
-In any selection status, press it to confirm selection.
3. VOLUME Up button
-Press to increase volume level.
4.
VOLUME Down button
-Press to decrease volume level.
5.
Tune Up button
-In
playing status, press it to
se~ect
the next station, channel,
or
track.
-In Navigation mode, press it to move highlight upward.
6.
Tune Down button
-In playing status, press it to select the previous station, channel,
or
track.
-In
Navigation mode, press it to move highlight downward.
5

Sign
Up
Display & Home
Menu
l . Sign Up Display
Once the unit is powered on, the introductory screen wi
ll
appear for 3 seconds and then
switches
to
radio source display.
r;1
~
Push
lntlniW.
by
HARMAN
2.
Home
Menu
(Source display)
6
At Home Menu, press the TUNE Up/Down button
to
move
to
desired source and press
ENTER button
to
confmn.
SiriusXM
BT
Music
USB
AUXIN
Settings

General Operations
1. VOLUME
Co
nt
ro
l
In
any playing status, simply press VOL button to
display the volume adjust screen. Then press
TUNE
UP/DN
button to select VOLUME,
VOLUME
-4~
ZONE
l , ZONE2, and simply press
VOL
UP/DN
button to adjust it.
ZONE
NOTE:
1.
VOLUME
refers to
Main
volume. Zone
1,
Zone 2 level will change along with
VOLUME adjustment.
2.
Zonel,
Zone2 volume level could be separately
adjusted only when i
t's
lower than Main volume.
2. MUTE Control
In Radio,
Si
riusXM,
or
AUX
mode, press
MUTE
button to mute sound output;
press again to resume sound output.
3. General Settings
Press and hold MENU button to back to
Home Menu, then press
TUNE
UP/DN button
to move highlight to Settings source, then
simply press
ENTER
button to go into the
Setting mode.
Note: highlight movement indicated
by
the
icon background change.
7

GeneralSettings
3-1. Bass Control
At Setting screen, press TUNE Up orDown button
to
select Bass, then press VOL
Up
or Down button
to
adjust Bass level.
3-2. Treble Control
At Setting screen, press TUNE Up or Down button
to select Treble, then press VOL Up or Down button
to adjustTreble level.
3-3. Balance Control
At
Setting screen, press TUNE
Up
or
Down
button
to
se
lect Balance, then press VOL Up or Down button
to adjust Balance level.
3-4.
Fa
der Control
At Setting screen, press TUNE Up or D
own
button
to
se
lect Fader, then press VOL
Up
or Down button
to adjust Fader level.
3-5. Loud Control
8
At Setting screen,
pr
ess TUNE Up or
Down
button
to
se
lect Loud, then
pr
ess VOL Up
or
Down button
to
select
ON
or OFF.
-7
1
11'
Treble
Balance
Fader
I -
Faoft
LOUD
~
Bass
liii
Trellle
Bass
Treble
Balance
rFader
Bass
.
Treb
le
(;~
Balance
Fader
Bass
(l
Trellle
1
0R
Subwooter
l.,.Bass
Treble
Balance
Fader
(
OFF
}
~
.........
-

GeneralSettings
3-6. EQ Selection
At
Setting screen, press
TUNE
Up
or
Down button to
select EQ, then press VOL Up
or
Down button to
se
lect
Off
, Classics, Jazz, Pop
or
Rock.
3-7. Subwoofer Gain Control
At
Setting screen, press
TUNE
Up
or
Down button to
select Subwoofer, then press
VOL
Up
or
Down button
to adjust Subwoofer
Ga
in
va
lue.
3-8. l-Volume Control
At Setting scr
ee
n, press
TUNE
Up
or
Down button to
select T-Volume, then press
VOL
Up
or
Down button
to adjust the Initial Volume Level. This feature controls
the maximum volume level desired when
power
it on.
3-9. Dual Zone Control
At Setting screen, press
TUNE
Up or Down button to
select Dual Zone, then press
VOL
Up
or
Down button
to select ON
or
OFF.
0
EQ
Bass
Treble
Bala
n
ce
Fao
er
(
CFF}
{
CLASSICS
}-L
I
O''d
(
JAZZ
)(
PCP
)(
ROCK
)
Sub.Gain
I-
Volume
Dual
Zone
eo
~
--=:.....
Bass
Treb
le
Ba
lan
ce
I
Fac:l
er
ij
i-Vo
lum
e
Dua
l
Zone
~
A
Vblume
3-
10.
TA
Vo
lum
e
Ad
ju
st
ment
At
Setting screen, press
TUNE
Up
or
Down button
to
TA
Volume
se
lect TA
Vo
lume, then press
VOL
Up
or
Down button
to adjustTA Volume level.
0
45
Parenlal
Lock
SXM
Reset
9

GeneralSettings
3-11. Brightness Adjustment
At
Setting screen, press
TUNE
Up
or
Down button to
select Brightness, then press VOL Up
or
Down button
to adjust Brightness level.
3-12. Area Selection
At
Setting screen, press TUNE Up
or
Down button to
selectArea, then press VOL Up or Down button to
select USA
or
EUR.
3-13. SiriusXM Parental
Lock-
Change Code
In Settings
sc
reen, press TUNE Up
or
Down button to
select Parental Lock. Then press VOL Up
or
Down
button to
se
lect Parental
Lock
sub-features.
Please refer to SiriusXM Section Operation for details.
3-14. SXM Reset
At
Setting screen, press TUNE Up
or
Down button to
select
SXM
Rese
t,
then ENTER button to reset the
SXMTuner.
3-15. Software Version View, Software Reset
At Setting screen, press TUNE Up
or
Down button to
se
lect S/W Version, then press
MENU
button to active
highlight at VlEW
and
press ENTER button to view
the Software
Ver
sion.
Software Reset:
In Software Version display status,
pre
ss TUNE UP,
TUNE DN, and
TUNE
UP in sequence, then press
and hold TUNE DN for
7s
to reset the unit.
Note:
It
will be necessary to re-enter the radio preset
memories and other personal settings as these
will have been erased when the software was
reset. After resetting the unit, ensure a
ll
functions are operating correctly.
lO
Br
i
ghtne
ss
1-~rume
Dual
Zone
TA~Iume
==-
~
Area
SXM
R
eset
S/W
Vers
ion
8
1-~lume
.
Dual
ZOne
BJuetDDitl
SIW~r
s
1011

Radio Section Operation
I. To Select
Radi
o mode
At
Home Menu, press TUNE Up/Down button to move the highlight
to
Radio source, then
press ENTER button to go into the Radio mode.
Note: highlight movement indicated by the icon background change to two tone orange.
2.
Radio
S
cr
e
en
Description
IDisplays
EUR
or
USA
to
indicate Only displays in Manual) Only displays when EQ I LOUD
the Area selected
in
the Settings. Tune status.
ON
was selected in the Settings.
I
Only shows when
eg
G u
'-
the stati
on
is
a •
Stereo Channe
l.
N
EWS
lu
T
ATP
•
.!.
CJ!lm)
SA
P5
DisplaysFM,AM
-+FM
1
04
20
or
WB
to
indicate •
BAND.
MHZ
SAVE: To save current frequency into P.List
BAND: To select FM, AM
or
WB band
P.
LIST: Global Preset List
TA: Traffic Announcement
PTY: ProgramType
Only displays when the
listen station
is
a preset
station.
Frequency
Bar
11

Radio Section Operation
3. AREA
Se
lection
At
Home Menu, move highlight to Settings, press
ENTER
button, then press TUNE
Down
button to move highlight to
AREA
feature. Press
VOL
Up
or
Down button
to
sel
ect
between
USA and EUR.
4.
BAND
Selection
In
Radio playing mode, press
MENU
button to activate navigation, then press
TUNE
Down
button to move highlight to BAND.
Now
press
MENU
button to toggle/select amongst
FM
,
AM
or
WB
band. WB=Weatherband.
5.
Auto
Tuning
In Radio playing mode, press TUNE Up/Down button to activate auto tune. This results in
automatically stopping at next station
of
sufficient signal strength.
6.
Manual
Tuning
In
Radio playing mode, l
ong
press TUNE Up/Down button for 2s. This will activate
man
ual
tune with
MANU
display
on
the top area. Then repeatedly press TUNE Up/Down button
to tune frequency by steps.
NOTE: Radio will revert back to AUTO tune mode after 5s without operation.
7. Station Save
In
Radio play mode, manually
or
auto tune to a station, then press
MENU
button to activate
bottom navigation. SelectSAVE icon and press
ENTER
button. The unit will display the
Global Preset List screen, press TUNE UP/DN button to
se
l
ect
a presetNo. and press
ENTER
button to save current station into Preset List.
The
Preset number will display
once the station is saved. The unit will go back to previous display
if
no operation in 5s.
8.
Preset
List
In
Radio play mode,
pr
ess MENU button to activate navigation, press T
UNE
UP/DN button
to move highlight to P.List, then press ENTER button to display the Global Preset List.
Press TUNE Up
or
Down
button to select a
preset andpress
ENTER
button to listen to it.
This will let you preview the
se
lected station
for 1Os before it reverts back to Radio screen.
During this time, you can select another
station with TUNE UP/DN
bu
tto
n.
NOTE:
1. Receiver can store up to 18 stations.
12
2.
If
there
is
no operation at Global Preset
List screen, it will go back to Radio
screen
by
itselfafter 5s
or
simply l
ong
press MENU button for 2s to
go
back
to previous display.
Global Preset
Ust

Radio Section Operation
9.
TA
(Traffic Announcement)
To
activate TAfunction, press MENU button to
activate bottom navigation, then press TUNE
Down button
to
move highlight
to
TA
, now
press MENU button to toggle/select between
TAON
or
OFF.
(Note:
TheTA
icon will display when
TA
ON
is selected.)
With TA ON selected, it will automatically
switch
to
Traffic Announcement when there
is
traffic news.
If
the listening frequency is a Traffic Program,
the TP icon would displ
ay.
TrafficAnnouncement volume can be set
in
th
e Settings. Whena traffic announcemen
is
received, it will broadcast it at the setTA
volume.
10. PTY (Program Type)
In Radio mode, if you want
to
select a particular
program type , press MENU button to activate
bottom navigation, then press TUNE Up button
to
move highlight
to
PTY and press MENU
button to display the program type list. Push
TUNE Up or Down button to select a desired
program type and press ENTER button. It will
then switch
to
Radio play screen and search for
a station with the selected program type.
NOTE:
NEW'S
PS
FM
104.20
MHz
TAVolume
0
PTY
Wst
Dual Zone
I:)
TAVolume
B
ngn
tn
ess
1.
The Program Type would be displayed on the top
of
the station frequency.
2.
If no operation
at
program type list screen, it will go back to Radio screen
by
it
self
after
5s
or
simply press MENU button for 2s
to
go back
to
previous display.
3.
If
no station with selected program type were found, it will revert back to previous playing.
13

SiriusXMSection Operation
1.
What is SiriusXM
Only SiriusXM® brings you more
of
what you love to listen to, all in one place. Get over
1
40
channels, including
co
mm
ercial-free music
plus
the best sports, news, talk, comedy and
entertainment. Welcome to the world
of
sa
tellite radio. A SiriusXM Vehicle Tuner and Sub-
scription are required.
For
more information, visit www.siriusxm.com
Activating your SiriusXM Subscription
1.
After installing your SiriusXM ConnectTuner and antenna, power on your r
ad
io
and
select
SiriusXM mode. You should be able to hear the SiriusXM preview channel
on
Channel
1.
If
you cannot hear the preview channels, please check the installation instructions to
make
su
re your SiriusXM Connect tuner is properly installed.
For
more information on how to install the SiriusXM Connect Vehicle tuner, consult the
installation guide included with the tuner.
2. After you
can
h
ear
the Preview channel, tune to Channel 0 to fmd the Radio ID
of
your tuner.
In addition, the Radio
ID
is located on the bottom
of
the SiriusXM Connect Vehicle Tuner
and its packaging. You will n
eed
this number to activate your subscription. Write the number
down for reference.
Note: the SiriusXM Radio
ID
does not include the letters I, 0 , S
or
F.
In the USA, you can activate online
or
by
ca
lling
SiriusXM
Listener care:
Visit www.siriusxm.com/activatenow
Call SiriusXM Listener Care at 1-866-635-2349
For
Canadian Subscriptions, please contact:
Visit www.siriusxm.ca/activatexm
Call
XM
Customer Care at l-877-438-9677
As part
of
the activation process, the SiriusXM satellites will send an activation message to
your tuner. When your radio detects that the tuner
ha
s received the activation message,
yo
ur
radio will display:Subscription Updated, press Enter to continue. Once subscribed, you
can
tune to channels in your subscription plan. Note, the activation process usually takes 10 to
15
minutes, but may take up to an hour. Your radio will need to be powered
on
and receiving
the SiriusXM signal
to
receive the activation message.
2.
To
Select SiriusXM Mode
At
Home
Menu
, press
TUNE
button to move
the highlight to SiriusXM source, then press
ENTER
button to go into the SiriusXM mode.
Note: highlight movement indicated
by
the
icon background change.
14

SiriusXMSection Operation
3. SiriusXM
Sc
reen Description
Only
displays when EQ
I
LOUD
ON
was selected in the Settings.
Display
sequence:
Channel
Number
Channel
Name
Category
Name
Artist
Name
Song
Title
Content
Info.
-.....................................................
\
.c
h.
8
·aos on 8 :
Only displays when the
P1
4+-
listening channel is a
preset channel.
:
Rock
i
Bill
I
dol
'
Rebel
Yell
····-·
·)
SAVE: To save currentchannel into P.List.
DIRECT: To directly input a channel No.
Cat.List: To display the Category List.
P.LIST: To display the Global Preset List.
4. To Display Radio I
D
Tune to Channel 0
or
directTune to Channel 0 to display the Radio 10.
S.MUTE
In
SiriusXM mode, press the MUTE button to mute sound output, and press it again
to resume sound output.
6.
To
Select the Previous I Next Channel
fn
SiriusXM mode, press TUNE Up
or
Down button to select the previous
or
next
channel. Press and hold TUNE Up
or
Down button to rapid tune/browse channels,
and
release the button when the desired channel is displayed
..
7. Storing a Channel
as
a
Preset
In SiriusXM playing mode, tune to
or
direct tune to a channel which you want to store
as a preset, then press MENU button to activate bottom navigation. lt will highlight at
SAVE, now press ENTER button.
It
will display the Global Preset
Li
st screen, press
TUNE
UP
/ON button to select a preset number and press ENTER button to save current
channel into Preset List. The Preset No. will display once the channel is saved. The unit
wi
ll
revert back to the previous display
if
no operation is performed
in
Ss.
15

SiriusXMSection Operation
8. Direct Channel
Input
'
~
In SiriusXM mode, first press MENU button to
En
t
er
CH
Num
ber
activate navigation, then press TUNE Down button
to move highlight at DIRECT, and press ENTER
button.
It
will display the keyboard. Press VOL Up
or Down button to
se
l
ect
the desired digit, then press
ENTER after each selection to move to next input.
After three
dig
it input, press ENTER button again to
jump
to the selected Channel.
Note:
If
a wrong digit is entered, simply press TUNE
DN
button to move to previous digit input. Repeat
above operation until the correct channel
is
entered.
9.
Ca
tegory List
In SiriusXM mode, first press
MENU
button to
activate navigation, then press TUNE Down button
to move highlight to Cat.LIST and to display the
Category List. Press TUNE Up
or
Down
button to
select and press ENTER button at your desired
Category. Then press TUNE
Up
or
Down and ENTER
button to select a desired channel.
10.
Pr
eset
Li
st Channel Tuning
In SiriusXM play mode, press MENU button to
activate navigation, press TUNE UP/DN button
to move highlight to P.List, then press ENTER
button to display the Global Preset List.
Press TUNE
Up
or
Down button to select
a desired preset and press ENTER button to listen
to
it.
It will let you
li
sten to the selected channel for
I
Os
before it reverts back to source playing screen.
Dur
ing this time, you can select another channel
with TUNE UP/
DN
button.
16
P
category
Li
st
Hl p-
Hop
_
IUI.D
n----u
:
~
Gl
obal P
reset
U
st
1

SiriusXM
Section Operation
11
. Channel Parental Lock
The
Parental Control feature allows you to limit access
to
any
SiriusXM channels, including those with mature
content. When enabled, the Parental Control feature
requires you to enter a passcode to tune to the locked
channels.
P•rentel
Lock
!-VOlume
8
oua1Zone
To
Lock
I Unlock any Channel, first
go
back to
Home
Menu and select Settings. Press
TUNE
button to choose
Parental Lock.
-Parental
Lo
ck On I
Off
Press
VOL
UP/ON button to move highlight to Off,
then press ENTER, it will prompt for passcode, input
four digits with
VOL
button
and
after each input press
ENTER button to
jump
to next input. After four digit
input, it will indicate
"Lock
is ON".
With Parental Lock
On
selected, all the locked
channels are temporarily unlocked which will let you
listen to the locked channels without inputting the
passcode agai
n.
Note:
Once
you leave SiriusXM mode
or
power
off
the unit, it will revert to Parental Lock Off.
-
To
Unlock all c
hann
els
Press
VOL
UP
/ON button to move highli
ght
to ALL,
then press ENTER, it will prompt for passcode, input
four digits with
VOL
button and after each input press
ENTER
button to
jump
to next input. After four digit
input, press
ENTER
button to unlock all channels.
-
To
Lock/Unlock channels one
by
one
Press
VOL
UP/ON button to move highlight to CH,
then press ENTER, it will prompt for passcode,
input four digit passcode, press
ENTER
button.
It
will display the Channel list, press
TUNE
UP/
ON
button and
pre
ss MENU at the desired channel.
Note:
if
the
se
lected channel was locked, then
pressing MENU button will unlock it; and
if
the selected channel was unlocked, pressing
MENU button will l
ock
it.
12. SiriusXM ParentaJ Lock Code Change
If
you want to chan
ge
your code, first
go
back to
Home
Menu and sel
ect
Settings. Press TUNE UP
button to choose Parental Lock.
Pre
ss
VOL
button to
choose
CODE
CHANGE.
It
will prompt for current
Enter Code
• Channel
Lock
orUnlock
Enter NewCode
passcode, then new code,
and
one
more prompt for
new
code confirmation.
Use
VOL
button for code input, and press
ENTER
button after
each
input.
If
a wrong digit is inputted, press TUNE ON button to move to previous digit input.
Note: Factory default passcode was 0000.
17

Bluetooth Section Operation
1.
To
Select Bluetooth mode
At
Home
Menu, press
TUNE
button to move the highlight to Bluctooth source, then simply
press ENTER button to go into the Bluetooth mode.
Note: highlight movement indicated by the icon background change.
2. Bluetooth Screen Description
.
ID3 tag:
'
'
'
'
Song name
~
Artist
:
Album .
Only displays when EQ
I
LOUD
ON
was selected
in
the Settings.
.....
····---·
......
Try
to
Reme
mb
e r :
.
.
.
.
.
.
The
Brothers
four
.
.
:
Try
Remember
.
to
.
..
.
.
-- -
_____
.,
..
II
If
already has
BT
device
connected, here display
DISCON.
If
no
BT
device connect,
here display CONN.
l•l~o:.:.~·m1
.,
H6 0 - l 0 3 *+--i
Paired device
name.J
3.
Pair
BT Device
CONN: To establish Bluetooth connection.
OISCON: To disconnect the BT Device.
If
there is no BT device paired,
go
to settings on the BT device and tum the Bluetooth
option ON. Pick
"MBB"
option on
you
r Bluetooth enabled device.
18
(i
fyou
are prompted for a password, the code entered will be "1234".)
lfth
ere was already a BT device paired, press MENU button to
hi
ghlight CONN and
pr
ess ENTER to establish the BT connection.

Bluetooth Section Operation
4.
Play
/Pause Play
Once the
BT
device successfu
ll
y pairs,
it
will begin to play the music in
the
device.
Note:
For
some B
lu
etooth phones, you
might
activate play from your phone first.
It
depends on the phone itself.
While
BT
Music
is playing, press the PAUSE button to pause the playback, and press
it
again to resume playback. -
Note: I refers to PLAY; • refers to PAUSE.
5. Track Up/Down
While
BT
Music
playing, simply press
TUNE
Up
or
Down
button to select the next
or
previous track.
6. Disconnect
1n
BT
Music playing mode,
if
you
want
to disconnect the
BT
device, press
MENU
button
to activate navigation, it will highlight
at
DISCONN
, press
ENTER
button to disconnect
the
BT
connection.
Note: When your
BT
device battery is
at
low charge, the Bluetooth connection may
occasionally
be
lost. To maintain good connectivity ensure that
your
BT
device battery is
adequately charged.
7. Connect
With
BT
device
paired
OK
,
but
disconnected,
if
you
want to estab
li
sh the
BT
connection,
first press
MENU
button to activate navigation, it will highlight
at
CONNE,
press
ENTER
button to connect the
BT
device.
Note: With the Bluetooth connection disconnected, once you power on the unit next time,
it will establish the Bluetoothconnection automatically.
8. Bluetooth On/
Off
Setting
There
is
a Bluetooth
On/Off
feature in Settings which allows
the
user
to turn
off
the
Bluetooth
feature.
With
Bluetooth
off
selected, the
BT
Icon
on
Home
Screen would be in
Gray
and could not be selected. (Note:
It
defaults
at
Bluetooth ON.)
Bluetooth 0Biuetootn
M
srwverslon
19
Table of contents
Other Prospec Electronics Marine Audio manuals


