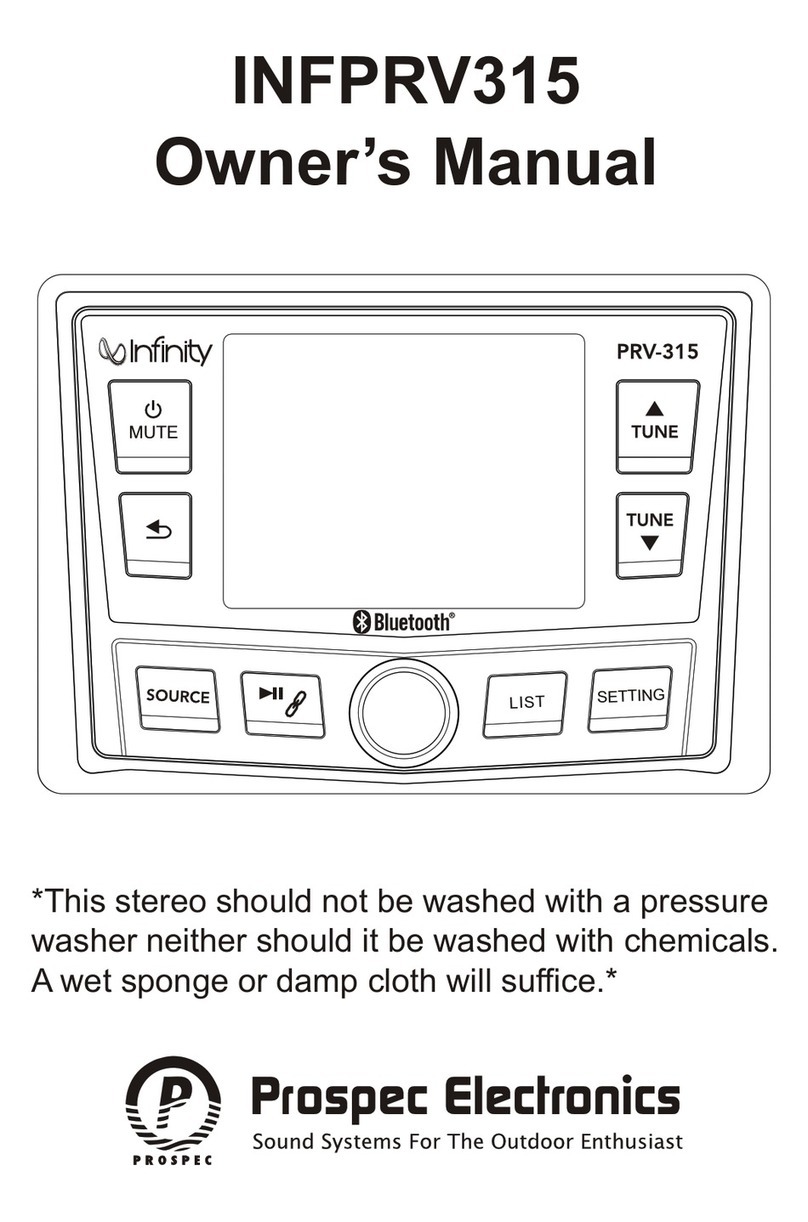
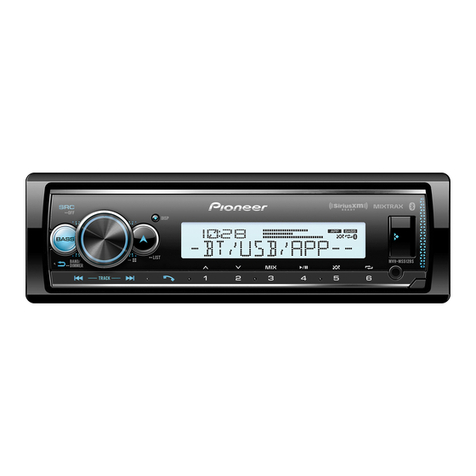
Prospec Electronics INFPRV450 User manual


Table
of
Contents
Table
of
Contents ----------------------------------------------------------------- 1
Product Description -------------------------------------------------------------- 2
Installation Instructions ---------------------------------------------------------- 3
Wiring Configuration ------------------------------------------------------------ 4
General Function
of
Buttons ---------------------------------------------------- 5
Sign up Display & Home Menu ------------------------------------------------ 6
General Operations --------------------------------------------------------------- 7
General Settings ------------------------------------------------------------------ 7
Radio Section Operation ------------------------------------------------------- 10
SiriusXM®
Section Operation -----------------------------------------------
12
Bluetooth Section Operation --------------------------------------------------
16
USB Section Operation --------------------------------------------------------
18
iPod/iPhone Operation --------------------------------------------------------- 20
AUX Section Operation --------------------------------------------------------
21
Troubleshooting ----------------------------------------------------------------- 22
1

ProductDescription
This Infinity PRV450 incorporates a 3.5" TFT color screen, ready to complement
your day whether you are on the water, motorcycle, UTV trail, or farm. Following
the same footprint as the popular INFPRV250, this stereo is synonymous with
excellence.
The INFPRV450 incorporates the following features:
AM/FM
SiriusXM-Ready™
(SiriusXM connect tuner and subscription required)
Bluetooth Audio Streaming with ID tagging
USB input and control-for USB drives only
,...
..
Auxiliary input
3.5" color TFT screen I Waterprooffaceplate
50W x 4 amplifier
Wired remote option
U.S. and European tuning
Charging through USB
@@
3 pair
of
RCA output including subwoofer output
Can Bus Control via NMEA2000
The Infinity brand is part
of
Harman International Industries. In 1958, Harman
Kardon developed the world's first stereo receiver and we are proud to bring
you the world's first Infinity marine color screen receiver!
Sirius, XM and all related marks and logos are trademarks
of
Sirius
XM
Radio
Inc. All rights reserved.
2

Installation
A mounting gasket has been added inside the package for convenience. Trace along
the outside edge
of
the gasket thus revealing your cutout.
Mounting Illustration
1.
Avoid installing stereo
below cupholders!
Make sure mounting
substrate is flat to avoid
flexing
of
the plastic.
-
"./
II
~
II
II
2. Use the back bracket and
studs to affix the unit. Install
the U bracket behind the unit,
using two nuts per bolt for
ultra hold.
3.
To
avoid possible water
ingress into wire harness
area, route the harness in
the downward direction
as shown above.
1
--
~
NO.
PART
DESCRIPTION
.-'
II
1
RADIO
2
MOUNTING
PLATE
3 MOUNTING
STUDS
I~
4
JAMB
NUTS
II
!!liD!!!
£]JUI
IIUICB
IIIUIII:~
5
MOUNTING
BRACKET
6
SPRING
WASHER
7
OUTER
NUTS
11=:
-
--
I
'./
"
II
I
Jn-
,l
II
L
fJ
'f
~
'fU
t
r
l
fT
~
:::;
5
'
II
\
I
Instructions:
1.
Install
jamb
nuts (4) loosely on mounting
studs (3), so they will not touch mounting
brackets (5) when installed.
2. Slip mounting bracket (5) on and make
flush with mounting surface (2).
DO NOT TIGHTEN
3.
Snug spring washer (6) and outer nuts (7)
against mounting plate (2).
DO
NOT TIGHTEN
4.
Position
jamb
nuts approximately 1/16"
from mounting bracket.
5.
Tighten outer nuts completely.
3

Wire Configuration
6P
REMOTE
(FRONT
LINE
OUT)
CONTROL
(SiriusXM)
(ANT
JACK)
(REAR
LINE OUT)
(CAN BUS)
(AUX)
(USB)
(REM)
(ACC)
(GROUND)
(SUBWOOFER)
WHITE
GRAY
(
FRONT
LEFT )
WHITE/BLACK
GRAY/BLACK
(FRONT
RIGHT)
GREEN
VIOLET
(REAR LEFT)
GREEN/BLACK
VIOLET/BLACK
(
REAR
RIGHT)
NOTE:
1.
When wiring, the red lead is recommended to be wired to ACC/ignition power lead.
2.
Make sure that the black wire on the wiring harness
is
connected to a good ground point
on the boat.
If
the chassis f the boat
is
used as a ground point, make sure that the surface
is
scraped clean
of
paint before attaching the wire to it.
It
is
recommended to connect the
black ground wire directly to negative terminal (-)
of
the boat battery.
3.
Before wiring your system, disconnect your boat battery's positive(+) cable. This helps
prevent damage in case
of
a short.
4

General Function
of
Buttons
1. POWER, MUTE, PAUSE button
-With unit off, press to power the unit on.
-With the unit on, press and hold for over 2s to power the unit off.
-In Radio, SiriusXM, AUX mode, press to MUTE sound output,
press again to resume sound output.
-In
USB, BT Music mode, press to PAUSE playback, press again
to resume playback.
2. MENU, ENTER button
-In any status, press and hold for 2s to navigate to home display.
-In source playing status, quick press to activate the bottom navigation function.
(Note: Bottom navigation function is disabled after 5s without operation.)
-In any selection status, press ENTER to confirm selection.
3. VOLUME Up button
-Press it to increase volume level.
4. VOLUME Down button
-Press it to decrease volume level.
5. Tune Up button
-In playing status, press to select the next station, channel, or track.
-In
bottom navigation mode, press to move highlight upward/over.
6. Tune Down button
-In playing status, press to select the previous station, channel, or track.
-In
bottom navigation mode, press to move highlight downward/over.
5

Sign
Up
Display & Home Menu
1.
Sign Up
Di
splay
Once
the unit powered on, the introductory home screen appears for 4 seconds, then
switches to the last played mode before
power
off
occurred.
(7;11
~
Pu
sh
11
lnflnit'(e
bv
HARMAN
2.
Hom
e
Me
nu
(Source display)
6
At Home Menu, press the
TUNE
Up/Down button to move to desired source and press
ENTER button to confinn.
SiriusXM
BT
Music
USB
AUXIN Settings
Note: icon background changes to two toned burnt orange
when selected.
for
examp
le, Radio mode is the selected
mode
in
above picture.

General Operations
1. VOLUME Control
In
any mode, press
VOL
UP/DN button
to
adjust volume level.
Press and hold VOL button
to
adjust volume
level rapidl
y.
2.
MUTE
Control
In
Radio, SiriusXM, or
AUX
mode, press
MUTE button
to
mute sound output; pres
again
to
resume so
und
output.
3. General Settings
Press and hold M
ENU
button
to
go
back
to
Home Menu, then press TUNE UP/
ON
button
to
move highlight
to
Settings source. Then
press ENTER button to go into
the
Settings
mode.
3-1. Bass
Co
ntrol
ln Settings screen, pre
ss
TUNE
Up
or
Down
button
to select
Ba
ss, then press VOL
Up
or
Do~
n button
to adjust Bass level.
3-2.
Treble
Co
ntrol
ln
Settings screen, press TUNE
Up
or Down button
to select Treble,
then
press VOL
Up
or
Down
button
to
adjust Treble level.
VOLUME
~t
Bass
Treble
Bass
}Tr
eble
Balance
Bass
Treble
,_
Balance
0
Fader
7

General Settings
3-3. Bala
nc
e
Co
ntrol
In Settings screen. press TUNE
Up
or Down button
to
select Balance, then press VOL
Up
or Down button
to
adjust Balance level.
3-4. Fader
Co
ntrol
In
Settin
gs
sc
reen. pre
ss
TUNE Up or Down button
to
select Fader. then pre
ss
VO
L Up or Down button
to
adjust Fader le
ve
l.
3-5. Loud
Co
ntrol
In
Settings screen, press TUNE
Up
or Down button
to
select Loud, then press VOL
Up
or Down button
to
select ON or O
FF
.
3-6. EQ
Se
lection
ln
Settings screen. press TUNE Up or Down button
to
select E
Q.
then press VOL
Up
or Down button
to
se
lect
OtT,
Classics. Jazz,
Pop
or
Ro
ck.
3-7. S
ubwoof
er Gain
Co
ntrol
At Setting screen, pre
ss
TUNE
Up
or Down button
to
select Subwoofer. then pre
ss
VOL Up or Down button
to adjust Subwoofer Gain level.
3-8.
1-
Volume
Co
ntrol
8
At
Setting screen, press TUNE
Up
or Down button
to
se
lect 1-
Volume
, then press VOL
Up
or Down button
to
adjust the Initi
al
Volume Level. This feature controls
the maximum volume level des
ired
when powered
on.
Balance
Fader
LOUD
[@
~
EQ
Sub.Gain
I-
Volume
Bass
Trenle
Balance
Fader
Bass
T
reb
le
Ba
l
ance
Fader
Bass
Treble
Balance
Faller
Bass
Trenae
Balance
Bass
I
TreDie
Balance
l
Fade
r
P.tllume
Bnghlness
Nea

GeneralSettings
3-9. Brightness Adjustment
In Setti
ng
s screen, pre
ss
TUNE
Up
or Down button
to
select Brightness, then press VOL
Up
or Down button
to
adjust Brightness level.
3
-10
. Area
Se
lection
In Settings screen, press TUNE
Up
or Down button
to
select Area, then press
VO
L
Up
or Down button
to
select
USA
or EUR.
3-11. SiriusXM Parental Lock - Change Code
In
Settings screen, press TUNE
Up
or Down button
to
select Parental Lock. Then press VOL
Up
or
Down
button
to
select Parent
al
Lock
sub-!'eatures.
Please refer
to
Si
riusXM Section Operation
ror
details.
3-
12.
SXM Reset
At Setting screen, press TUNE
Up
or
Down
button
to
select
SXM
Reset. then ENTER button
to
reset the
SXM
Tuner.
3-
13
. Software Version
Vi
ew, Software Reset
At
Setting screen. press TUNE
Up
or Down button
to
select S/W Version, then press MENU button to activate
highlight
at
VIEW and press ENTER button
to
view
the Software Version.
Software Rese
t:
In Software Version display status, press TUNE
UP.
TUNE 0 . and TUNE
UP
in
sequence. then press
and hold TUNE
DN
for
7s
to
reset the unit.
Note:
It
will
be
necessary to re-enter t
he
radio preset
memories and other personal settings as these
\viii
ha\C been erased when the softwa
re"
as
reset. After resetting the unit. ensure
all
functions arc operating correctly.
Brightness
Area
SXM
Reset
5/W
Version
1-'Wiume
Bnghtness
Area
1-'Wtume
Bnghtness
1-'Wtume
1
Bnghtness
9

Radio Section Operation
1.
To Select R
ad
io
mode
At Home Menu, press TUNE Up/Down button
to
move the highlight
to
Radi
o source, then
press ENTER button
to
go into the Radio mode.
Note: highlight movement indicated
by
the icon backgrou
nd
change
to
two tone orange.
2. Radio Screen Description
I
I
Di~pla)S
EUR
or uSA
to
indicate
the Area selected
tn
the Settings.
I
Only shows when
~A
•
<f
U
the station
is
a SA MANU
Stereo Channel.
Onl} displays when
EQ
LOUD
0 ' was sckcted
in
the Settings.
( Displays
FM.
AM.
r.
FM
1
04
•
2
0 Only displays when
P5._
the station
is
a preset
station.
MHz
10
1-rcquency Bar
'1:...._--
---1[
Frequency Mark J
SAVE:
To
Sa\C
current frequency into
P.List
BAND:
To
select
F\11.
AM
P.LIST:
Global Preset
Lt..,t

Radio Section Operation
3. AR
EA
Selection
At
Home Menu, move highlight
to
Sertings, press ENTER button, then press TUNE Down
button
to
move highlight to AREA feature, press VOL
Up
or
Down
button to select between
USA
and
EUR.
4. BAND Selection
In
Radio playing mode, press MENU button
to
activate navigation, then press
TUNE:
Down
button
to
mo\e highlight
to
BAND. Now press MENU button
to
toggle and select bet''ecn
FM
or
AM
band.
5.
Auto
Tuning
In
Radio playing mode, press TUNE
Up
/
Down
button
to
activate auto tune. This results
in
automatically stopping at next station
of
sufficient signal strength.
6.
Manua
l Tuning
In
Radio playing mode, long press
TU
E
Up
/Down button for
2s.
This will activate manual
tune with
MANU
display
on
the top area. Then repeatedly press
TU
E
Up
Down button
to
tunc frequency
by
steps.
NOTE: Radio
will
revert back
to
AUTO tunc mode after 5s without operation.
7.
Statio
n
Save
In
Radio play mode, manually or auto tunc
to
a station, then press MENU button
to
activate
bottom navigation. Select
SAVE
icon
and press ENTER button. The unit will display
the
Global Preset
List
screen, press TUNE
UP
ON
button
to
select
a
preset
o.
and press
E TER button
to
sa\e current station into Preset List. The Preset number will display
once the station
is
saved. The
unir
wil
l go back
to
previous display if
no
operation
in
5s.
8.
Preset
Lise
In
Radi
o play mode, press M
ENU
button
to
activate navigation, press TUNE
UP
/
ON
button
to
move highlight
to
P.List, then press ENTER button
to
display
the
Global Preset List.
Pres TU E
Up
or
Down
button
to
select
a
preset and press ENTER button
to
listen
to
it.
Thi
s will let
you
preview the selected station
for
I
Os
before it reverts back to
Radi
o screen.
During this time,
you
can se
le
ct another
stat
ion
with TUNE
UP
!DN button.
NOTE:
1.
Receiver can store
up
to
18 stations.
2.
[f
there
is
no
operation
at
Global
Pr
eset
List screen.
it
will
go
back to
Radi
o
screen
by
itsclrafter 5s or s
impl
y long
press MENU button
for
2s
to
go
back
to
previous display.
Global
Pr
eset
Li
st
II

Sirius
XM
Section Operation
1. What is Siriu
sXM
Only SiriusXM® brings you more
of
what you love
to
listen to,
all
in
one place. Get over
140
channels, including commercial-free music pl
us
the best sports, news, talk. comedy and
entertainment. Welcome
to
the world
of
satellite radio. A SiriusXM Vehicle Tuner
and
Sub-
scription arc required. For more infonnation, visit www.siriusxm.com
Activating your SiriusXM Subscription
I.
After installing your SiriusXM Connect Tuner and antenna, power on your radio and select
SiriusXM mode.
You
should be able
to
hear the SiriusXM preview channel on Channel
I.
If
you cannot hear the preview channels, please check the installation instn1ctions
to
make
sure your SiriusXM Connect tuner
is
properly installed.
For more information on how
to
install the SiriusXM Connect Vehicle tuner, consult the
installation guide included with the tuner.
2.
After you can hear the Preview channel, tune
to
Channel 0
to
find
the Radio
ID
of
your tuner.
In
addition, the Radio TD
is
located
on
the bottom
of
the SiriusXM Connect Vehicle Tuner
and its packaging.
You
will
need this number to activate your subscription. Write the number
down
for
reference.
Note: the SiriusXM Radio 10 docs not include the letters
I,
0,
S or
F.
In
the USA, you can activate online or
by
calling SiriusXM Listener care:
Visit www.si
ri
usxm.com/activatenow
Call SiriusXM Listener Care at 1-866-635-2349
For Canadian Subscriptions, please contact:
Visit www.siriusxm.ca/activatexm
Call XM Customer Care at 1-877-438-9677
As part
of
the activation process, the Si1iusXM satellites will send
an
activation message
to
your tuner. When your radio detects that the tuner has received the activation message, your
radio
will
display:Subscription Updated, press Enter
to
continue. Once subscribed, you can
tune
to
channels
in
your subscription plan. Note, the activation process usually takes I0
to
15
minutes, but may take
up
to
an
hour. Your radio
wi
ll need
to
be
powered
on
and receiving
the SiriusXM signal
to
receive the activation message.
2.
To
Select SiriusXM Mode
12
At
Home Menu, press TUNE button
to
move
the highlight
to
SiriusXM source, then press
ENTER button
to
go into the SiriusXM mode.
Note: highlight movement indicated
by
the
icon background change.

SiriusXMSection Operation
3. Sirius
XM
Scr
een Description
Only displays when EQ LOUD 0 '
''as
selected
in
the
Settings.
Display sequence:
Channel Number
Channel Name
Category
Name
Artist Name
Song
1 itle
Content
In
ro.
Ch . 8
80s
on
8
~
Rock
Bill)"
m
t'Wel
R
ebel
Ye.ll
Only displays when the
P1
4._
listening channel
is
a
preset channel.
SAVE:
To
save current channel into
P.List.
DIRECT: To directly input a channel
o.
Cat.List:
To
display the Category
Li-.1.
P.LIST:
To
display the Global Preset
List.
4.
To
Di
splay Radio ID
Tunc
to
Channel 0 or
di
rect Tune
to
Channel 0
to
display the Radio
10.
5.
MUTE
In SiriusXM mode, press the MUTE button
to
mute sound output, and press
it
again
to
resume sound output.
6.
To
Select the Previous
I
Next Channel
In SiriusXM mode, press TUNE
Up
or Down button
to
select the previous or next
channel. Press and hold TUNE
Up
or Down button
to
rapid tunc/browse channels,
and release the
bu
tt
on when the desired channel
is
displayed
..
7. Storing a Channel as a
Pr
eset
In
SiriusXM playing mode, tune
to
or direct tunc
to
a channel which you want
to
store
as a preset, then press MENU button
to
activate bottom
na'
igation.
It
will highlight at
SAVE,
now press E
TER
button.
It
will display the Global Preset
List
screen. press
TUNE
UP
ON button
to
select a preset number and press ENTER button
to
save current
channel into Preset List. The Preset
No.
wi
ll
display once the channel
is
saved. The unit
will revert back
to
the previous display
if
no
operation
is
per
fom1ed
in
5s.
13

SiriusXM
Section Operation
8.
Dir
ect
Channel
Input
(<<
UJn
ll)
In
SiriusXM mode, first press MENU button
to
Enter
CH
Number
activate navigation, then press TUNE Down button
to
move highlight at DIRE
CT.
and press ENTER
button. It will display the keyboard. Press
VOL
Up
or
Down
button
to
select the desired digit, then press
ENTER after each selection
to
move
to
next input.
After three digit input. s
impl
y press ENTER button
again
to
jump
to
the selected Channel.
Note: Ifa wrong digit
is
inputted, simply press
TU
NE
DN
button to move
to
previous digit input. Repeat
above operation until the
CO
JTect
channel
is
inputted.
9.
Category
List
In
SiriusXM mode, first press MENU button
to
activate navigation,
th
en
press TUNE Down button
to
move highlight
to
Cat.
LI
ST and
to
display the
Category List. Press TUNE
Up
or Down button
to
select and press ENTER button at your desired
Category. Then press TUNE
Up
or Down and ENTER
button
to
select a desired channel.
10.
Preset
List Channel Tuning
14
In SiriusXM play mode, press MENU button
to
activate navigation, press TUNE
UP
/
ON
button
to
move highlight
to
P.List, then press
EN
TER
button
to
display the Global
Pr
eset L
ist.
Simply press TUNE
Up
or Down button to select
a desired preset and press ENTER button to listen
to
it.
It
w
ill
let you
li
st
en
to
th
e selected channel
for
1
Os
before it reverts back
to
source playing screen.
During this time, you can select another channel
with TUNE
UP
/
ON
button.
P
category
List
··
~
.
6'>
....
.........
..
Global Preset Ust
J

SiriusXMSection Operation
11
. C
hann
el Parental Lock
@
The Parental Control feature allows you
to
limit access
to
any SiriusXM channels, including those with mature
P•rent•l
Lock
content. When enabled, the Parental Control feature
requires you to enter a passcode
to
tunc
to
the locked
channels.
Bnghtness
QArea
To
Lock I Unlock any Channel, first go back
to
Home
Menu and select Settings. Press TUNE button
to
choose
Parental Lock.
-P
are
nt
al Lock On I
Off
Press VOL
UP
/
DN
button
to
move highlight
to
Off,
then press ENTER,
it
will
prompt
for
passcodc, input
four digits with
VOL
button and after each input press
ENTER button
to
jump to next input. After four digit
input, it will indicate "Lock
is
ON''.
With
Parental
Lock
On
selected,
all
t
he
locked
channels arc temporarily unlocked which will let you
listen
to
the locked channels without inputting the
passcode again.
Note: Once you leave SiriusXM mode or power
oiT
the unit,
it
will
revert
to
Parental Lock Off.
-To Unlock all cluumels
Press VOL
UP
/
DN
button
to
move
high
light
to
AL
L.
then press ENTER.
it
will prompt
for
passcode. input
four digits\\
ith
VOL button and after each input press
E TER bullon
to
jump
to
next input. After four digit
input. press ENTER bullon
to
unlock
all
channels.
-
To
Lock
/U
nlock c
hann
els one by one
Press VOL
UP
/
ON
button
to
move highlight
to
CH,
then press ENTeR,
it
will prompt
for
passcode,
input four digit passcode. press ENTER button.
It
will display the Channel list. press TUNE
UP
/
ON
button and press MENU
at
the desired channel.
ote: ifthe selected channel was locked. then
pressing MeNU button
will
unlock
it:
and if
the selected channel was unlocked, pressing
MENU
button will lock
it.
12. S
iriusXM
Par
ental Lock Code C
han
ge
If you want
to
change your code, first go back
to
Home Menu and select Settings. Press TUNE
UP
button to choose Parental Lock. Press VOL button
to
choose COOl: CIIANGE.
ft
will prompt
for
current
Enter Code
0
Channel
Lock
or
Unlock
Enter NewCode
passcodc, then
new
code, and one more prompt
for
new code confirmation.
Usc
VO
L button
for
code input, and press eNTER button alter each input.
If a wrong digit
is
inputted. press TUNE
ON
button
to
move
to
previous digit input.
Note: Factory default passcode was 0000.
15

Bluetooth Section Operation
I. To Sele
ct
Bluctoo
th
mode
At
Home Menu. press TUNE butlon
to
move the highlight
to
Bluetooth source. then
press ENTER button
to
go into the Bluetooth mode.
Note: highlight movement indicated
by
the
icon
background change.
2. Blue
tooth
S
cr
een Desc
ription
103
tag:
Song name
Artist
Album
Try
:
The
.
:
Try
.
Only displays
when
FQ LOUD
ON
was selected
in
the Settings.
to
Re me
mber
Brother
s
four
to
Re
member
•'
If
already has BT device
connected. here display
DISCO .
~
··
------~--------------
I
r
no
BT
device connect,
here display CO
H6 0 - L 0 3
*
~
Paired
de'
ice
name.]
CONN:
To
establish Bluctooth connection.
DISCON:
To
disconnect the
BT
Device.
3.
Pair
BT
Device
16
Ifthere
i~
no
BT device paired, go
to
setlings on the BT device and turn the Bluetooth
option 0 . Pick "PRY" option on your Bluctooth enabled device.
(if
you are prompted
for
a password, the code entered
wi
II
be
"1234".)
Irthere
'v\as
previously a
BT
device paired, simply press MENU butlon
to
highlight
CONN and press ENTER
to
establish the
BT
connection.

Bluetooth Section Operation
4. Play/Pause Play
Once the BT device being paired
is
successful, music will begin to play.
Note: For some Bluetooth enabled phones, you may need to activate play from your
phone first.
It
depends on the phone itself.
While
BT
Music
is
playing, press the PAUSE button
to
pause the playback, and press it
again
to
resume playback.
Note: I refers
to
PL
AY;
..,.
refers
to
PAUSE.
5. Track Up/Down
While
BT
Music
is
playing, press TUNE
Up
or Down button
to
se
lect
the next or
previous track.
6. Disconnect
ln
BT Music playing mode,
in
order
to
di
sconnect the BT device, press MENU button
to
activate bottom navigation,
it
will highlight at DISCONN, press ENTER button to
disconnect
th
e
BT
connection.
Note: When your BT device battery
is
at low charge. the Bluctooth connection may
occasionally
be
lost. To maintain good connectivity ensure that your BT device battery
is
adequately charged.
7.
Connect
With
BT
device paired OK,
but
disconnected,
if
yo
u want
to
reestablish the BT connection.
press MENU bulton
to
activate bottom navigation, it will highlight at CONN
E.
Press
ENTER button
to
connect the BT device.
Note:
With
the Bluctooth connection disconnected, once you power
on
the unit next time.
it
will establish
th
e Bluctooth connection automatically.
17


USB Section Operation
4. Track Up/Down
While
USB
is
playing, simply TUNE
Up
or Down button
to
select the next
or
previous
track.
To
fast forward or rewind, press and hold TUNE button.
5. Scan Play
While
USB
is
playing, press
MENU
button
to
activate navigation,
it
will highlight at
SCAN. now repeat press MENU button
to
toggle select Track Scan, Directory Scan, or
SCAN
OFF.
(Note: The play mode icon would change simultaneously.)
SCN
Refers
to
play
of
the first
lOs
of
all
the tracks
in
the
USB
device.
D.
SC
N Refers
to
play
of
the first
I
Os
of
all
the tracks
in
current Directory.
C
Refers
to
play
of
all the tracks
in
normal sequence.
6. Repe
at
play
While
USB
is
playing, press MENU burton
to
activate navigation, then press TUNE
Down
button
to
move highlight
to
RPT, repeat
prc5s
MENU
button
to
toggle select Track
Repeat, Directory Repeat, or
RP
T
OFF.
(Note: The play mode
icon
would change
~o,imultanl!ou~ly.)
Refers
to
play
of
current track repeatedly.
Refers
to
play
of
the tracks
in
current Directory repeatedly.
Refers
to
play
of
all
the tracks
in
normal sequence.
7. Random play
While
USB
is
playing, press MENU button
to
activate navigation, then press TUNE
Down button
to
move highlight
to
ROM, repeal press
MENU
button
to
toggle select
Track Random, Directory Random, or R
OM
OFF.
(Note: The play mode icon would
change simultaneously.)
:X:
Refers
to
play
of
all
the tracks
in
a random sequence.
~
Refers
to
play
of
the tracks
in
current Directory
in
a random sequence.
C
Refers
to
play
of
all
the tracks
in
nonnal sequence.
8.
F.
LI
ST (Folder
I
File Se
ar
ch)
While
USB
is
playing. press MENU button
to
activate na' igation. then press TUNE Down button
to
move highlight
to
F.LIST. press ENTER bullon
to
go inside the F.List.
In
F.Li~l.
pres~
TUNE
Up
or
Down button
to
choose
desired Folder. press ENTER
to
display sub-directory
or Iiles inside, press TUNE
Up
or Down button
to
choose desired
file
and
press ENTER button
to
play
it.
;)
File
li
st
Search
19
Table of contents
Other Prospec Electronics Receiver manuals
