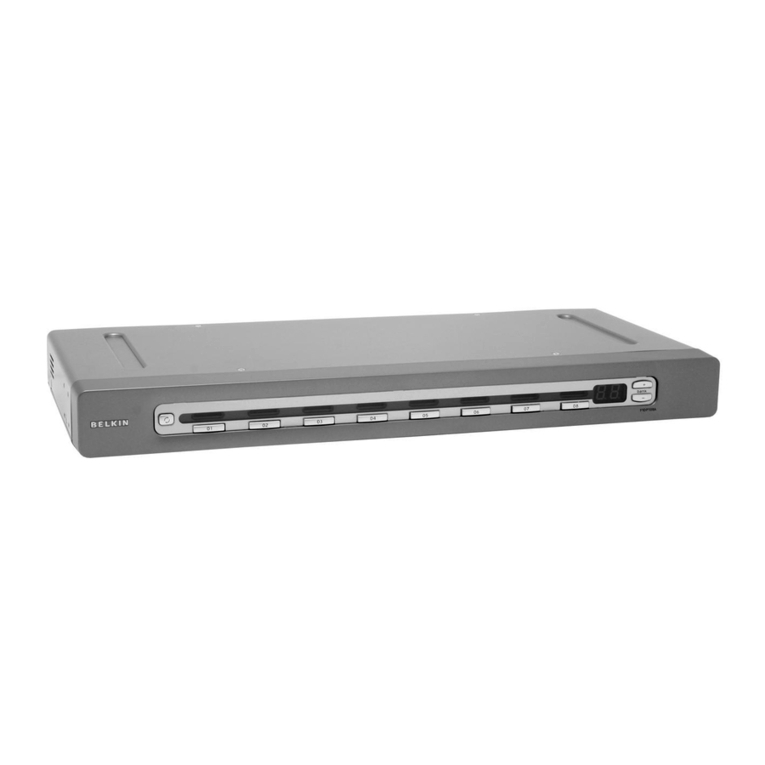
ProSum Prima IP-8 User manual

Prima IP-8 and Prima IP-16
8-port and 16-port KVM Switches over IP
User Manual
Revision 1.51
23/08/2007

Copyright and trademarks
Copyright © 2007 PROSUM. All rights reserved
All trademarks in this manual are the properties of their respective trademark owners.
FCC Statement
This equipment has been tested and found to comply with the regulations for a Class B digital device,
pursuant to Part 15 of the FCC Rules. These limits are designed to provide reasonable protection against
harmful interference when the equipment is operated in a commercial environment. This equipment
generates, uses, and can radiate radio frequency energy and, if not installed and used in accordance with this
User Guide, may cause harmful interference to radio communications. Operation of this equipment in a
residential area is likely to cause harmful interference in which case, the user will be required to correct the
interference at his/her own expense.
CE Statement
This is a Class B product. In a domestic environment, this product may cause radio interference, in which
case the user may be required to take adequate measures.

Prima IP User Manual Rev 1.5 2007
- -
i
Table of Contents
CHAPTER 1. ADVANTAGES AND FEATURES................................................................................. 1
1.1 ADVANTAGES................................................................................................................................... 1
1.2 PRIMARY FEATURES ......................................................................................................................... 3
1.2.1 General features .......................................................................................................................... 3
1.2.2 TCP/IP remote connection........................................................................................................... 3
1.2.3 Thin-client Viewer Program ........................................................................................................ 3
1.2.4 Hi-Speed PPP Connection........................................................................................................... 3
1.2.5 Video server ................................................................................................................................. 3
1.2.6 Power ON-OFF Control Support ................................................................................................ 3
1.2.7 Security ........................................................................................................................................ 4
1.2.8 Alarms and Notifications ............................................................................................................. 4
1.2.9 User Management........................................................................................................................ 4
1.2.10 Global Time Zone Support ...................................................................................................... 4
1.2.11 Maintenance and KVM management ...................................................................................... 4
1.3 SYSTEM ARCHITECTURE .................................................................................................................. 5
1.3.1 LAN/WAN Configurations ........................................................................................................... 5
1.3.2 Power Control Configuration...................................................................................................... 6
1.3.3 PPP connections.......................................................................................................................... 6
1.4 PRIMA IP EXTERNAL VIEWS ............................................................................................................ 7
1.4.1 Prima IP Front View ................................................................................................................... 7
1.4.2 Prima IP 8 - Front-panel............................................................................................................. 7
1.4.3 Prima IP 16 - Front-panel........................................................................................................... 7
1.4.4 Prima IP Rear View..................................................................................................................... 7
CHAPTER 2. INSTALLING PRIMA IP ................................................................................................ 9
2.1 CHECKLIST BEFORE INSTALLATION ................................................................................................. 9
2.2 SETTING UP THE PHYSICAL CONNECTIONS .................................................................................... 11
2.3 CONFIGURING YOUR SERVERS FOR CONNECTIONS TO PRIMA IP................................................... 13
2.3.1 Turn off mouse acceleration and “Snap to” option................................................................... 13
2.4 MORE TIPS FOR SERVER DESKTOP CONFIGURATION..................................................................... 15
2.4.1 Configure Display Resolution on your Server........................................................................... 15
2.4.2 Turn off the Special Transition Effects ...................................................................................... 15
2.4.3 Choose Plain and Solid Server Desktop Backgrounds for your Connected Servers ................. 16
2.5 PRIMA IP NETWORK SETTINGS ...................................................................................................... 17
2.5.1 IP Settings.................................................................................................................................. 17
2.5.2 Port Base ................................................................................................................................... 18
2.6 CONFIGURING YOUR FIREWALL/ROUTER FOR ACCESSING PRIMA IP ACROSS INTERNET ............... 19
2.7 SECURITY SETTINGS....................................................................................................................... 20
2.7.1 Select a User Password Policy .................................................................................................. 20
2.7.2 Select a Security Level for Viewer Connection.......................................................................... 20
2.7.3 Installing Certificates and Key on PRIMA IP for Security level 3 ............................................ 21
2.7.4 Remote Clients ........................................................................................................................... 23
CHAPTER 3. VIEWER CONNECTION ............................................................................................. 25
3.1 INSTALLING THE VIEWERS ON THE CLIENT COMPUTER ................................................................ 25
3.1.1 Win32 Viewer............................................................................................................................. 25
3.1.2 Java Viewer ............................................................................................................................... 25
3.2 INSTALLING CERTIFICATES ON THE CLIENT COMPUTER ............................................................... 26
3.2.1 Win32 Import Certificate.......................................................................................................... 26
3.2.2 Java-based Import Certificate ...................................................................................................26
3.3 STARTING THE VIEWER CONNECTION ........................................................................................... 27
3.3.1 Specifying the Viewer Connection Options ............................................................................... 27
3.3.2 User Name and Password..........................................................................................................28

3.4 SOME TIPS ABOUT VIEWER CONNECTIONS.................................................................................... 29
3.4.1 Typing the PRIMA IP IP Address .............................................................................................. 29
3.4.2 Connection Performance Tuning............................................................................................... 29
3.4.3 Local and Remote Mouse Cursor Synchronization ................................................................... 29
3.5 SAVING THE CONNECTION OPTIONS .............................................................................................. 30
3.6 ADJUSTING THE VIEWER WINDOW SIZE ........................................................................................ 31
3.6.1 Changing the Viewer Size to Full Screen (Win32 Viewer only) ................................................ 31
3.6.2 Scaling the Viewer Window .......................................................................................................32
3.6.3 Centralizing the control of your remote servers ........................................................................ 32
3.7 VIEWER TITLE BAR INFORMATION ................................................................................................ 33
3.8 THE SELECT COMPUTER BOX ........................................................................................................ 34
3.8.1 Win32 Viewer............................................................................................................................. 34
3.8.2 Java Viewer ............................................................................................................................... 34
3.9 VIEWER QUICK MENU.................................................................................................................... 35
3.9.1 Opening the Viewer Menu .........................................................................................................35
3.9.2 Menu Items................................................................................................................................. 36
3.10 VIDEO DISPLAY PROBLEM TROUBLESHOOTING ............................................................................ 38
CHAPTER 4. PRIMA IP UNIT MANAGEMENT .............................................................................. 41
4.1 WEB-BASED MANAGEMENT INTERFACE........................................................................................ 41
4.2 USER PRIVILEGES –SUPERADMIN, ADMIN, USER .................................................................. 42
4.3 VIEWERS......................................................................................................................................... 43
4.4 MAIN/DATE &TIME –DATE,TIME,ZONE SUPPORT AND NTP SERVER SYNCHRONIZATION ....... 44
4.5 MAIN/SECURITY –CERTIFICATES,VIEWER ENCRYPTION AND PASSWORD POLICIES ................. 45
4.5.1 Certificates and Keys ................................................................................................................. 45
4.5.2 Security Level of Viewer Connections ....................................................................................... 45
4.5.3 User Password........................................................................................................................... 46
4.6 MAIN/TCP/IP SETTINGS –PORT AND IP SETTINGS ...................................................................... 47
4.7 MAIN/WAN PPP........................................................................................................................... 48
4.7.1 PPP Modes ................................................................................................................................ 48
4.7.2 PPP Server Settings................................................................................................................... 49
4.7.3 PPP Client Settings.................................................................................................................... 50
4.8 KVM SERVER/LOG –LOGGING SERVER EVENTS .......................................................................... 51
4.9 KVM SERVER/MAIN SETTING –KVM SERVER MAIN SETTINGS .................................................. 52
4.9.1 Video Quality ............................................................................................................................. 52
4.9.2 Scanning .................................................................................................................................... 53
4.10 KVM SERVER/VIEWER CONNECTION –VIDEO SERVER NAME AND KEYBOARD TYPE SETTINGS 54
4.11 KVM SERVER/COMPUTERS –PORT AND IP SETTINGS................................................................... 56
4.12 KVM SERVER/POWER CONTROL –ENABLE THE POWER CONTROL .............................................. 58
4.13 KVM SERVER/LOCAL CONSOLE –USER AUTHENTICATION AND MOUSE ACCELERATION ........... 60
4.14 KVM SERVER/VIDEO MODE DATABASE –MODIFYING THE VIDEO DISPLAY DATABASE............ 61
4.15 USERS/LOCAL DATABASE -MANAGING THE USER ACCOUNTS ................................................... 63
4.16 USERS/USER GROUPS –TUNING IN WITH THE REMOTE AUTHENTICATION SERVERS ................... 65
4.17 USERS/REMOTE SERVERS –TUNING IN WITH THE REMOTE AUTHENTICATION SERVERS............. 67
4.17.1 Directory Server Using LDAP............................................................................................... 67
4.17.2 RADIUS Server...................................................................................................................... 68
4.18 USERS/RADIUS ACCOUNTING –SETTINGS FOR RADIUS ACCOUNTING .......................................... 69
4.19 USERS/CURRENT STATUS –SHOWING THE CURRENTLY CONNECTED USERS............................... 70
4.20 ALARMS/EMAILS –SENDING EMAIL NOTIFICATIONS FOR CRITICAL SERVER EVENTS................. 71
4.21 ALARMS/SNMP –SENDING SNMP MESSAGES FOR CRITICAL SERVER EVENTS .......................... 72
4.22 ALARMS/SELECTIONS –SELECT THE ALARM-TRIGGERING EVENTS ............................................. 73
4.23 MAINTENANCE/SOFTWARE VERSION –SOFTWARE VERSION INFORMATION................................ 75
4.24 MAINTENANCE/SOFTWARE UPGRADE –UPGRADING THE SOFTWARE VIA WEB ........................... 76
4.25 MAINTENANCE/FIRMWARE UPGRADE –UPGRADING THE FIRMWARE VIA WEB........................... 77
4.26 MAINTENANCE/CONFIGURATION SAVE AND RESTORE ................................................................. 78
4.27 MAINTENANCE/REBOOT –CONFIGURATION BACKUP AND UPLOAD ............................................. 79
4.28 APPLY SETTINGS/RESTART SERVERS –VALIDATE NEW SETTINGS &RESTART VIDEO SERVERS 80

Prima IP User Manual Rev 1.5 2007
- -
iii
CHAPTER 5. LOCAL CONSOLE OPERATION............................................................................... 81
5.1 FRONT-PANEL BUTTONS ................................................................................................................ 81
5.2 KEYBOARD HOTKEYS .................................................................................................................... 81
5.3 ON SCREEN DISPLAY...................................................................................................................... 82
5.3.1 OSD Main Menu ........................................................................................................................ 82
5.3.2 OSD Setup Menu........................................................................................................................ 83
5.4 LOCAL CONSOLE OPERATIONS ...................................................................................................... 84
5.4.1 Select PC.................................................................................................................................... 84
5.4.2 Next Lower Channel .................................................................................................................. 85
5.4.3 Next Higher Channel ................................................................................................................. 85
5.4.4 Next Lower Bank (when daisy-chained) ................................................................................... 85
5.4.5 Next Higher Bank (when daisy-chained) ................................................................................... 85
5.4.6 Beep Sound On/Off .................................................................................................................... 86
5.4.7 Show OSD Menu........................................................................................................................ 86
5.4.8 OSD Title Bar ON/OFF............................................................................................................. 86
5.4.9 OSD Title Bar Position.............................................................................................................. 86
5.4.10 Auto Logout ........................................................................................................................... 86


Prima IP User Manual Rev 1.5 2007
- -
1
Chapter 1.
Advantages and Features
1.1 Advantages
The Prima IP 8 / Prima IP 16 is a 16-port IP-based KVM Switch with single-port KVM Link Extender over
IP. In addition to the traditional local console, it provides a remote access over the LAN/Internet IP network.
It is functionally versatile, robust and ultra-secure. It supports full 1024-bit PKI authentication, 256-bit SSL
data encryption, LDAP, RADIUS as well Active Directory authentication and RADIUS accounting.
Figure 1: Prima IP KVM Switches
Today, the IP-based KVM Switch with multi-port capacity has been regarded as a reliable solution to address
the critical issue of server rack management with administrator’s ready access anytime anywhere. Prima IP 8
and Prima IP 16 are designed with a view to offer a cost-effective yet full-featured functionality under these
scenarios.
Total server control from BIOS level up anytime anywhere
The Prima IP 8 / Prima IP 16 gives users total control over its total 16 server ports, from boot stage such as
the BIOS-level CMOS setting up to the GUI applications and daily maintenance routines such as power
cycling (power control unit required). All these could be nicely done either on local console or using a thin-
client software viewer on any computer. All you need for accessing your computer remotely is to login,
download the viewer, and get yourself connected to a whole bunch of servers in seconds.
Total Control Anytime Anywhere
With Prima IP 8 / Prima IP 16, the server administrator can access enterprise server room or data center on
his own seat without toils and troubles of going anywhere from across the street to oversea. Organizations
can enjoy a centralized and cost-effective control over its dispersed servers in different branch offices around
the world, saving money for outsourcing costs.
Rack mount Cascadable with OSD Menu Control
In addition to keyboard hotkeys and front-panel buttons, Prima IP 8 / Prima IP 16 also provides OSD menu
for intuitive KVM switching operations. Its cascadable feature can upscale the server number to 128 by
cascading with other PRIMA-4, PRIMA-8 or PRIMA-16 KVM Switch. Both USB and PS/2 interface
support on PC side offers maximum convenience in a computing environment that accommodates both
newer USB-enabled computers and older computers with only PS/2 interfaces.

- 2 -
Versatile backup connection featuring a PPP Server or PPP Client
To provide a redundancy of a backup connection system while network might no longer function in critical
situation, Prima IP also allows an easy and convenient PPP connection over the dial-in modem phone line. It
could serve as a PPP server to accept a peer computer to make PPP connection request over a dial-in modem
phone line. On the other hand, Prima IP could also serve as a PPP client to dial-in to your ISP or enterprise
PPP server to connect to internet. Thus, the PPP server/client feature allows users a second backup system,
which offers a direct cable/modem dial-in access to your connected servers via PSTN while your network is
down.
Critical advantage over other remote server management solution
The advantages of using Prima IP KVM Switch, as compared to the conventional software remote control
solution is that: The hardware-based remote control solution such as Prima IP is capable of accessing the
connected servers regardless of the server states while software remote control solution cannot be functional
while the server is still in the POST or boot stage or in a “blue screen of death”. The Prima IP offers a server
management capacity of up to 128 connected servers by cascading with Prima KVM switches. There is no
need to install any software utility on the server side. Prima IP also offers power on/off alternatives if used
with a remote power control unit.
KVM Switch Management
Prima IP 8 / Prima IP 16 not only provide remote user access, but also play the role of KVM management. It
manages the software version of all KVM switches connected in the daisy-chain, and upgrades automatically
any KVM switches whose software is not the latest. It displays the KVM error and information messages
into its server log. It permits to setup remotely the name of computers that are displayed in the OSD, the
local user name and password.
Stability and ultra-security with flexibility and convenience
The Prima IP distinguishes itself among its peer products not only in its stability and durable performance,
but also in its industry-standard security features such as full 1024-bit PKI Authentication and 256-bit SSL
data encryption. Together with 3 levels of viewer connection security levels in combination with 3 types of
password policies plus three categories of user privileges, all these make Prima IP a ultra-powerful IP KVM
Switch with ultra-flexibility for a customized balance between data safety and user convenience. On the
other hand, the robustness and the ease of maintenance of the embedded systems involve zero costs for the
unit management and maintenance.
Global Time Zone and Time Servers Support
To make Prima IP really comfortable with all the global time zones it will be deployed in, it is vital to
provide a convenient Global Time Zone support for a correct time stamp to all logging events, alert e-mail
notifications. This will not leave server administrators in troubles with calculating time differences.
Additionally, the Prima IP also supports NTP time server and keep its time always sync with the timer server
you specify. The Prima IP is even sophisticated enough to take care of the daylight saving time in each and
every Time Zone/Region, thus saving troubles for updating time frame with daylight saving specifics every
six months.
Upgrade and Configuration Backup is just a breeze
Prima IP is fully Web-enabled to allow software upgrade and configuration upload/backup over the Web
Management Interface. All you need to do is to upload the files to Prima IP over Web interface and it is
freshly restarted and begins working with those latest update functionalities and features. Web update can be
easily performed across internet-by a remote SUPERADMIN!
Advantages Galore
With Prima IP, the server administrator can access enterprise server room or data center on his own seat
without toils and troubles of going anywhere from across the street to oversea. Organizations can enjoy a
uniquely centralized and cost-effective control over its dispersed servers in different branch offices around
the world, saving money for outsourcing costs.

Prima IP User Manual Rev 1.5 2007
- -
3
1.2 Primary features
1.2.1 General features
•8/16-port IP-based Cascadable 19” Rack mount USB PS/2 KVM Switch with OSD
•Provides 1 digital port for remote control over IP
•Port capacity scalable up to a maximum of 128 computers with cascaded configuration of other Prima
KVM Switches (Prima 4/Prima 8/Prima 16)
•PS/2 local [analog] console for local rack server management
•USB and PS/2 Dual Interface Support on PC side
•Operation and channel selection by front-panel buttons, keyboard hotkeys, OSD menu and Viewer
interface
•Dual numerical LED displays and LED port indicators for easy bank/port status monitoring
•Autoscan mode for quick browsing of all connected computers
•Serial port for external modem/remote power control device
•Multiple users can login in a same remote server desktop
•Total control over the remote server from BIOS level up to GUI applications
•Remote Power On/Off support
•Ultra-security using full 1024-bit PKI Authentication / 256-bit SSL encryption
•Work with LDAP / RADIUS / Active Directory Servers
•Ethernet 10/100 and serial PPP server and client connections
1.2.2 TCP/IP remote connection
•SSL-encrypted Web Management Interface for all settings and upgrade/backup features
•Support Telnet session and FTP service (disabled by default for more security)
1.2.3 Thin-client Viewer Program
•Win-32 viewer and Java viewer for cross-platform compatibility
•Connection options configurable for optimized performance
•Shared, Non-Shared and View Only sessions
•Easy download and installation
•Multiple viewer instances can be run on a same client computer
•Options for Automatic video centering and optimization
1.2.4 Hi-Speed PPP Connection
•PPP Connection support over serial interface [RJ12] up to 1 Mbps
•PPP server enabling for PPP connection across a pair of modems for secure or backup direct access
•PPP client enabling for PPP connection to the internet with a modem
1.2.5 Video server
•Support up to 1600 x 1200 @ 60 Hz resolution
•8/16-bit color
•3 Video Quality settings
•4 Video Compression schemes
•8-bit color reduction
•Configurable database to set up new or unknown VGA modes
•Virtually compatible to any KVM Switch through automatic video quality optimization
1.2.6 Power ON-OFF Control Support
•Remote power ON-OFF control over serial interface
•Serial commands configurable to fit serial power control devices
•Power ON-OFF privilege only for the SUPERADMIN users

- 4 -
1.2.7 Security
•1024-bit Public key Authentication using certificates generated by an external CA
•256-bit SSL Encryption for keyboard, mouse and video signal transmissions
•Remote authentication support for LDAP or RADIUS servers
•RADIUS accounting support
•3 SSL security levels :
•No authentication – No encryption
•Server Authentication – SSL encryption
•Server & Client authentication – SSL encryption
•3 password policies :
•No Password
•One global password for all users
•One different password for each user
1.2.8 Alarms and Notifications
Alert e-mail notification and SNMP trap messages for critical server events such as No Video, Blue Screen
and NumLock Test Failure
1.2.9 User Management
•User login either by querying the local user database or by connection to remote LDAP or RADIUS
server
•3 user privileges :
•SUPERADMIN – to access complete set of management features and user features, including Power
ON-OFF remote servers
•ADMIN – partial set of management and all user features
•USER – only user features
•User Group management
•Create specific user groups, each of which is assigned with privilege to access only those computers that
are within that group
1.2.10 Global Time Zone Support
•Time support for all continents and major cities
•Time synchronization by connection to any NTP time servers
•Automatic Daylight Saving management
1.2.11 Maintenance and KVM management
•Manages the software version of all KVM switches connected in the daisy-chain
•Upgrades automatically any KVM switch whose software is not the latest
•Record the error and information messages of all KVM switches in the daisy-chain within its server log
•Setup remotely the name of computers that are displayed in the OSD, the local user name and password

Prima IP User Manual Rev 1.5 2007
- -
5
1.3 System Architecture
Prima IP is based on an embedded Linux platform for computing power and rugged stability. The Prima IP
employs a High speed Processor to ensure excellent video quality and fast keyboard / mouse response across
the Internet, even when bandwidth availability is limited.
1.3.1 LAN/WAN Configurations
The Prima IP KVM switch enables local and remote access of the connected computers/servers behind
anytime anywhere.
Figure 2: Prima IP KVM Switch - Basic Configuration
The Prima IP KVM switch can be daisy-chained with multiple Prima KVM switches (up to 8 units) to
upscale port capacity up to hundred computers/servers.
Figure 3: Prima IP KVM switch daisy-chained with other Prima KVM Switches

- 6 -
1.3.2 Power Control Configuration
The Prima IP KVM switch supports Serial Power Control device to facilitate the remote Power ON/OFF and
power cycling of the connected computers/servers.
Figure 4: Prima IP connected to a Remote Power Control Device
1.3.3 PPP connections
The Prima IP KVM switch can serve as either a PPP client or a PPP server to support PPP connection. The
Prima IP offers a second backup connection over modem phone line in case the network is down.
Figure 5: Prima IP as PPP server to accept dial-in request from a remote PPP client via modem line
Figure 6: Prima IP as PPP client to dial-out to ISP for remote clients to access via internet

Prima IP User Manual Rev 1.5 2007
- -
7
1.4 Prima IP External Views
1.4.1 Prima IP Front View
1.4.2 Prima IP 8 - Front-panel
1.4.3 Prima IP 16 - Front-panel
The Dual Numerical LED shows bank number of the Prima IP KVM Switch within a Daisy-chain
The 10/100Mbps LED is lit as solid orange when the current digital link is running on 100Mbps speed.
The Link/Act LED gives off solid green light when a network link is established and flashes whenever
network transmission are perceived on the digital port.
The Power LED indicates the Power On status when it is lit as solid red.
The Video LED indicates the normal functioning of video server when it is blinking orange.
1.4.4 Prima IP Rear View
Figure 7: Prima IP 8 - Rear-panel

- 8 -
Figure 8: Prima IP 16 - Rear-panel
8 x 16 PC ports: The PC port is where you connect to your computer. The PC port is a HDB 15 connector
integrated with USB and PS/2 keyboard, mouse and video. To connect PC port to one of your computer, you
may use either USB KVM Combo Cable, or PS/2 KVM Combo Cable, or Combo-free USB PS/2 KVM
Cable, depending on your package option.
Local Console - PS/2 Keyboard port: This is where you connect the PS/2 keyboard for local console.
Local Console - PS/2 Mouse port: This is where you connect the PS/2 mouse for local console.
Local Console - Monitor port (HDB-15): This is where you should plug in the Monitor for your local
console on Prima IP.
Ethernet Port (RJ-45): The Ethernet port, or digital port, offers anytime anywhere access of Prima IP and
subsequently the conventional KVM Switch(es) and servers/computers connected behind it to the remote
login clients lover LAN/Internet.
The Daisy chain OUT Port (RJ-45): The Daisy chain OUT port is of a HDB 15 female connector, where
you can daisy-chain downstream to a Prima KVM switch.
Serial Port 1 (RJ-12): This is the so-called Console Management port, and it is where you connect the serial
console cable for advanced console management of Prima IP unit via a serial terminal emulation utility such
as Windows HyperTerminal or Minicom on Linux/Unix.
Serial Port 2 (RJ-12): The serial control port allows you to connect to either an external modem or a power
control unit or to a cascaded chain of power control units. When added with an external modem to its serial
control port, Prima IP could serve either as a PPP server to allow direct cable connection or dial-in
connection from its peer computers, or as a PPP client to dial-in to the ISP or an enterprise PPP server.
Furthermore, through serial commands sent over its serial control port, Prima IP can perform remote power
on/off and power cycling task via the (cascaded) power control module(s).
Prima IP Power Receptacle: You must use the DC9V 4A adapter provided within the package. The center
pin is of a positive polarity. Use of any other adapter will nullify the warranty.
Restore-to-Default Button: The Restore-to-Default button is a tiny recessed button located to the left of the
Power Receptacle, and can only be accessed by prying down with a pointed needle tip. To depress the
recessed button for over 5 seconds, and upon release, it will restore Prima IP to factory default – the default
IP settings and user account settings that come with factory default.

Prima IP User Manual Rev 1.5 2007
- -
9
Chapter 2.
Installing Prima IP
2.1 Checklist before Installation
Before installing the KVM switch, you should run through the following peripheral checklist to ensure a
proper setup of your KVM Switch….
1. Suitable KVM cables to connect the Prima IP KVM Switch to the keyboard, video and mouse ports of
each of your PC. For each USB style (or PS/2 style) computer connected, you should have the USB (or
PS/2) KVM combo cable (all male), or the Combo-free USB PS/2 KVM cable. The Combo-free USB
PS/2 KVM cable is highly recommended for your convenience.
2. A monitor with a standard D-sub 15-pin video connector (HDB-15) that you have verified to be working
when connected directly to each of your PCs.
3. A standard PS/2 style Microsoft or Logitech keyboard.
4. A standard PS/2 style Microsoft or Logitech compatible 5-key mouse
5. Daisy-chain cable(s), necessary only if you need to connect to other Prima KVM Switch (Prima 4/8/16).
6. Terminator, necessary only if you need to daisy-chain multiple Prima KVM Switches.
Figure 9: The 3-1 USB Combo KVM cable
Figure 10: The 3-1 PS/2 combo KVM cable

- 10 -
Figure 11: The Combo-free USB PS/2 KVM cable
Figure 12: The Daisy-chain Cable [M-HDB15-to-HDB15-F]
Figure 13: The [Daisy-chain] Terminator

Prima IP User Manual Rev 1.5 2007
- -
11
2.2 Setting up the Physical Connections
Step 1. Power on the Prima IP.
Step 2. If a local console is required, connect a keyboard, mouse and monitor to the Prima IP local console
ports
Step 3. If you have no intention to daisy-chain your Prima IP KVM switch with either of the Prima KVM
switches (Prima 4/Prima 8/Prima 16), connect your computers to the PC ports using the USB KVM cable, or
PS/2 KVM cable, or the Combo-free USB PS/2 KVM cable that come with Prima IP packing box.
If you are using any PS/2 computer: Please make sure all of your PS/2 computers are powered off
before connecting to the KVM Switch. Otherwise, the non-PnP PS/2 interfaces might not recognize
the PS/2 keyboard and mouse later. USB computers do not have this limitation.
Figure 14: Prima IP configuration – Single server mode
Step 4. Make sure (at least the PS/2) computers that are to be connected to the KVM switch are powered off.
If not, power them off before you proceed with the following steps. If you use only one single Prima IP
KVM switch in non-cascaded application, ignore steps 5 and jump directly to step 6.
Step 5. Use the daisy-chain cable (M-HDB15-HDB15-F) to connect the Daisy Chain Port (HDB 15 female)
of the [master] Prima IP to the Daisy Chain IN Port (HDB 15 male) of the second Prima KVM switch. Then
power it on.
If you have other switches to be daisy-chained, repeat Step 5 to connect them. You can daisy-chain up to 8
units.
You must plug a Terminator onto the Daisy-chain Out Port of the last Prima KVM switch unit.

- 12 -
Figure 15: Combo-free USB PS/2 KVM Cable
The special Combo-free KVM cable provides a PS/2 keyboard connector, a USB connector and a
HDB video connector for the computer connection. When connecting with a USB computer, plug
the USB connector to it and leave the PS/2 connector free. When connecting with a PS/2 computer,
add one USB-to-PS/2 adapter to the USB connector and you’ll have a PS/2 connector for mouse.
DO NOT try to connect both USB connector and PS/2 keyboard connector to a computer at
the same time.
Step 6. Boot up connected computers. After the computers has booted, go forth to verify the connections
with each of the connected computers. On the Prima local console you should switch to every computer and
verify that the keyboard, mouse and monitor are all working on each of the connected server(s).

Prima IP User Manual Rev 1.5 2007
- -
13
2.3 Configuring your Servers for Connections to
Prima IP
Now that you have set up your local console on Prima IP, you can now configure your connected servers just
by using the access provided by Prima IP’s local console.
Mouse acceleration is NOT supported by Prima IP. Therefore, you must turn off the mouse acceleration on
all your connected servers.
2.3.1 Turn off mouse acceleration and “Snap to” option
Windows XP Platform
Access Control Panel->Mouse. On the Mouse Properties tab, select the Pointer Options page
Adjust the pointer speed slide bar to the exact middle.
Uncheck the Enhance pointer precision option.
Uncheck Automatically move pointer to the default button in a dialog box
Click OK.
Windows 2000 Platform
Access Control Panel->Mouse. On the Mouse Properties tab, select the Pointer Options page :
Adjust the pointer speed slide bar to the exact middle
Select the Acceleration as None
Uncheck Move pointer to the default button in dialog box
Click OK.

- 14 -
Windows 98
Access Control Panel->Mouse. Click the Mouse Properties tab and select the Motion page. In the Pointer
speed box, adjust the pointer speed slide bar to the slowest (leftmost) position and click OK.
The mouse setting page on different Windows platforms might be quite different, some gives
mouse acceleration option and some do not. If you see any mouse acceleration option, please
uncheck it. If there is no mouse acceleration available on the setting page, you can adjust the mouse
speed slide bar to either x1 or the slowest position (such as on Linux platforms). Sometimes, it
requires a middle position on the speed slide bar to make mouse synchronization on the viewer side,
for example, Windows XP requires a middle position on mouse speed. Anyway, the worst case is
that you have to make some trial and error to make your mouse acceleration off and the speed as x 1
(could be at the slowest position or the middle position).
This manual suits for next models
1
Table of contents
Popular Switch manuals by other brands
Extreme Networks
Extreme Networks BlackDiamond 8800 Series Hardware installation guide
Brocade Communications Systems
Brocade Communications Systems 300 Hardware installation guide
OEZ
OEZ MAA-D16-001-A230 Instructions for use
autenco
autenco AUT PIRSP Installation & operating instructions
Extron electronics
Extron electronics MPX 866 A Specifications
D-Link
D-Link DXS-3250E - xStack Switch Specifications
