Proteus VR Labs Ltd GLIDE VR User manual
GLIDE VR INSTRUCTION MANUAL
TRANSLATIONS CONTENTS:
Customer Support
support@proteusvr.com
Page 2-21 - English
Page 22-41 - Deutsch
Page 42-61 - Français
Page 62-81 - Español
Page 82-101 - Nederlands
Page 102-121 - Italiano
GLIDE VR INSTRUCTION MANUAL
CONTENTS:
Customer Support
support@freeyvr.com
Proteus VR Labs Ltd.
Studio 5, Unit 13
Elizabeth Tower
Juno Way
London
SE14 5RW
United Kingdom
Page 4-7 Health & Safety Warnings
Page 8-11 Seng Up Your Glide VR
Page 12-15 Frequent Controls
Page 16-17 Troubleshoong
Page 18-19 ‘Game/Key’ switch
English. Rev. 0
Page 4 of 21 Page 5 of 21
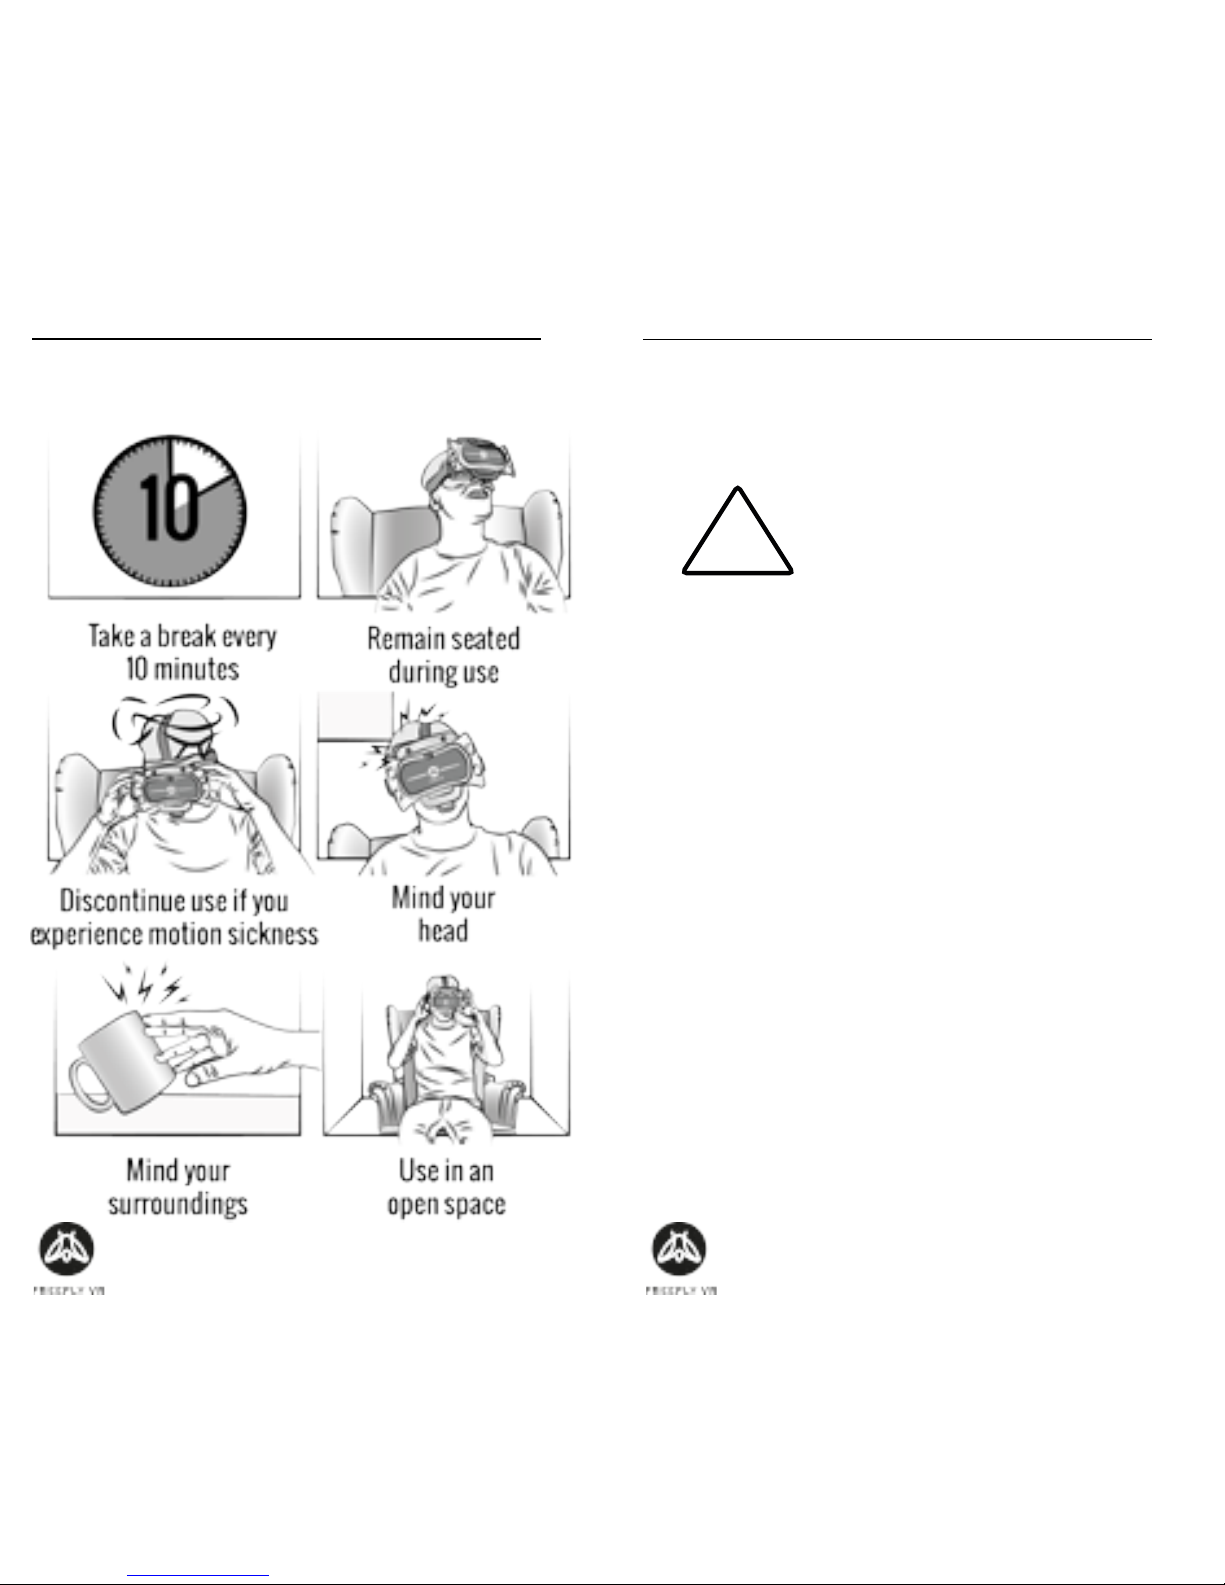
HEALTH & SAFETY WARNINGS:
Safe Use Summary
HEALTH & SAFETY WARNINGS:
WARNING: All users of the Freey VR head
set and
Glide VR
gamepad
should read these instrucons
carefully before using the head
set. Failure to follow these
instrucons may result in serious
injury.
Save these instrucons.
Thank you for purchasing the
Glide VR
Bluetooth
controller; begin your virtual reality experience to
jump to the next level.
Suitability
Virtual reality is not suitable for everyone. Use of
virtual reality equipment can cause dizziness, dis-
orientaon and other symptoms. If you have any
doubt whether it is safe for you to use virtual reality
products, please consult your doctor.
The user should NOT take the product apart and
we bear no responsibility for liability nor product
guarantee.
!

Page 6 of 21 Page 7 of 21
HEALTH & SAFETY WARNINGS:
Suitability (cont.)
Do not give the
Glide VR
to small children. Keep out
of reach of children, when the device is not in use.
Storage
The
Glide VR
can be stored in the Freey case along
with the Freey VR headset.
Store the
Glide VR
controller in a dry, room temper-
ature area, out of the way of direct sunlight.
Disposal and Waste Recycling
Controller should not be disposed of in general
waste. Device can be taken to your local recycling
centre or returned to supplier.
Internal baery is rechargeable, replacing or dis-
posing is not required. If the product fails to charge,
the supplier should be contacted for repairs or re-
placement.
HEALTH & SAFETY WARNINGS:
Damage or Repairs
User should not aempt to repair or modify con-
troller. This could result in product malfuncon or
eected game play and we bear no responsibility
for liability therein.
If the product is damaged, broken or malfuncon-
ing, user should contact suppliers for replacement
or repairs.
Usage on Aircraft
Before boarding ensure the controller is fully
switched o and only acvated the allowed on
ight. The products Bluetooth signal could interfere
with aircras whilst on take-o and landing.

Page 8 of 21 Page 9 of 21
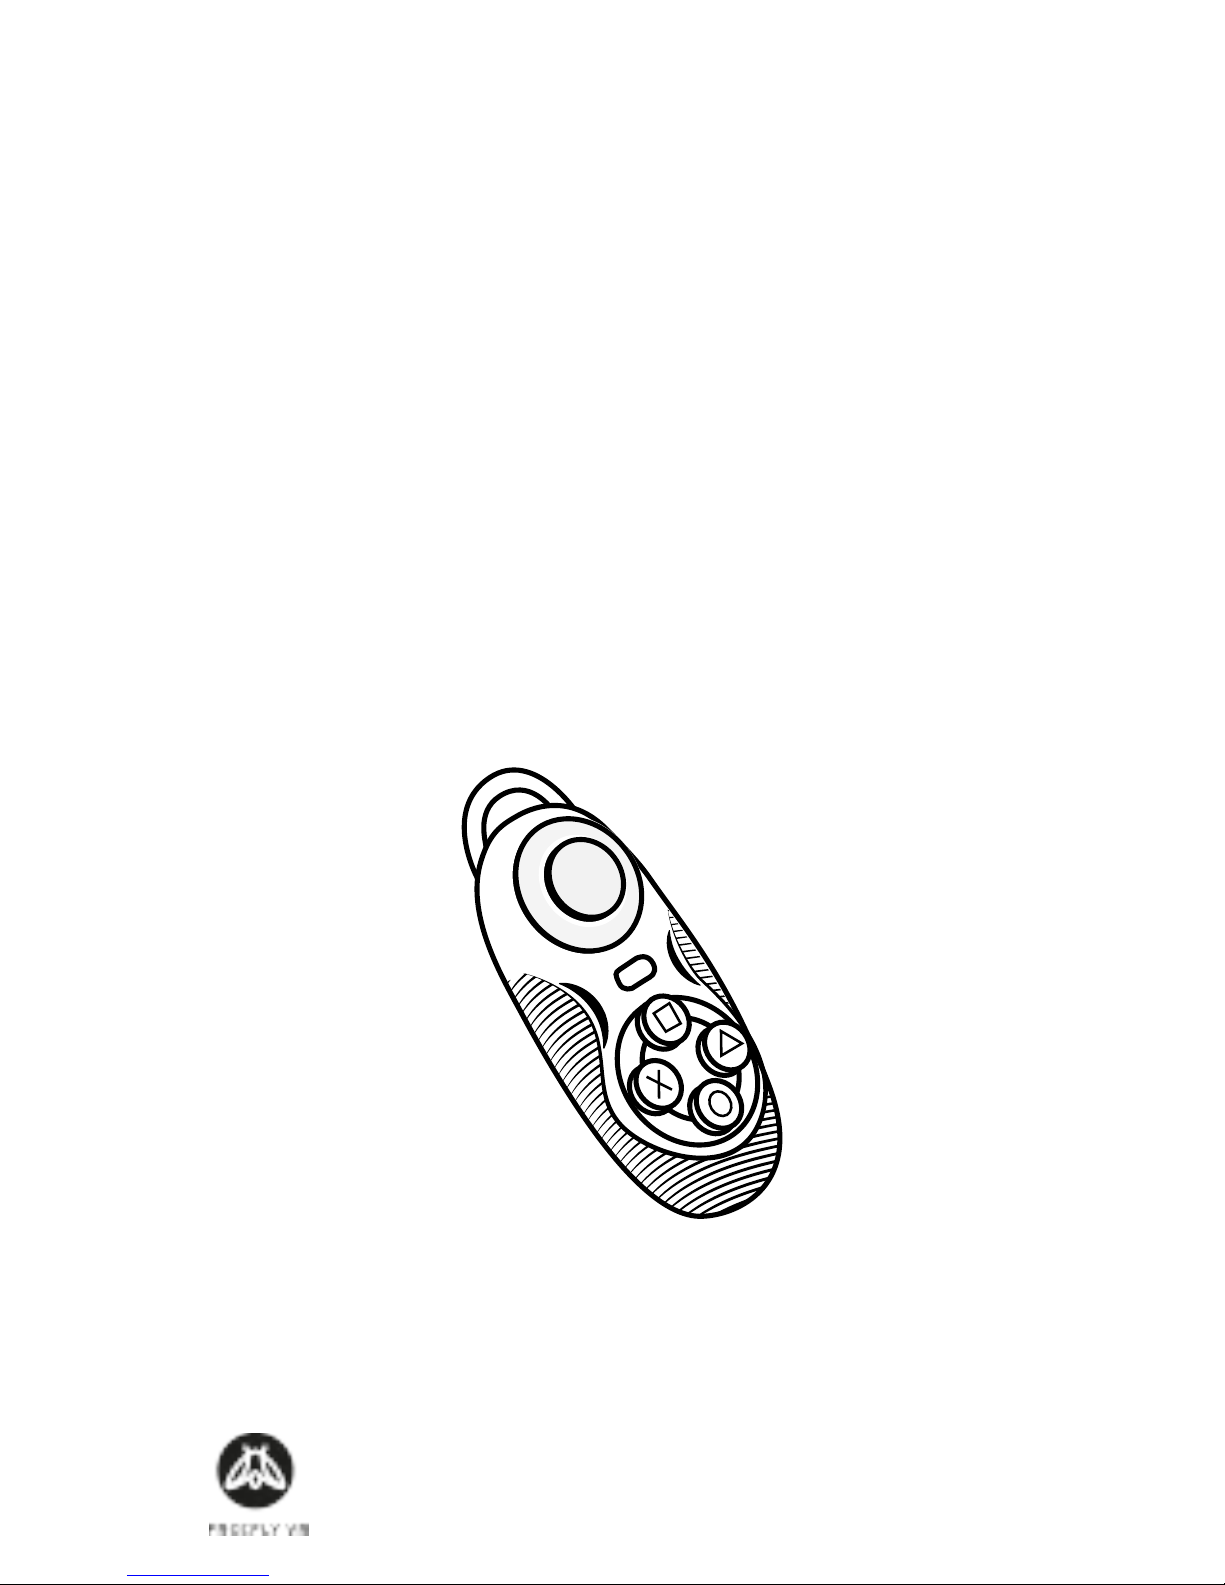
SETTING UP YOUR GLIDE VR:
Modes
The Glide VR can be held in either landscape or por-
trait mode. On the side is a switch entled ‘Game/
Key’. In ‘Game’ mode, the Glide VR will work as a
two-handed, landscape controller. In ‘Key’ mode,
the Glide VR will work as a one-handed, portrait
controller.
Make sure your desired orientaon is selected.
For game play the controller can be held in the
horizontal posion and be held with both hands
if user desires. This will give opmal game play
experience, allowing the user to control the joy
pad with one hand and the command buons with
the other.
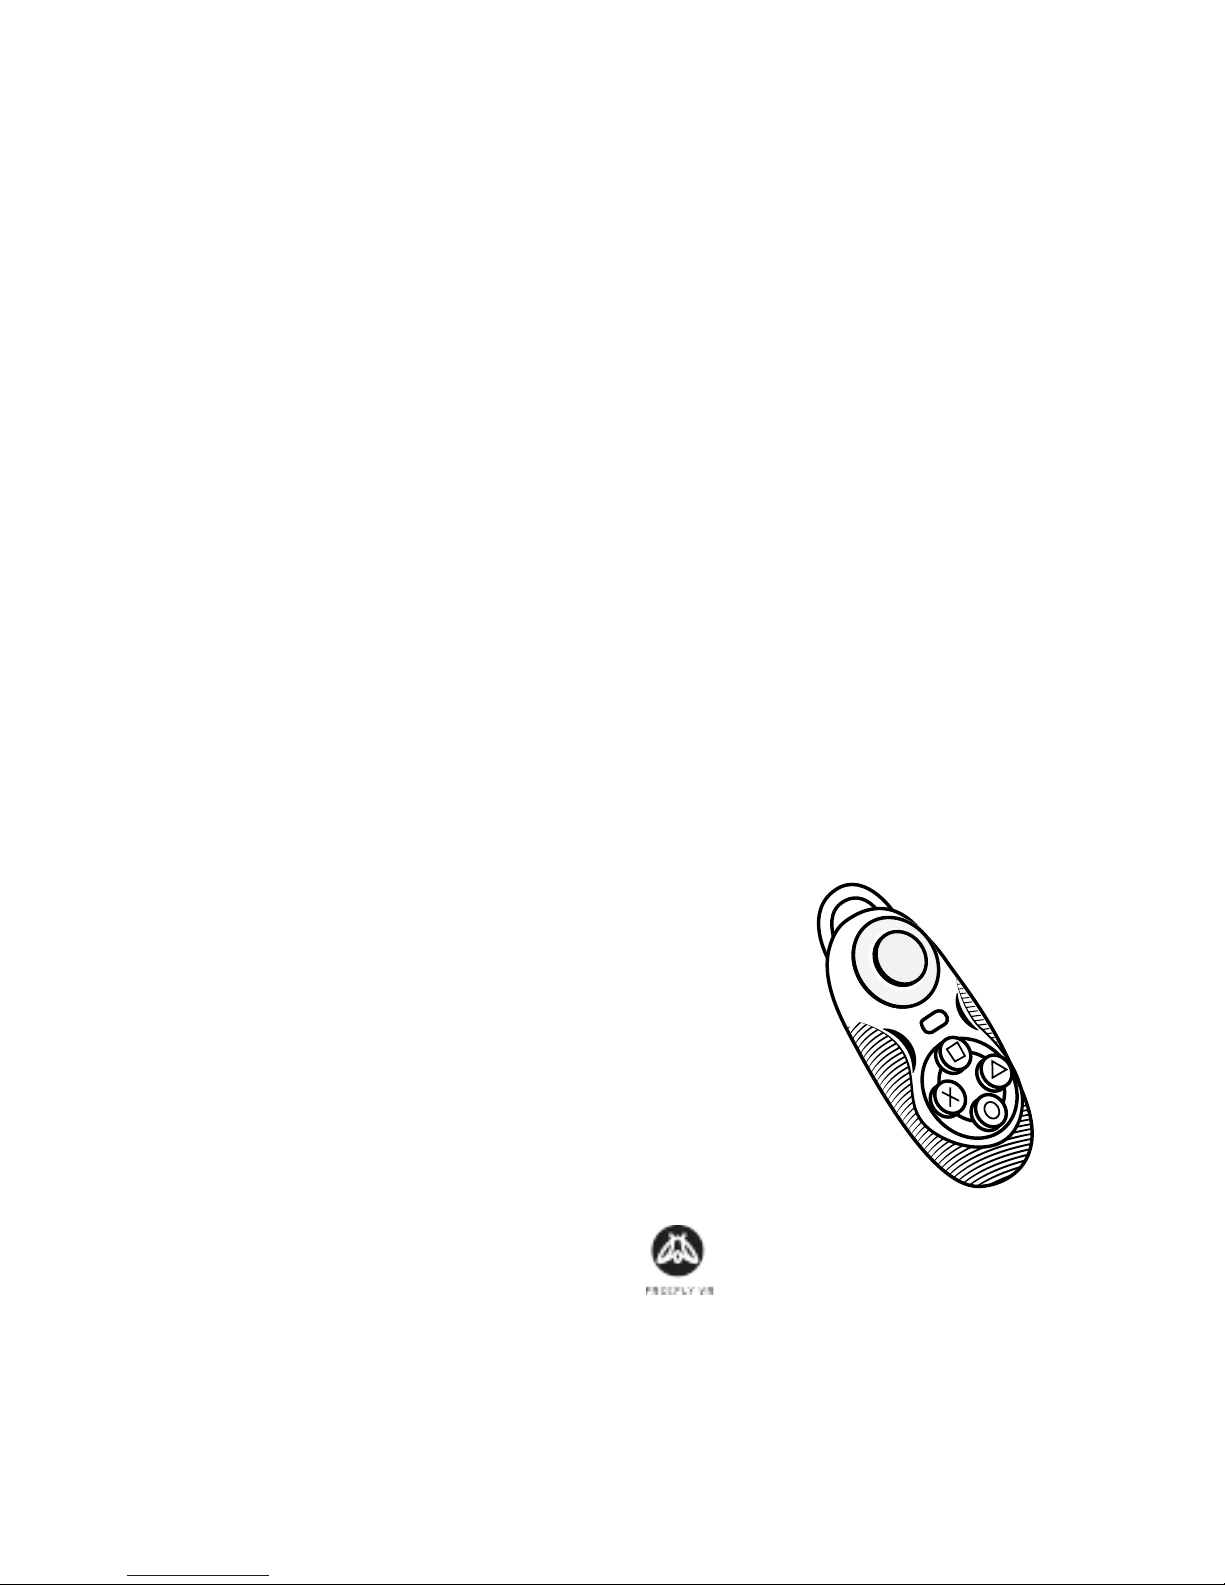
SETTING UP YOUR GLIDE VR:
Modes (cont.)
Charging
To charge the
Glide VR
connect it via a USB cable
to suitable charging point. The front facing LED
will ash from red to magenta to indicate that
the device is charging and a solid red to indicate
full charge.
As each app and Smartphone is programmed dier-
ently. The
Glide VR
buon setup can vary between
devices and apps.
VR is an emerging technology; there are no indus-
try standards and Freey VR cannot control these
dierences.
Some trial and error may be required.
Page 10 of 21 Page 11 of 21
SETTING UP YOUR GLIDE VR:
Step 1: Smartphone Requirements
The
Glide VR
is compable with iOS and Android
smartphones with Bluetooth compability. For an
up-to-date list of recommended smartphones visit
freeyvr.com;
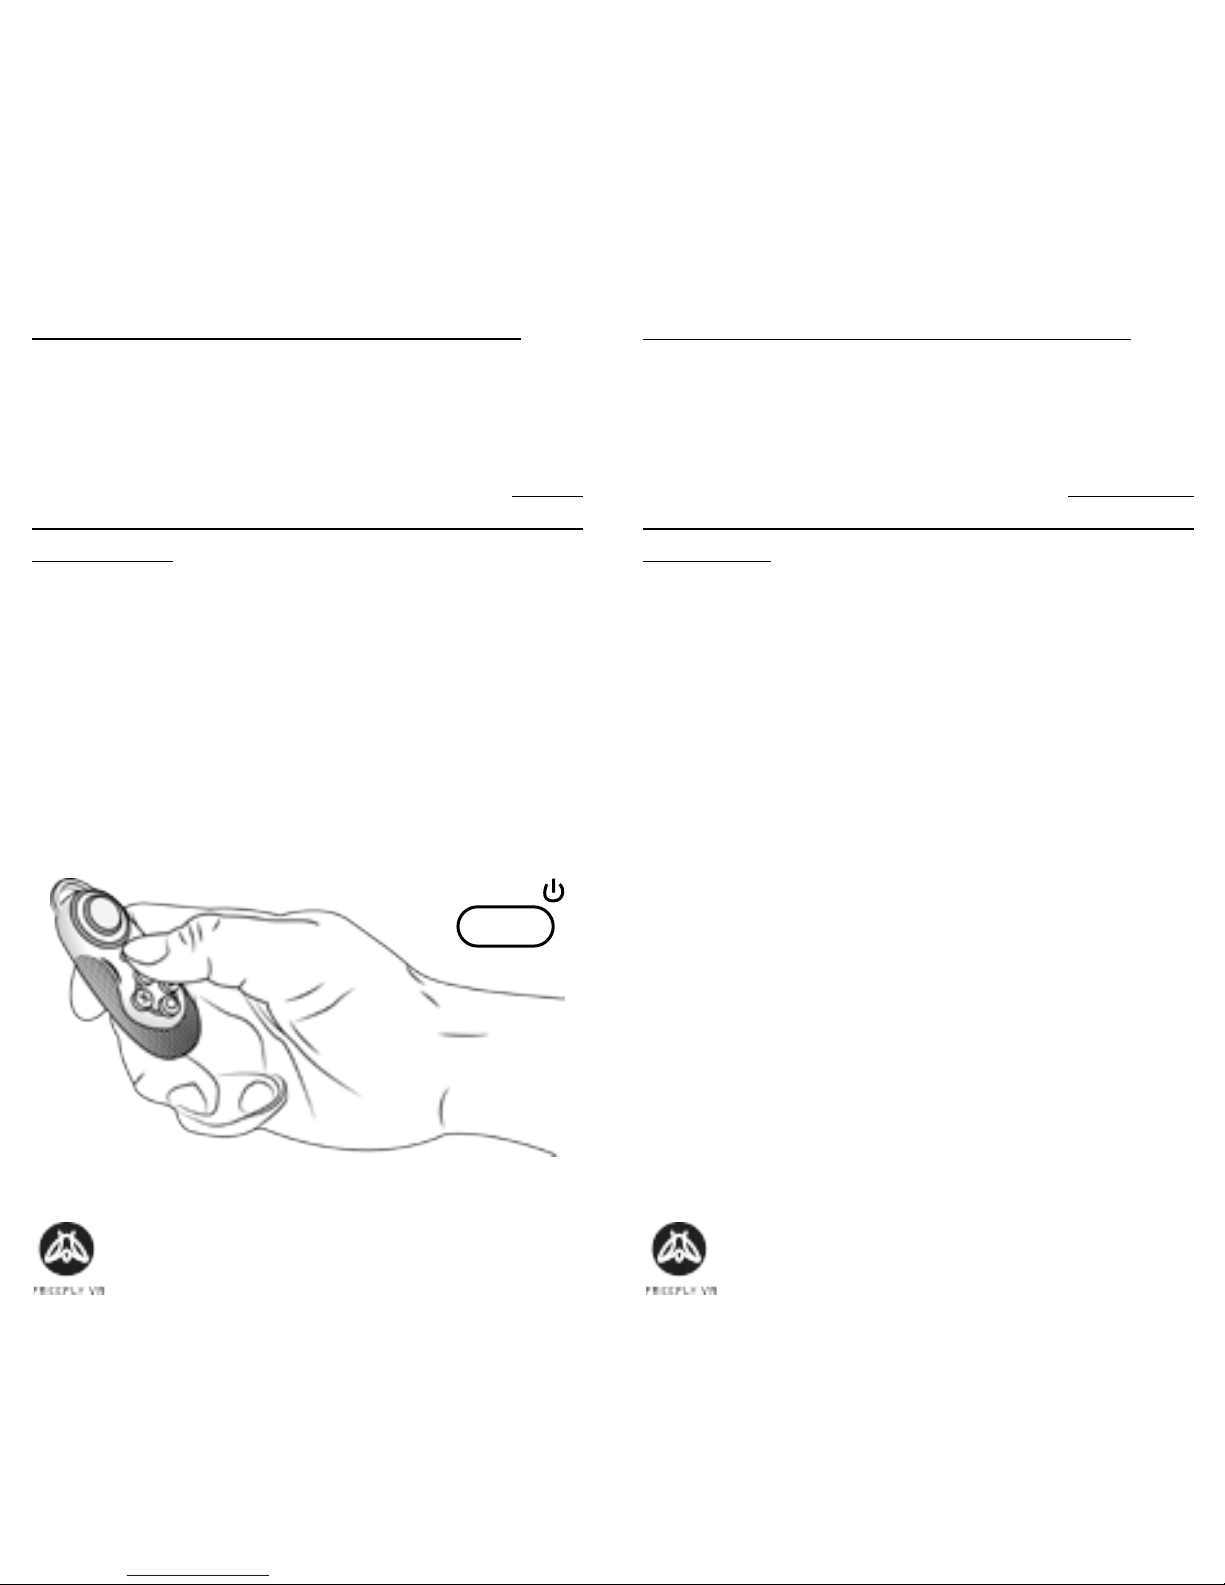
Step 2: Turn on your Glide VR
Hold down Start buon unl the blue light comes
on;
START /
SETTING UP YOUR GLIDE VR:
Step 3: Enable Bluetooth
AFTER the light starts ashing, enable Bluetooth on
your smartphone and scan for devices. TIP: turning
the controller on rst will ensure a much quicker
connecon;
Step 4: Search for ‘Freey VR Glide’
The controller should be detected within 10 sec-
onds and will have the name: ‘Freey VR Glide’
followed by 4 characters;
Step 5: Pair to ‘Freey VR Glide’
Tap the name of the controller to connect it to
your phone.

Page 12 of 21 Page 13 of 21
FREQUENT CONTROLS:
NB: Disclaimer
Reminder: VR is an emerging technology; there are
no industry standards and Freey VR cannot con-
trol these dierences.
Some trial and error may be required.
These instrucons are for Android for iOS instruc-
ons, go to freeyvr.com.
Step 1: Charging
Ensure the Glide VR has sucient charge before
use. The device will have some charge on delivery,
but may require addional charging;
FREQUENT CONTROLS:
Step 3: Landscape
In ‘Game’ mode, you must hold the
Glide VR
two-handed horizontally (selected ‘Key’ mode will
turn the orientaon vercal);
Step 2: Game Mode
The
Glide VR
has two funcon modes, ‘Key’ and
‘Game’. For the purpose of these instrucons we
will use the ‘Game’ funcon, so switch it to that
mode now. To do this, turn the switch on the le
hand side of the
Glide VR
to ‘Game’ mode;
Page 14 of 21 Page 15 of 21
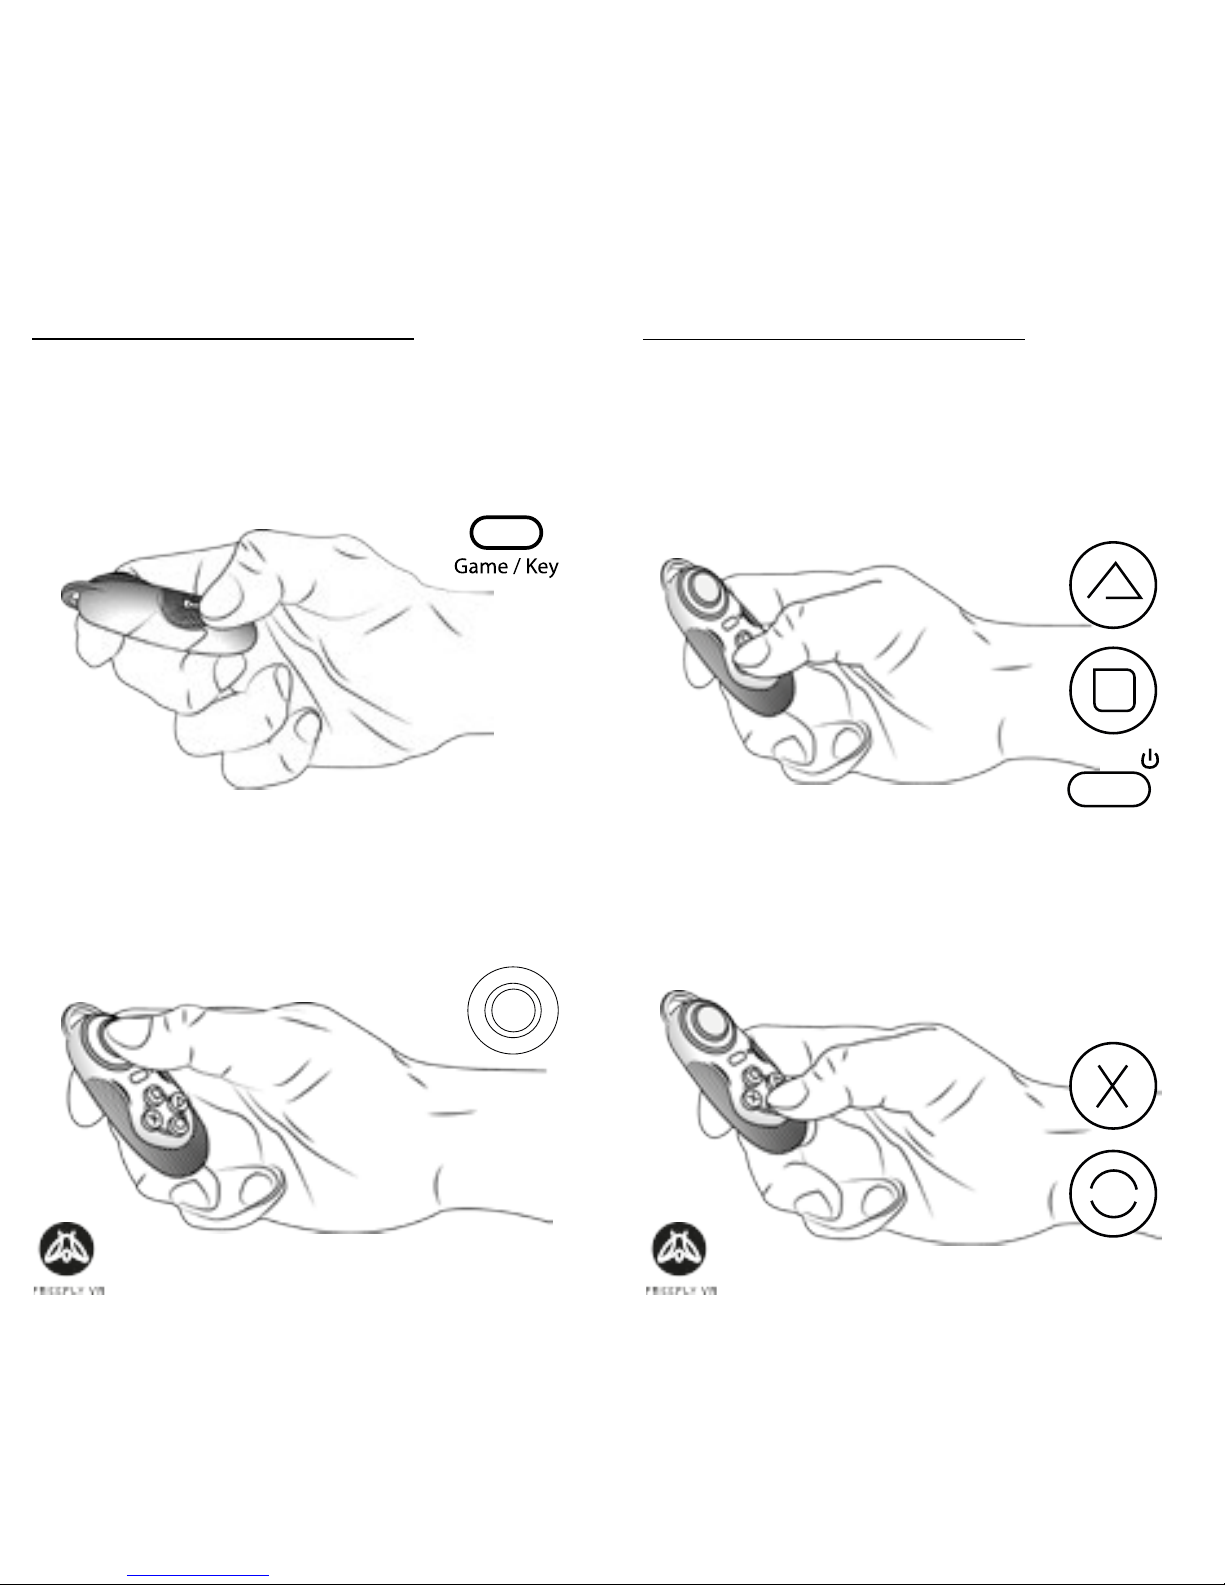
FREQUENT CONTROLS:
Joypad
The Joypad works as direconal and the orientaon
will turn in relaon to the ‘Game/Key’ switch.
Game/Key
Choose ‘Game’ mode for horizontal/landscape
mode, or ‘Key’ mode for vercal/portrait mode.
FREQUENT CONTROLS:
Back (Game) & Accept (Key)
The X and Circle buons all work as
back
most of
the me in Game mode
,
and
accept
most of the
me in ‘Key’ mode.
Accept (Game) & Back (Key)
The Start, Square and Triangle buons all work as
accept
most of the me in ‘Game’ mode
,
and
back
most of the me in ‘Key’ mode.
START /
Page 16 of 21 Page 17 of 21
TROUBLESHOOTING:
This is a development kit controller, so there are
issues that need some iniave or experimentaon
to solve. If you nd a soluon, or would like aid
in nding a soluon, contact support@proteusvr.
com. Thankyou in advance for your understanding
and help!
Ensure the device has charge before use. Charge
the device before use. This gives the controller the
full amount of power required for game play.
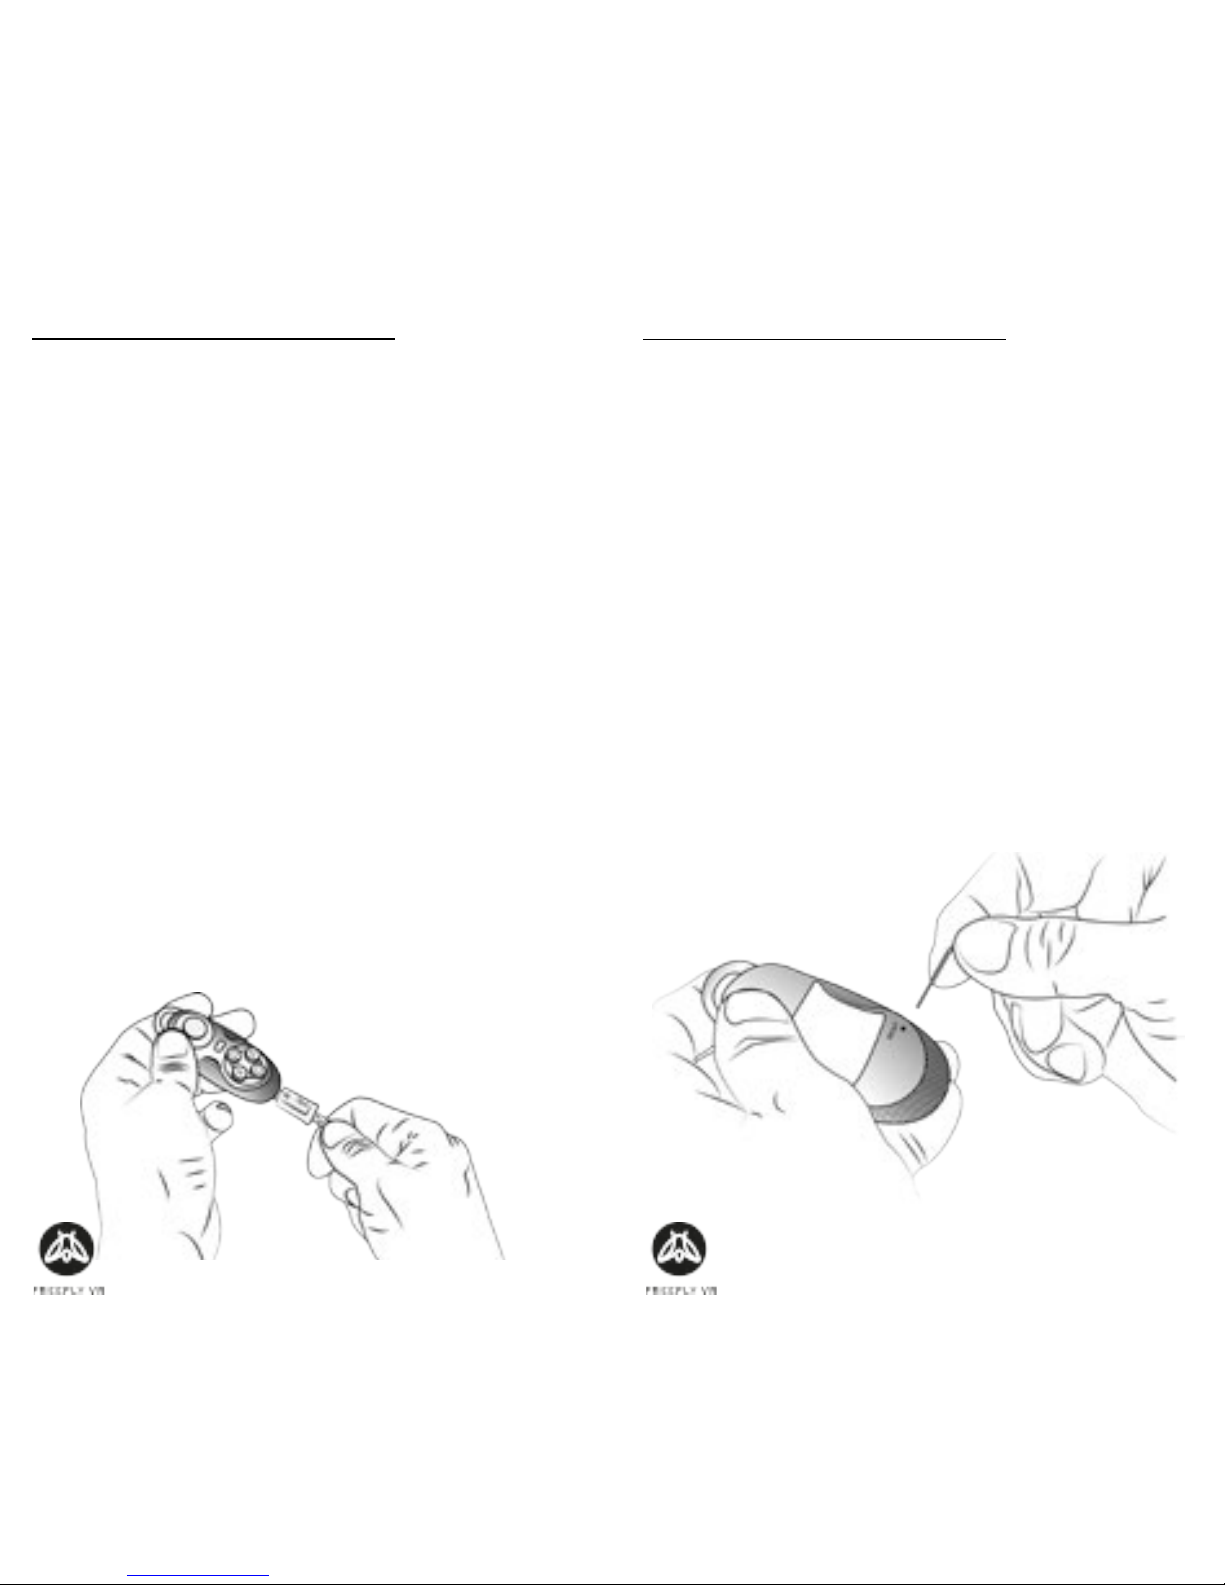
If the controls have changed orientaon, or the
direconal pad appears to move in the wrong di-
recon, try switching the ‘Game/Key’ mode. If the
problem persists, use an extended paperclip and
press the buon opposite.
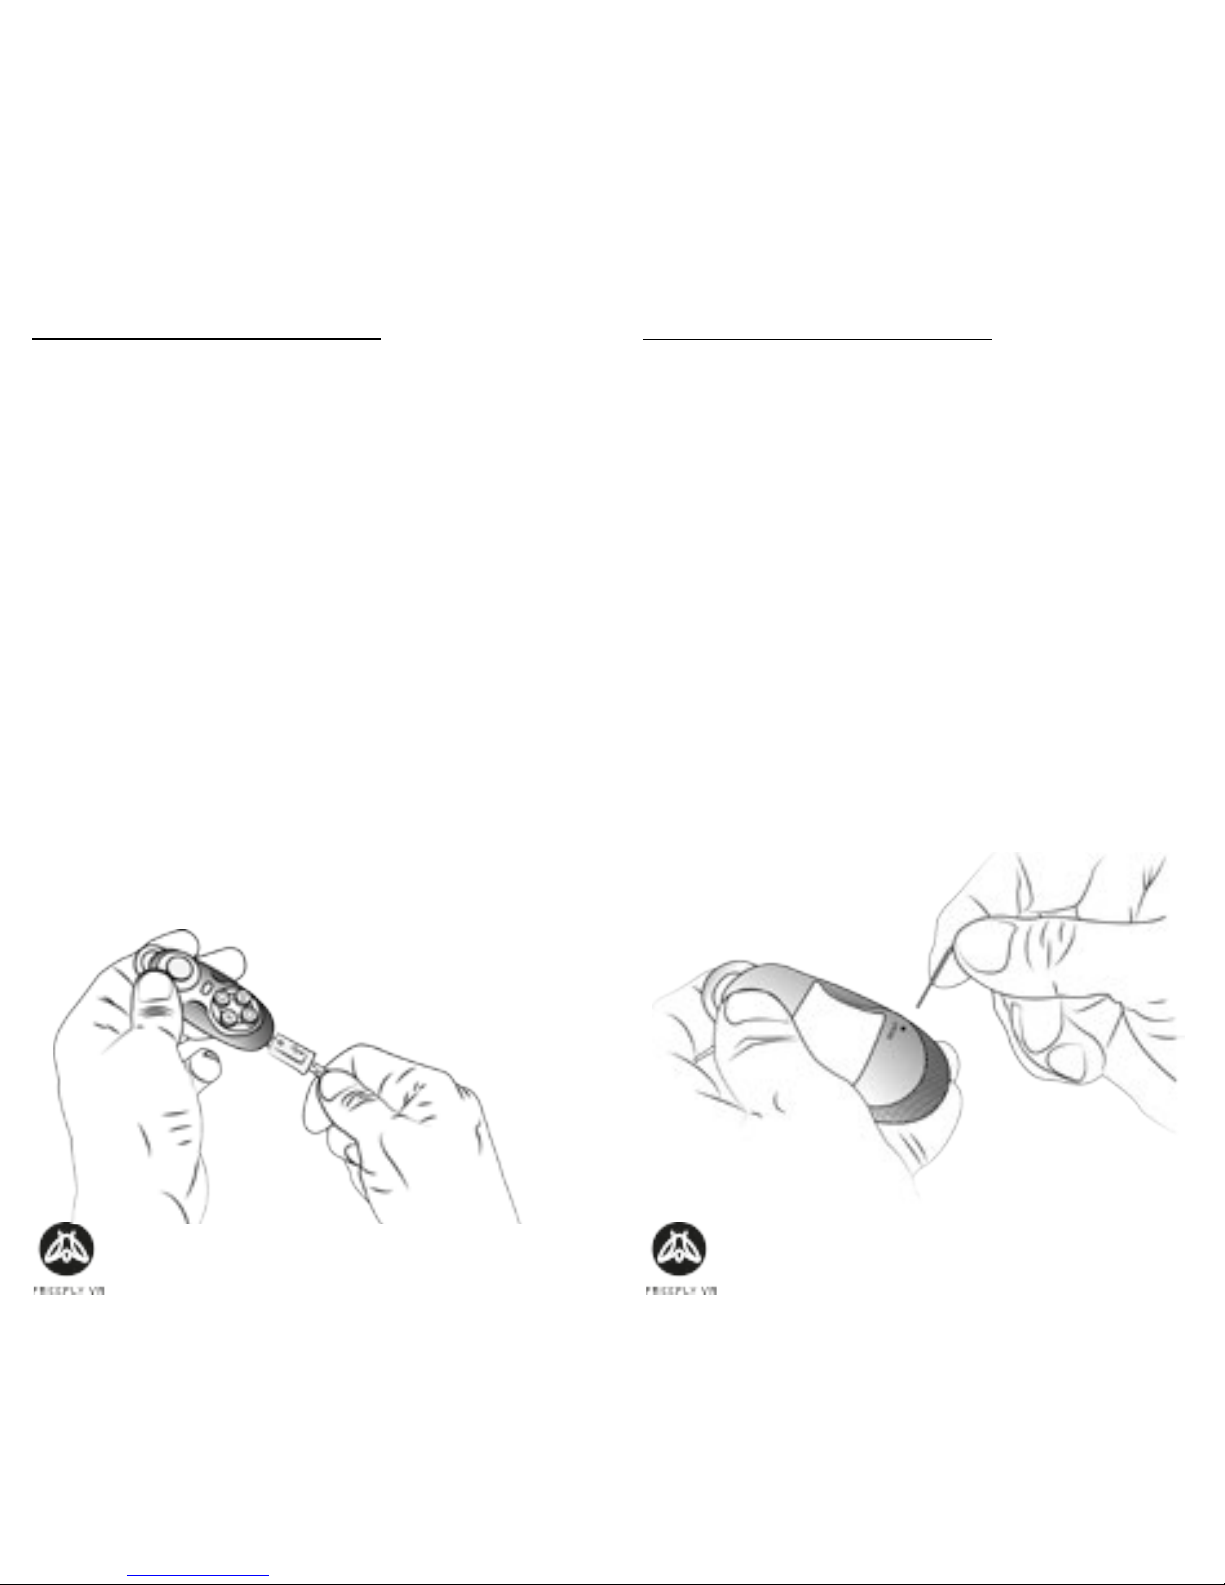
TROUBLESHOOTING:
If the controller isn’t discovered, turn o your
smartphone’s Bluetooth and turn it on again.
To turn o the controller, simply hold down the
start buon unl the light goes out. This will hap-
pen automacally aer 5 minutes if not connected
to a Bluetooth device, or 10 minutes of inacvity if
connected to a Bluetooth.
If the device becomes unresponsive there is a pin-
hole reset on the rear of the device. Use an extend-
ed paperclip and press this buon.

Page 18 of 21 Page 19 of 21
GAME MODE:
The ‘Game/Key’ switch, changes the playing ori-
entaon.
In ‘Game’ mode, hold the Glide VR in landscape/
horizontally.
KEY MODE:
The ‘Game/Key’ switch, changes the playing ori-
entaon.
In ‘Key’ mode, hold the Glide VR in portrait/veri-
tcally.

Page 20 of 21 Page 21 of 21
CONTROLS:
This is a dev kit, so there are no fully dened con-
trols. Use this page to note down what controls
you nd work, or even program yourself! We’re
working with developers to standardise controller
buon mapping in VR, so let us know what con-
trols
you
enjoy using and we’ll do our best to make
them sck!

GLIDE VR BEDIENUNGSANLEITUNG
INHALT:
Customer Support
support@freeyvr.com
Proteus VR Labs Ltd.
Studio 5, Unit 13
Elizabeth Tower
Juno Way
London
SE14 5RW
United Kingdom
Seiten 24-27 Gesundheitshinweise
Seiten 28-31 Einrichtung des Glide VR
Seiten 32-35 Häuge Nutzungsarten
Seiten 36-37 Problemlösungen
Seiten 38-39 ‘Game/Key‘ Schalter
Deutsch. Rev. 0
Seite 24 bis 41 Seite 25 bis 41
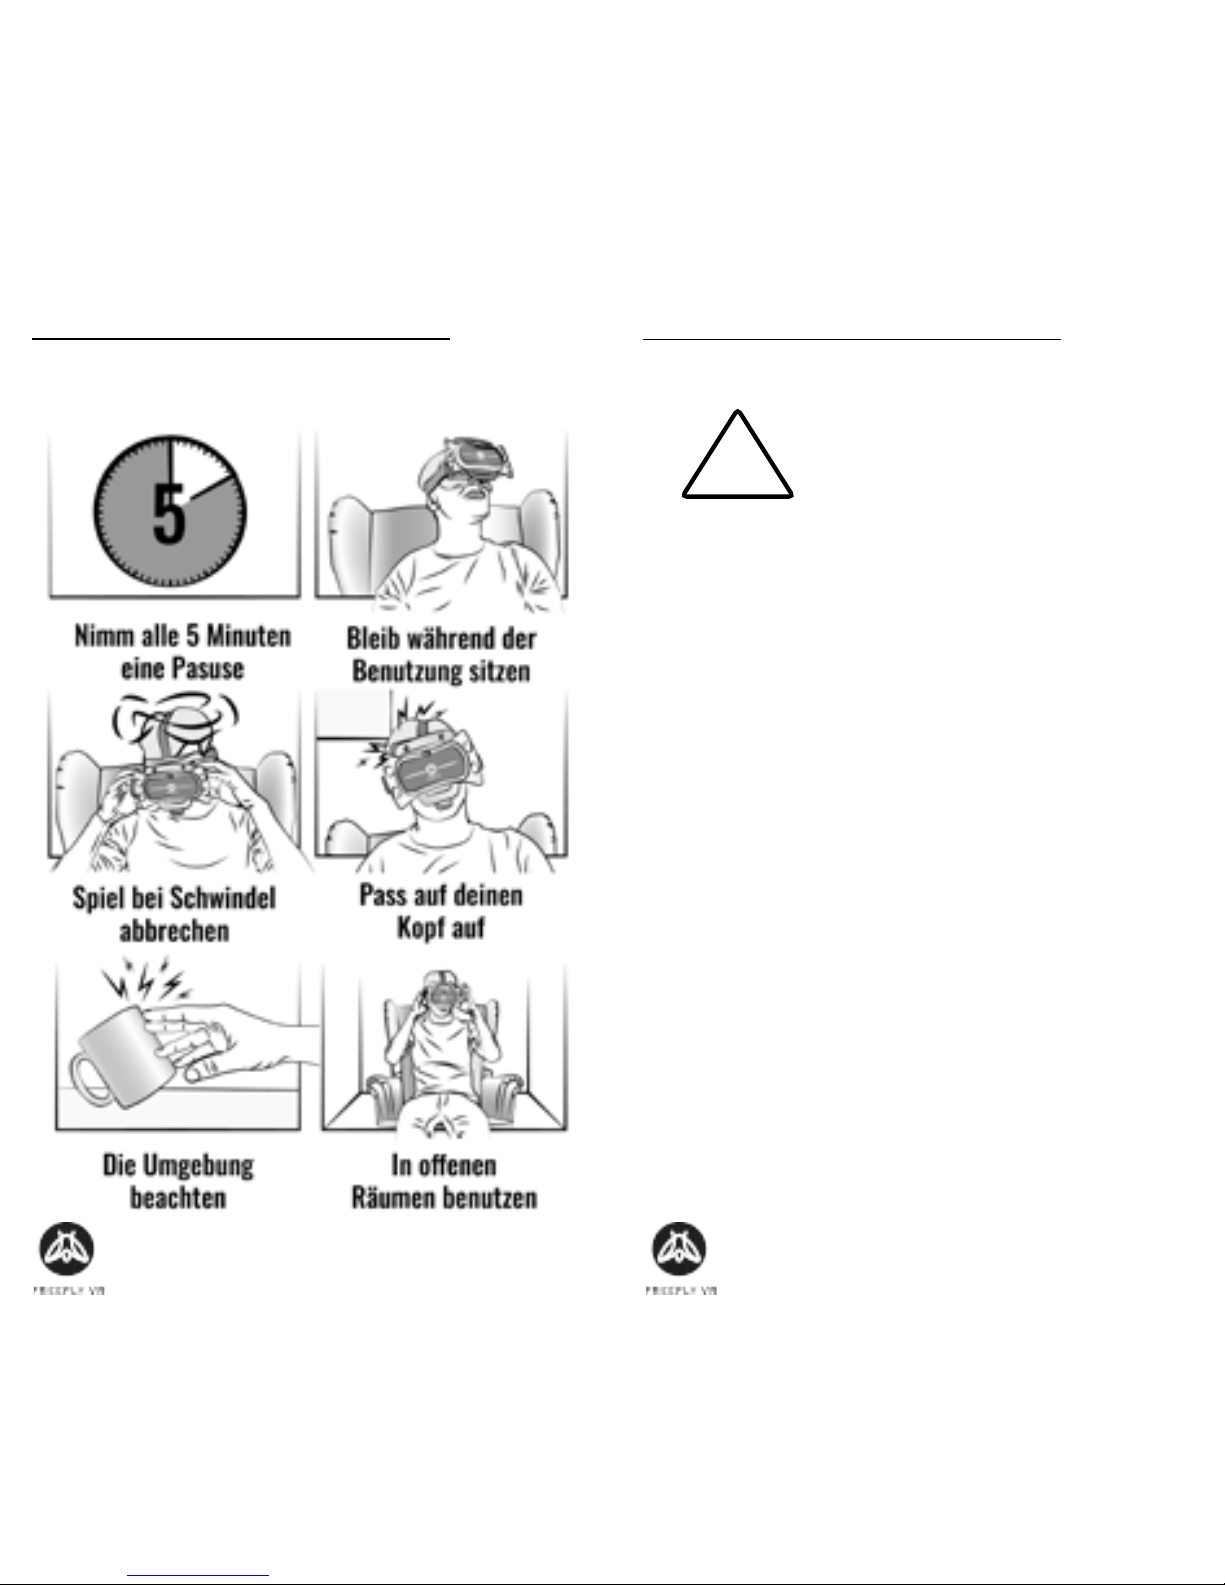
GESUNDHEITSHINWEISE:
Gesundheitswarnungen
GESUNDHEITSHINWEISE:
WARNUNG: Alle Nutzer des
Freey VR und Glide VR
sollten diese Instrukonen genau
durchlesen. Durch falsche Benutzung dieser Geräte
können ernsthae Verletzungen entstehen. Diese
Anleitung auewahren.
Danke für den Kauf des Glide VR Bluetooth Control-
lers. Bringe deine Virtual Reality Abenteuer auf ein
neues Level.
Haftung
Die Virtuelle Realität ist nicht für jedermanns Sa-
che. Die Benutzung dieser Ausrüstung kann zu
Orienerungslosigkeit, Schwindel und anderen
Symptomen führen. Sollten Sie irgendwelche Zweif-
el daran haben, ob die Benutzung sicher für Sie ist,
konsuleren Sie bie Ihren Arzt.
Das Produkt sollte auf KEINEN Fall demonert
werden, wir tragen keine Verantwortung und auch
keine Garane, sollte man es dennoch tun.
!

Seite 26 bis 41 Seite 27 bis 41
GESUNDHEITSHINWEISE:
Haftung (Fortsetzung)
Geben Sie das Glide VR keinen Kindern. Ausser Re-
ichweite von Kindern auewahren, wenn Sie das
Gerät nicht benutzen.
Aufbewahrung
Das Glide VR kann im Auewahrungsbehälter des
Freey VR Headset gelagert werden.
Bewahren Sie den Glide VR Controller in einem
trockenen Raum bei Zimmertemperatur ohne di-
rekte Sonneneinstrahlung.
Entsorgung und Recycling
Der Controller sollte nicht über den Hausmüll ent-
sorgt werden sondern gehört zu Elektroschro.
Die Baerien sind wieder auadbar, Ersetzen oder
Entsorgung ist nicht notwendig. Sollte sich der Akku
nicht mehr auaden, wenden Sie sich an die Ver-
kaufsstelle für eine Reparatur oder Ersatz.
GESUNDHEITSHINWEISE:
Schäden und Reparaturen
Der Kunde sollte nicht versuchen das Produkt zu
reparieren oder modizieren. Es könnten Fehlfunk-
onen aureten und wir tragen keinerlei Haung
für dadurch entstehende Schäden.
Sollte das Gerät beschädigt, kapu oder Störungen
aureten sollte man die Verkaufsstelle kontaker-
en für Reparaturen oder Ersatz.
Nutzung in Flugzeugen
Vor dem Boarding ist sicherzustellen, dass der
Controller komple ausgeschaltet ist und erst dann
wieder eingeschaltet wird, wenn es wieder gestat-
tet ist. Das Bluetooth Signal könnte die Bordelek-
tronik beeinussen während Landung und Start.

Seite 28 bis 41 Seite 29 bis 41
EINRICHTUNG DES GLIDE VR:
Modi
Für Virtual Reality Apps muss der „Game“-Modus
ausgewählt werden. In diesem Modus verhält
sich das Glide VR wir ein Spielkonsolen Controller.
Die Tastenbelegung kann im Einstellungsmenü
verändert werden.
Wenn Sie den Controller auch für andere Sachen
als VR Erlebnisse benutzen möchten, wählen Sie
den „Key“-Modus.
Für Spiele sollte der Controller horizontal mit bei-
den Händen gehalten werden. Dies ermöglicht
opmaler Spielspass wie man ihn von anderen
Controllern kennt.
EINRICHTUNG DES GLIDE VR:
Modi (Fortsetzung)
Auaden
Um das Glide VR zu laden muss es nur per USB
Kabel an eine passende Stromquelle angeschlossen
werden. Die vorderen LED blinken von rot bis pur-
pur um anzuzeigen, dass das Gerät geladen wird.
Ein permanentes rotes Leuchten zeigt, dass das
Glide VR vollständig geladen ist.
Jede App und jedes Smartphone ist unterschiedlich
programmiert. Die Tastenbelegung des Glide VR
kann daher variieren.
Virtual Reality ist eine Technologie die noch ganz
am Anfang steht. Es sind noch keine industriellen
Standards gesetzt und Freey VR kann diese Unter-
schiede nicht kontrollieren. Ein wenig ausprobieren
wird möglicherweise nög sein.

Seite 30 bis 41 Seite 31 bis 41
EINRICHTUNG DES GLIDE VR:
Schritt 1: Smartphone Voraussetzungen
Das Glide VR ist kompabel mit iOS und Android
Smartphones die über Bluetooth verfügen. Eine ak-
tuelle Liste der empfohlenen Smartphones nden
Sie auf freeyvr.com;
Schritt 2: Schalte Dein Glide VR ein
Halte den Startknopf bis das blaue Licht leuchtet.
START /
EINRICHTUNG DES GLIDE VR:
Schritt 3: Bluetooth Einschalten
Akviere Bluetooth auf Deinem Smartphone NA-
CHDEM das blaue Licht blinkt und scanne nach
Geräten. TIPP: Den Controller vor dem Smartphone
einzuschalten erlaubt einen schnelleren Verbind-
ungsauau.
Schritt 4: Nach „Freey VR Glide“ suchen
Der Controller sollte innerhalb von 10 Sekunden
gefunden werden und den Namen „Freey VR
Glide“ gefolgt von 4 Zeichen tragen.
Schritt 5: Mit „Freey VR Glide“ koppeln
Einfach den Namen des Controllers berühren um
die Verbindung herzustellen.
Seite 32 bis 41 Seite 33 bis 41
HÄUFIGE NUTZUNGSARTEN:
NB: Disclaimer
Zur Erinnerung: Virtual Reality ist eine Technologie
die noch ganz am Anfang steht. Es sind noch keine
industriellen Standards gesetzt und Freey VR kann
diese Unterschiede nicht kontrollieren. Ein wenig
ausprobieren wird möglicherweise nög sein.
Diese Anleitung ist für Android. Für eine Anleitung
des iOS besuchen Sie freeyvr.com
Schritt 1: Auaden
Vor der Benutzung wird geraten, das Glide VR
vollständig aufzuladen. Bei der Lieferung wird das
Gerät schon ein wenig geladen sein, sollte aber erst
noch ganz aufgeladen werden.;
HÄUFIGE NUTZUNGSARTEN:
Schritt 3: Haltungsart
Im „Game“-Modus muss der Glide VR zweihändig
gehalten werden.
Schritt 2: Game Mode
Das Glide VR hat zwei Funkonsmodi: „Key“ und
„Game“. Die meisten VR Spiele brauchen den
„Game“-Modus, also schalten Sie diesen nun ein.
Um das zu tun muss der Regler auf der Unterseite
eingestellt werden.

Seite 34 bis 41 Seite 35 bis 41
HÄUFIGE NUTZUNGSARTEN:
Joypad
Das Joypad wird in Spielen als Steuerung verwen-
det.
Game/Key
Der „Game“-Modus ist für Spiele, der „Key“-Modus
für andere Anwendungen.
HÄUFIGE NUTZUNGSARTEN:
Zurück (Game) & Accept (Key)
Das X und der Kreisknopf funkonieren beide als
„zurück“ in den meisten Fällen im Gamemodus und
die Funkon “Akzepert” meistens im “Key” Modus
Accept (Game) & Zurück (Key)
Die Start, Quadrat und Dreieck Knöpfe funkonier-
en meistens als „Akzeperen“ im Gamemodus und
die Funkon “zurück” meistens im “Key” Modus
START /
Seite 36 bis 41 Seite 37 bis 41
PROBLEMLÖSUNGEN:
Da es sich um ein Produkt im Entwicklungsstadium
handelt ist ein wenig Iniave und Experimener-
freude nög um die allenfalls auretenden Prob-
leme zu lösen. Wenn Sie eine Lösung für Problem
nden und diese teilen möchten, teilen Sie diese
mit support@proteusvr.com. Vielen Dank im
Voraus für das Verständnis und die Hilfe!
Es ist sicherzustellen, dass das Gerät ausreichend
geladen ist bevor es benutzt wird. Nur so hat der
Controller genug Power für das Spielen.
Wenn die Steuerung die Orienerung geaendert
hat oder das Steuerkreuz laeu in die falsche Rich-
tung, sollte der Modus zu “Game/Key” geaendert
werden. Sollte das Problem weiter bestehen, kann
mit einer aufgebogenen Bueroklammer in den
“Reset” Knopf auf der Rueckseite des Controllers
gedruckt werden.
PROBLEMLÖSUNGEN:
Sollte der Controller nicht erkannt werden,
schalten Sie das Bluetooth Ihres Smartphones aus
und wieder ein.
Um den Controller abzustellen hält man einfach
den „Start“-Knopf bis das Lämpchen ausgeht. Dies
geschieht ausserdem automasch wenn er 5 Mi-
nuten nicht per Bluetooth verbunden ist oder nach
10 Minuten Inakvität.
Sollte das Glide VR nichtmehr reagieren, gibt es
auf der Rückseite ein kleines Loch in das man zum
Neustart zb. Eine Papierklammer einführen kann.

Seite 38 bis 41 Seite 39 bis 41
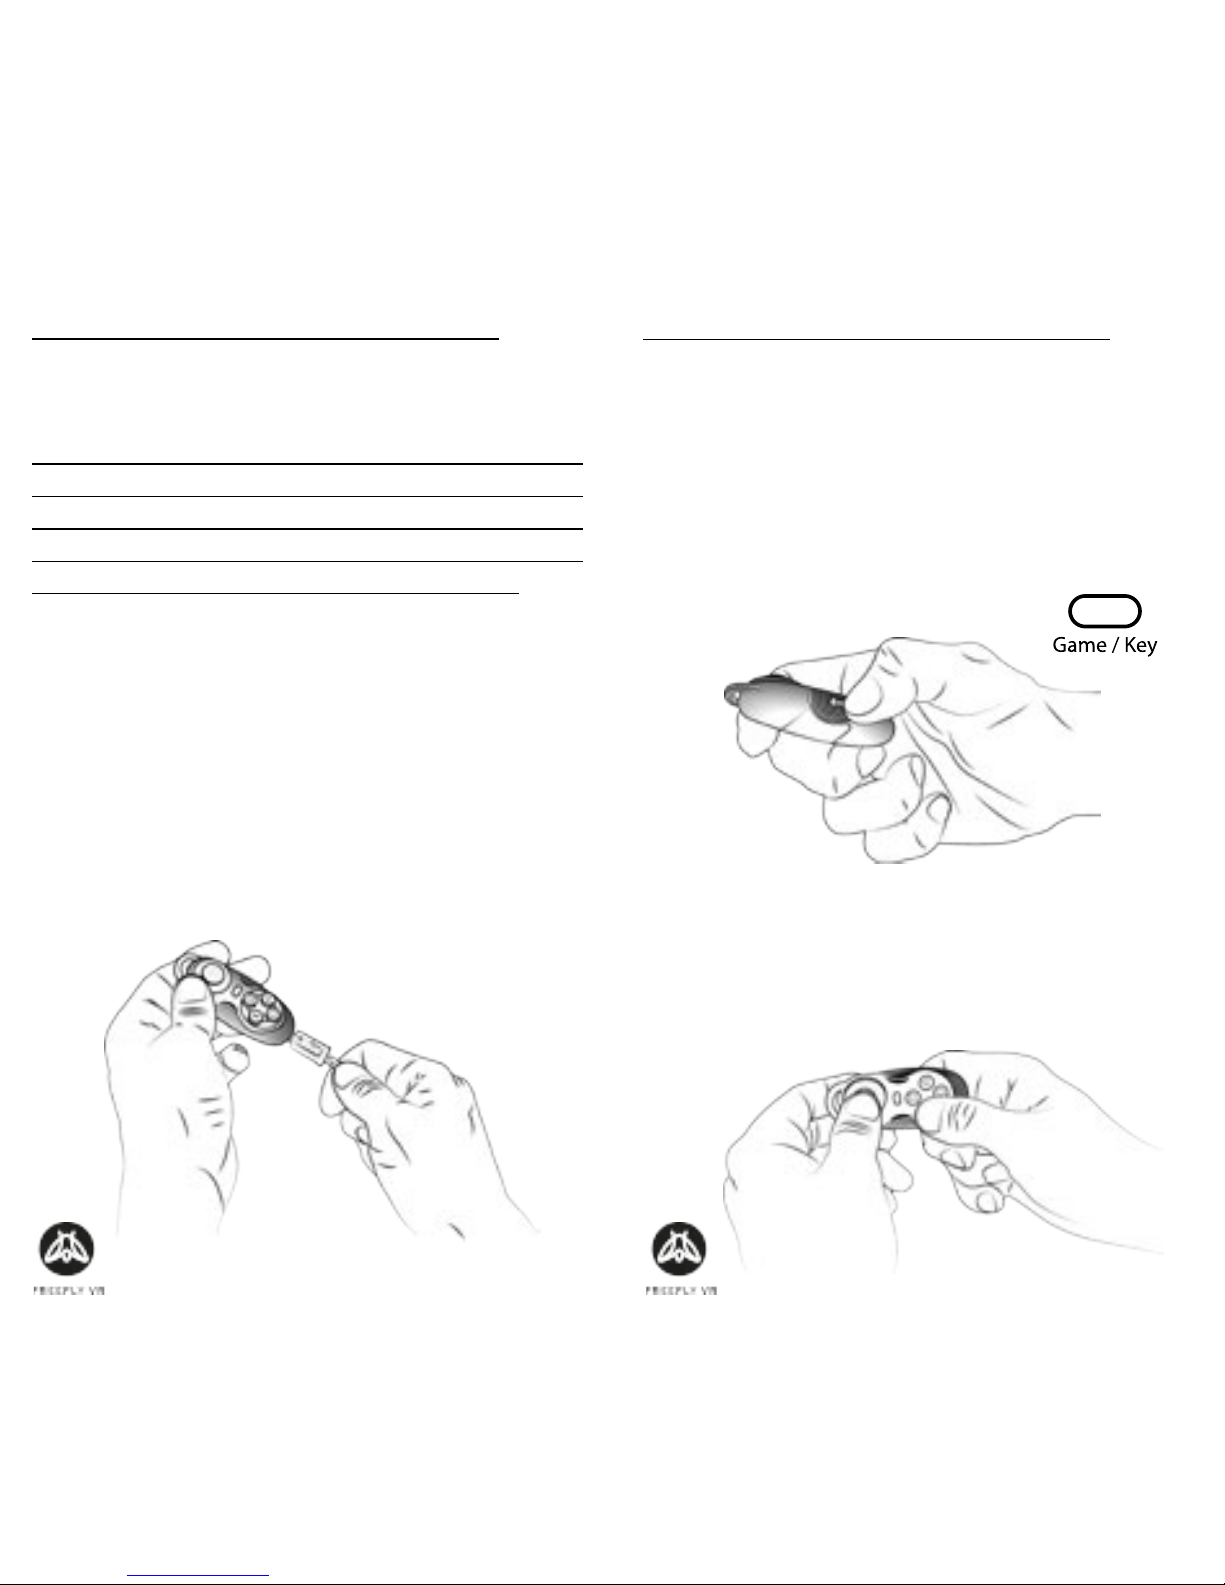
GAME MODUS:
Der “Game/Key” Schalter dreht die Speilorien-
erung.
Fuer den “ Game” Modus wird der Controller hori-
zontal gehalten.
KEY MODUS:
Der “Game/Key” Schalter aendert die Spielorien-
erung.
Fur den “Key” Modus muss der Controller verkal/
aufrecht gehalten werden.
Other manuals for GLIDE VR
1
Table of contents
Languages:
Popular Accessories manuals by other brands


SCS
SCS IR-1000TS-W installation manual

HCL
HCL Digital PEN user guide

AmazonBasics
AmazonBasics AB 20 manual

ipf electronic
ipf electronic PY740020 manual

Galvin Specialised
Galvin Specialised Flowmatic TZ-FLOW225866 Product installation guideline

ELEKTROBOCK
ELEKTROBOCK PocketHome PH-TS20 operating instructions