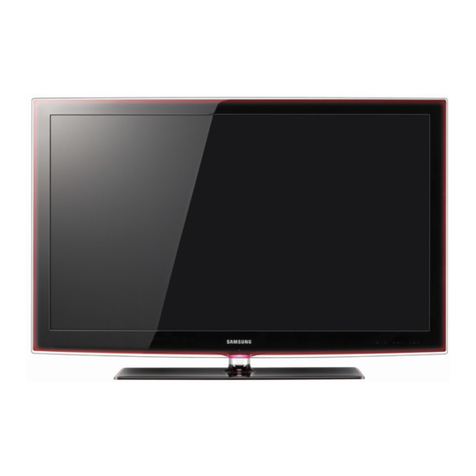
Proton CS-32 User manual

Parts No.: F21-4T707
CS-32
CS-37
CS-42
Multi-Media LCD Display
Owner's Manual

1
Preface
Before Using The Product
Communication Regulations
Important Safety Instructions
Safety Information
Maintenance and Precaution
Getting Started (Preparation)
Introducing The Television
Supplied Accessories
TV Control Functions
Setting Up The Remote Control
Remote Control Functions
Inputs and Outputs
Connection Drawing
Connecting the Antenna or Analog Cable TV (CATV)
Connecting the Digital Set-Top Box (Commonly Used For HDTVs, Satellite TVs etc)
Connecting the Component Video
Connecting the S-Video or Composite Video
Connecting the PC
Connecting the HDMI
Setting Up The Television
Changing the Source
Aspect
Accessing the OSD (On Screen Display) Menu
Icon Description
VIDEO
MODE
CONTRAST
AUDIO
TUNER
AIR / CABLE
AUTO SCAN
ADD / ERASE
DIGITAL TUNER
AUTO SCAN
Table of Contents
3
4
4
5
7
8
10
11
11
12
13
14
15
16
18
19
21
22
23
24
25
25
26
27
28
29
30
30
31
32
33
33
33
34
35

2
AUDIO LANGUAGE
DIGITAL C.C.
C.C. OPTIONS
TIME ZONE
DISPLAY
TIMER
SLEEP TIMER
TIMER SETTING
POWER ON
POWER OFF
SET DATE / TIME
PARENTAL CONTROLS
TV RATING
MOVIE RATING
BLOCK CHANNEL
BLOCK UNRATED
CHANGE PASSWORD
CLEAR ALL
SETUP
CAPTIONS
LANGUAGE
TV NO SIGNAL
OSD TIMEOUT
AUTO POWER OFF
Basic Troubleshooting
General Specifications
32” LCD
37” LCD
42” LCD
Preparing Your Proton LCD TV for Wall Mounting
RGB Frequency Table
Acronyms, Abbreviations, Functions, and Terms
Channel Frequency Table
Table of Contents
35
36
36
37
38
39
39
39
39
40
40
41
41
42
43
43
44
44
45
45
45
45
46
46
47
49
49
50
51
52
53
54
58

3
About This Manual
This manual is designed to make operating your 32”, 37”, 42” LCD TV as easy as possible.
Information in this document has been carefully checked for accuracy; however, no guarantee
is given to the correctness of the contents. Due to the continuation of system improvements,
these changes will be incorporated in newer editions.
Copyright
© Copyright 2007
This document contains proprietary information protected by copyright. All rights are reserved.
No part of this manual may be reproduced in any form by any mechanical, electronic or other
means, without written consent.
Trademarks
All trademarks and registered trademarks are the property of their respective owners.
Preface

4
FCC Compliance
This equipment has been tested and found to comply with the limits for a class B digital
device, pursuant to Part 15 of the FCC Rules. These limits are designed to provide reasonable
protection against harmful interference in a residential installation. This equipment generates,
uses, and radiates radio frequency energy. If not installed and used in accordance with the
instructions, may cause harmful interference to radio communications. However, there is no
guarantee that interference will not occur in a particular installation. If this equipment causes
interference to radio or television reception. To determine if the signal is interfered, switch the
equipment off and on. If interference does occur user is encouraged to try to correct the interference
by one or more of the following measures:
•Reorient or relocate the receiving antenna;
•Increase the separation between the equipment and receiver;
•Connect the equipment into an outlet on a circuit different from that to which the re-
ceiver
is connected;
•Consult with the dealer or an experienced radio/TV technician for help.
This device complies with Part 15 of the FCC Rules. Operation is subject to the following two
conditions:
1. This device may not cause harmful interference.
2. This device must accept any interference received, including interference that may
cause undesired operation.
Canada Class B Statement
This Class B device meets all requirements of the Canadian interference-causing equipment
regulations.
Cet appareil numérique de la Class B respecte toutes les exigencies du Réglemensur le materiel
brouilleur du Canada.
Before Using The Product
Communication Regulation

5
1. Read these instructions.
All the safety and operating instructions should be read before the product is operated.
2. Keep these Instructions.
The safety and operating instructions should be retained for future reference.
3. Heed all Warnings.
All warnings on the product and in the operating instructions should be adhered to.
4. Follow all Instructions.
All operating and using instructions should be followed.
5. Do not use this apparatus near water.
6. Clean only with dry cloth.
7. Do not block any ventilation openings. Install in accordance with the manufacturer’s
instructions.
8. Do not install near any heat sources such as radiators, heat registers, stoves, or other
apparatus (including ampliers) that produce heat.
9. Do not defeat the safety purpose of the polarized or grounding-type plug. A polarized
plug has two blades with one wider than the other. A grounding type plug has two
blades and a third grounding prong. The wide blade or the third prong are provided
for your safety. If the provided plug does not fit into your outlet, consult an electri-
cian for replacement of the obsolete outlet.
10. Protect the power cord from being walked on or pinched particularly
at plugs, convenience receptacles, and the point where they exit from
the apparatus.
11. Only use attachments/accessories specified by the manufacturer.
12. Use only with the cart, stand, tripod, bracket, or table specied by the manufacturer, or sold
with the apparatus. When a cart is used, use caution when moving the cart/apparatus com-
bination to avoid injury from tip-over.
13. Unplug this apparatus during lightning storms or when unused for long periods of
time.
0/24!",%#!247!2.).'
Before Using The Product
Important Safety Instructions

6
14. Refer all servicing to qualified service personnel. Servicing is required when the
apparatus has been damaged in any way, such as power-supply cord or plug is dam
aged, liquid has been spilled or objects have fallen into the apparatus, the appara-
tus has been exposed to rain or moisture, does not operate normally, or has been
dropped.
15. WARNING: To reduce the risk of re or electric shock, do not expose this apparatus to rain
or moisture.
16. The apparatus shall be connected to a mains socket outlet with a protective earthing
connection.
17. WARNING: To prevent injury, this apparatus must be securely attached to the oor/wall
in accordance with the installation instructions.
18. Batteries shall not be exposed to excessive heat such as sunshine, re or the like.
19. Where the mains plug or an appliance coupler is used as the disconnect device, the dis-
connect device shall remain readily operable.
20. CAUTION: These servicing instructions are for use by qualified service personnel only.
To reduce the risk of electric shock do not perform any servicing other than that con-
tained in the operating instructions unless you are qualified to do so.
21. Do not install this equipment in a confined space such a book case or similar unit.
22. Maintain minimum 10cm free space around the apparatus for sufficient ventilation.
23. The ventilation should not be impeded by covering the ventilation openings with items
such as newspapers, table-cloths, curtains, etc.
24. No naked flame sources, such as lit candles, should be placed on the apparatus.
25. The apparatus should be used in moderate climates.
26. The apparatus shall not be exposed to dripping or splashing and that no objects filled
with liquids, such as vases, shall be placed on the apparatus.
Before Using The Product
Important Safety Instructions

7
This equipment generates, uses, and radiates radio frequency energy. If not installed and used
in accordance with the instructions, this may cause harmful interference to radio or television
reception. However, there is no guarantee that interference will not occur in a particular installation.
If this equipment causes interference to radio and television reception. To determined, try by
turning the equipment off and on. If the interference does occur the user is encouraged
to try to correct the interference by one or more of the following measures:
•Reorient or relocate the receiving antenna;
•Increase the separation between the equipment and receiver;
•Connect the equipment into an outlet on a circuit from that to which the receiver is connected.
Caution
To prevent fire, shock hazard, or interference, only use the recommended accessories. To
prevent electric shock, do not use the plug with an extension cord, receptacle, or other outlet
unless the blades can be fully inserted to prevent blade exposure. To reduce the risk of electric
shock, do not remove the unit cover or back. There are no serviceable parts inside. Refer
servicing to a qualified personnel only.
CAUTION: TO REDUCE THE RISK OF ELECTRIC SHOCK
DO NOT REMOVE COVER
NO USER-SERVICEABLE PARTS INSIDE
REFER SERVICING TO QUALIFIED SERVICE PERSONNEL
RISK OF ELECTRIC SHOCK
DO NOT OPEN
This symbol is intended to alert the user to the presence of uninsulated dangerous
voltage within the product’s enclosure that may be of sufficient magnitude to
constitute risk of fire or electric shock.
This symbol is intended to alert the user to the presence of important operating
and maintence instructions in the literature accompanying this product.
Before Using The Product
Safety Information

8
Do not remove the cover or back of the TV. Any unauthorized changes or modication
to the product will void the user’s warranty.
Do not place the TV in a closed compartment. This will overheat the TV.
Turn off the product if liquid is accidentally spilled into the TV. Contact your local
dealer for assistance.
Do not expose the TV to rain or moisture.
According to the industrial standards, when pulling the power cord from the
outlet, hold the power plug instead of the cord.
Make sure the power cord from the AC outlet is unplugged, and disconnect from
the antenna if the TV is left unattended and unused for a long period. This will
prevent damages to the TV lighting and power-line surge.
Before Using The Product
Maintenance and Precaution

9
Do not expose the TV to heat sources such as radiators, heaters, stoves and
other heat-generating products (including audio amplifiers).
Unplug the power cord from the AC outlet before cleaning the TV. Use specic
screen cleaner kit for LCD screens. Do not use liquid cleaners or aerosol cleaners.
Do not use this TV with an extension cord or power bar; this can cause a fire or
an electric shock.
Do not place heavy items or belongings on the top of the TV.
Hand carry the TV with at least another person.
Before Using The Product
Maintenance and Precaution

10
Getting Started (Preparation)
Ventilation recommendations:
Avoid improper installation of the product. Never position the unit where ventilation is impossible.
When installing this TV, minimal ventilation distance recommendation must be maintained
between the set, wall, furniture and tightly enclosed area. Refer to the minimum distance
guidelines shown for a safe operation.
Cleaning the screen:
The screen is coated with a special thin lm to reduce reection. If this lm is damaged, uneven
colors, discoloration, scratches, and other problems that cannot be repaired may occur. Pay attention
to the following when handling the screen.
•Do not use glue or adhesive tape on the screen.
•Do not write on the screen.
•Do not allow the screen to come in contact with any hard objects.
•Do not allow condensation to form on the screen.
•Do not use alcohol, thinner, benzene or other solvents on the screen.
•Do not rub the screen forcefully.
CAUTION:
•Operate only from the power source specified (AC 100-240V) on the unit.
•Avoid damaging the AC plug and cord.
•When you are not using this unit for a long period of time, it is recommended that you
disconnect the power cord from the main outlet.
•When the source has no signal to input, TV will be “Auto Power Off” after 5 minutes.
POWER CORD CONNECTION:
Connect the power cord, after completing all other connections.
1. Connect the power cord to this device.
2. Connect the power cord to the power outlet.
(1)
(2)
10 cm
10 cm
30 cm
10 cm 10 cm 10 cm
30 cm
10 cm

11
Introducing The Television
The following items come along with your LCD TV:
Remote control
Two AAA Batteries
Power Cord
User’s Manual
Warranty Card ( in last page )
Cleaning Cloth
( Use ONLY the cleaning cloth
enclosed to clean yourTV bezel )
Supplied Accessories

12
0RESSTHISBUTTONTOTURNTHEPOWERONSTANDBY
0RESS THIS BUTTON TO DISPLAY THE /3$ MENU )T CONTAINS ALL THE
OPTIONSTOCONFIGUREYOUR46gSSETTINGS
)22%#%)6%2
,%$).$)#!4/23
0/7%2
-%.5
#(
6/,
3/52#%
4ARGET THE REMOTE CONTROL AT THE )2 2ECEIVER 7HEN OPERATING
THEREMOTECONTROLMAKESURETHEREARENOOBSTACLESBETWEEN
YOUANDTHE)22ECEIVER
4HE,%$INDICATORLIGHTSUPINDIFFERENTCOLORSGREENREDORORANGE
%ACHCOLORREPRESENTSADIFFERENTSTATUS
'REEN0OWERISON2ED3TANDBY/RANGE0OWERSAVINGMODE
"UTTONS&LANK
0/7%2
-%.5
#(
6/,
6/,
3/52#%
0RESS TO CHANGE CHANNEL 7HEN IN MENU MODE THESE ACTS AS
NAVIGATIONKEYS
0RESSTOADJUSTTHEVOLUMEWHENINMENUMODETHESEACTSAS
NAVIGATIONKEYS
6IDEOINPUTSELECTION
0RESSTHISBUTTONTODISPLAYTHEMENUFORINPUTSELECTIONMODE
#(
Introducing The Television
32" 37" 42" TV Control Functions

13
1. Open the lid of your remote control battery compartment on the
back of the remote control.
2. Insert two AAA batteries. Use the (+) and (-) marks to guide you.
The (+) marks on your batteries correspond to the (+) marks on
the compartment. The (-) marks on your battery correspond to
the (-) marks on the compartment.
Note: Do not mix new and used or different kind of batteries.
3. Put the lid back onto the remote control battery compartment.
Introducing The Television
Setting Up the Remote Control

14
CH +/ CH
-
1
Power on/off.
OK Press this key to confirm selection.
6
VOL +/ VOL
-
3
Press these keys to adjust volume.
2
Press these keys to change the channels.
MUTE
8
Press this key to turn off the sound.
Press the " MUTE " button again or press
" VOL+/ VOL-- " to enable sound.
MENU
9
Press this key to display the OSD menu.
In the OSD menu, press this key to exit the menu.
SOURCE
7
Press this key repeatedly to search for the video
source. If you have a DVD player connected to the
component input, then select " COMPONENT "
from source menu.
5
Navigation keys in Source and Setup menu.
Adjusting keys in Source and Setup menu when in
PIP mode.
0~9 / 100+, / -
4
Numerical keys to select desired channel.
/-: Minor channel indicator ( Direct Digital RF
channel tune )
On Screen display on/off. ( shows channel and other
details )
DISPLAY
15
Activates the sleep timer.
SLEEP
11
RECALL
10
Recall last channel.
ASPECT
13
Choose from widescreen, panoramic, 4 : 3 video,
16 : 9 zoom. ( More details on Page 38 )
14
FREEZE Press this key to freeze current frame from the
screen.
16
MULTI PICTURE
Switch among PIP ( Picture In Picture ) mode,
PAP(Picture And Picture) mode, and MAIN ( Main
Picture Only ) Mode.
12
ACTIVE WINDOW
Switch controlling between the PIP or PAP and the
MAIN.
13
1 5
16
4
2
6
14
3 5
11
12
10
8
7
9
1
Allows the user to select the audio
channels
provided by the channel station (commonly used to
select between / among languages).
21
AUDIO
Press to display “ I-plate ” which provides
information about the current channel. Press the
second time,
the screen will show the program’s
extended
information.
19
INFO
17
Turns the DTV caption on or off.
C.C.
Opens the Program Guide & shows all the active
channels.
22
EPG
( Electronic
Programming Guide )
20
To exit OSD menu.
EXIT
18
DTV Press this button to enter the DTV mode.
21
22
19
20
17
18
Introducing The Television
Remote Control Functions
Note:
Panoramic only available when
source
is 480i or 480p.

15
!VAILABLE)NTERFACE
0ROGRESSIVE$6$PLAYER($46
SETTOPBOX($062$6(3DIGITAL
MEDIAPLAYER
#OMPONENTSUPPORTBOTH(IGH$EFINITION
PROGRAMS P I AND STANDARD
DEFINITIONPROGRAMSIP
0#2'"INPUT0#)NPUTANDAUDIOINPUTS
0OWER)NPUT
0#)NPUT
#AMCORDER NONPROGRESSIVE $6$
PLAYERDIGITALCAMERA6#2
#ONTAINS3VIDEOCOMPOSITEVIDEOAPAIR
OF2,AUDIOINPUTS
!6)NPUTS(6IDEO)
($46 3ETTOP "OX 0ROGRESSIVE
($$6$0LAYER
#ONTAINSONECOMPOSITEVIDEO3UBWOOFER
ANDONEPAIROF2,AUDIOOUTPUTS
($-)
($-)
($-)
($-)INPUT
!UDIO6IDEO
/UTPUTS
45.%2 .43#!43#
-AINTENANCEUSEONLY
36# 3ERVICECONNECTOR
!#6
!NYAMPLIFIERSWITH30$)&INPUT
30$)&(#/!8)!,)$IGITALAUDIOOUTPUT
#OMPONENT)NPUTS
(#OMPONENT
#OMPONENT)
$ESCRIPTION 2ECOMMENDED$EVICES
($-) ($-)($-)
0HONE
*ACK
9 0B#B 0R#R
Your LCD TV has five types of video connections.
You should capitalize on the best connection
available from your LCD TV to get the best display
quality. For example, if you have a progressive DVD
player that supports a component video connection,
you should connect the DVD player to your LCD
TV using component video connections instead of
composite video or S-video connections.
($-)!6#ABLE
2'"6'!VIDEOCABLE
2#!COMPONENTVIDEOCABLE
3VIDEOCABLE
2#!COMPOSITEVIDEOCABLE
#ABLES
Introducing The Television
Inputs and Outputs

16
, 2
0R#R0B#B9
).
/54
!UDIO#ABLE
PIN$SUB#ABLE
36)$%/
#/-0/.%.4
!UDIO 6IDEO
6IDEO(9ELLOW)
!UDIO,EFT(7HITE)
!UDIO2IGHT(2ED)
3IGNAL0ATH
36)$%/ #/-0/.%.4
0#
($-)
$6$ / 6#$
#!46
46'!-%
#!-#/2$%2
$6$ / 6#$
($-) ($-)($-)
0HONE
*ACK
9 0B#B 0R#R
Introducing The Television
Inputs and Outputs
Connection drawing

17
TV
DIGITAL TV
VIDEO
SVIDEO
COMPONENT 1
COMPONENT 2
VGA
HDMI 1
HDMI 2
HDMI 3
Main Source
4. Connect the power cord of the LCD TV to a power outlet.
5. Press the “ ” button on either the remote control or the TV controls and select TV on the
source menu. ( Changing the source, refer to Page 25 )
!.4
#!",%3/#+%4
OR
NOTSUPPLIED
,#$462%!2
POWER
V
O
L
+
V
O
L
-
C
H
+
C
H
-
O
K
SOURCE
Introducing The Television
Inputs and Outputs
1. Disconnect the TV from all power sources before making any connections.
2. Use the coaxial cable (75 ohms) usually provided by your
antenna or cable provider.
3. Hook up the cable to the ANT input in the side of the LCD TV.
#OAXIAL#ABLE
NOTSUPPLIED
Connecting the Antenna or Analog Cable TV ( CATV )
• 32” LCD: “ ” button on the TV controls (refer to Page14)
• 37” LCD: “ ” button on the TV controls (refer to Page14)
• 42” LCD: “ ” button on the TV controls (refer to Page14)

18
MENU
POWER
V
O
L
+
V
O
L
-
C
H
+
C
H
-
O
K
7. Then choose STD and press “OK”.
• STD-Standard
• HRC-Harmonic Related Carrier
• IRC-Incremental Realted Carrier.
8. In order for the LCD TV to detect avail-
able channels, press “ ” and choose the
first option “Tuner” and press “OK”. Scroll
down to “Auto Scan” and press “OK”. The
television will automatically scan the available
channels for you. ( For more information on
the TUNER menu, refer to Page 32~33 )
Change TV channel standard.
TUNER
CABLE STD
NO
ADDED
28
MAIN
MENU
SELECT ADJUST BACK
AIR / CABLE
AUTO SCAN
ADD / ERASE
CURRENT CHANNEL
MTS
Auto scan available TV channels.
TUNER
CABLE STD
NO
ADDED
12
MAIN
MENU
SELECT ADJUST BACK
AIR / CABLE
AUTO SCAN
ADD / ERASE
CURRENT CHANNEL
MTS
Introducing The Television
Inputs and Outputs
Connecting the Antenna or Analog Cable TV ( CATV )
6. Press the “ ” button on the remote control to display the OSD menu. Use or to navigate
through the icons. In the three option (Tuner), press “ OK ”. Choose the rst option
“ AIR / CABLE ” and press “ OK ”. If your TV is connected to the antenna. If your TV
is
connected to the cable television outlet, choose Cable STD, Cable HRC, Cable IRC. (For more
information on the TUNER menu, refer to Page 32~33)
•32” LCD: “ ” button on the TV controls
( refer to Page14)
•37” LCD: “ ” button on the TV controls
( refer to Page14)
•42” LCD: “ ” button on the TV controls
( refer to Page14)
To find out your local cable system, please contact your cable company.

19
1. Disconnect the TV and set-top box from all power sources before making any connec-
tions.
2.
Use a HDMI cable, component video cable, or S-video cable to connect the HDMI, COMPONENT,
or SVIDEO output jacks of your digital set-top box to the HDMI, COMPONENT, or SVIDEO input
3. Use the AUDIO cables to connect the AUDIO ( L/R ) output jacks of your digital set-top box
to the AUDIO ( L/R ) input jacks on the side of the LCD TV. If you use the HDMI cable, you
don’t need to connect the audio cable between the two equipments. The HDMI cable
transmits both digital video and audio signals.
4. Connect the power cords of your digital set-top box and LCD TV to the power outlets.
9
0B#B
0R#R
9
0B#B
0R#R
#OMPONENT
3ETTOP"OX
,
2
,
2
36IDEO
($-)
NOTSUPPLIED
NOTSUPPLIED
NOTSUPPLIED
!UDIO
NOTSUPPLIED
,
2
,
2
!UDIO
NOTSUPPLIED
($-) ($-)($-)
9 0B#B 0R#R
Introducing The Television
Inputs and Outputs
Connecting the Digital Set-Top Box ( Commonly Used For HDTVs, Satellite TVs, etc. )
This manual suits for next models
2
Table of contents
