Powering on and image setup
џOpen the lens cover (12).
џTurn the riflescope on with a brief press of the ON (5) button. Image appears on
the display in several seconds.
џTo turn off the display during operation, press and hold down the ON button
longer than one second.
џTurned off display will show a message “Display off”.
џTo turn on the display, press briefly the ON button.
џTo turn off the riflescope, press and hold down the ON button longer than three
seconds. Display will show a message “Display off” and a countdown from 3 to 1
sec, and will turn off upon countdown expiration.
џRotate the dioptre adjustment ring (2) to see a crisp image of the aiming reticle
and the status bar icons. Once this adjustment is done, there is no need to
rotate the dioptre adjustment ring for distance or any other conditions.
џPoint the riflescope at an object located at a certain distance (20-30 m for
example).
џRotate the lens focus knob (7) to see a crisp image of the object observed.
џTo set up display brightness and contrast, digital zoom, please refer to the QUICK
MENU FUNCTIONS section.
џTo improve image quality in low light conditions or in complete darkness, turn on
the built-in IR Illuminator (4). Please refer to section 10 to read about IR
Illuminator operation.
џAfter use, hold down the ON button to turn the unit off.
Built-in IR Illuminator
11
The riflescope is equipped with a built-in IR Illuminator featuring a wavelength of
940 nm or 850nm which provides significant increase in observation range in
lowlight conditions and in the darkness.
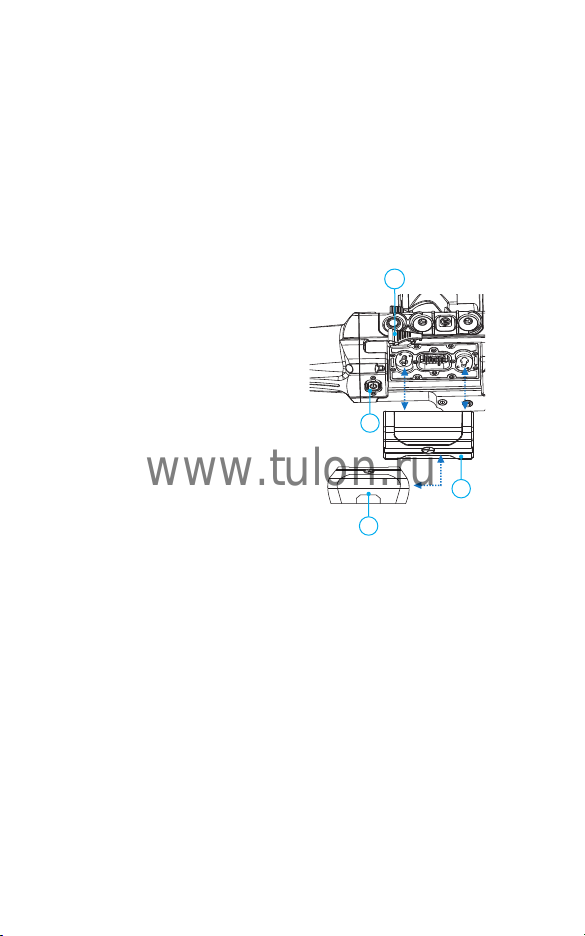
џMake sure that the IR Illuminator is mounted and connected to the riflescope –
the display will show icon of the connected or disconnected IR Illuminator.
џTo activate the IR Illuminator: turn on the riflescope with the ON (5) button, press
briefly the IR button (19) on the edge of the IR Illuminator. IR power level upon
start is minimal .
џIR Illuminator icon with respective power level is shown in the bar status.
џTo switch between power levels press briefly the IR button ( > > ).
To deactivate the IR Illuminator, hold down the IR button.
Removing the IR Illuminator:
џTo remove the IR Illuminator, raise the lever (18) and pull. Install the plug (16).
џThe status bar will show an icon of the disconnected IR Illuminator ( ).
Notes: Upon turning the IR off, power level is not saved in the riflescope's memory.
IR Illuminator is not focusable.
IR Illuminator's heat sink becomes hot: this is normal and is not a defect.
Zeroing
12
The riflescope features two zeroing methods - “one shot” zeroing and using FREEZE
function. Zeroing should be done at operating temperatures, by following the order
of these steps:
џMount the rifle with the riflescope installed on a bench rest.
џSet a target at a certain distance.
џAdjust the riflescope according to the instructions of section 9 "Powering on and
image setup".
џSelect the zeroing profile (see main menu option «Zeroing profile» )
џAim the firearm at the target and take a shot.
џIf the point of impact does not match the aiming point (centre of the riflescope's
reticle), hold down the M (9) button to enter the main menu.
џEnter the submenu “Zeroing” with UP/DOWN buttons. Press the M (9)
button to confirm.
џSet the zeroing distance value (see main menu option “Zeroing” =>
submenu “Add new distance” ).
џGo to the submenu with a brief press of the M button.
џSelect icon with UP/DOWN buttons. Press the M button to confirm.
џAdditional menu for zeroing parameters setup appears on the display. .
џAn auxiliary cross appears in the centre of display, and coordinates of
the auxiliary cross X and Y appear in the top right corner (Pic. 5).
џSelect icon with UP/DOWN buttons. Press the M button to confirm.
џHolding the reticle in the aiming point, with UP/DOWN buttons to move the
auxiliary cross horizontally or vertically relative to the reticle until the auxiliary
cross matches the point of impact.
Attention! Not to hold the reticle in
the aiming point, you can use the
FREEZE function – freezing the
zeroing screen (refer to main menu
option “Zeroing” => submenu
“Distance” => submenu “Zeroing
parameters setup” => submenu
FREEZE .
џSwitch between movement
directions of the auxiliary cross
from horizontal to vertical with a
brief press of the M button.
џSave the new position of the reticle with a long press of the M button.
џMessage “zeroing coordinates saved” confirms successful operation.
џMenu exit takes place. The reticle will now move to the point of impact.
џExit the submenu, take another shot - the point of impact should now match the
aiming point.
Windage